
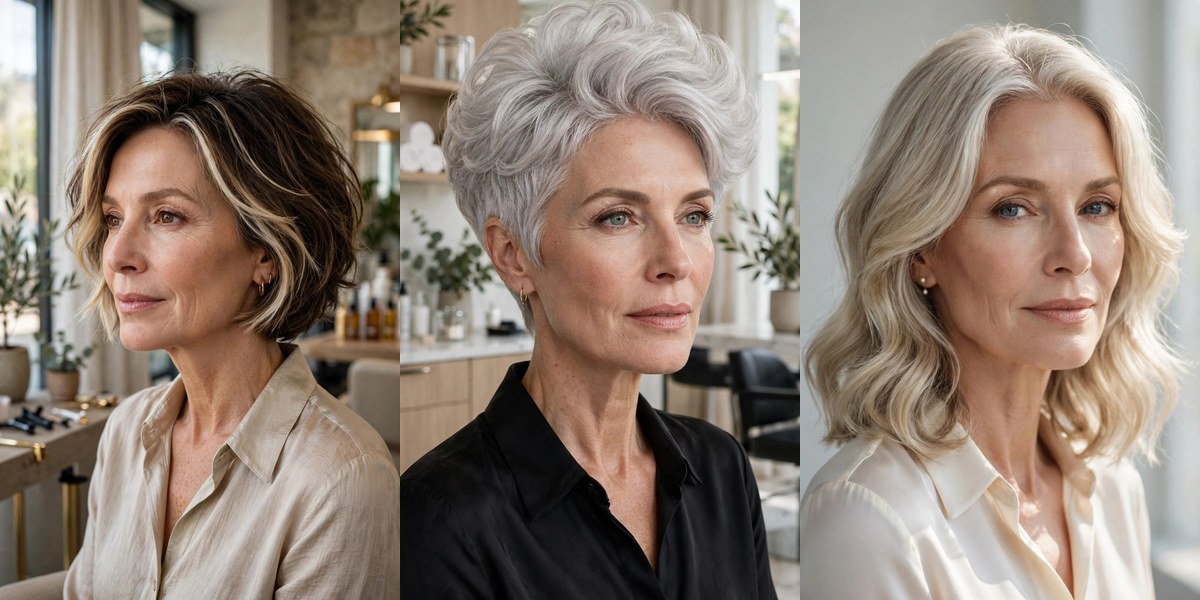
What if the cut is only half the story? So many of us choose a flattering hairstyle and then style it the same flat way every morning — same part, same direction, same products — and wonder why it never looks like the salon photo. The cut gives you the shape; the styling gives you the volume.
That’s the idea behind this list. Below are 26 hairstyles for thin, fine hair over 50 — from blunt lobs to airy crops — and every single one comes with a concrete styling trick: the blow-dry direction, the part switch, the roller, or the cool shot that makes it actually look full. Pick your cut, steal the trick, and enjoy hair that behaves.
One more thing before we start: most of these tricks take under five minutes and need nothing you don’t already own. The right technique, applied to the right cut, beats an expensive product every time.
1. 🌊 Softly-Bent Blunt Lob
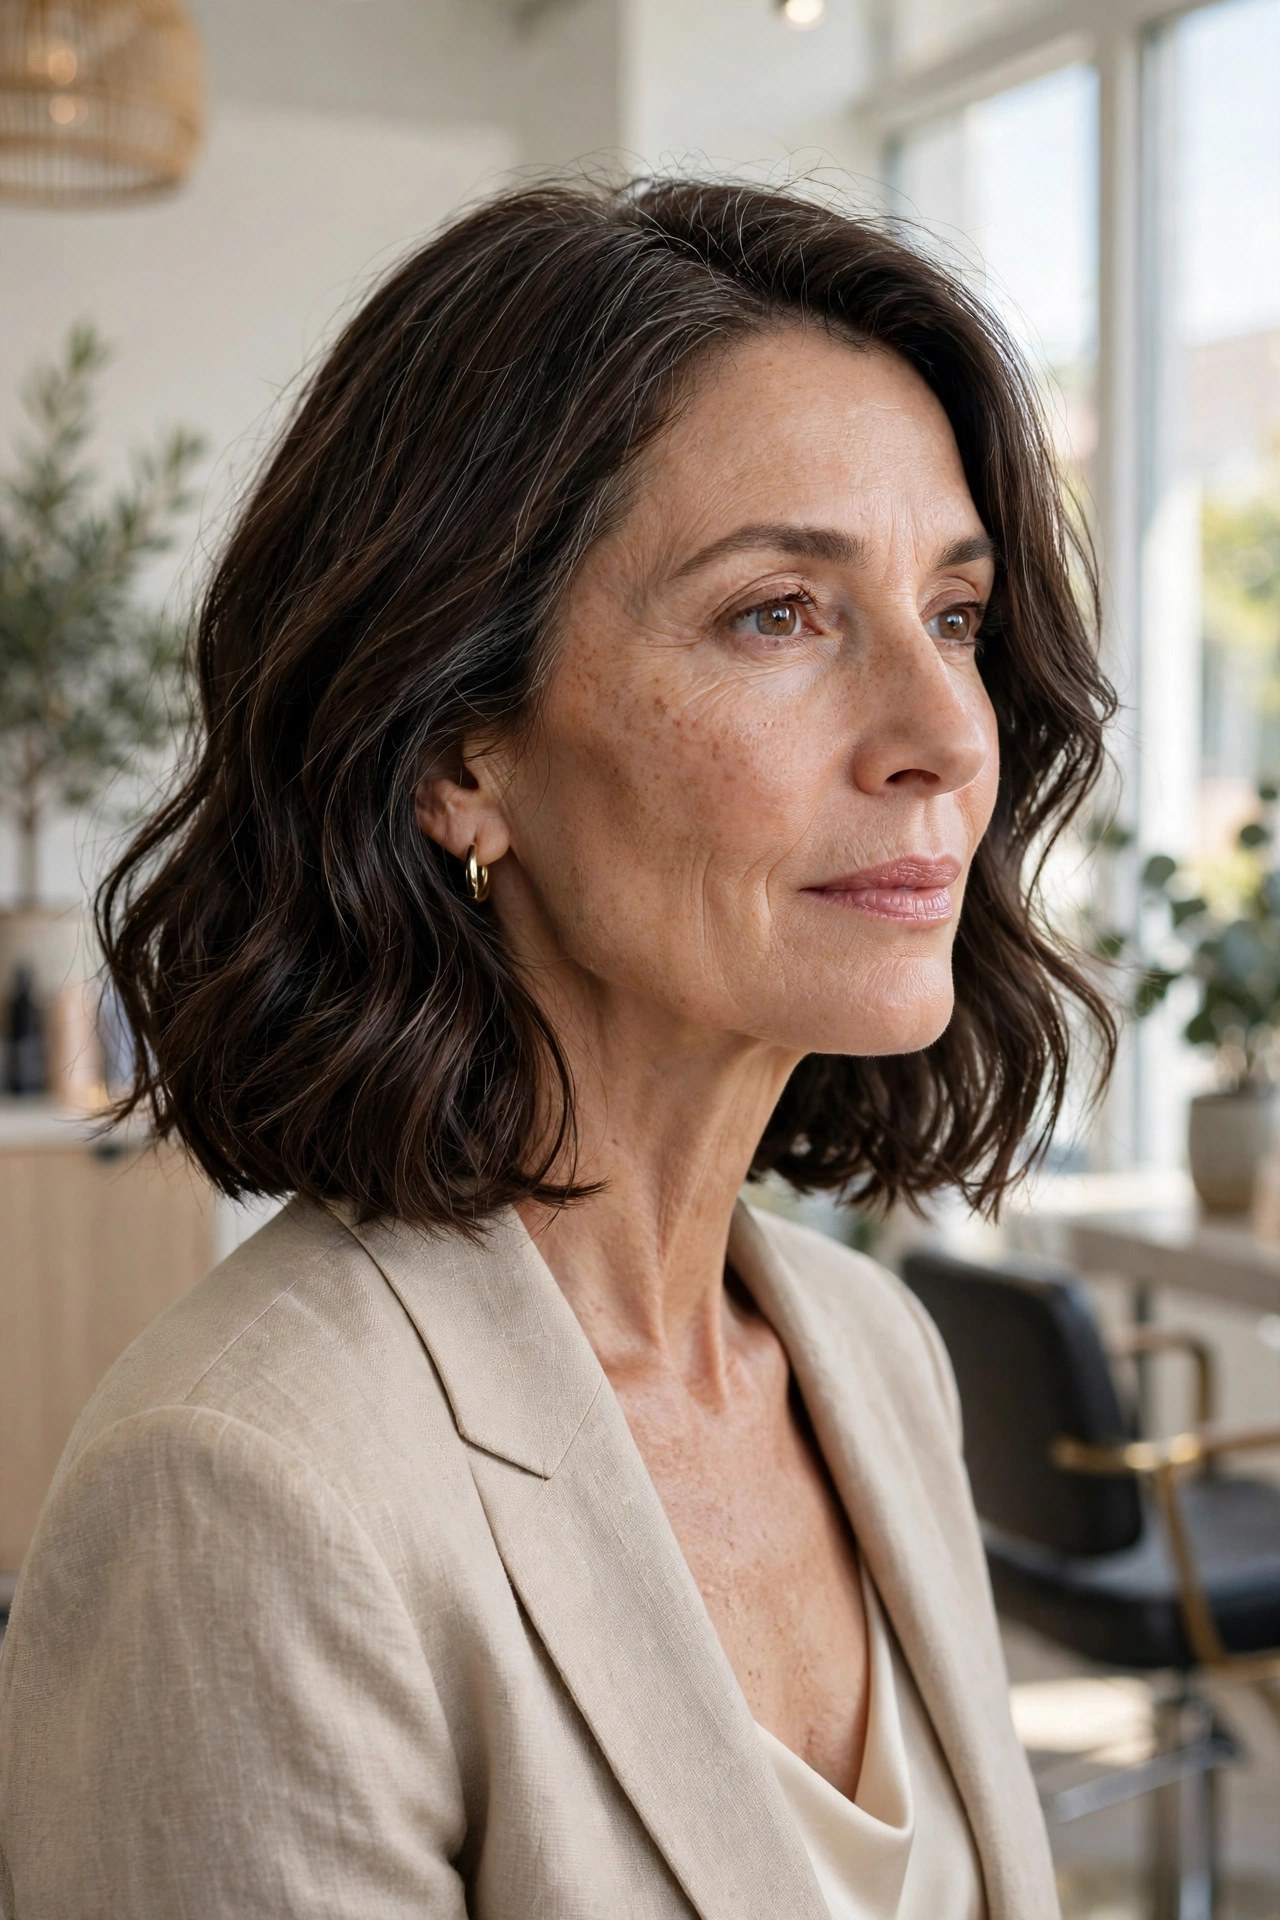
A collarbone-length lob with a strong, blunt baseline keeps fine ends looking dense, while soft bends through the mid-lengths add width the straight version can’t. It’s the longest cut in this list — proof you don’t have to go super-short for fullness.
Try this: Ask your stylist for a blunt perimeter with minimal interior layering and soft bends, not curls.
Styling trick: Bend alternating sections with a medium iron, leaving the ends straighter — then hit each bend with the cool shot to set it.
Avoid: Tight curls, which spring up and expose how fine the hair really is.
2. 💫 Crown-Teased Pixie Bob
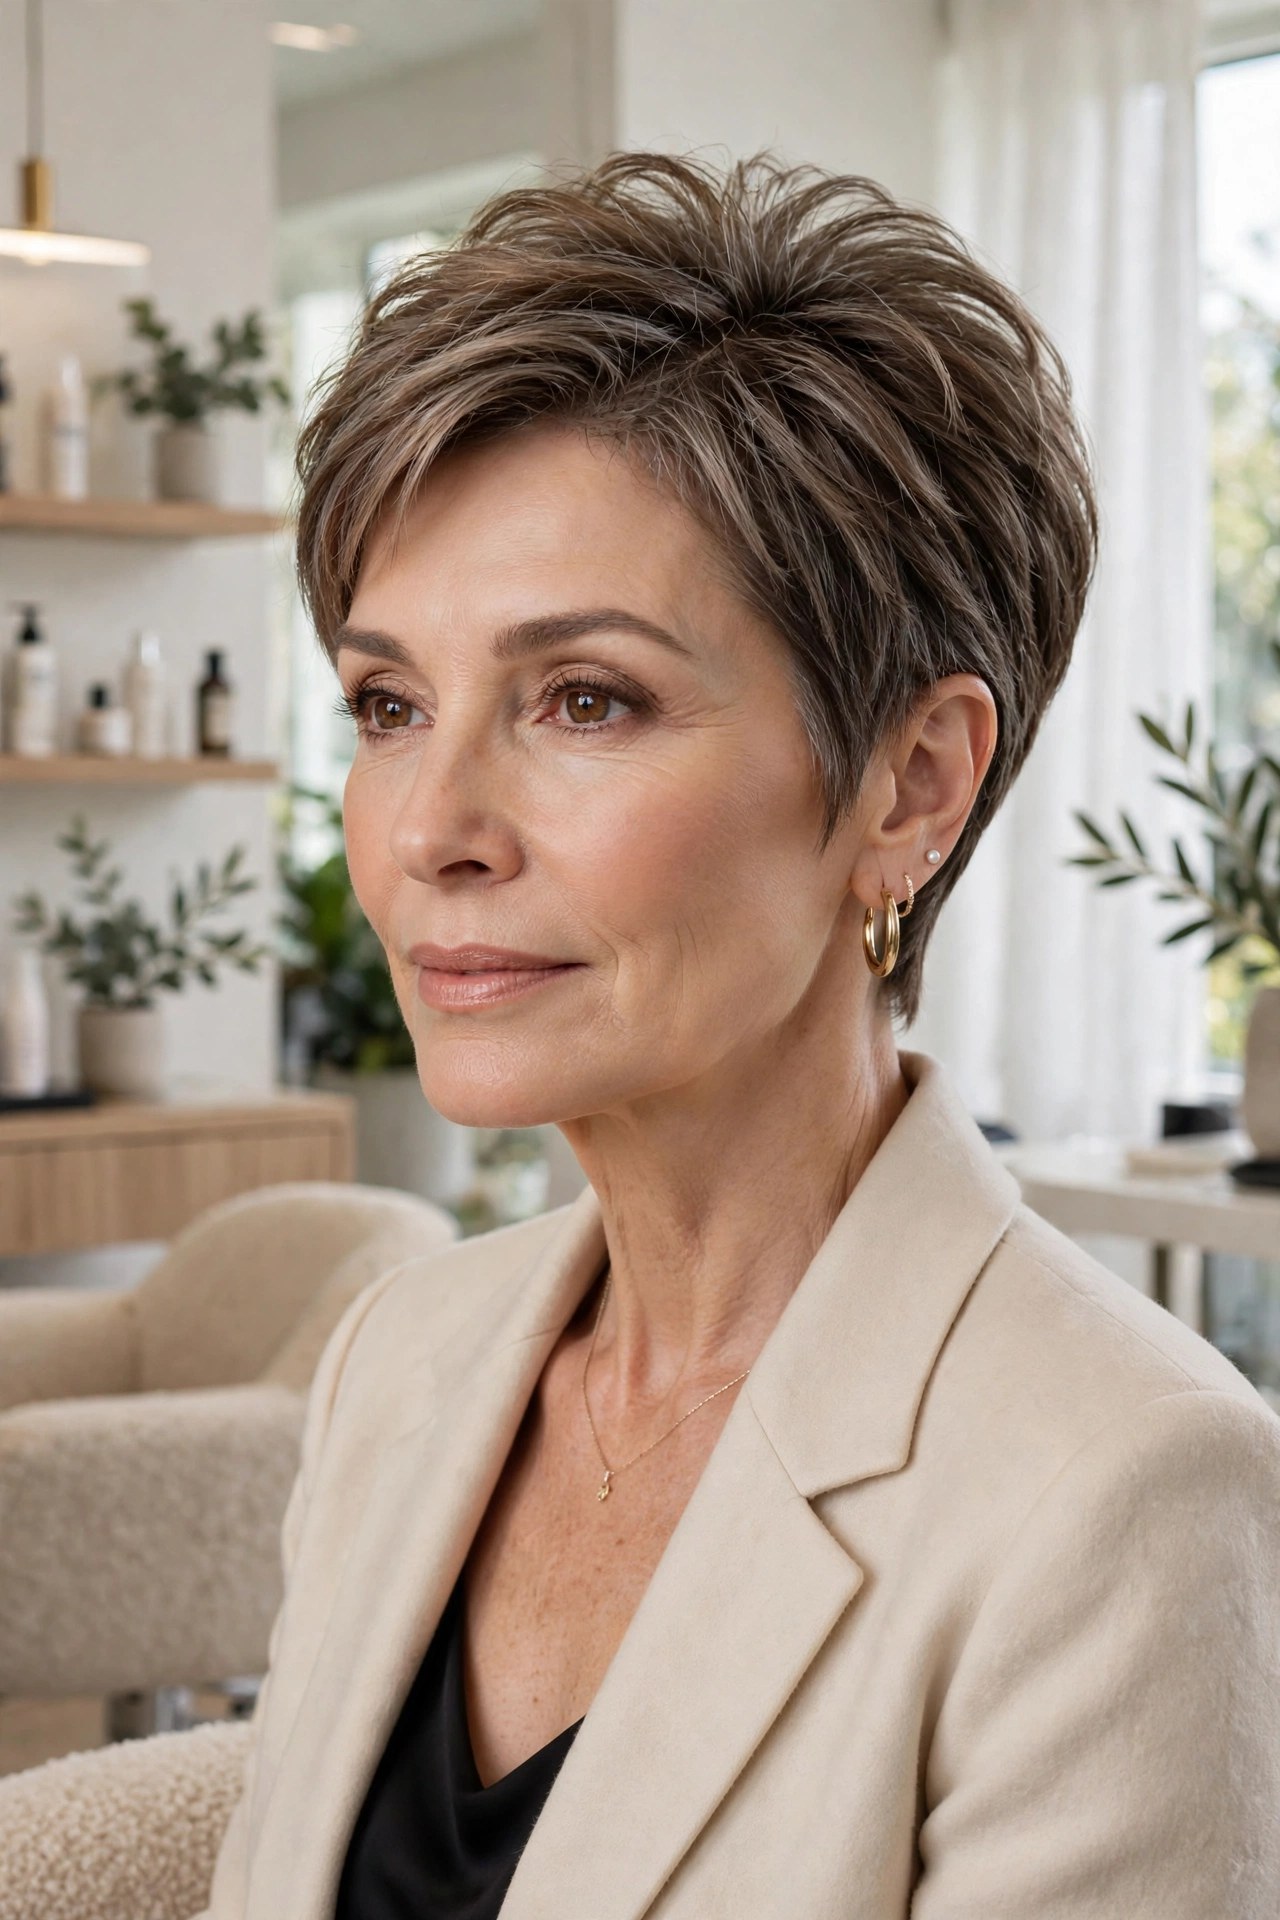
A pixie bob already lifts fine hair, but a gentle tease at the crown — just the under-layers — adds a cushion of height that lasts all day. The top layer smooths over it, so the lift is invisible and the shape stays polished.
Try this: Tease only the under-layers at the crown, then smooth the top layer over with a soft brush.
Styling trick: A light mist of flexible spray on the teased section before smoothing locks in the height without stiffness.
Make it yours: Skip the tease on relaxed days — the cut still holds a soft, natural shape.
3. ✨ Textured French Bob with Money Piece
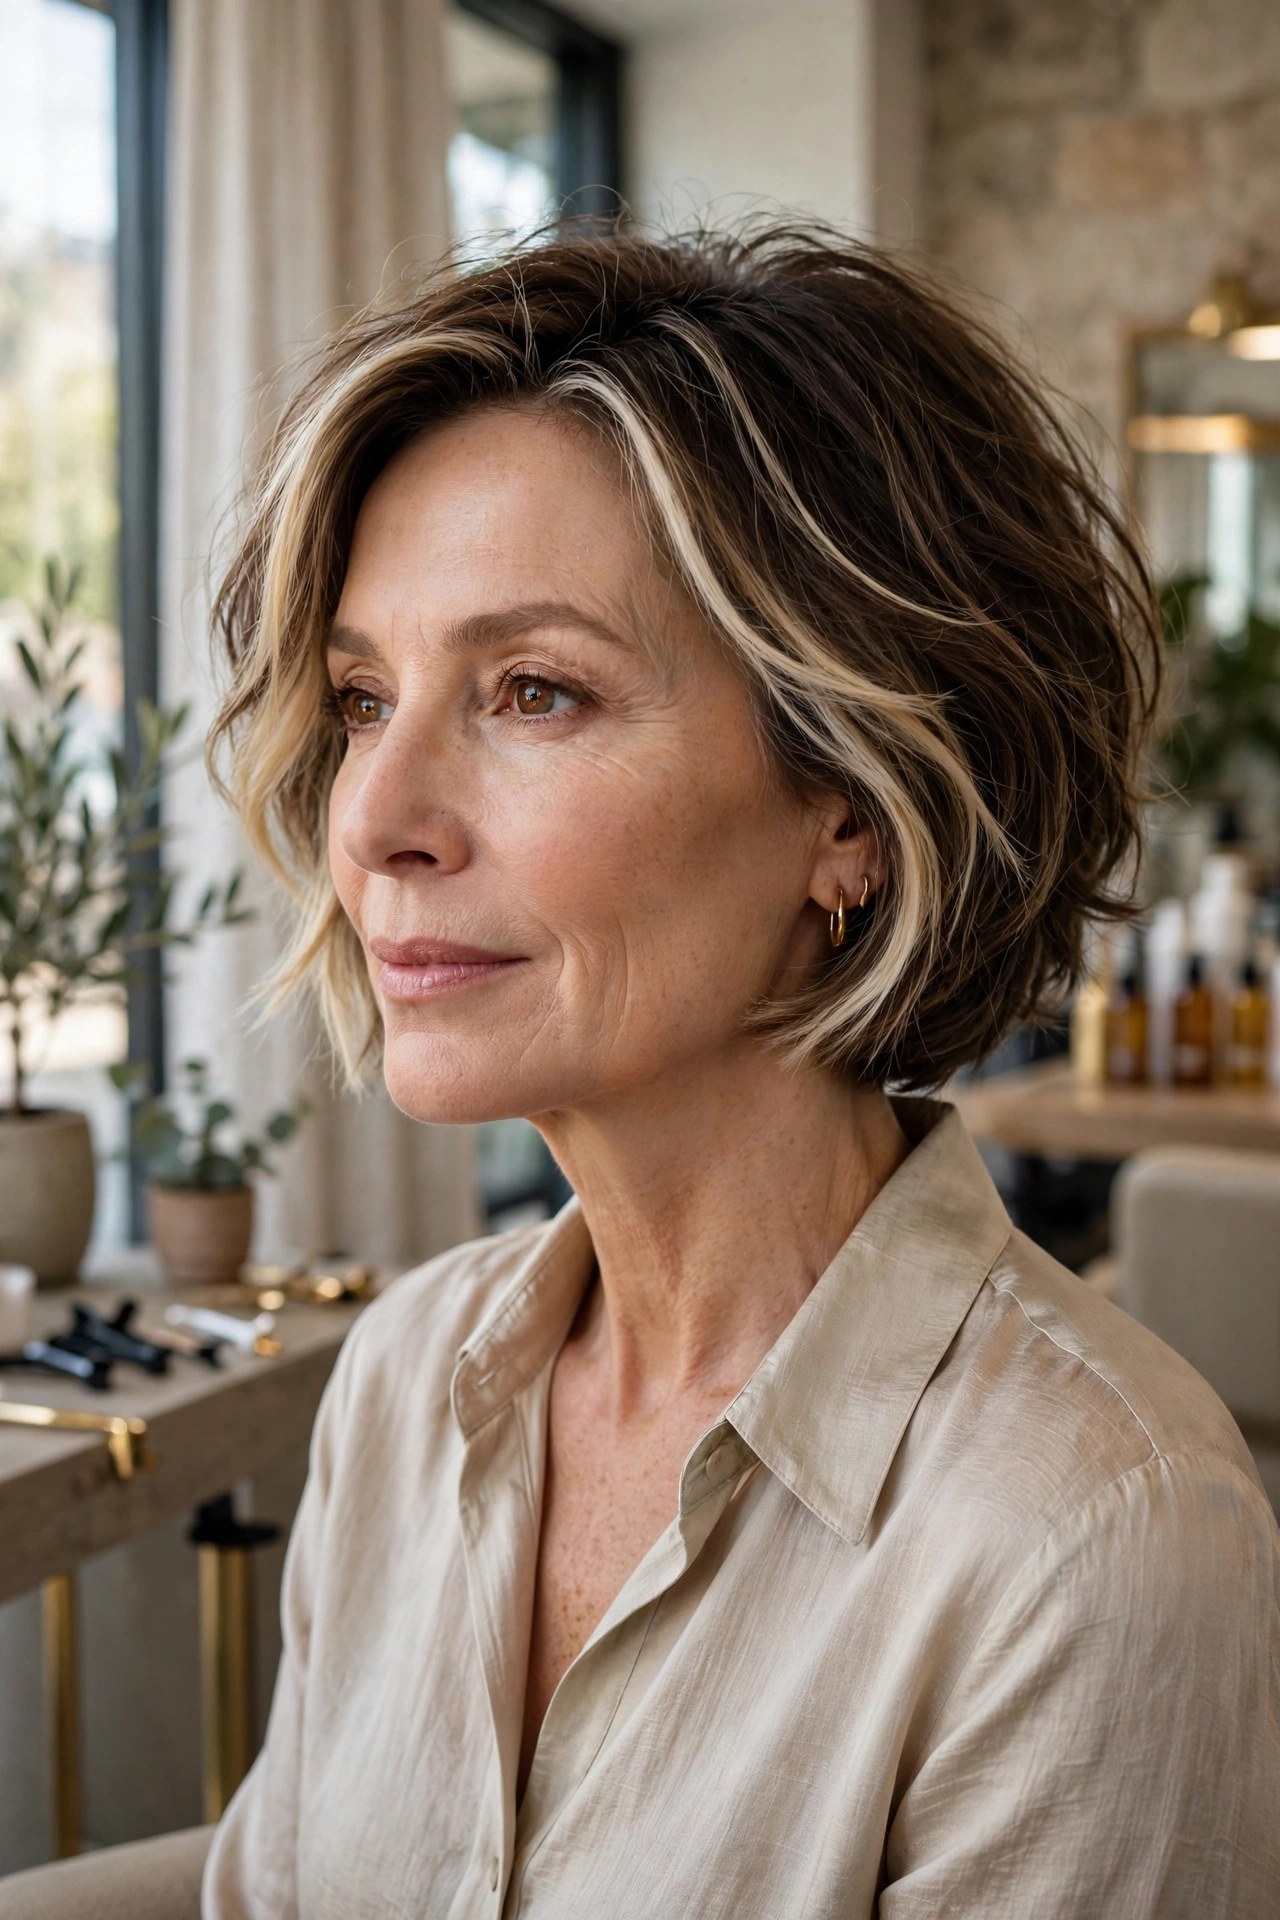
Face-framing “money piece” highlights — brighter ribbons right around the face — bring light exactly where it flatters most, while the jaw-length French bob keeps the outline strong. The contrast between bright front pieces and a deeper base reads as dimension, and dimension reads as fullness.
Try this: Ask for the brightest ribbons at the front and finer placement toward the back.
Styling trick: Tuck one side behind your ear to show off the money piece — the asymmetry adds instant interest.
Budget tip: A partial highlight around the face costs far less than a full head and does more for the look of fullness.
4. 🍃 Wispy Airy Crop
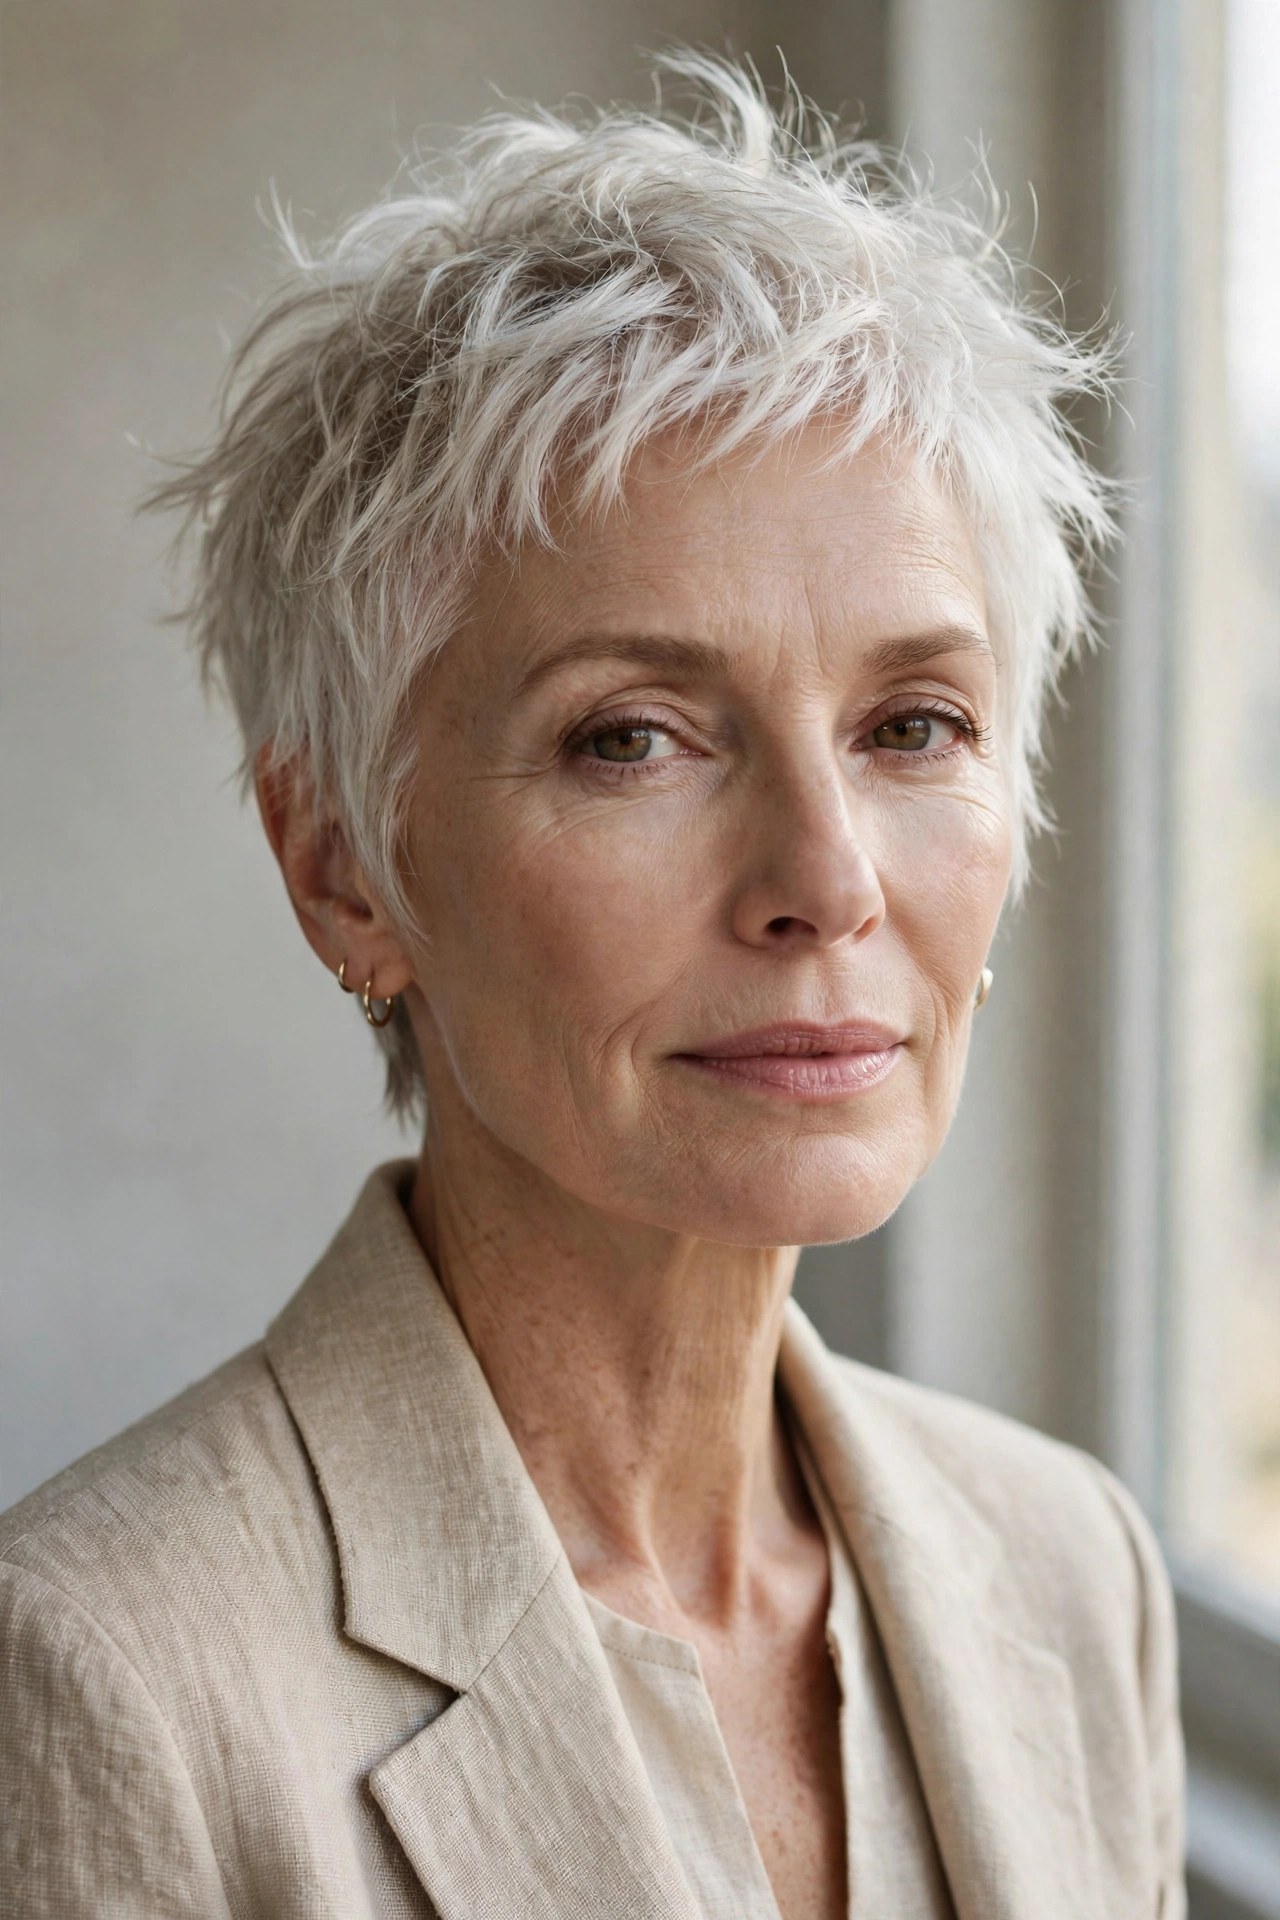
Feather-light and barely-there, this crop is cut to move — fine layers that lift and separate instead of lying in a sheet. It’s the answer for women who want short hair that feels like nothing: cool in summer, quick to wash, and softly textured without any real styling.
Try this: A pea-sized amount of light cream, scrunched through damp hair, then air-dry.
Styling trick: Flip your part to the opposite side while damp — the roots dry with lift they wouldn’t have otherwise.
Avoid: Heavy pomades; they glue wispy pieces into clumps.
5. ➡️ Side-Part Lob with Root Volume
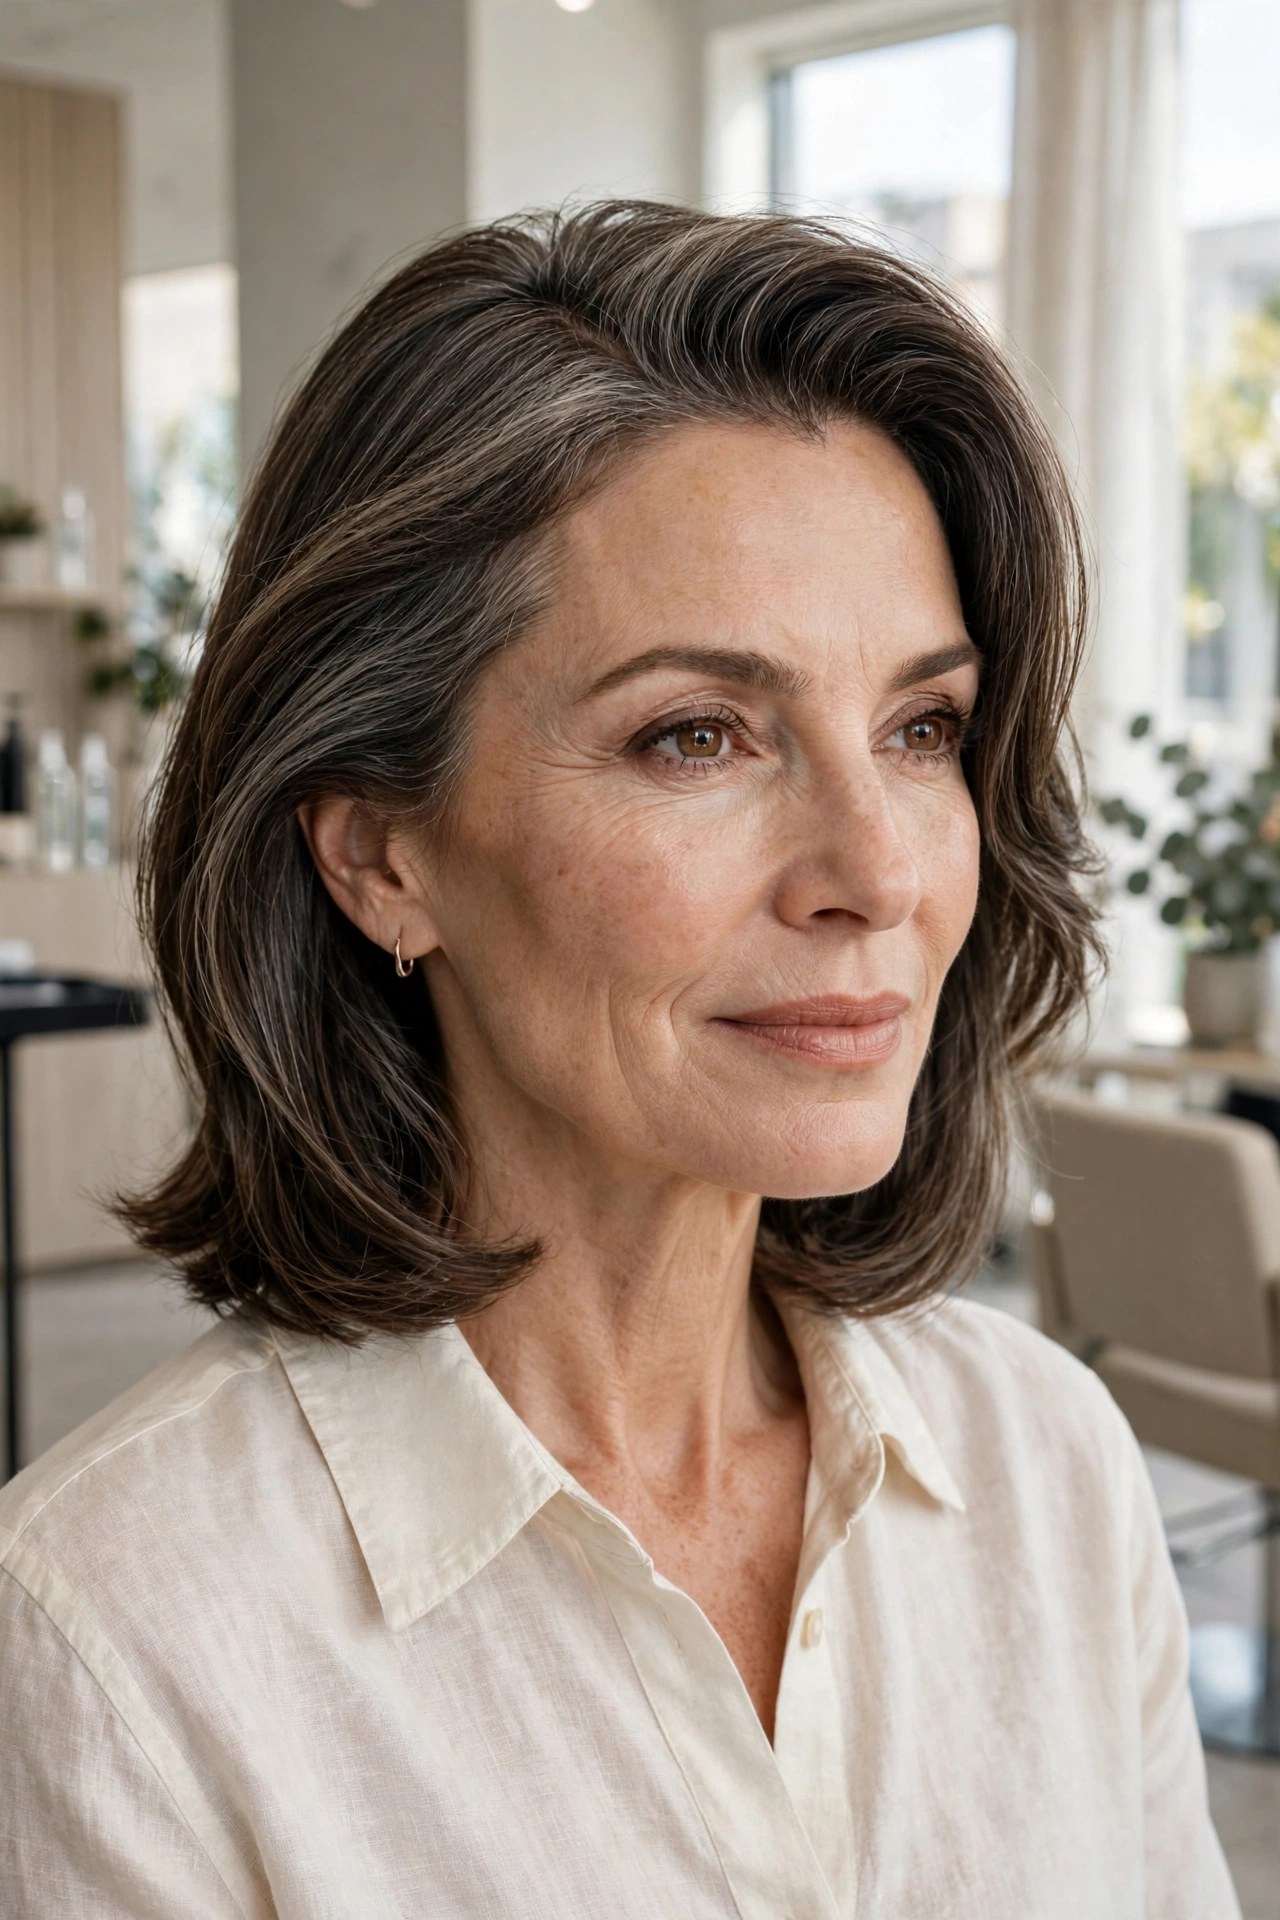
A deep side part is the fastest volume trick there is: it piles most of the hair to one side, creating height at the root and a sweeping diagonal. On a collarbone lob, it also quietly covers a widening part line — a common concern after 50.
Try this: Train the new part while hair is damp for the first week, drying roots in the deep position.
Styling trick: Flip the heavy side over once mid-dry for extra root lift, then let it settle.
Make it yours: Keep the underneath side sleek so the fuller side looks fuller still by contrast.
6. 🌙 Curled-Under Pixie with Soft Bangs
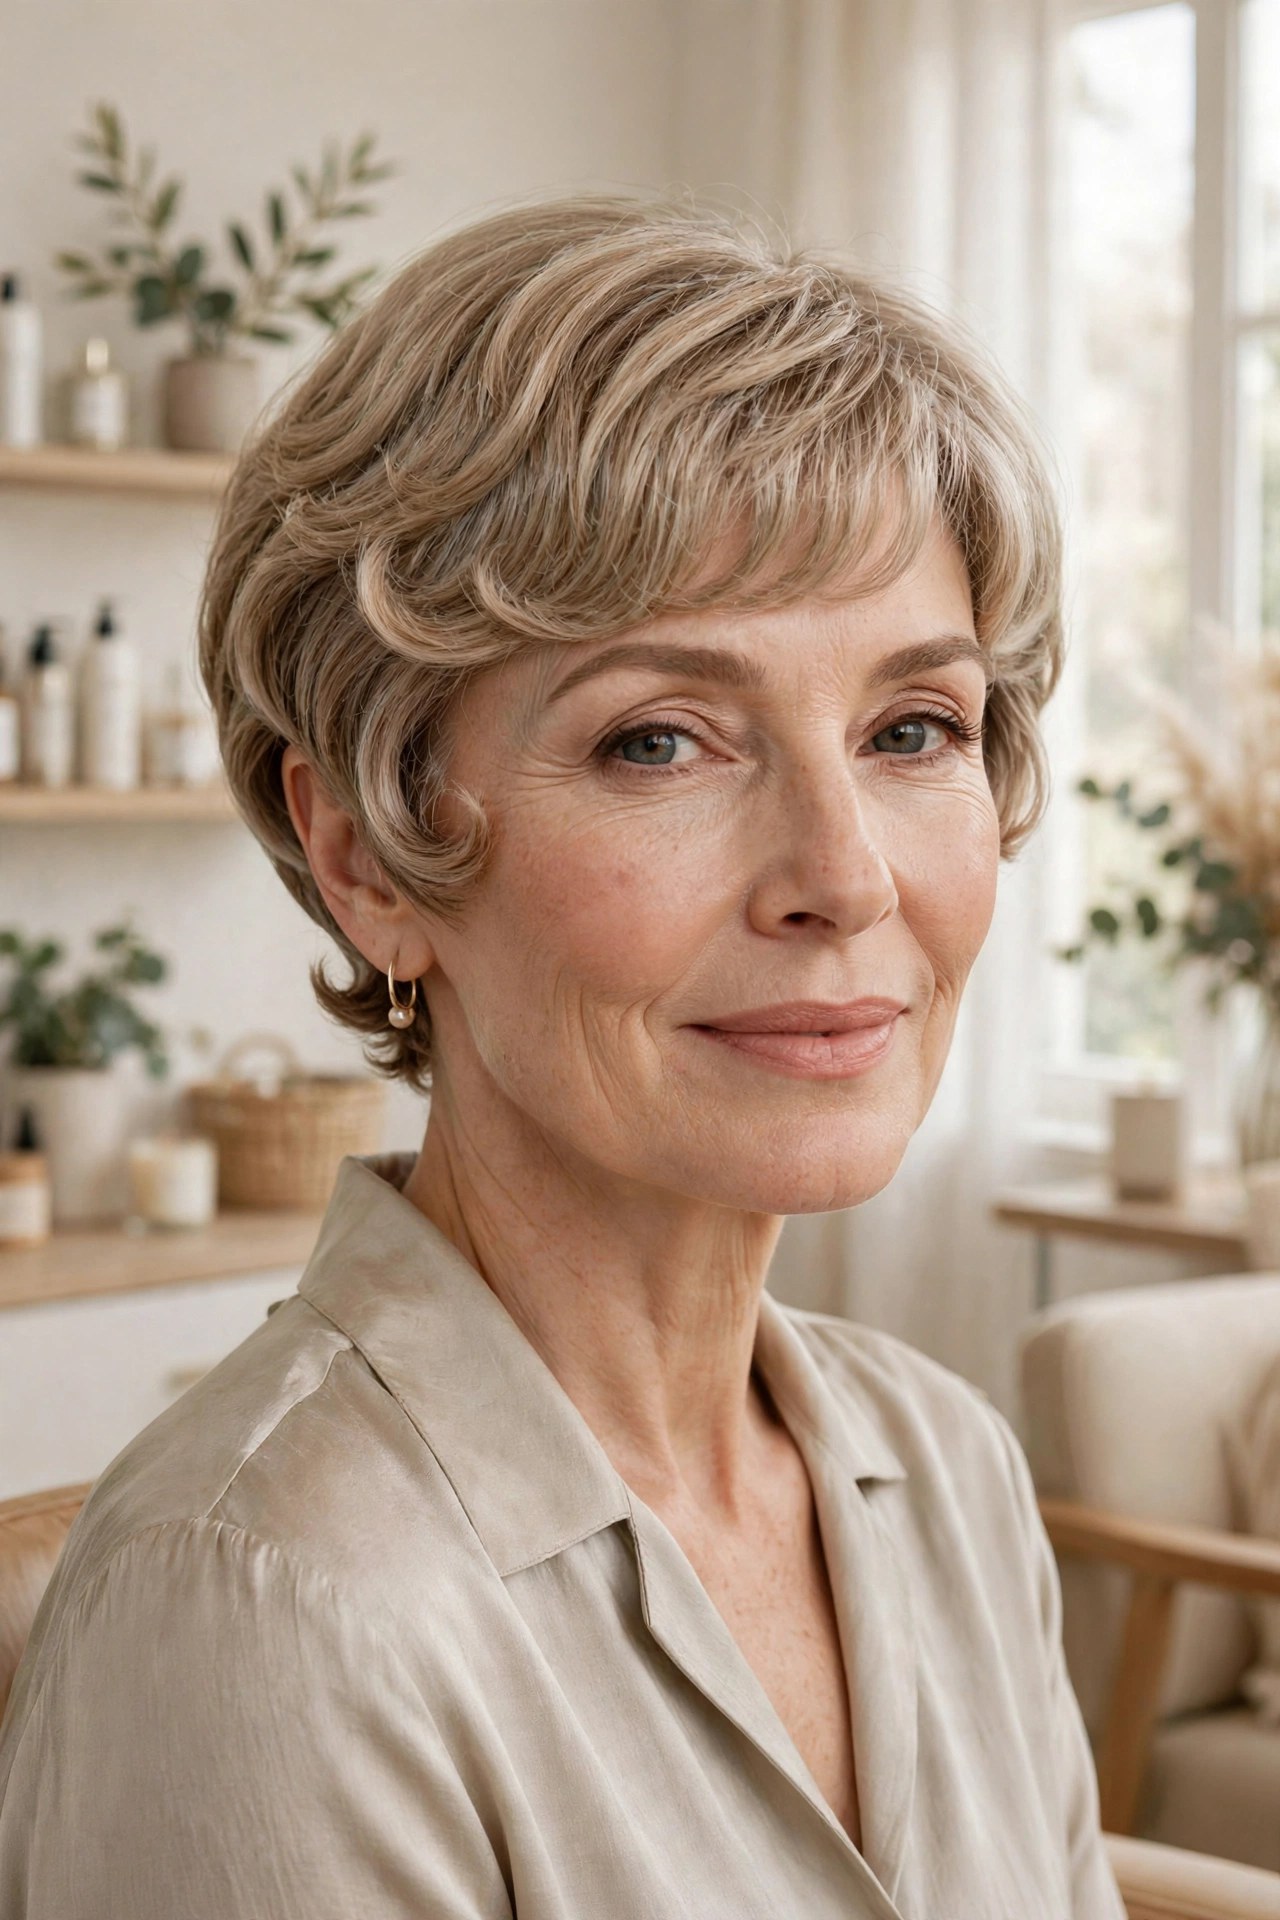
Ends that curve gently under create a soft, rounded silhouette that reads as fullness — the shape tucks in rather than hanging limp. Paired with soft bangs, this pixie frames the face beautifully while the rounded outline does the volumizing work.
Try this: A small round brush at the ends, rolling under while lifting the roots outward first.
Styling trick: Dry the bangs first, before the rest — they’re the shortest and set fastest, so they need a head start.
Avoid: Drying everything straight down; you’ll press out the curve that makes this cut work.
7. 🤎 Dimensional Brunette Bob
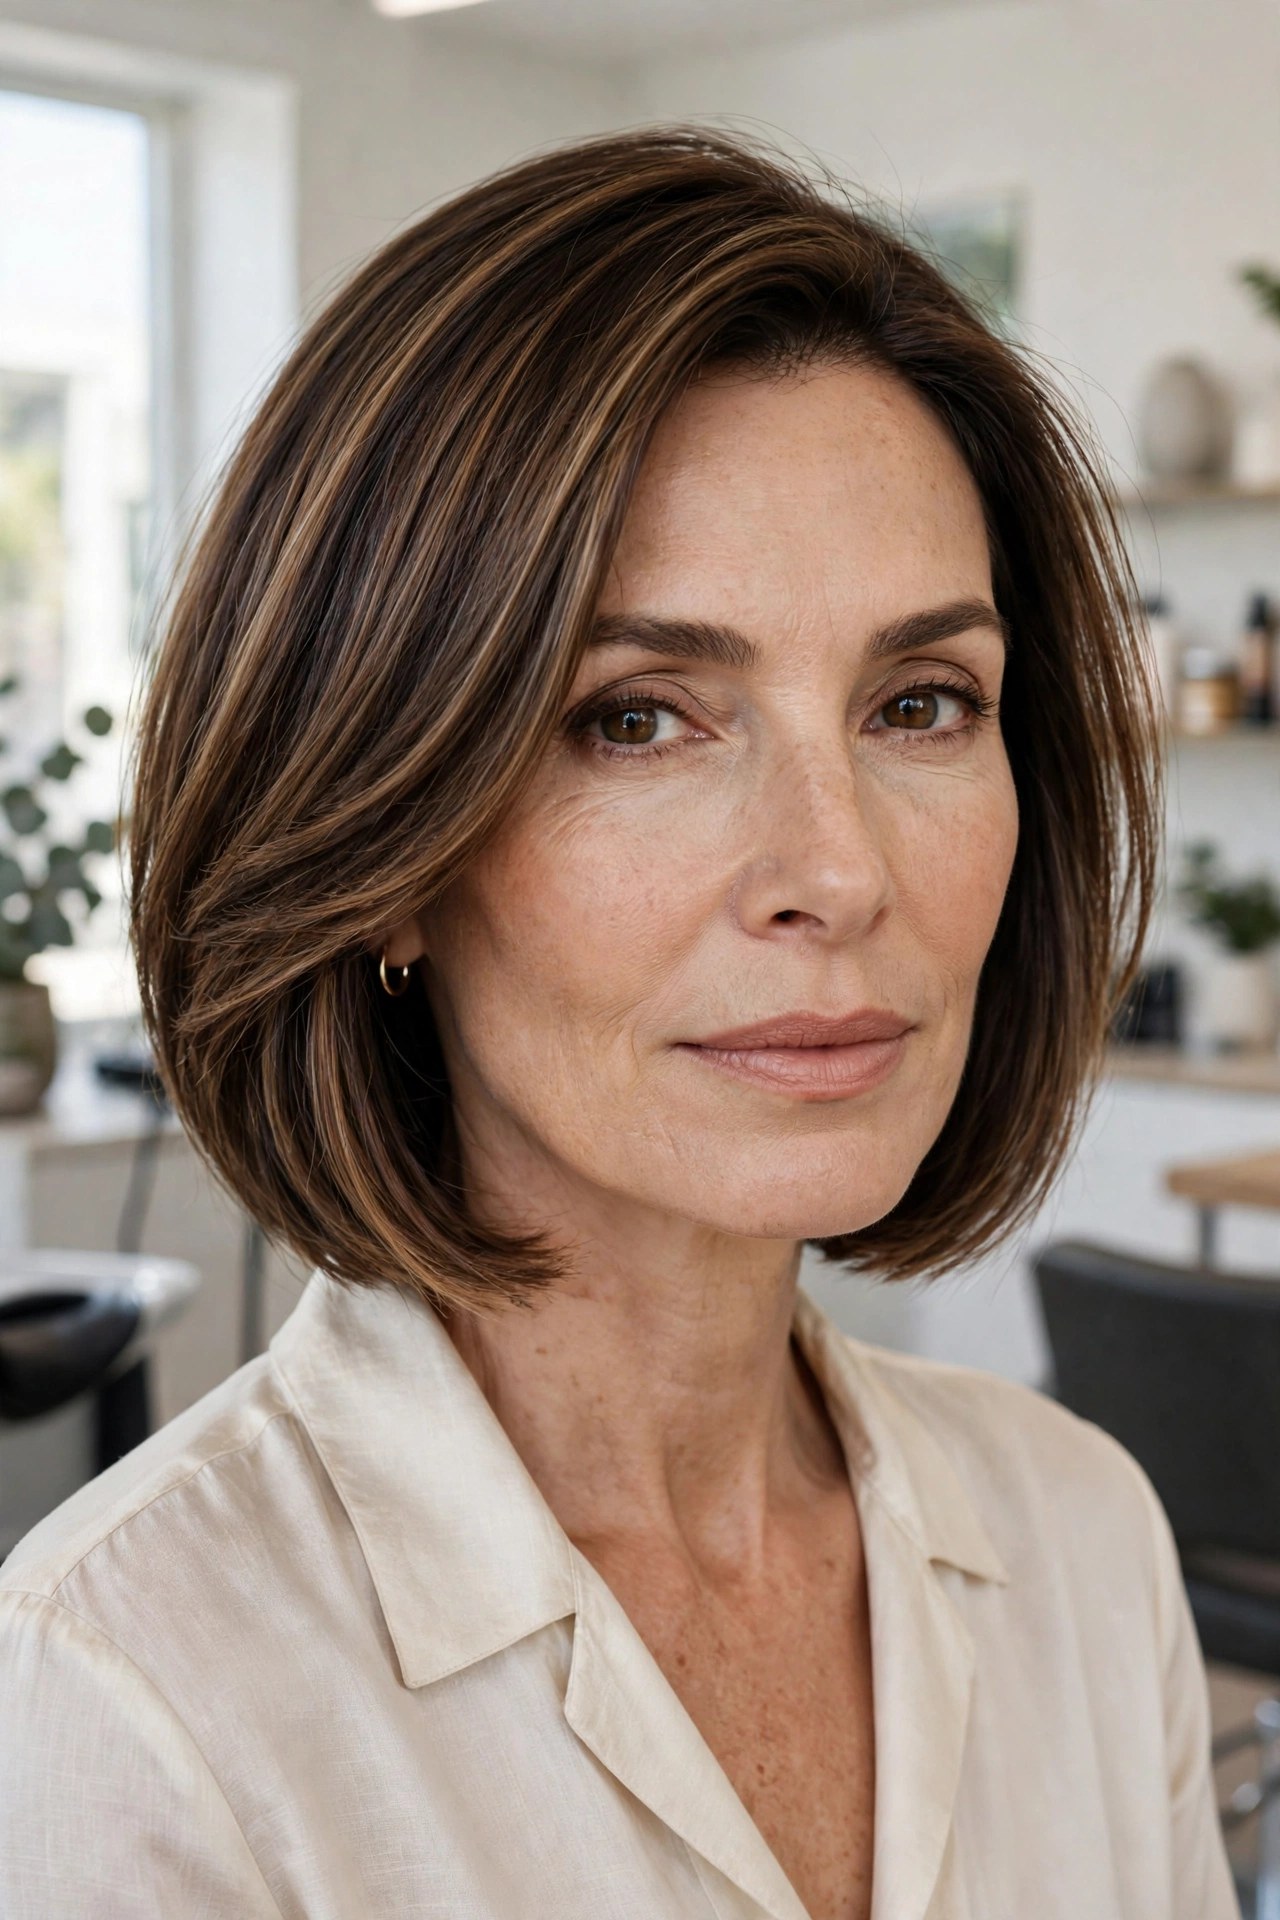
Multi-tonal brunette — ribbons of lighter brown woven through a deeper base — creates the light-and-shadow that fine hair can’t make on its own. On a chin-length bob, that dimension multiplies the sense of texture, and a glossy finish seals the deal.
Try this: Ask for ribbons narrow enough to preserve depth between them — contrast, not stripes.
Styling trick: A clear gloss between color appointments keeps the dimension reflective and rich.
Budget tip: Dimensional brunette grows out more gracefully than solid dark color.
8. 🪶 Feathered-Nape Pixie
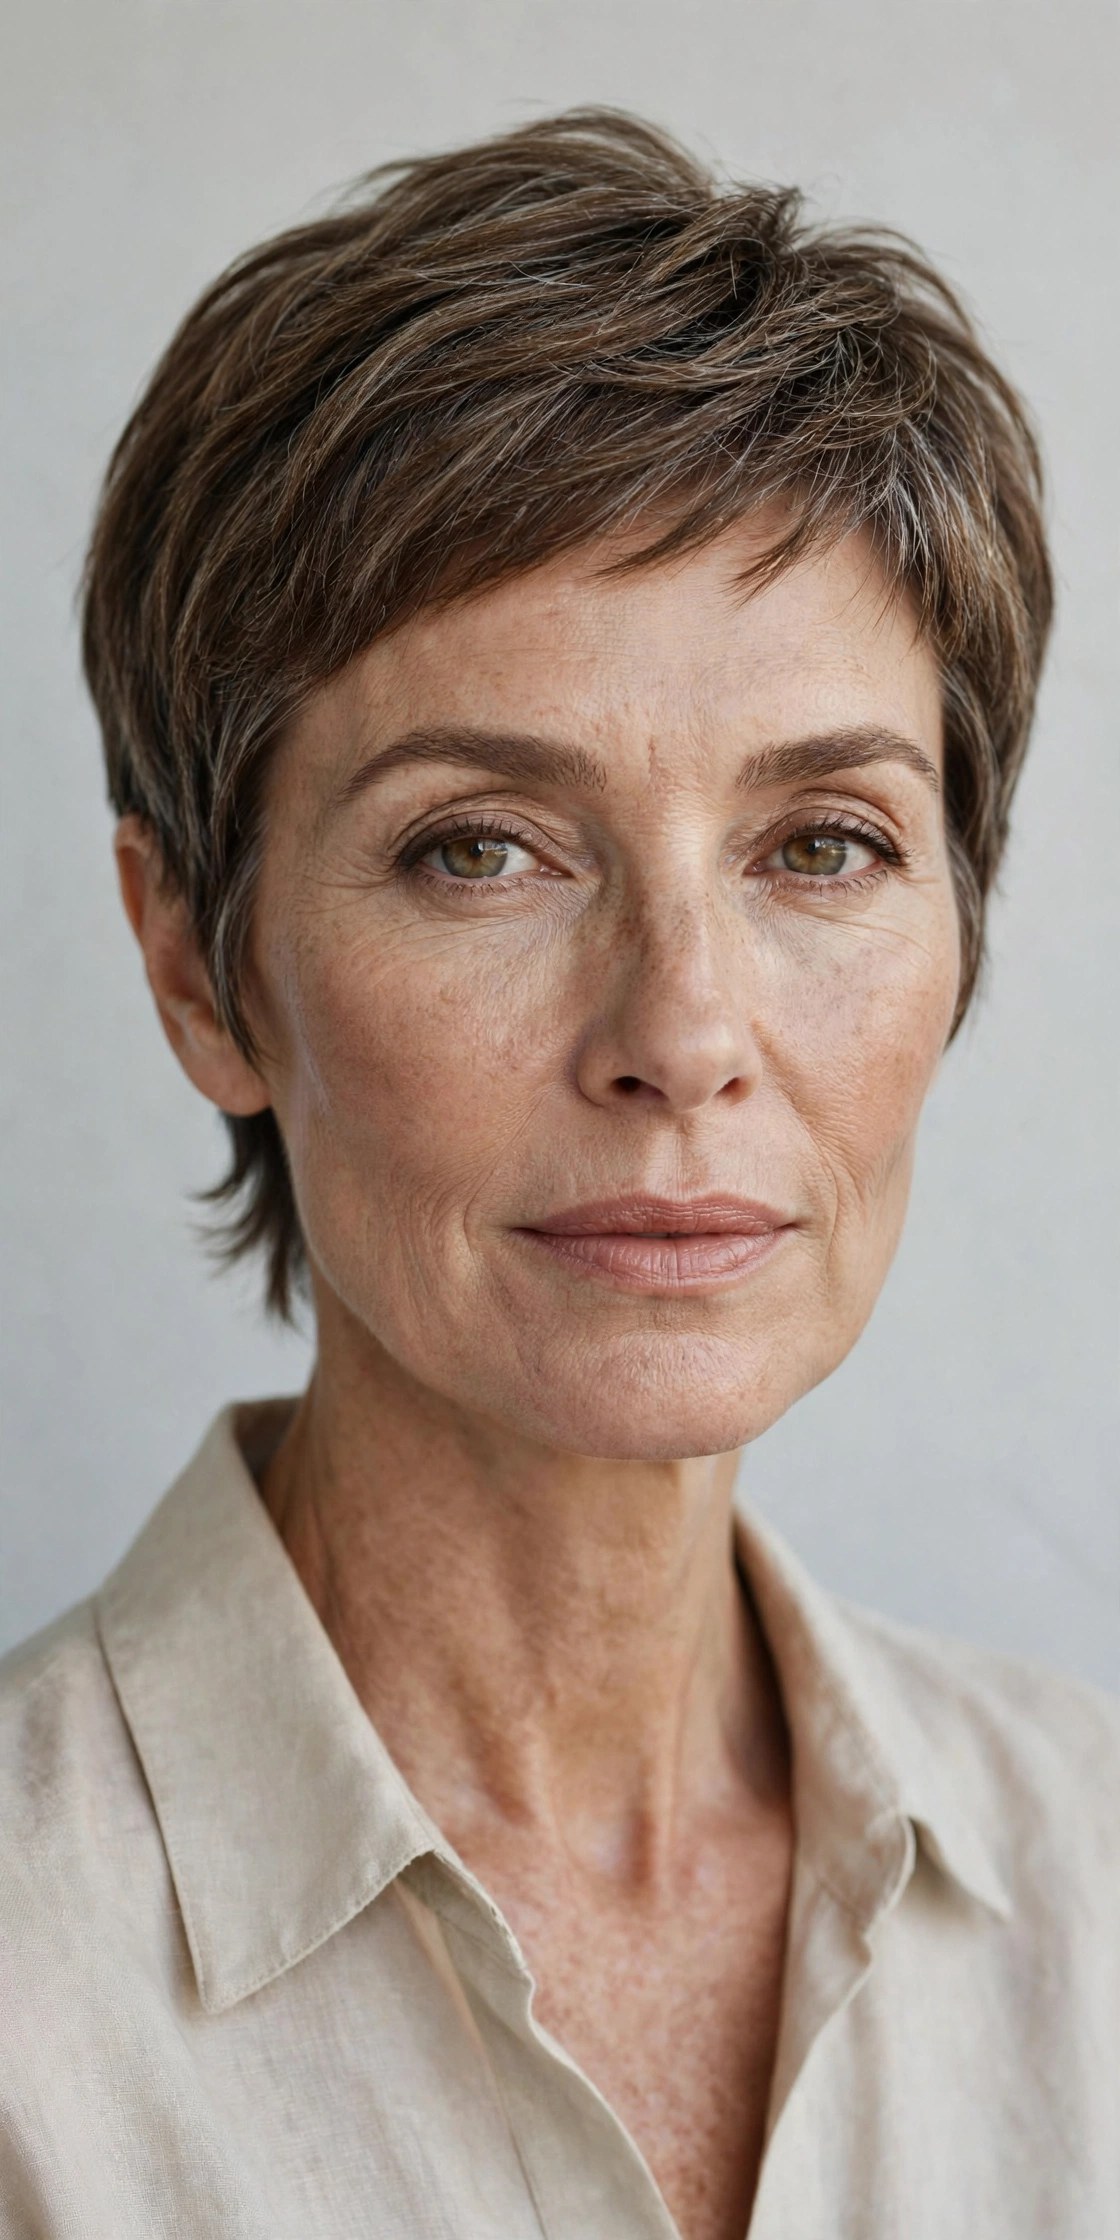
The nape is feathered soft instead of cut blunt, which keeps the back of this pixie light and touchable while the crown carries the fullness. It’s a gentle, feminine take on the pixie — neat from behind, voluminous from the front.
Try this: Ask for soft, feathered shaping at the nape rather than a hard, blunt line.
Styling trick: Dry the nape upward with a small brush — the feathered ends lift instead of lying flat.
Avoid: Letting the nape grow shaggy; the clean feathering is what keeps it elegant.
9. 📐 Softly-Graduated Chin Bob
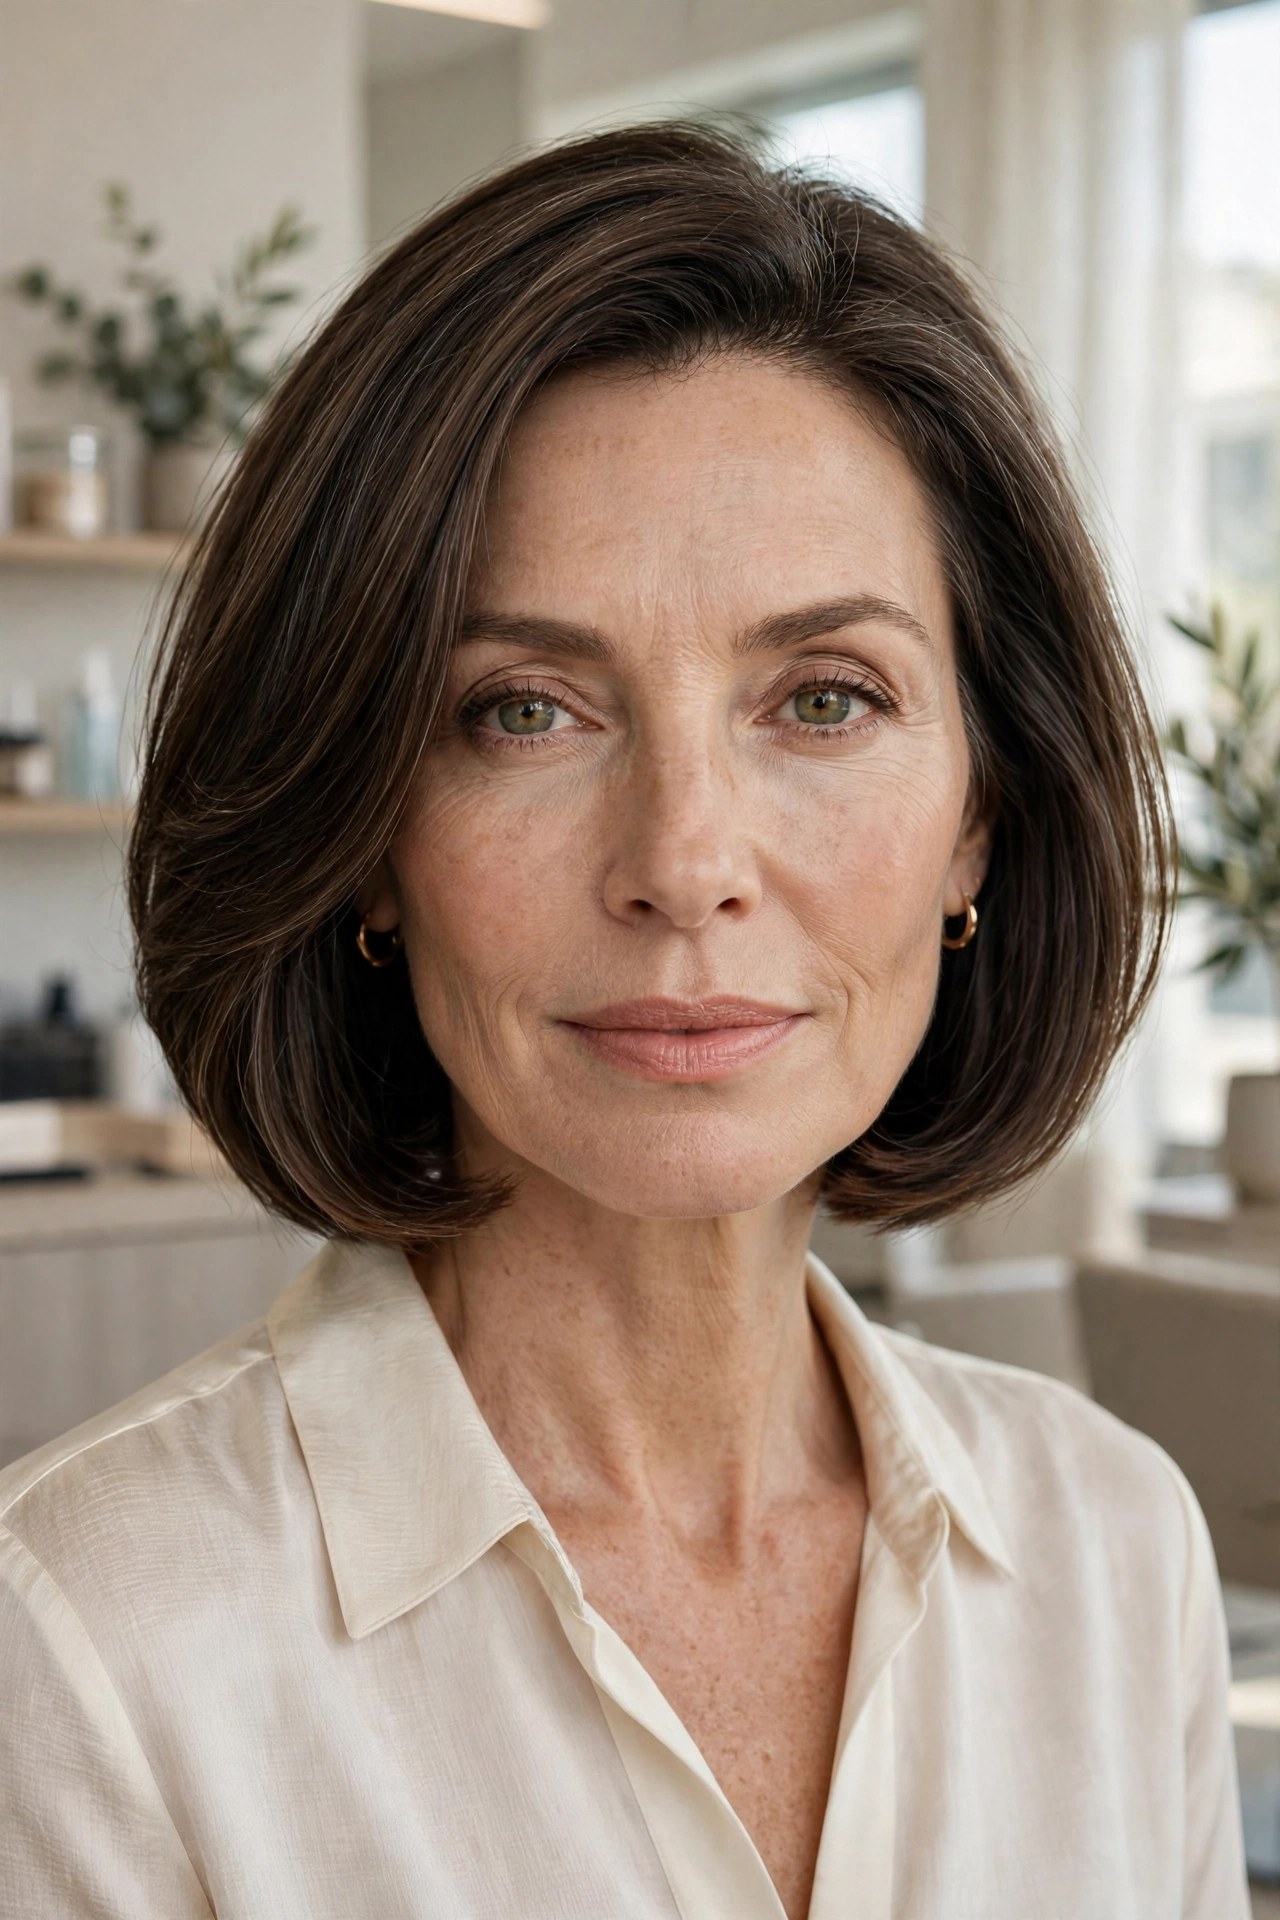
Subtle graduation through the back builds a gentle, rounded shape that supports the crown from underneath. The front stays longer and sleeker for a modern profile. It’s the quiet achiever of this list — no drama, just a bob that refuses to sit flat.
Try this: Ask for stacked graduation focused low at the back, built through elevation not thinning.
Styling trick: A root-lifting spray concentrated at the back emphasizes the stacked shape while the front stays smooth.
Make it yours: Tuck one front section behind your ear for an instant asymmetric update.
10. 🎀 Curtain-Part Bob
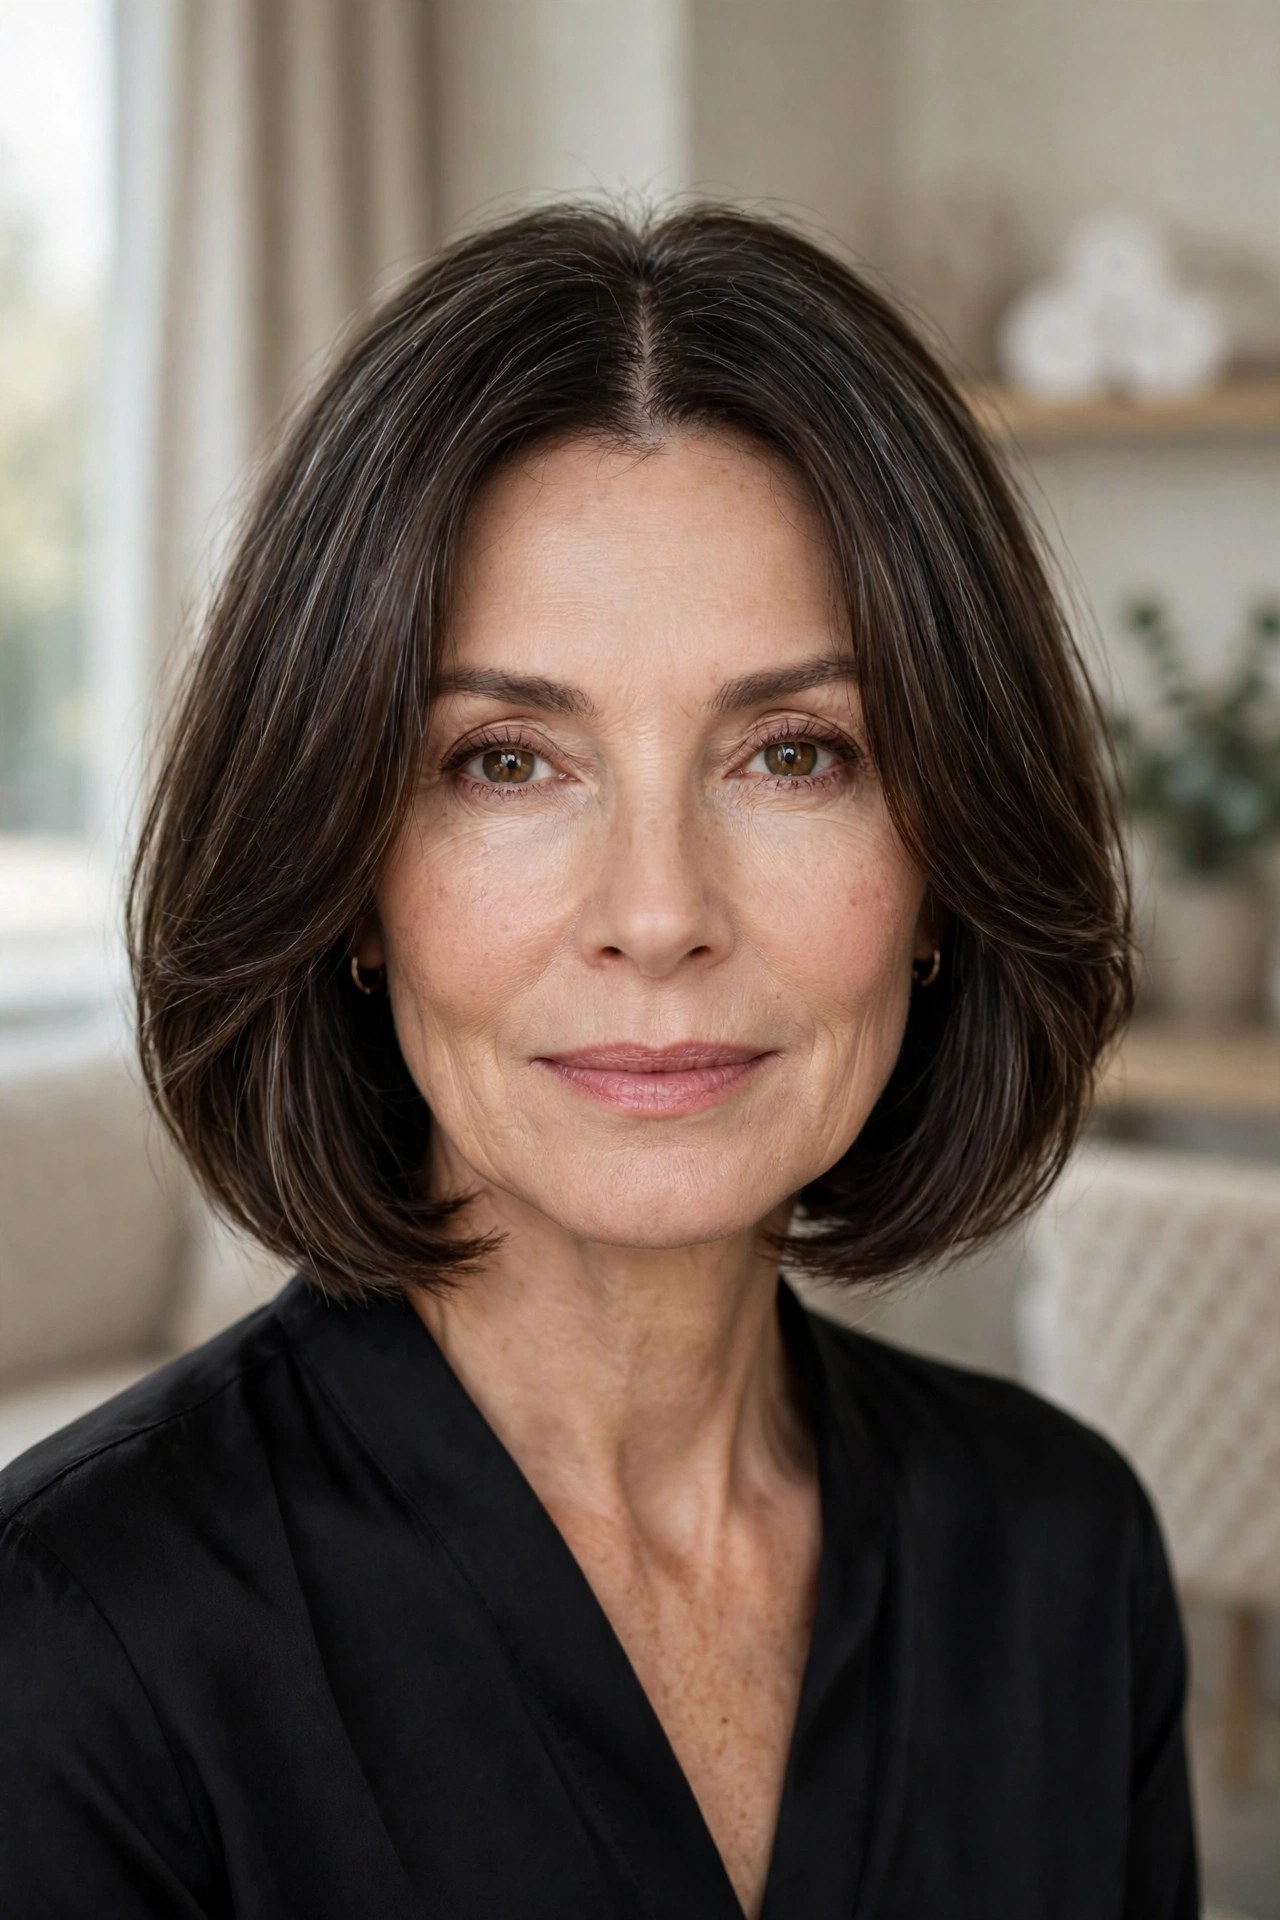
A center curtain part opens the face like drapes, with cheek-length pieces framing each side. The parted front creates natural lift at the roots — hair can’t lie flat when it’s been directed in two opposing directions — while the chin-length bob keeps the ends substantial.
Try this: Wrap the front sections around a round brush away from your face for the open curtain effect.
Styling trick: Clip the parted front sections up while they cool — the lift sets in and lasts hours longer.
Avoid: A heavy center part on very fine hair without the face-framing pieces; it can expose the scalp line.
The cool shot button on your dryer is the most underused volume tool in existence. Heat shapes fine hair; cold sets it. After lifting any section, blast it with cool air for five seconds before you let go — that set is what keeps volume alive past noon.
11. 🤍 Silver Blown-Out Pixie
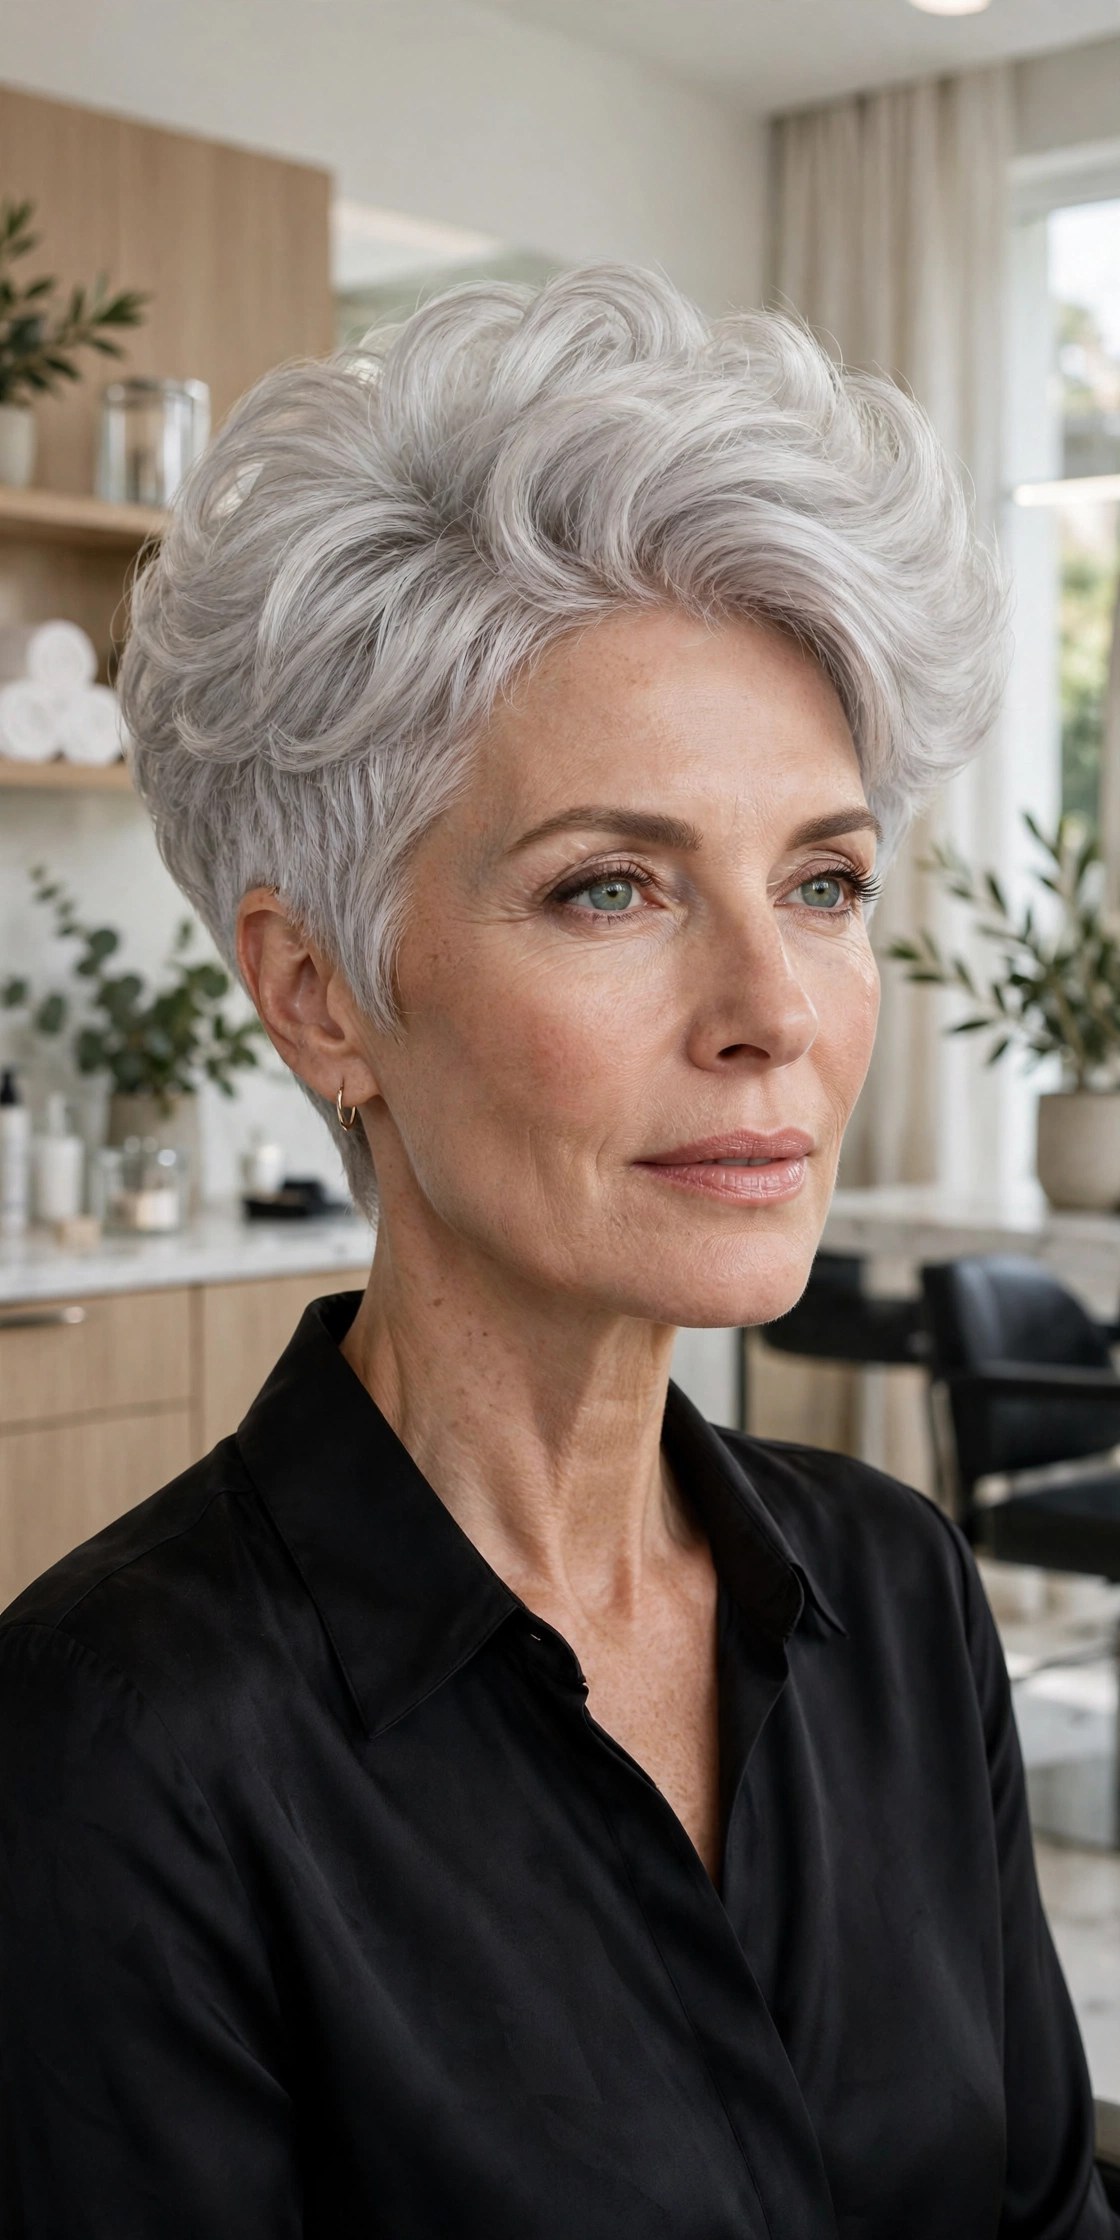
A full, bouncy blowout on a silver pixie is pure glamour — the rounded shape catches light through every layer, and luminous gray reflects it back. It’s proof that short silver hair can be the most striking hair in the room.
Try this: A round brush and dryer, section by section, rolling under for that bouncy, rounded finish.
Styling trick: A weekly purple shampoo keeps silver bright; yellowed gray always looks flatter.
Budget tip: Embracing silver eliminates color costs — invest the savings in great cuts.
12. ⏱️ The 5-Minute Root-Lift Style
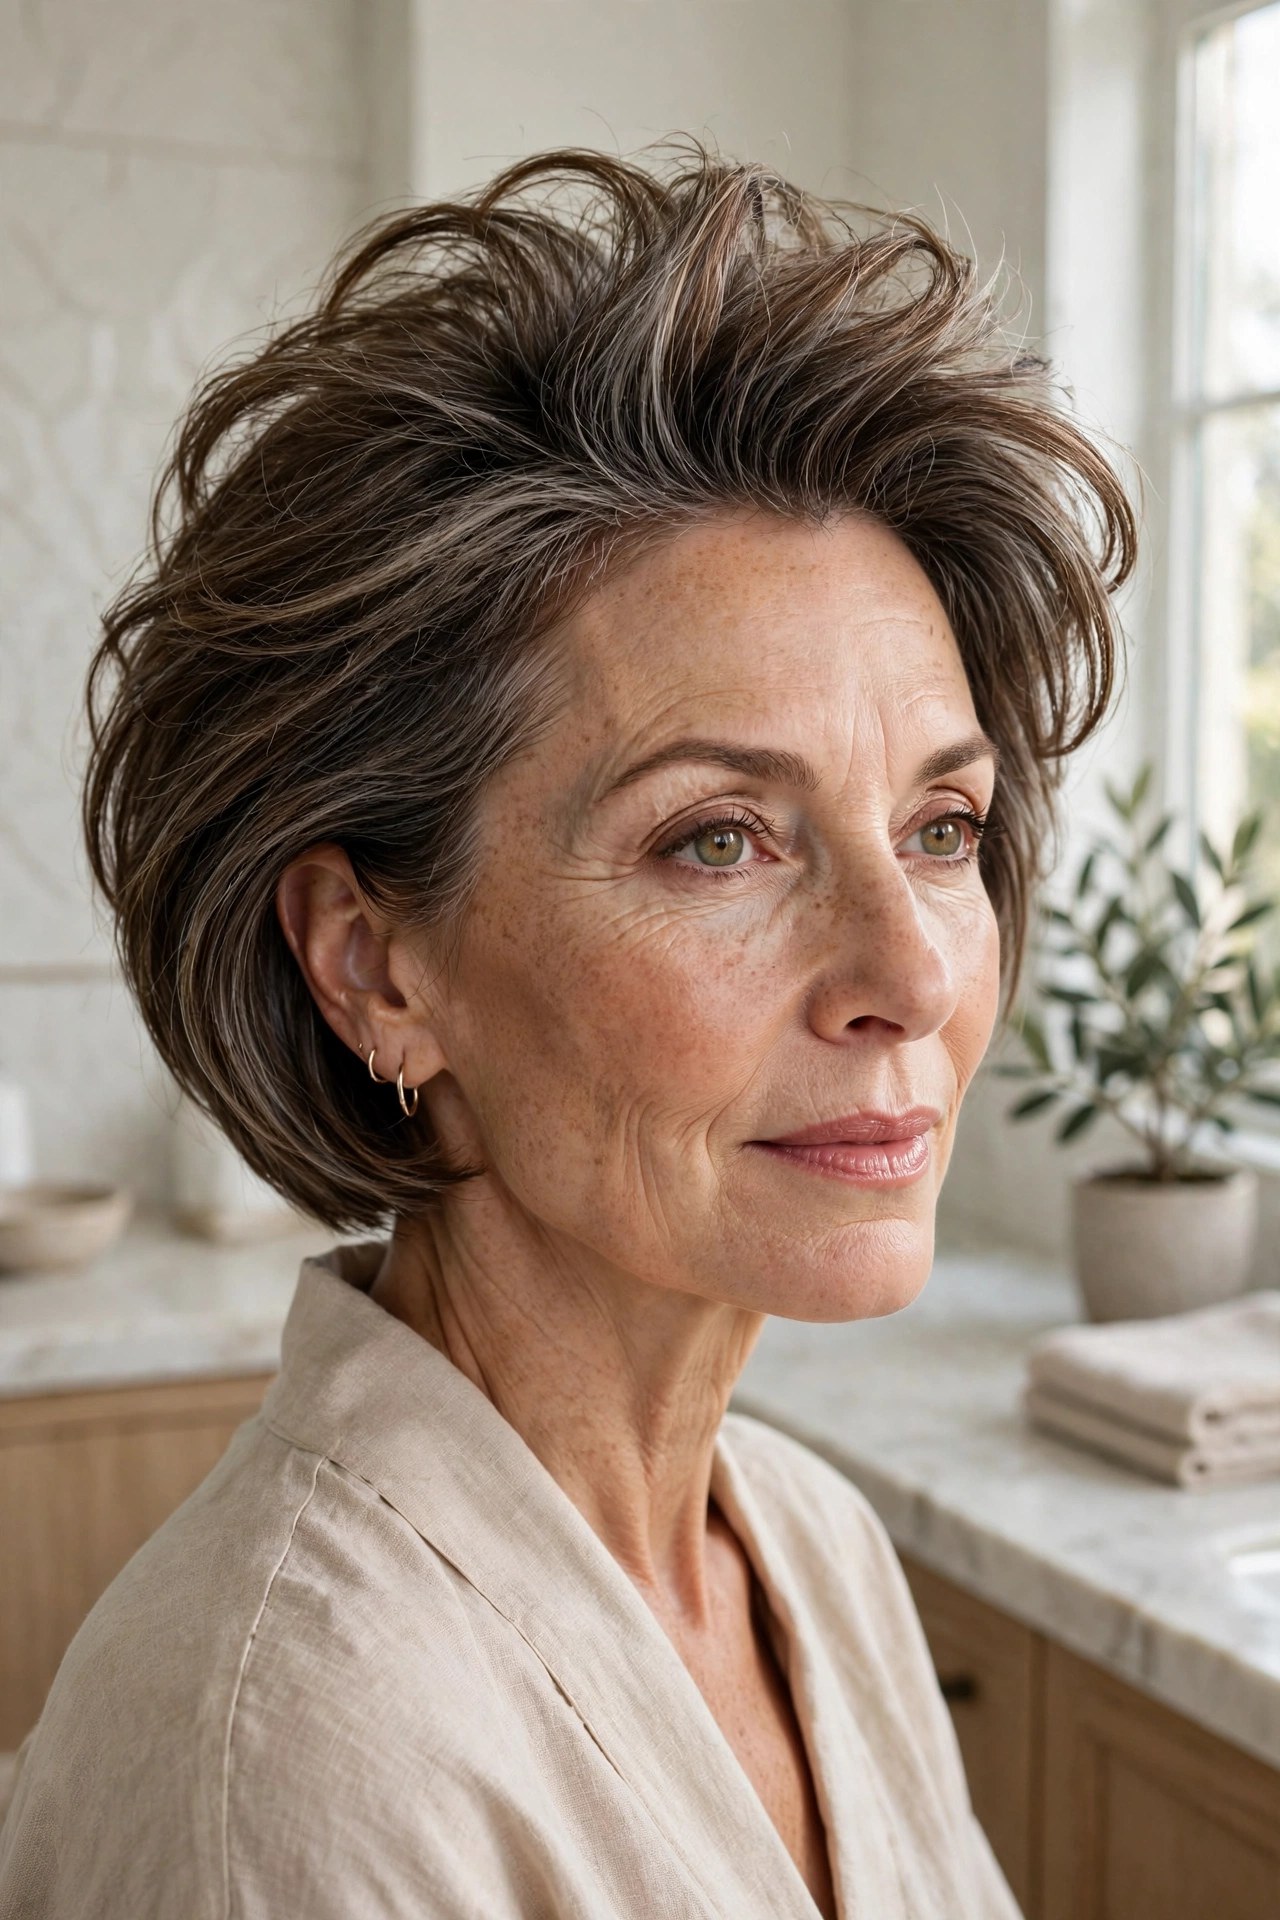
This isn’t a specific cut — it’s a rescue routine for any short style in this list. Five minutes, three moves: lift the roots with your fingers while drying, flip your part, and hit everything with cool air. It’s the styling trick to learn before you learn any other.
Try this: Work a little volumizing mousse into damp roots — product goes on roots, never ends, for lift.
Styling trick: Dry with your head tipped to one side, then the other; roots dry lifted in both directions and can’t settle flat.
Make it yours: Keep a travel dryer brush by the door for two-minute morning refreshes.
13. 🏖️ Tousled Wavy Bob
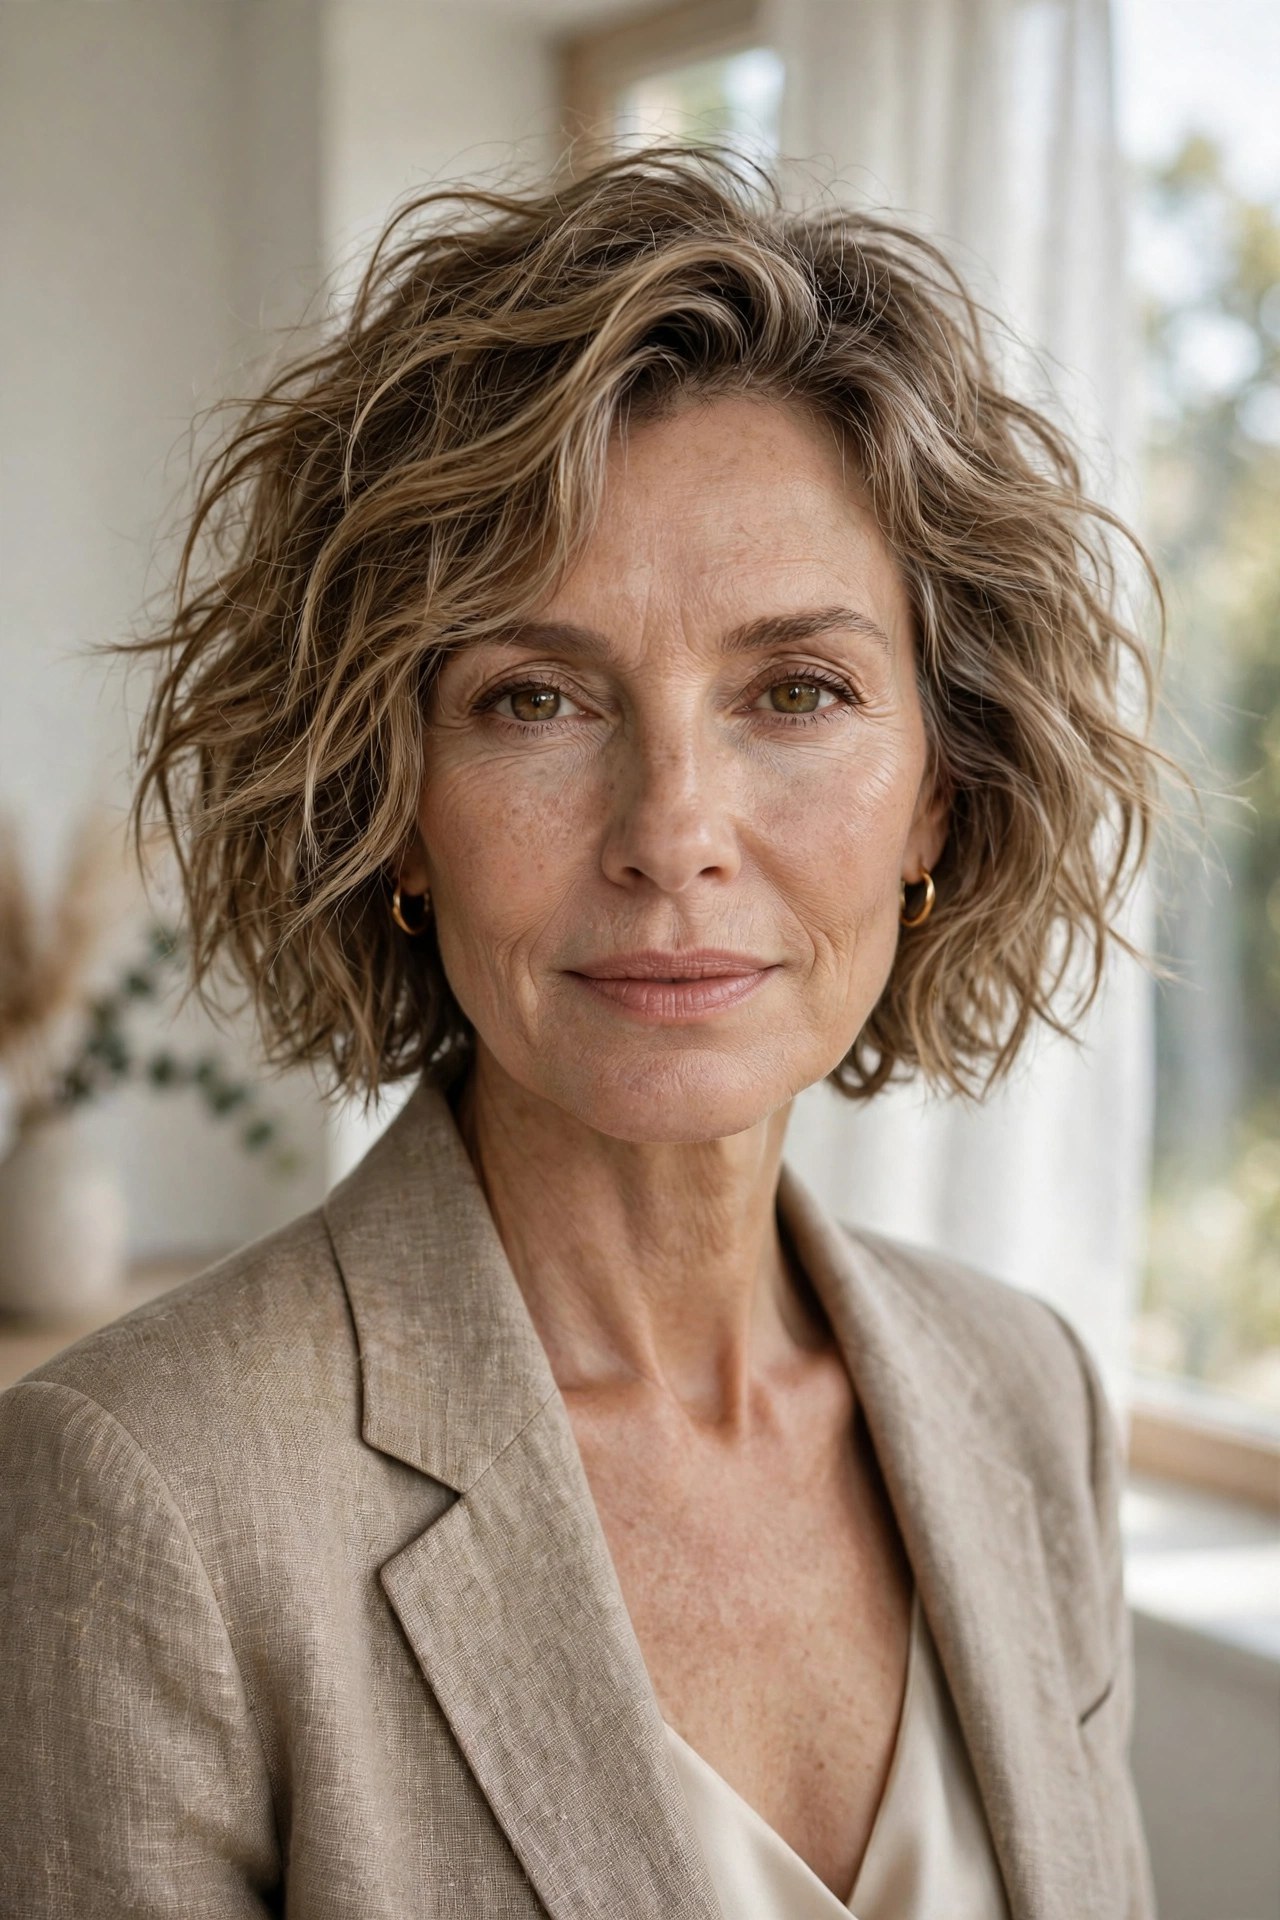
Undone waves give fine hair something sleek styles can’t: width. A few loose bends push the sides outward, and the tousled finish means imperfection is the goal — the easiest “styled” look in this list. Chin-length keeps the ends looking full through all the texture.
Try this: A sea-salt spray on damp hair, scrunched with fingers — waves without heat.
Styling trick: Twist two front sections away from your face while damp, let dry, then release — heatless waves in minutes.
Avoid: Brushing out the waves; finger-separate only, or you’ll get frizz instead of texture.
14. ↔️ Softly-Tapered Pixie with Fringe Sweep
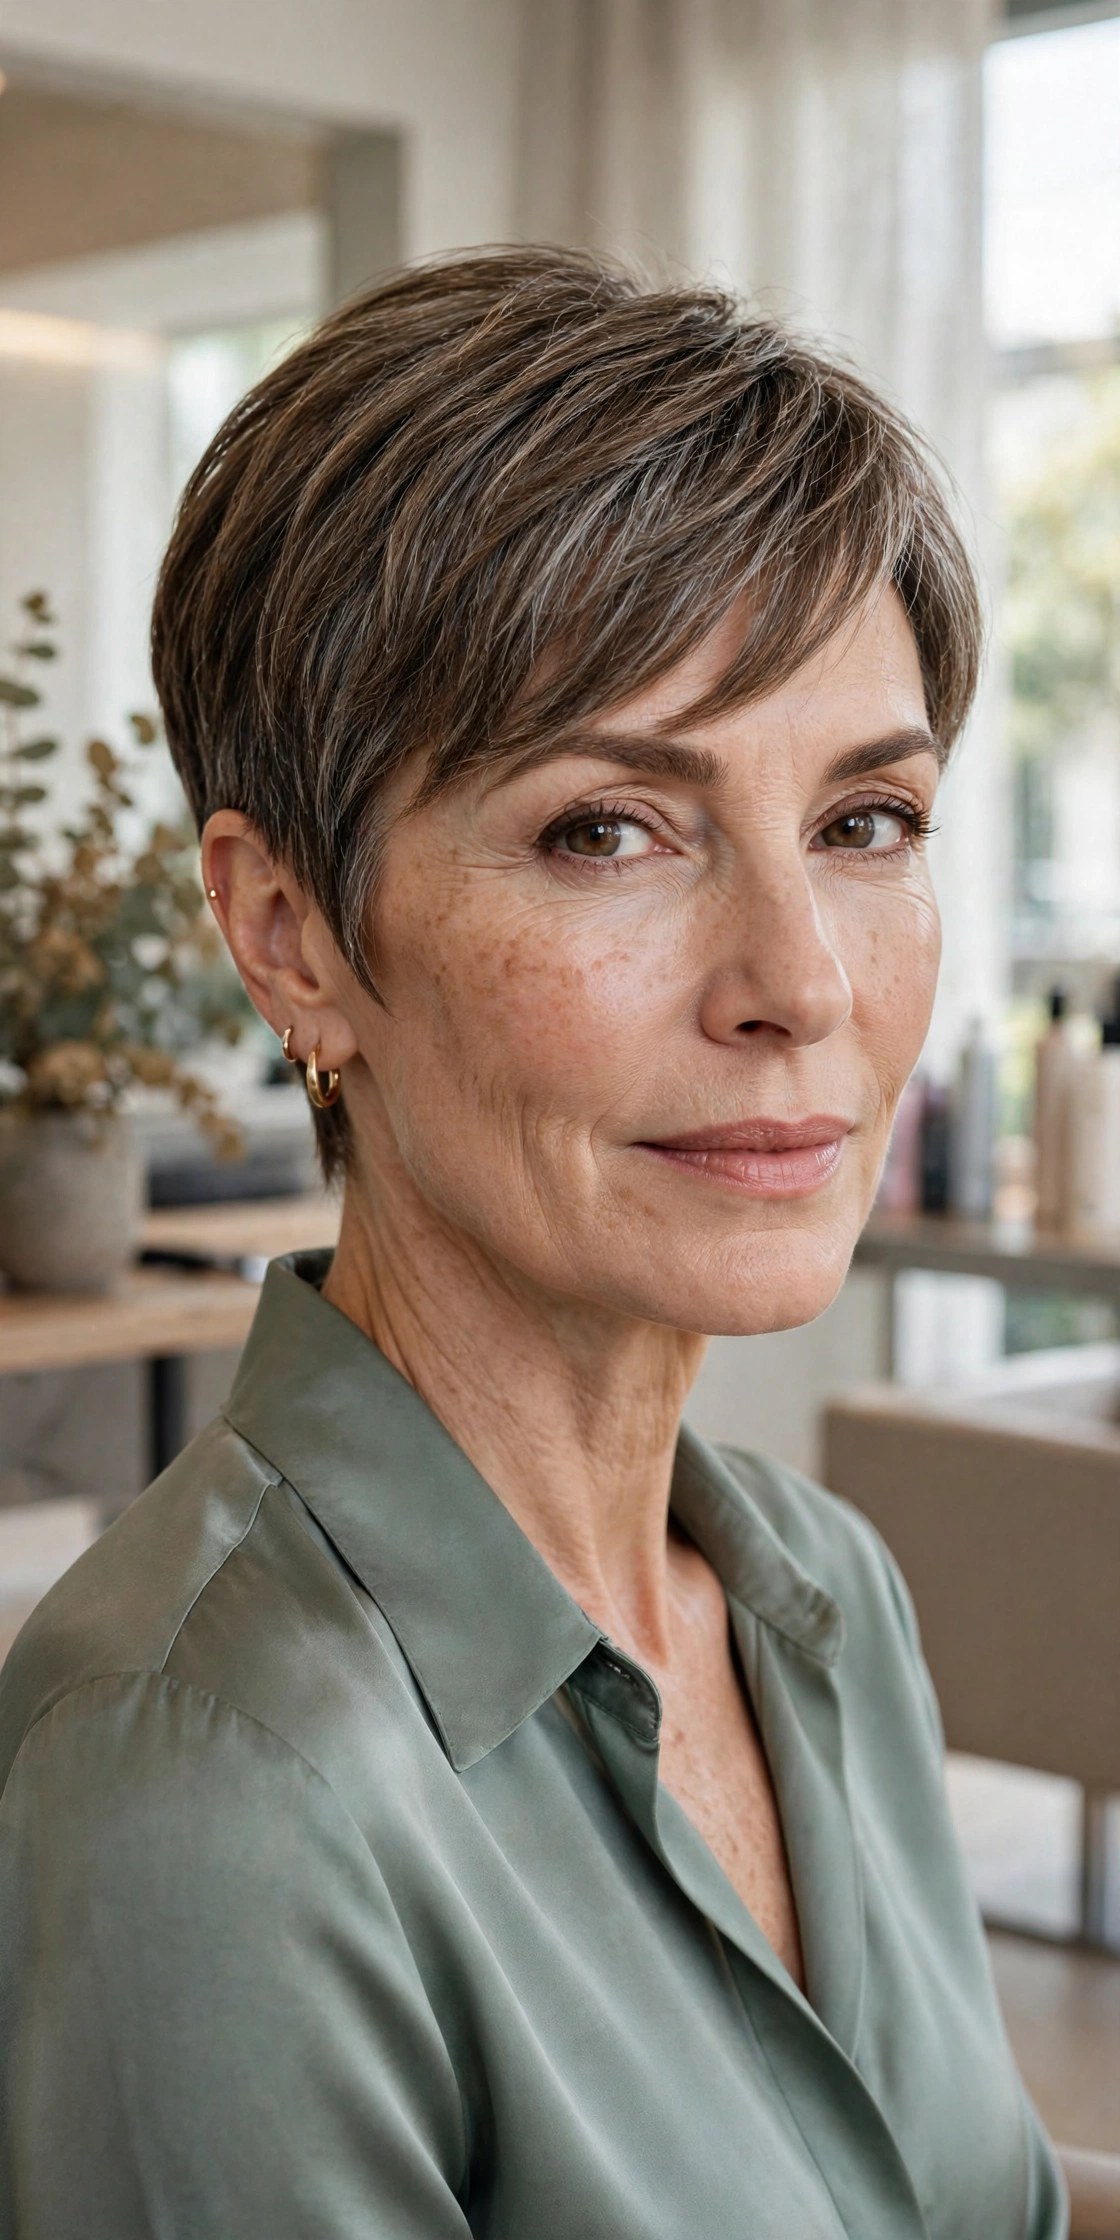
Neatly tapered sides keep this pixie tidy while a longer fringe sweeps across the forehead, creating a diagonal line the eye follows. The sweep adds movement and softness, and the taper makes the top look fuller by contrast.
Try this: Blow-dry the fringe across your face first, then sweep it into place.

Styling trick: A deep side part makes the fringe sweep even more dramatic — try both and compare.
Make it yours: Pinch the fringe ends with a dab of light cream for piecey definition.
15. 🦪 Pearl-Toned Lob
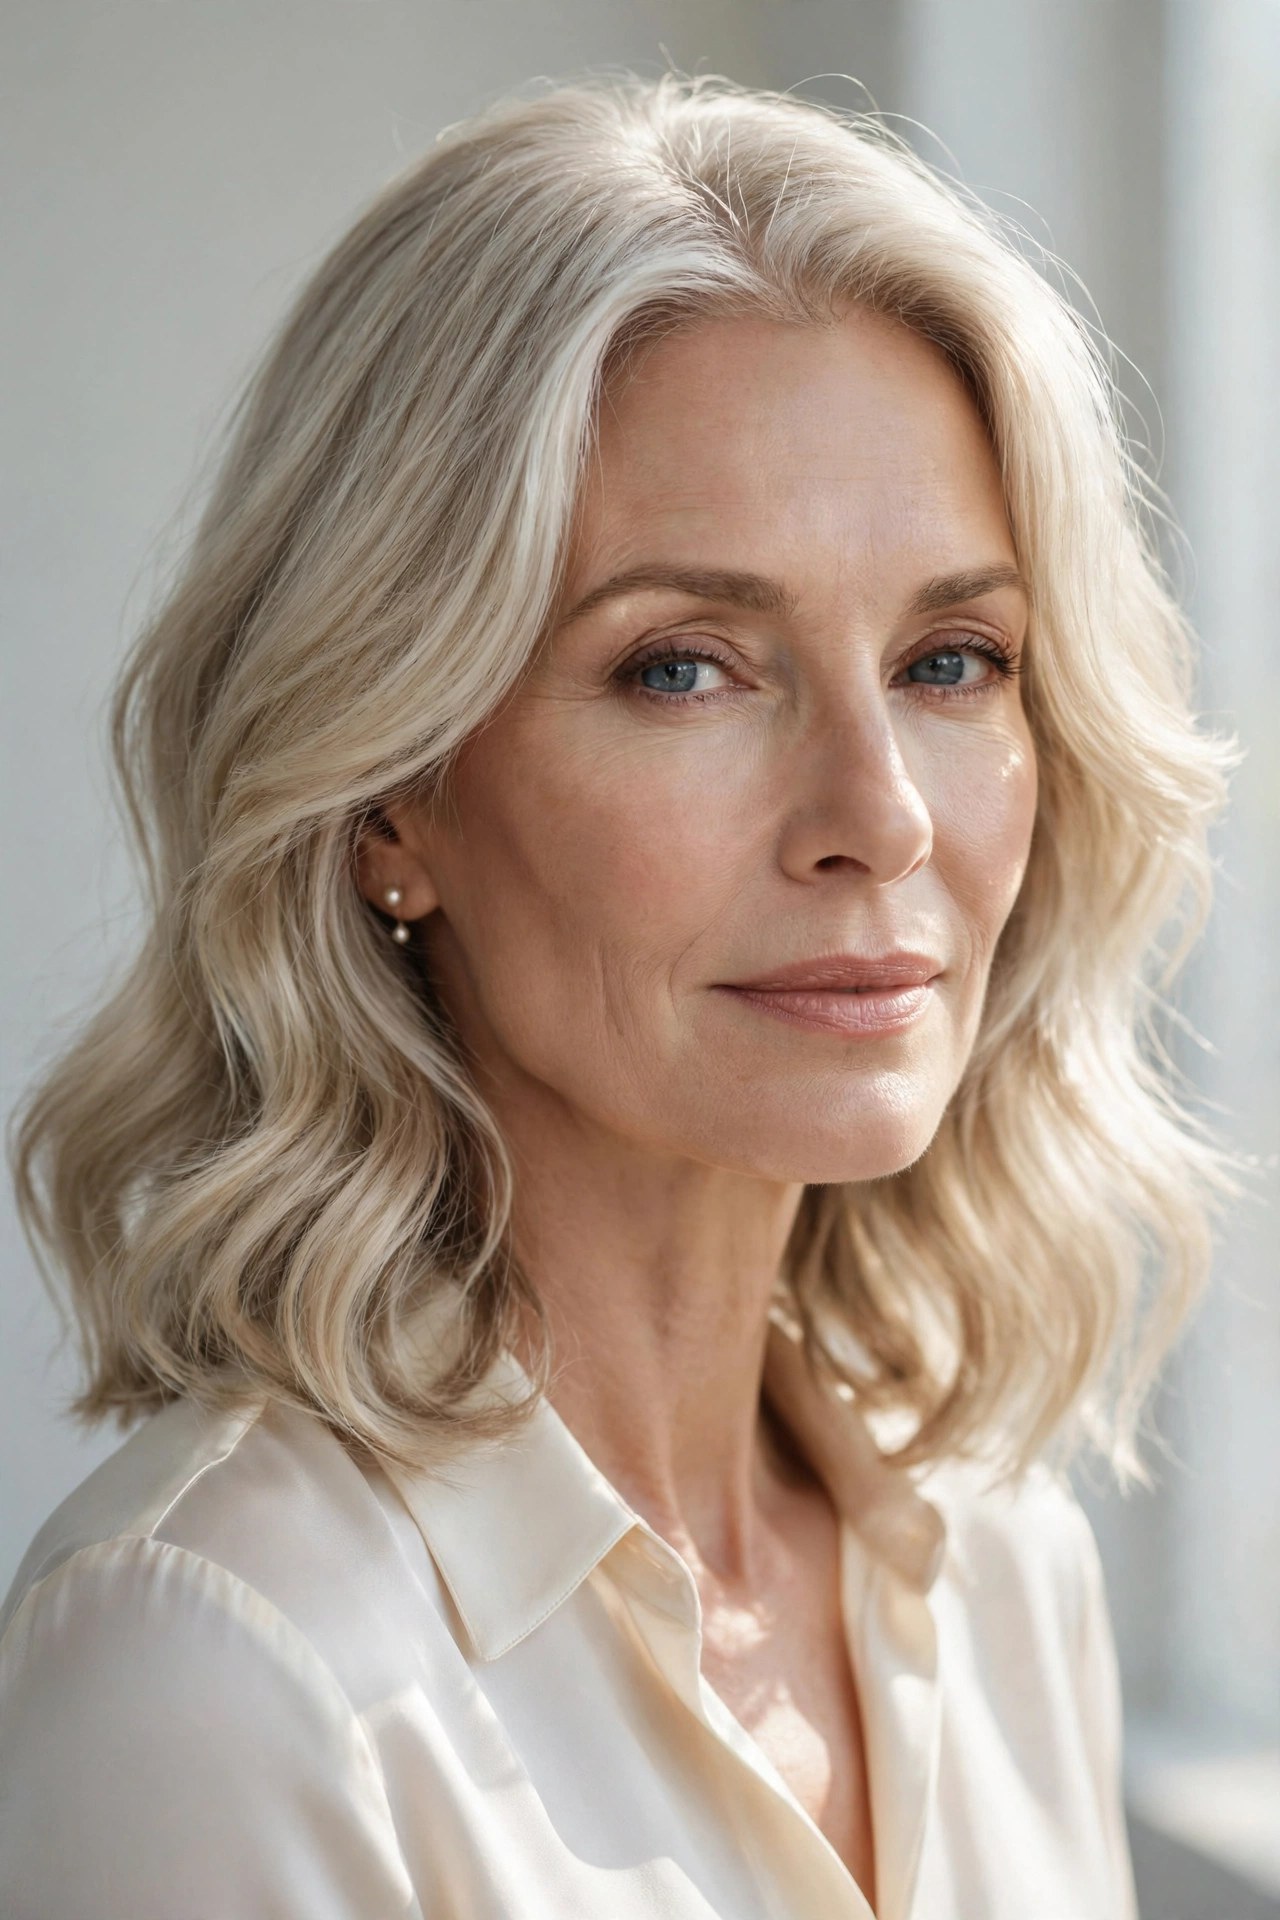
Pearl blonde — luminous, cool, almost iridescent — turns a collarbone lob into something ethereal. The light tone reflects maximum light, which is free volume, while soft waves keep the length from hanging flat. It’s a statement color that stays elegant.
Try this: Ask for a softly shadowed root so regrowth is gentle, not abrupt.
Styling trick: Finish with a light texture spray at the roots and mid-lengths — never a heavy wax on pearl tones.
Avoid: Warm-toned products that can dull the cool pearl finish over time.
16. 💨 Airy Piecey Bob
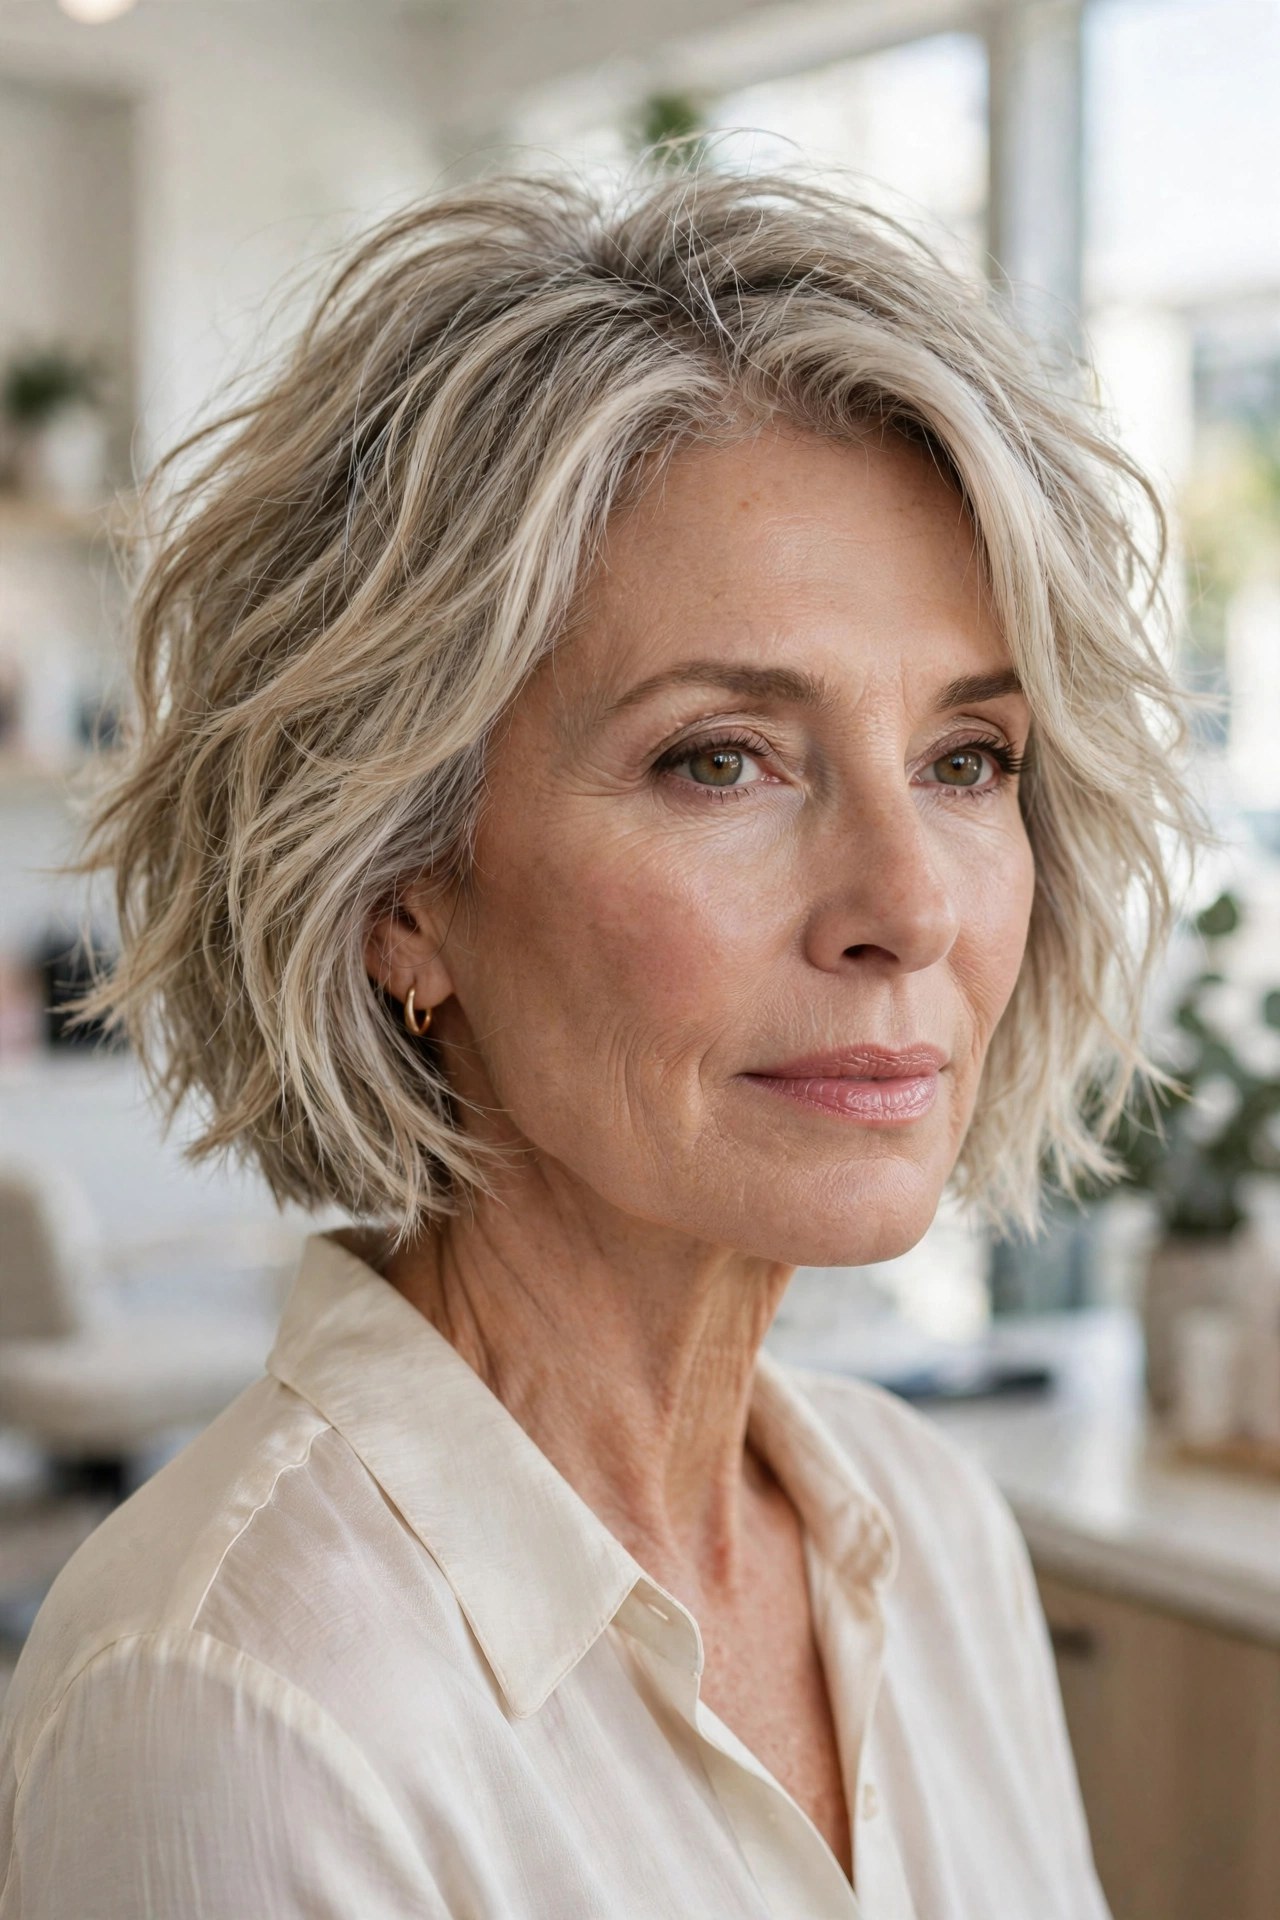
Separated, piecey ends break up the flat plane that makes fine hair look thin — each defined piece catches light differently. This bob keeps the separation light and breezy rather than chunky, so it reads as airy texture, not choppiness.
Try this: Ask your stylist to point-cut just the last inch for separation without losing the line.
Styling trick: Twist tiny sections between your fingers with a dab of light cream while hair is warm — the pieces set as they cool.
Avoid: Over-applying product; piecey turns stringy fast on fine hair.
17. ⬅️ Brushed-Back Silver Pixie
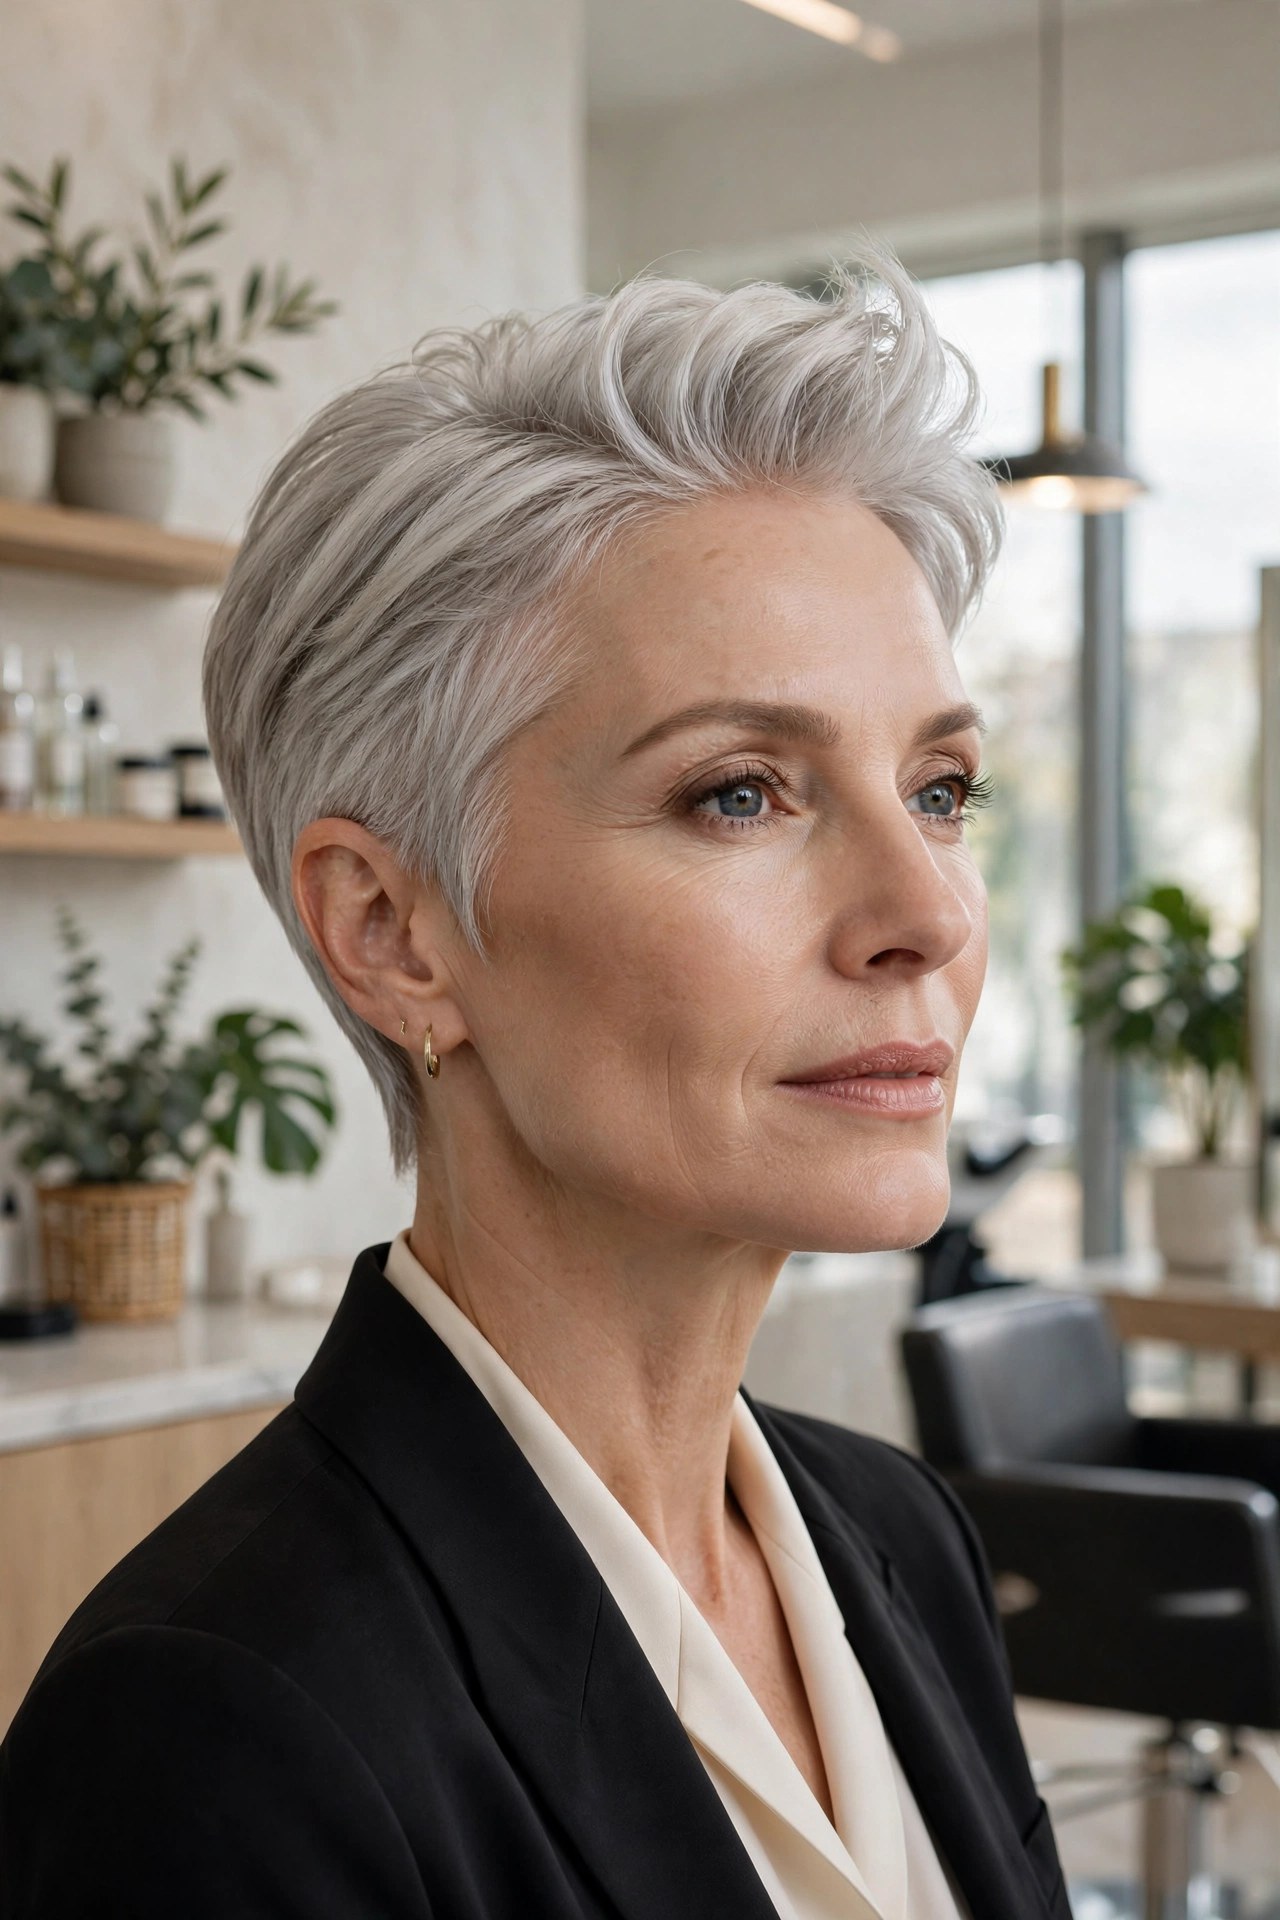
Brushing everything back and away from the face is a power move for fine hair: the backward direction creates lift at the front hairline, opens up the whole face, and shows off silver to its best advantage. Sleek sides keep it controlled while the top stays lofty.
Try this: Dry the front straight back with a vent brush, lifting at the roots.
Styling trick: A headband worn for ten minutes while hair cools trains the back-swept direction to hold.
Make it yours: Add a bold lip — the open face can carry it beautifully.
18. 👑 Layered-Crown Bob
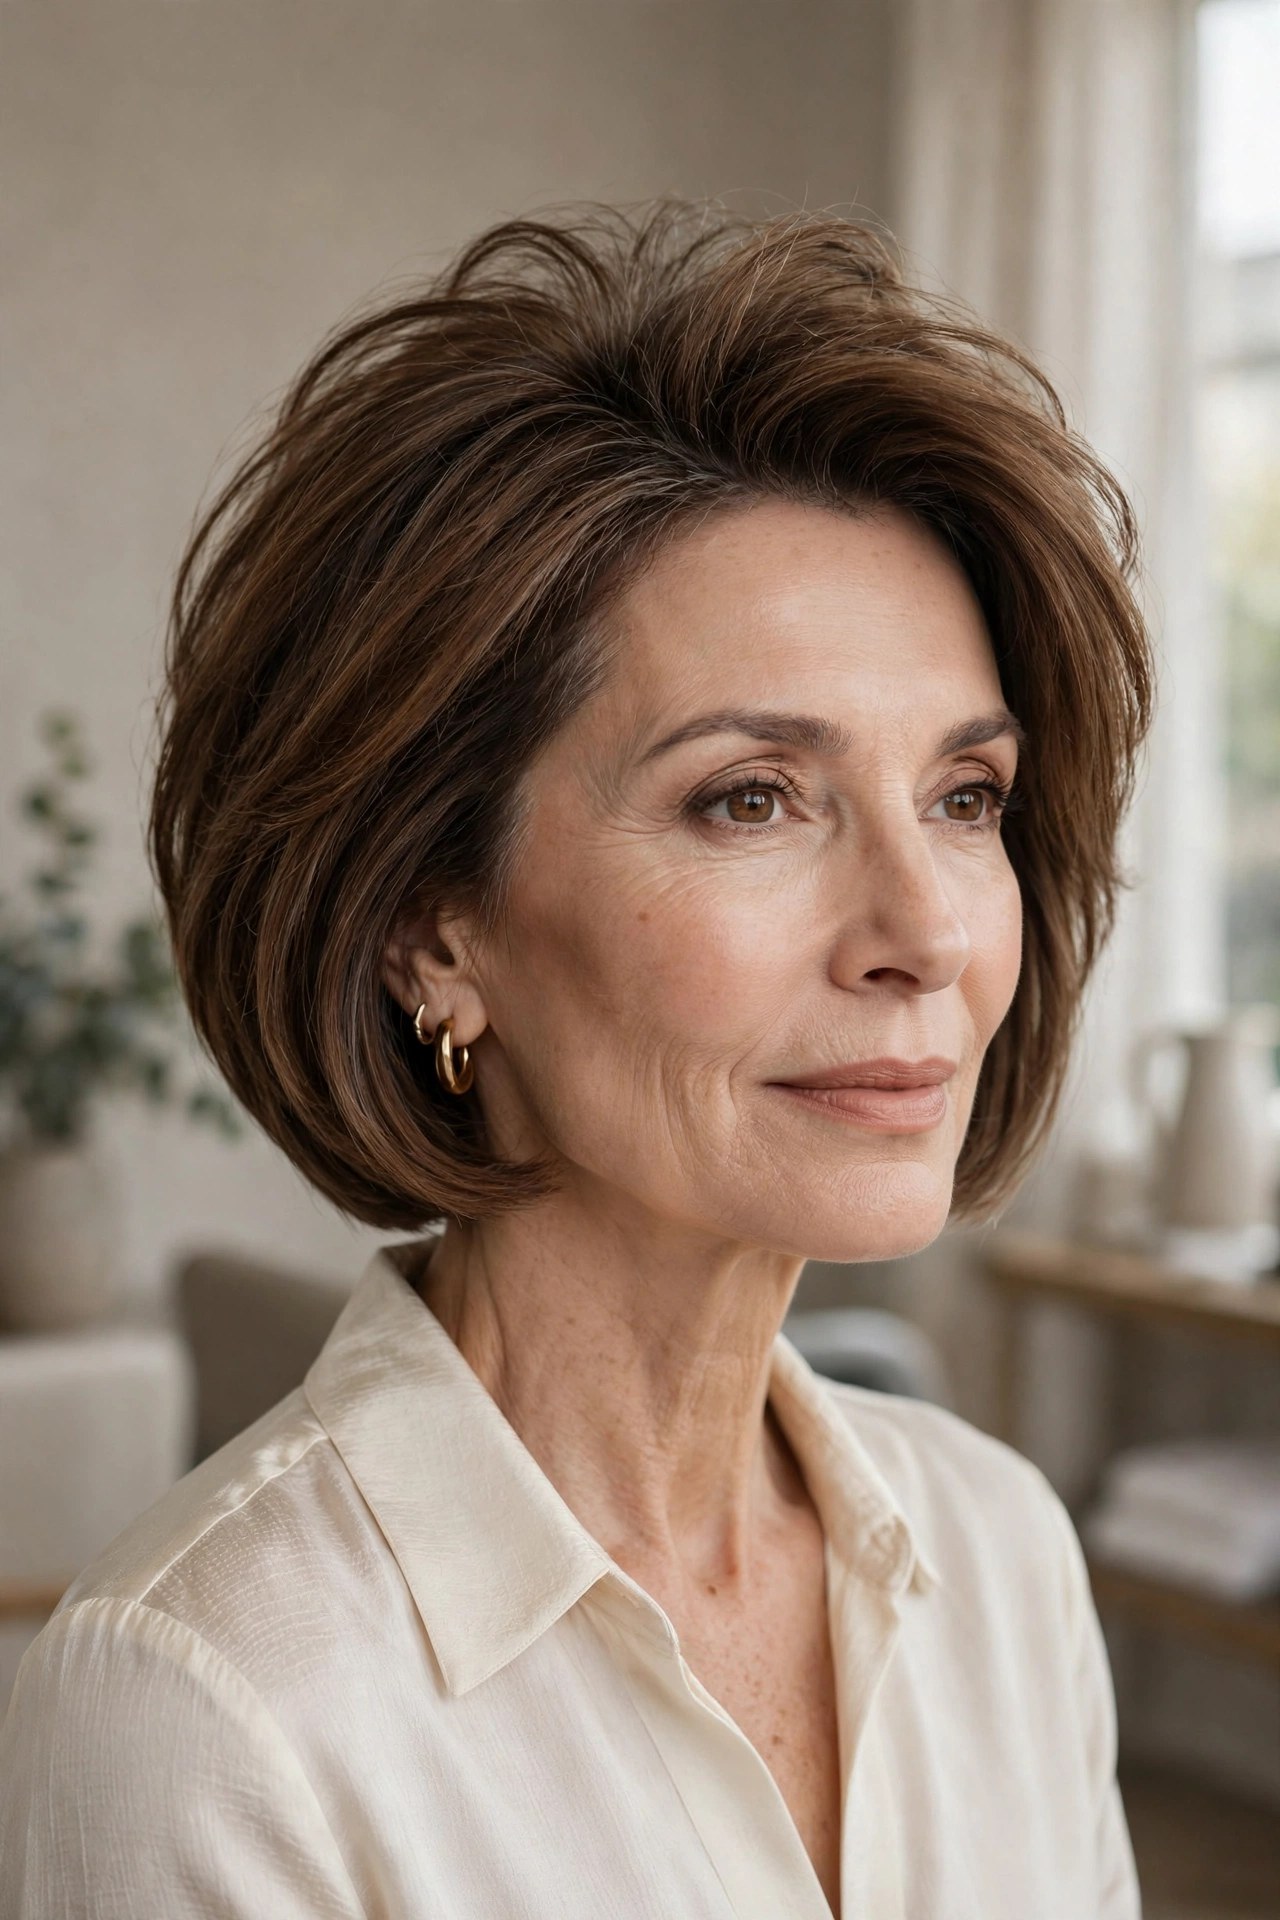
When the crown is the weak spot, layer it deliberately. Short, soft layers concentrated on top let fine strands stack on each other instead of lying in one sheet — and stacked hair always looks like more hair. The chin-length perimeter keeps the bottom looking solid.
Try this: Ask for crown layers that are soft and blended, never choppy or disconnected.
Styling trick: Dry the crown in the opposite direction of your part, then flip — the roots stand up instead of lying down.
Avoid: Thinning shears through the crown; they remove the very hair the layers need to stack.
19. 💥 Voluminous-Fringe Bixie
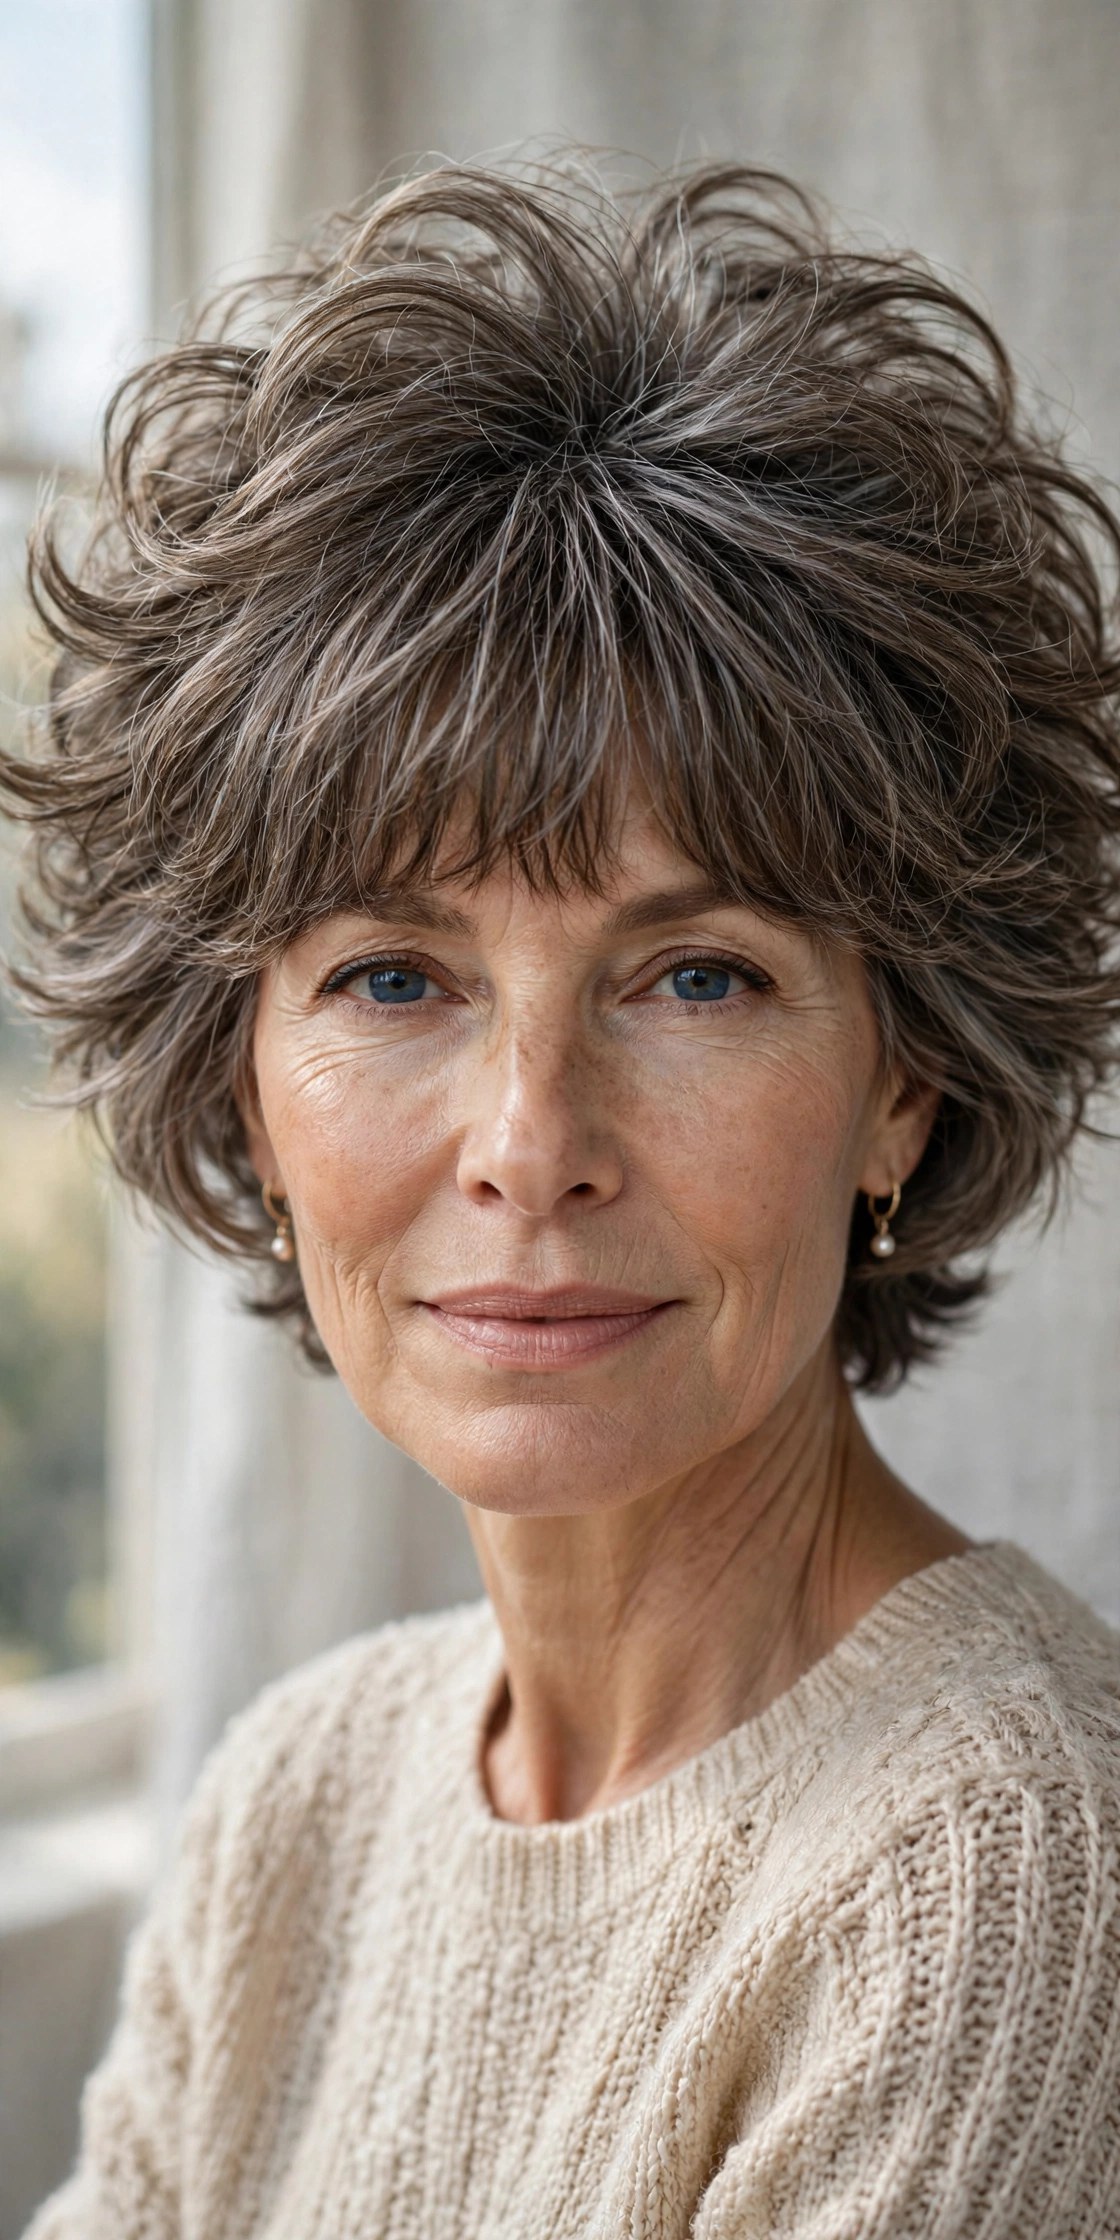
A bixie with a full, voluminous fringe puts the fullness right up front where everyone sees it. The fringe is cut with enough body to hold its shape, while the feathered top and tapered back keep the cut light. It’s bold, current, and surprisingly wearable.
Try this: Blow-dry the fringe with a round brush, rolling under for that full, rounded finish.
Styling trick: A single velcro roller at the fringe while you do your makeup — remove it last for maximum bounce.
Avoid: A fringe cut too thin; this look needs enough hair up front to hold the volume.
20. 🎢 Velcro-Roller-Set Bob
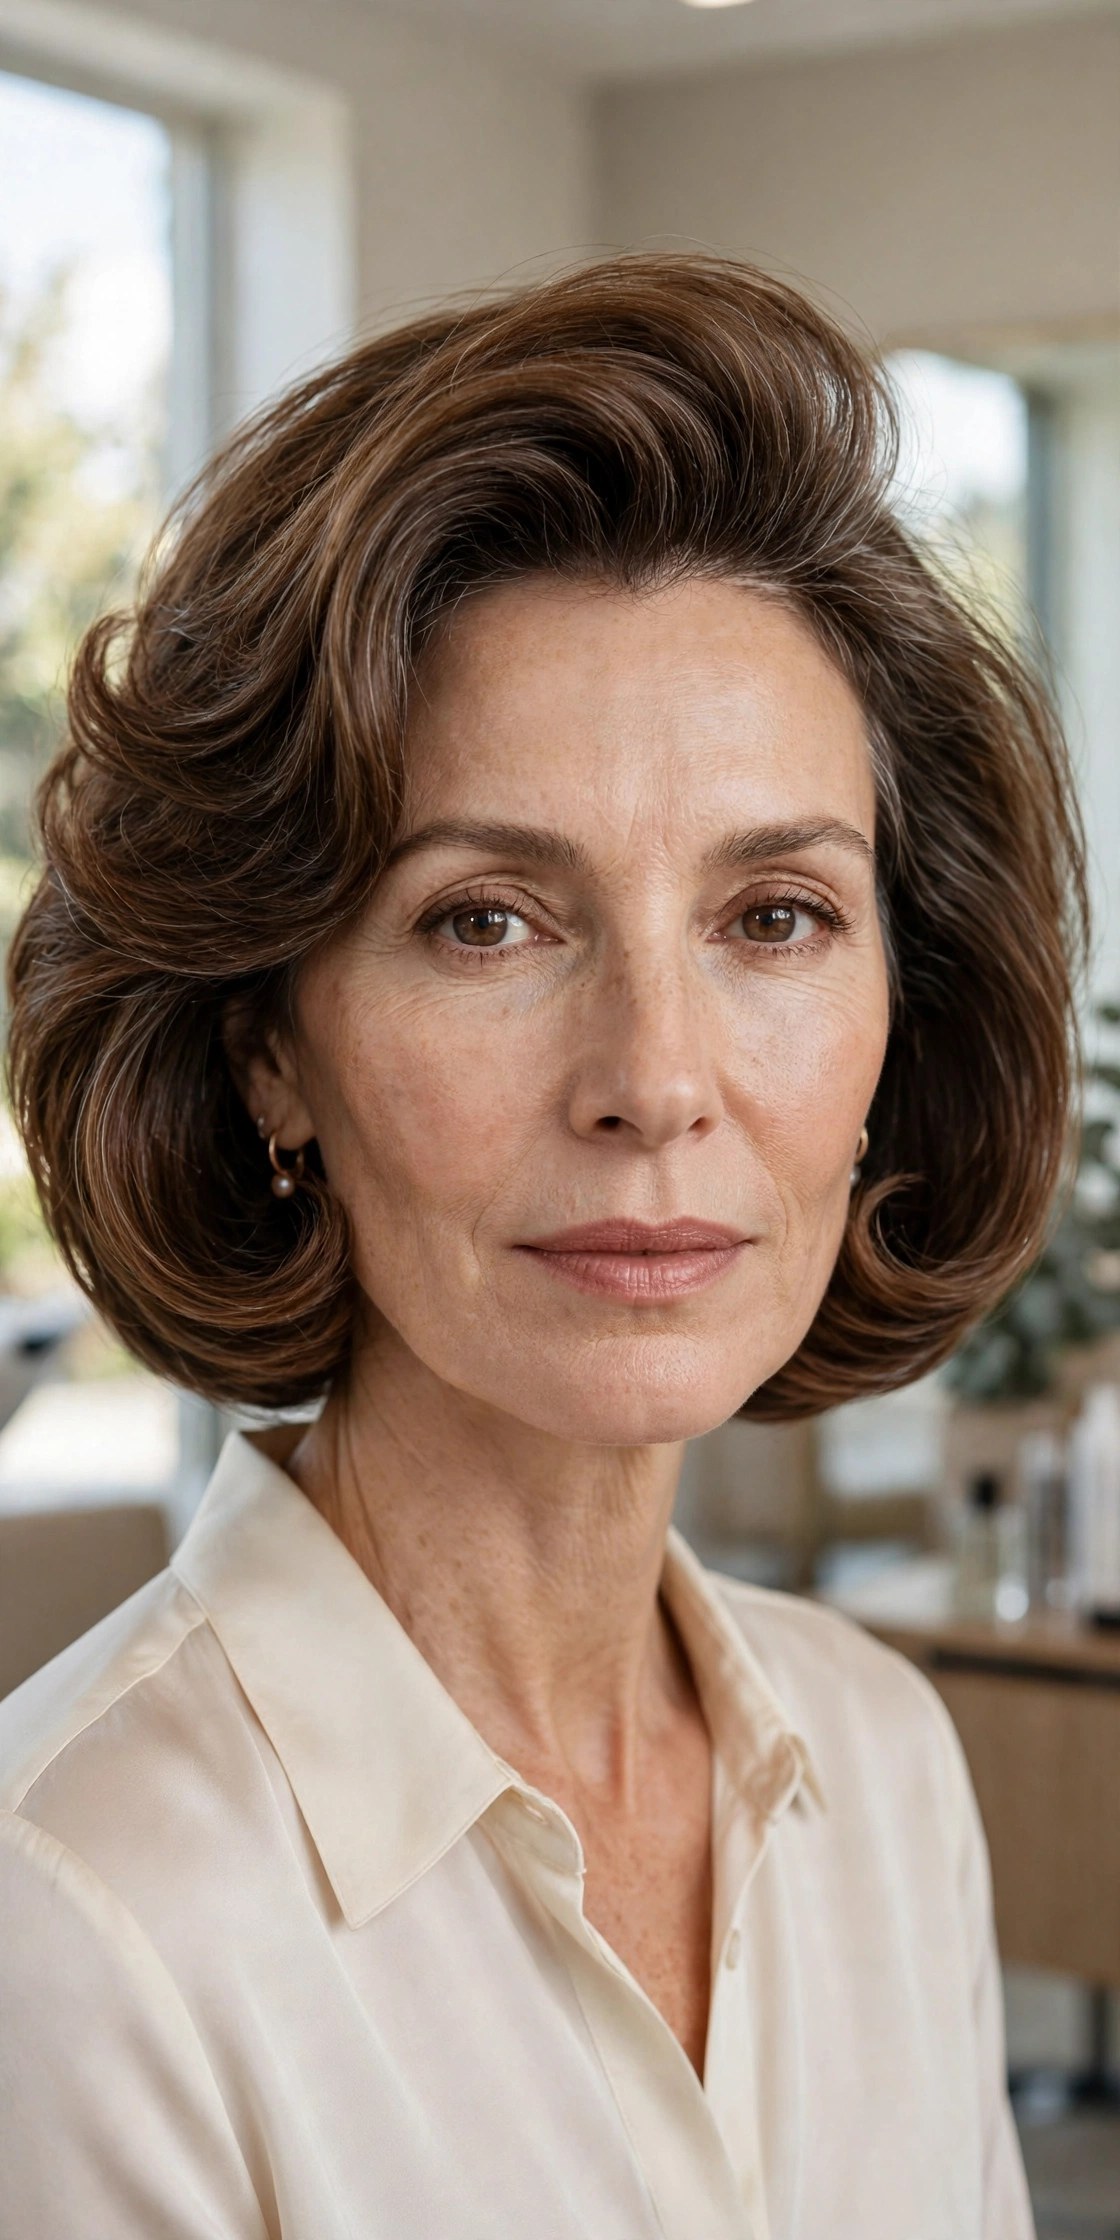
Old-school velcro rollers are still the best volume tool for fine hair — no heat damage, just lift. Set the crown while you do your makeup, and by the time you’re dressed, the bob has bounce no blowout alone can match. The finished shape is smooth, rounded, and full.
Try this: On nearly-dry hair, roll the crown sections up and away, then finish with a cool shot.
Styling trick: Roll the front section forward, not back — when you release it, the fringe falls with extra lift.
Budget tip: A set of velcro rollers costs almost nothing and lasts for years.
Second-day hair is actually easier to volumize than freshly washed hair — clean fine hair is slippery and collapses faster. A light mist of dry shampoo at the roots before styling gives grip and lift, and it buys you an extra day between washes.
21. ❄️ Cool-Shot Flipped Bob
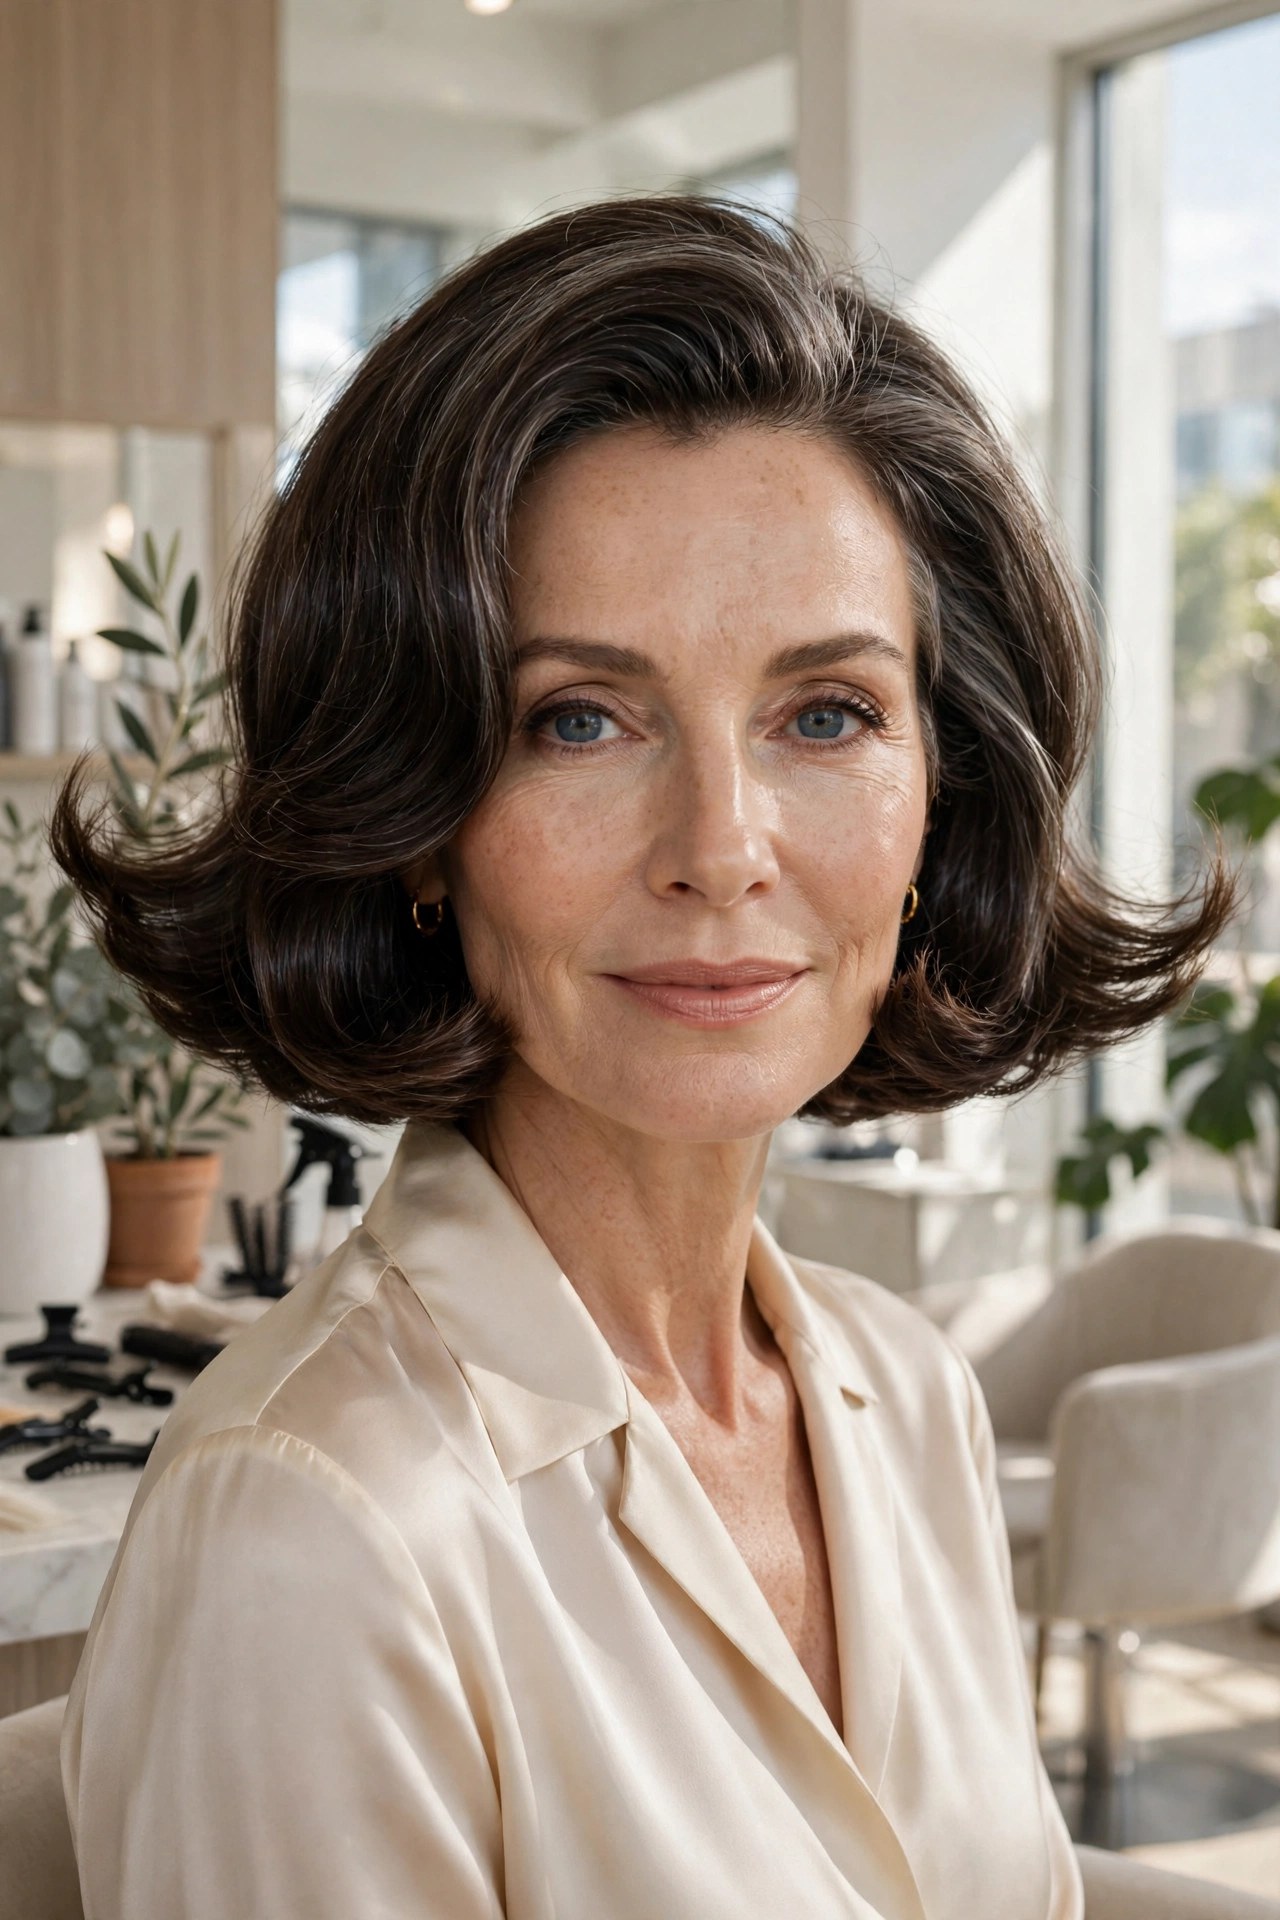
The flip gets its staying power from the cool shot: ends flicked outward with a round brush, then set with cold air so the flick holds all day. On a chin bob, the outward flip creates width and playfulness that a tucked-under finish can’t match.
Try this: Wrap sections around a round brush and roll outward at the ends — then cool-shot each section before release.
Styling trick: Flip just the bottom inch, not the whole length — a little flick goes a long way.
Avoid: Flipping every section the same way; alternate slightly for a natural finish.
22. 🩶 Textured Gray Crop
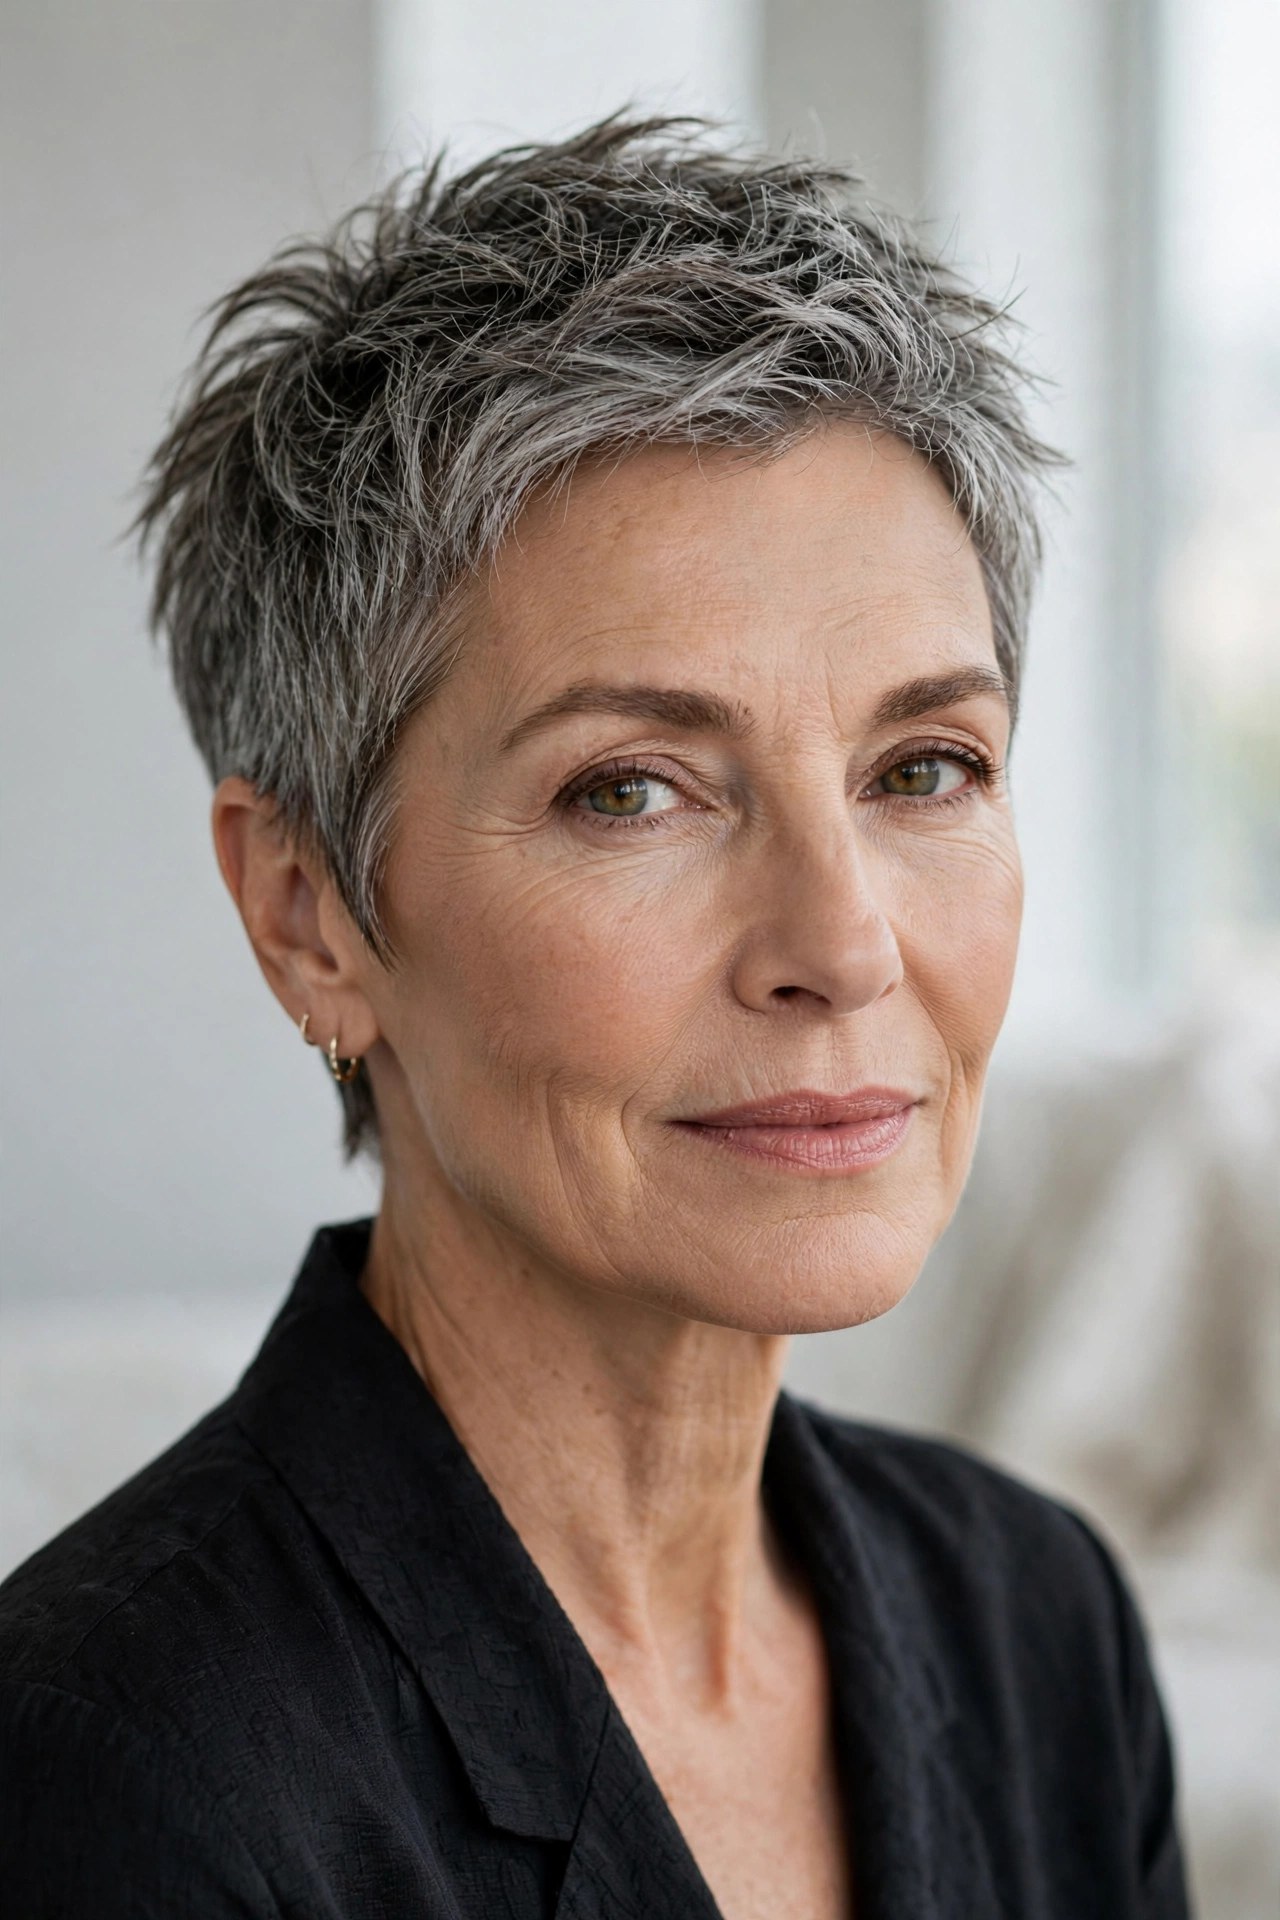
Salt-and-pepper texture is dimension you don’t have to pay for — the natural mix of tones creates depth that reads as fullness. This crop is cut with piecey separation to show off that texture, short enough to be effortless and interesting enough to never be boring.
Try this: A light curl foam scrunched into damp hair encourages the natural texture.
Styling trick: Let it air-dry untouched — every touch while drying flattens the natural lift.
Make it yours: This cut is made for glasses; the texture balances frames beautifully.
23. 🌅 Wavy Piecey Lob
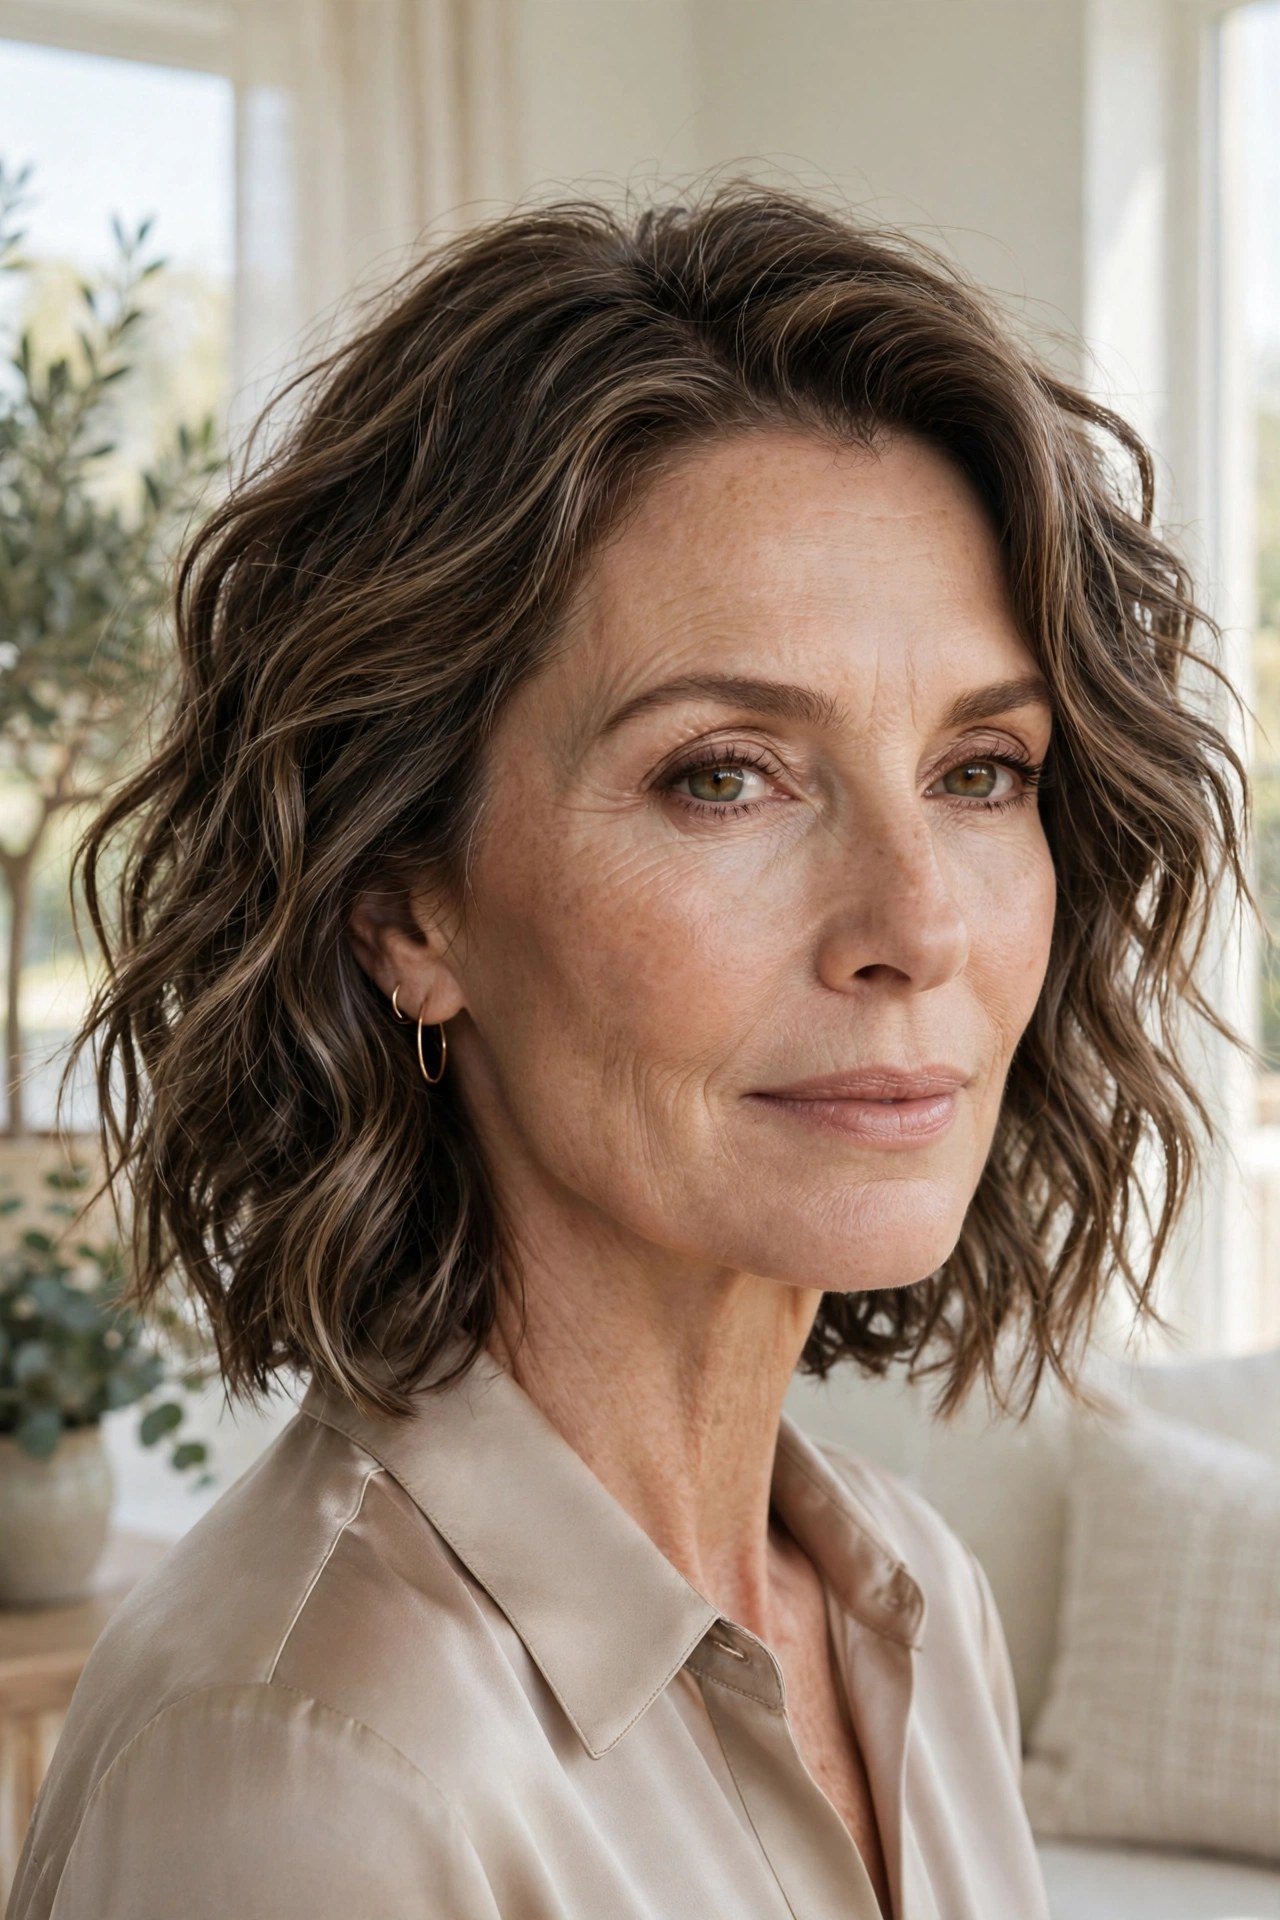
Longer than a bob but lighter than one length, this lob pairs loose waves with piecey, separated ends. The waves create width through the sides while the piecey finish keeps it modern. It’s the most versatile cut in this list — dress it up or down in minutes.
Try this: A medium-barrel iron on scattered sections only — curling every strand looks overdone on fine hair.
Styling trick: Sleep in two loose braids; morning waves with zero heat and zero effort.
Avoid: Brushing the waves into one solid sheet — separate with fingers to keep the piecey texture.
24. ⤵️ Soft Blown-Under Bob
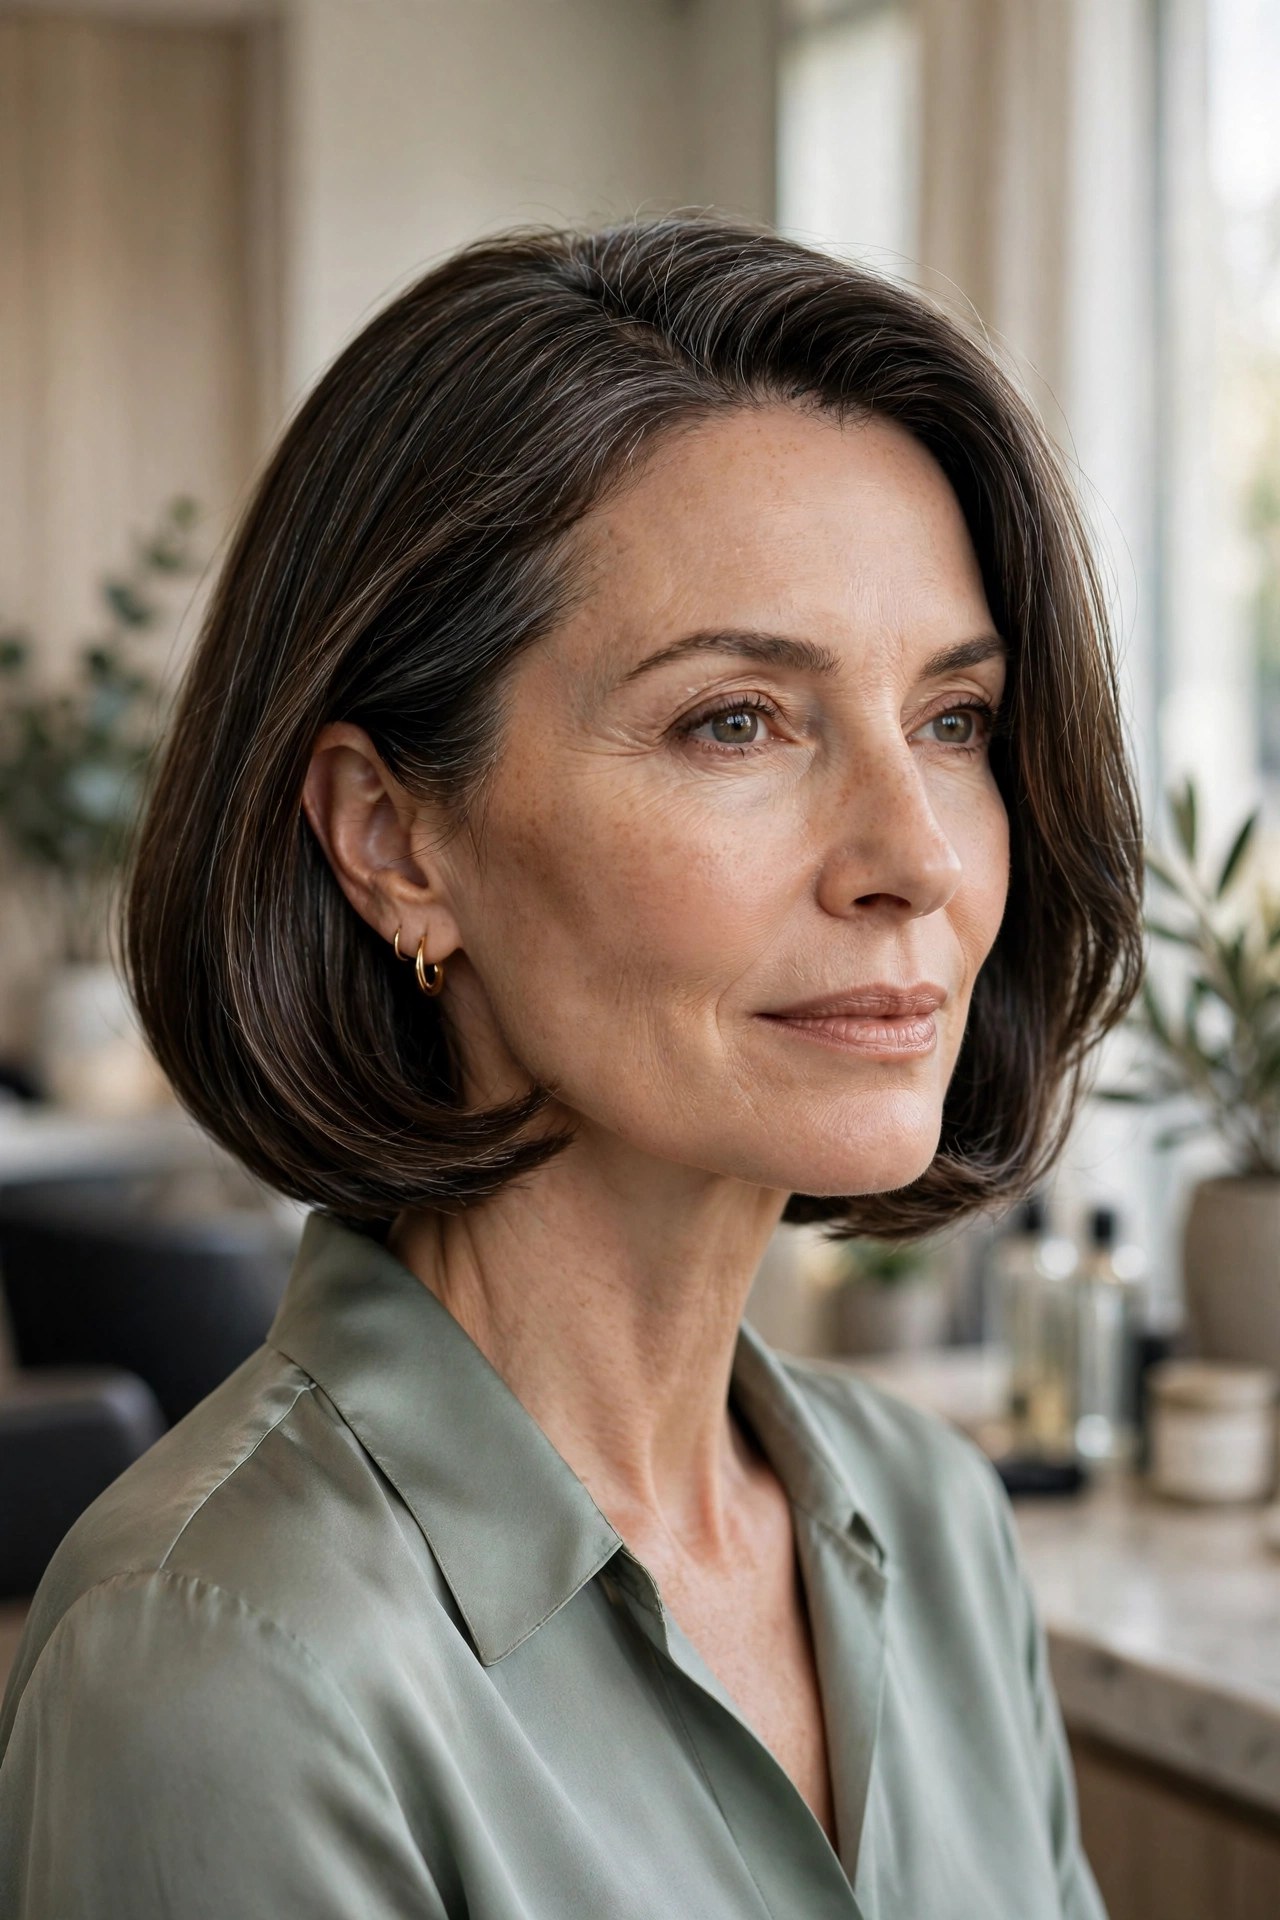
The classic salon blowout, miniaturized: ends curved gently under for a smooth, rounded finish that reads as polished fullness. On fine hair, the tucked-under curve creates the illusion of density at the perimeter — every end accounted for, none left wispy.
Try this: A round brush at the ends, turning under, with the dryer following the brush — not ahead of it.
Styling trick: Tuck the ends under with a flat iron on low heat for a next-day refresh — ten seconds per section.
Make it yours: A center part keeps it classic; a side part adds instant lift.
25. 🌪️ Windswept Pixie Bob
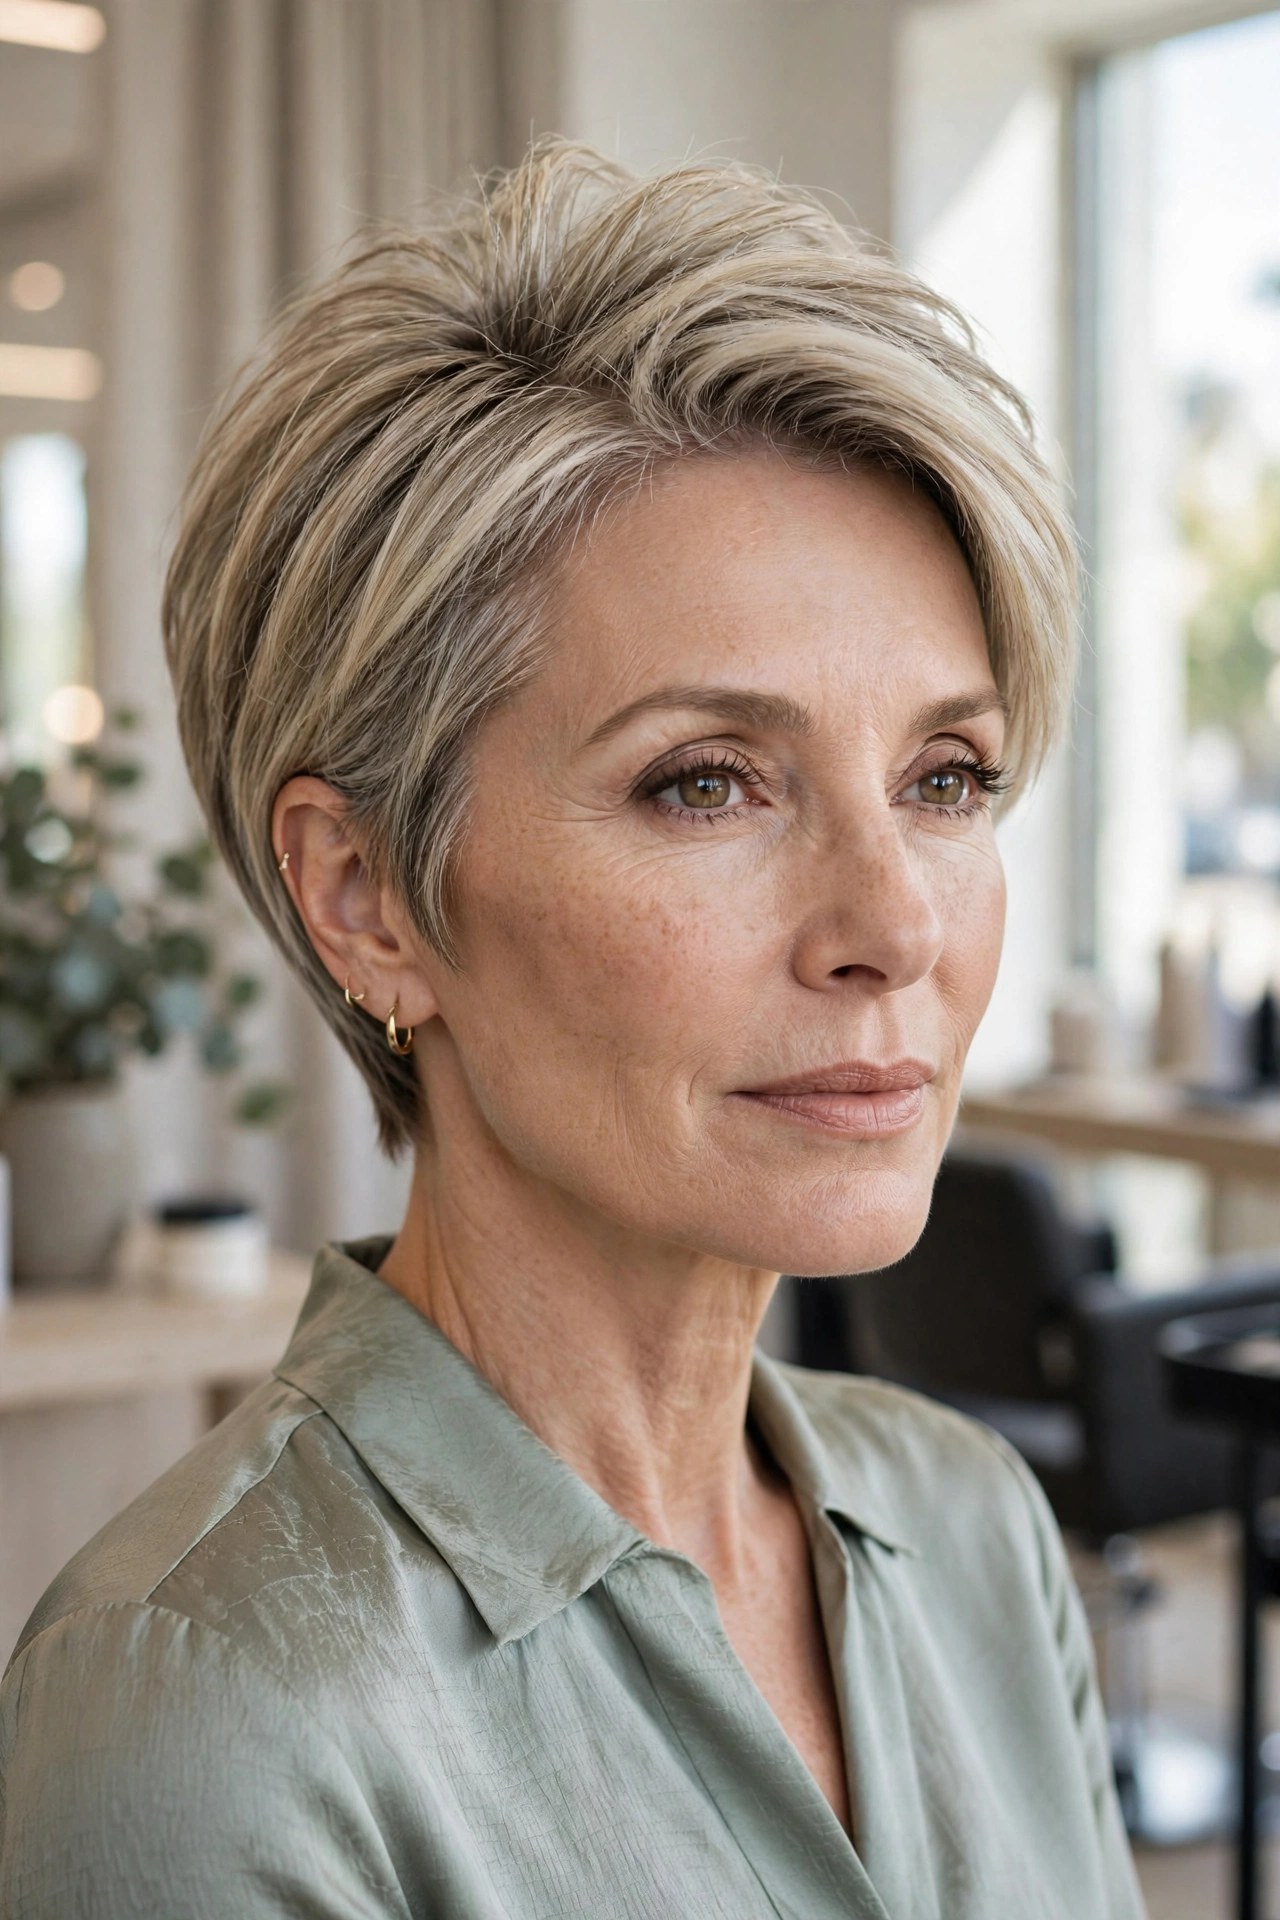
Like a fresh breeze caught mid-motion: this pixie bob is styled in deliberately mixed directions — some pieces forward, some swept back — so no two strands lie flat together. The windswept texture creates the illusion of density through pure movement, and it looks fantastic a little undone.
Try this: Ask for varied, feathered lengths through the top; uniformity is the enemy of the windswept look.
Styling trick: Dry with your fingers, pushing sections in alternating directions — the chaos is the style.
Avoid: Smoothing it into submission; the moment it looks “done,” the volume disappears.
26. 📏 Deep Side-Part Chin Bob
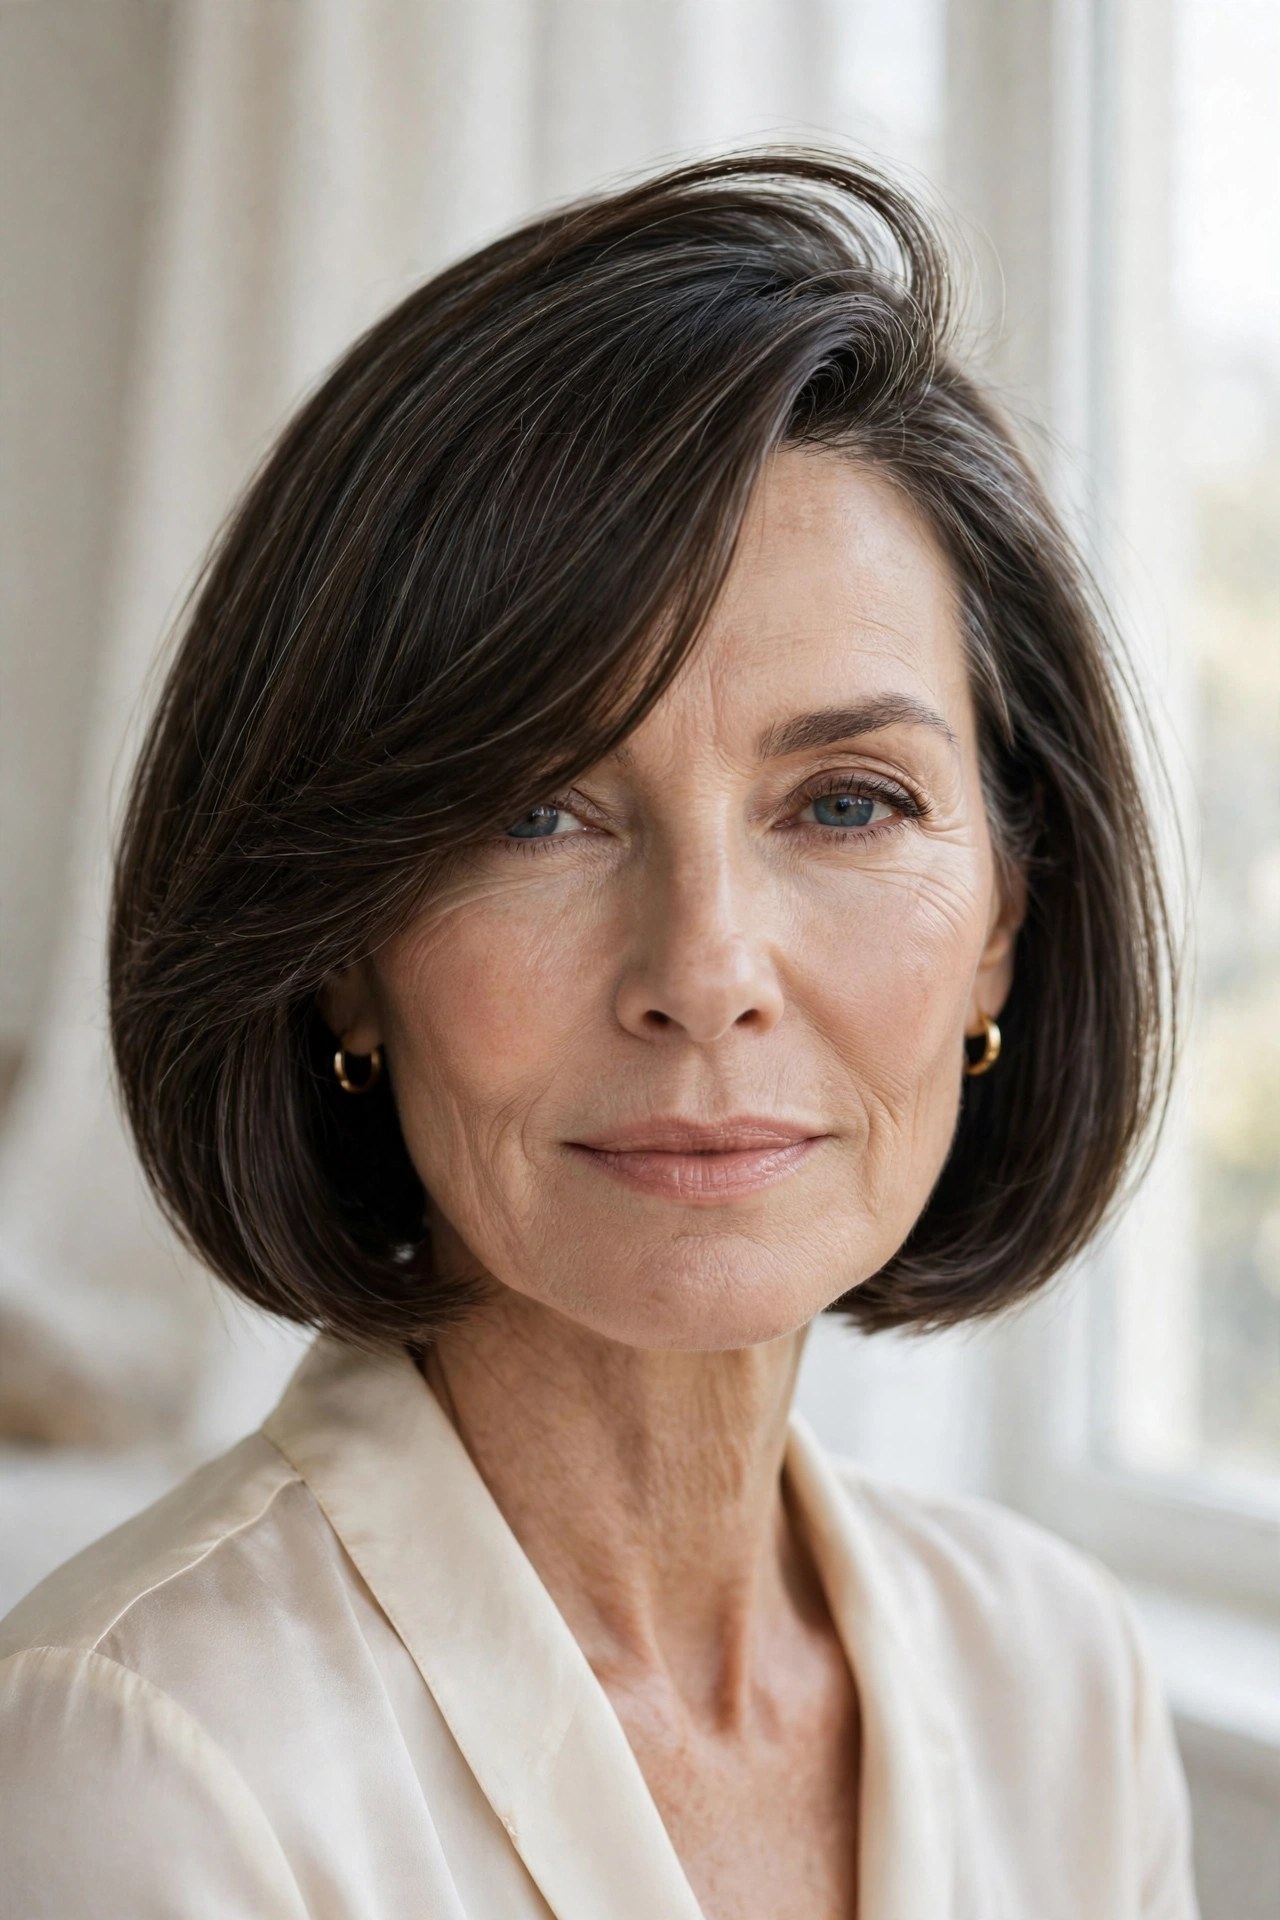
We close with the simplest trick in the book, on the most reliable cut in the list. A chin-length bob with a deep side part piles the hair diagonally for instant root height — no layers, no teasing, no tools beyond a comb. Sometimes the best styling trick is just a new part.
Try this: Find your deep part while hair is damp, then dry the roots in that position for a full week.
Styling trick: Switch your part to the other side every few months — roots lift higher when they’re not trained flat.
Budget tip: The cheapest volume trick ever invented: free, instant, and it works on every cut here.
❓ Hairstyles for Thin Fine Hair FAQs
What’s the easiest styling trick for thin fine hair?
Change your part and your drying direction. Drying roots in the opposite direction of how they’ll fall — then flipping back — builds lift that lasts, and a deeper side part piles hair for instant height. Both take under a minute and work on almost any short cut.
Do I need hot tools to get volume in fine hair?
No — and for fragile fine hair, less heat is better. Velcro rollers, a round brush with your dryer’s cool shot, upside-down drying, and air-drying with the right part all build volume without damage. Save hot tools for occasional polish, not daily volume.
How do I make my blowout last past midday?
Set everything with cool air before you touch it — heat shapes, cold sets. Use lightweight products only, keep your hands out of your hair, and carry a dry texture mist for a midday root refresh. Sleeping on a silk pillowcase also preserves next-day volume.
Can thin fine hair handle a lob, or should I stay short?
A lob works if the perimeter stays strong — blunt or softly bent ends keep collarbone length from looking wispy. Avoid heavy layering through a lob; keep the weight at the bottom and add movement only at the crown and face-framing pieces.
What products should I avoid on thin fine hair?
Heavy oils, thick creams, and strong-hold waxes near the roots — they flatten fine hair faster than anything. Stick to lightweight mousse, root-lifting spray, dry texture mist, and dry shampoo. If a product feels heavy in your hand, it will feel heavier on your hair.
✅ Your Cut + Styling-Trick Checklist
- ☐ Pick a cut with a strong perimeter or built-in crown lift — the shape does half the work
- ☐ Learn one root-lift trick: opposite-direction drying, a deeper part, or velcro rollers
- ☐ Always set with the cool shot — heat shapes, cold locks it in
- ☐ Switch to lightweight products; keep heavy creams and oils away from roots
- ☐ Try second-day styling — slightly lived-in hair holds volume better than squeaky-clean hair
- ☐ Book trims every 6–8 weeks so the shape stays sharp and the tricks keep working
The cut gets you in the door; the styling trick keeps you there. Master one or two of these techniques and every hairstyle in this list will look fuller, longer, and more like the photo that inspired you. Save your favorites, practice the tricks, and enjoy the good-hair days.
📖 Keep Reading
- 💫 31 Short Shag Haircuts for Fine Hair That Add Real Volume — shaggy texture tricks that multiply fine hair.
- ✂️ 19 Short Haircuts Over 60 for Thin Hair That Add Instant Fullness — more fullness-first short cuts.
- 💇 25 Hairstyles for Thin Fine Hair Over 50 That Double the Volume — more volume-building ideas to explore.
Discover more from Fashinate Style
Subscribe to get the latest posts sent to your email.