
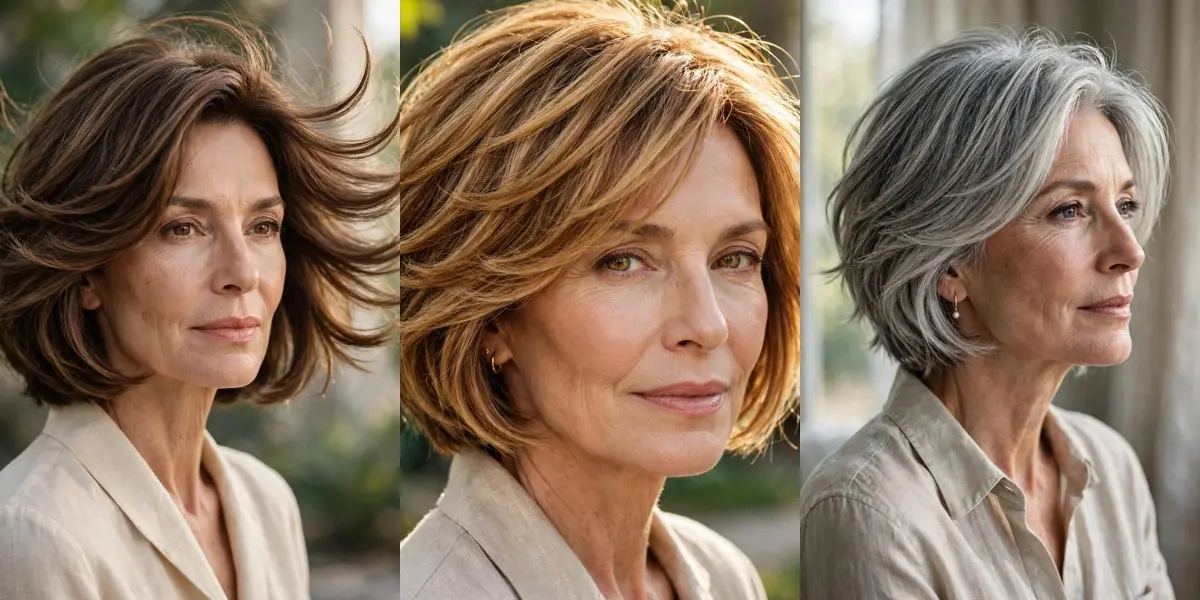
Confession: for years I believed layered bobs were only for thick hair — that fine or thinning hair should avoid layers at all costs. Then a stylist proved me wrong in a single appointment. She didn’t add a dozen choppy layers; she placed exactly five, each one beginning at a deliberate point: cheekbone, jaw, crown. My hair moved for the first time in years, and the ends still looked full. That is when I understood: layers aren’t the enemy of fine hair. Random layers are.
Below are 24 short layered bobs that treat layering as a craft — where each layer begins, how it’s cut, and what it does for the shape. Find the layer story that matches your hair, and bring it to your stylist with confidence.
1. 💫 The Swing-Layer Bob
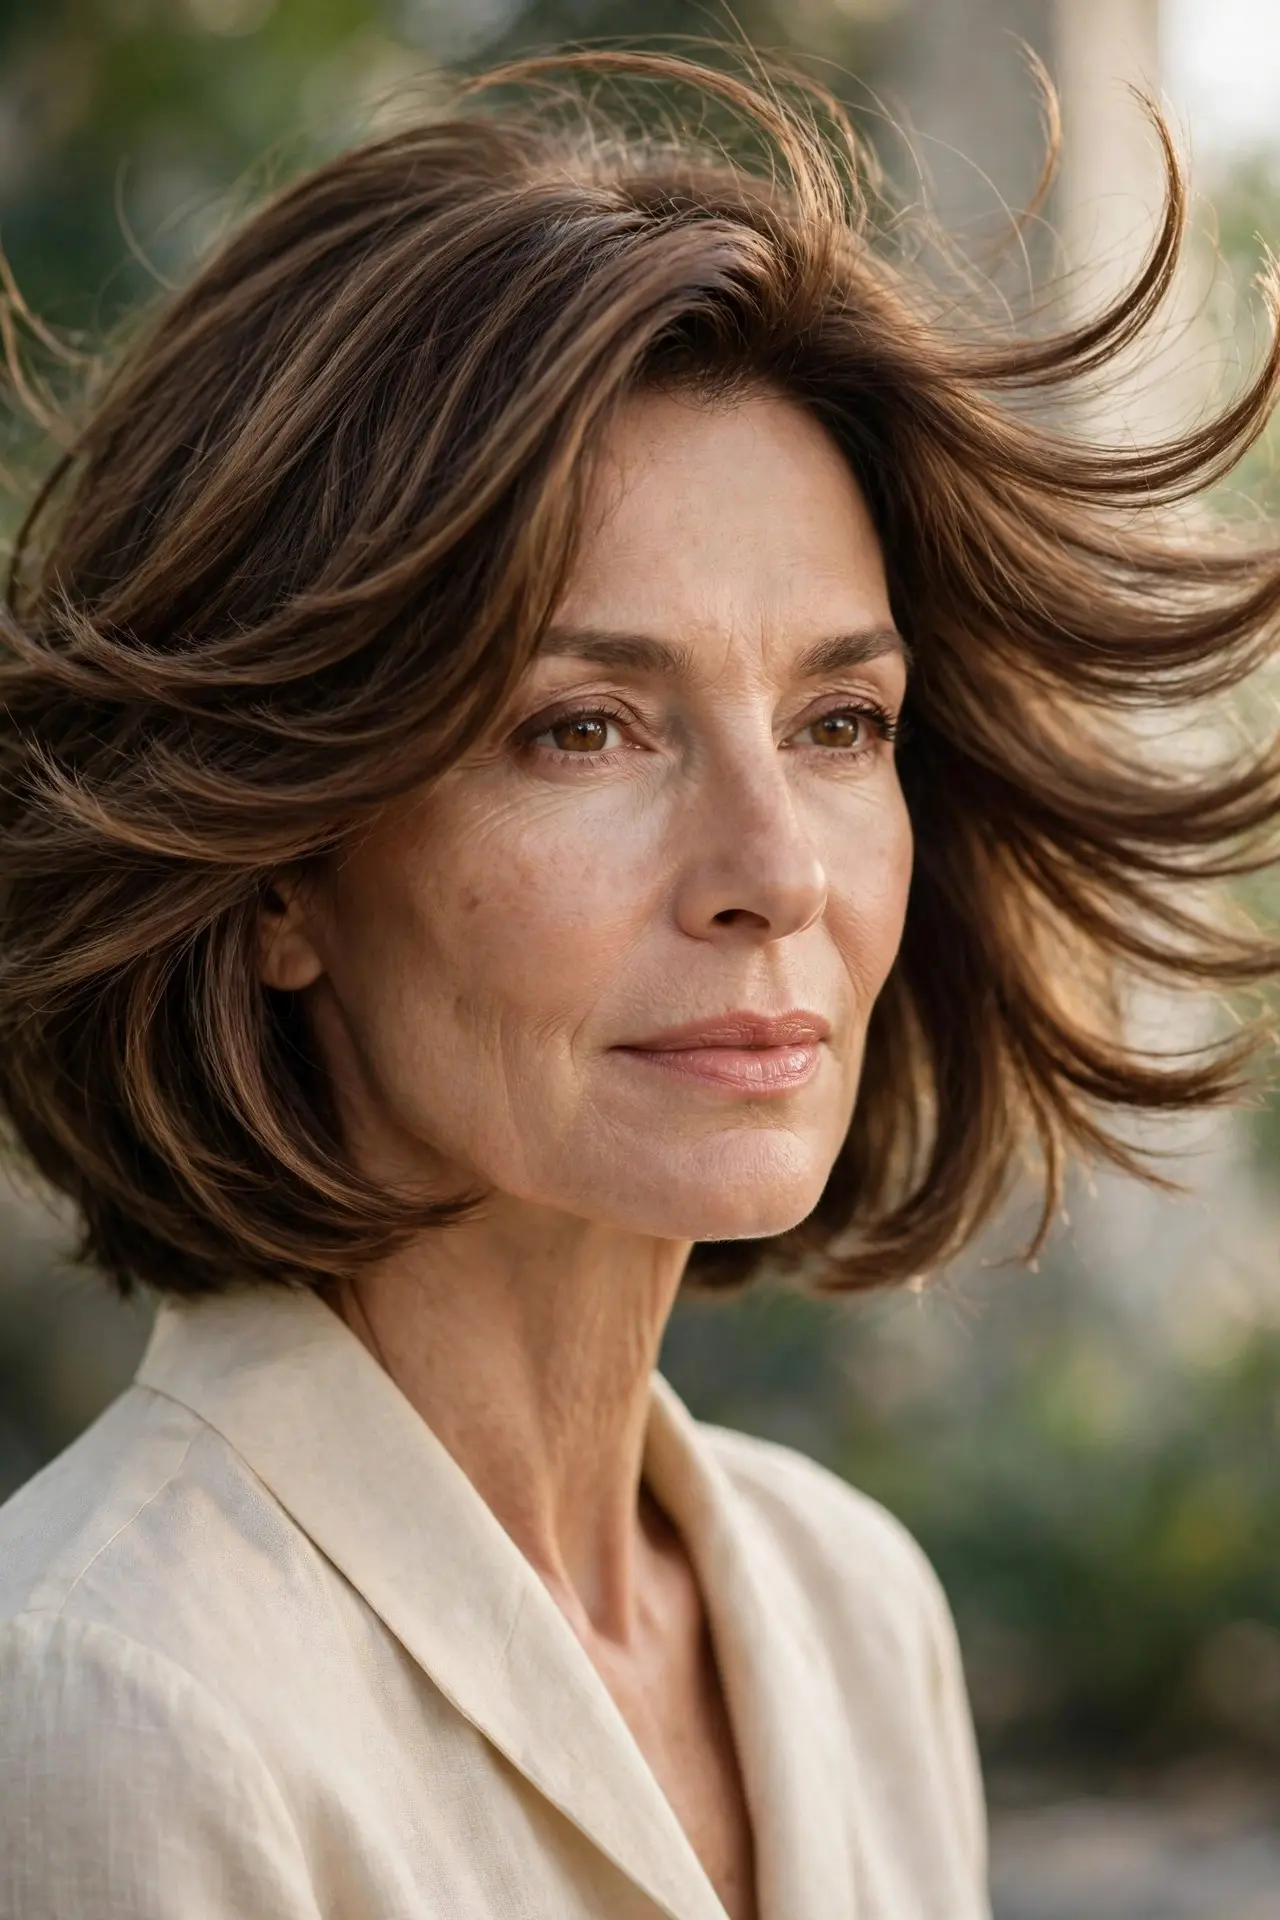
Layers cut on a curve so they swing when you move — the bob has rhythm built in. Each layer is slightly longer than the one above, creating a cascading swing that never sits still. It is movement as a design feature.
Best for: straight hair that tends to hang lifeless.
Styling tip: blow-dry with a round brush, turning each section under to activate the swing.
Avoid: heavy products that glue the swing in place.
Try this: shake your head gently after styling — the swing should move freely.
2. 🪶 The Feather-Cut Bob
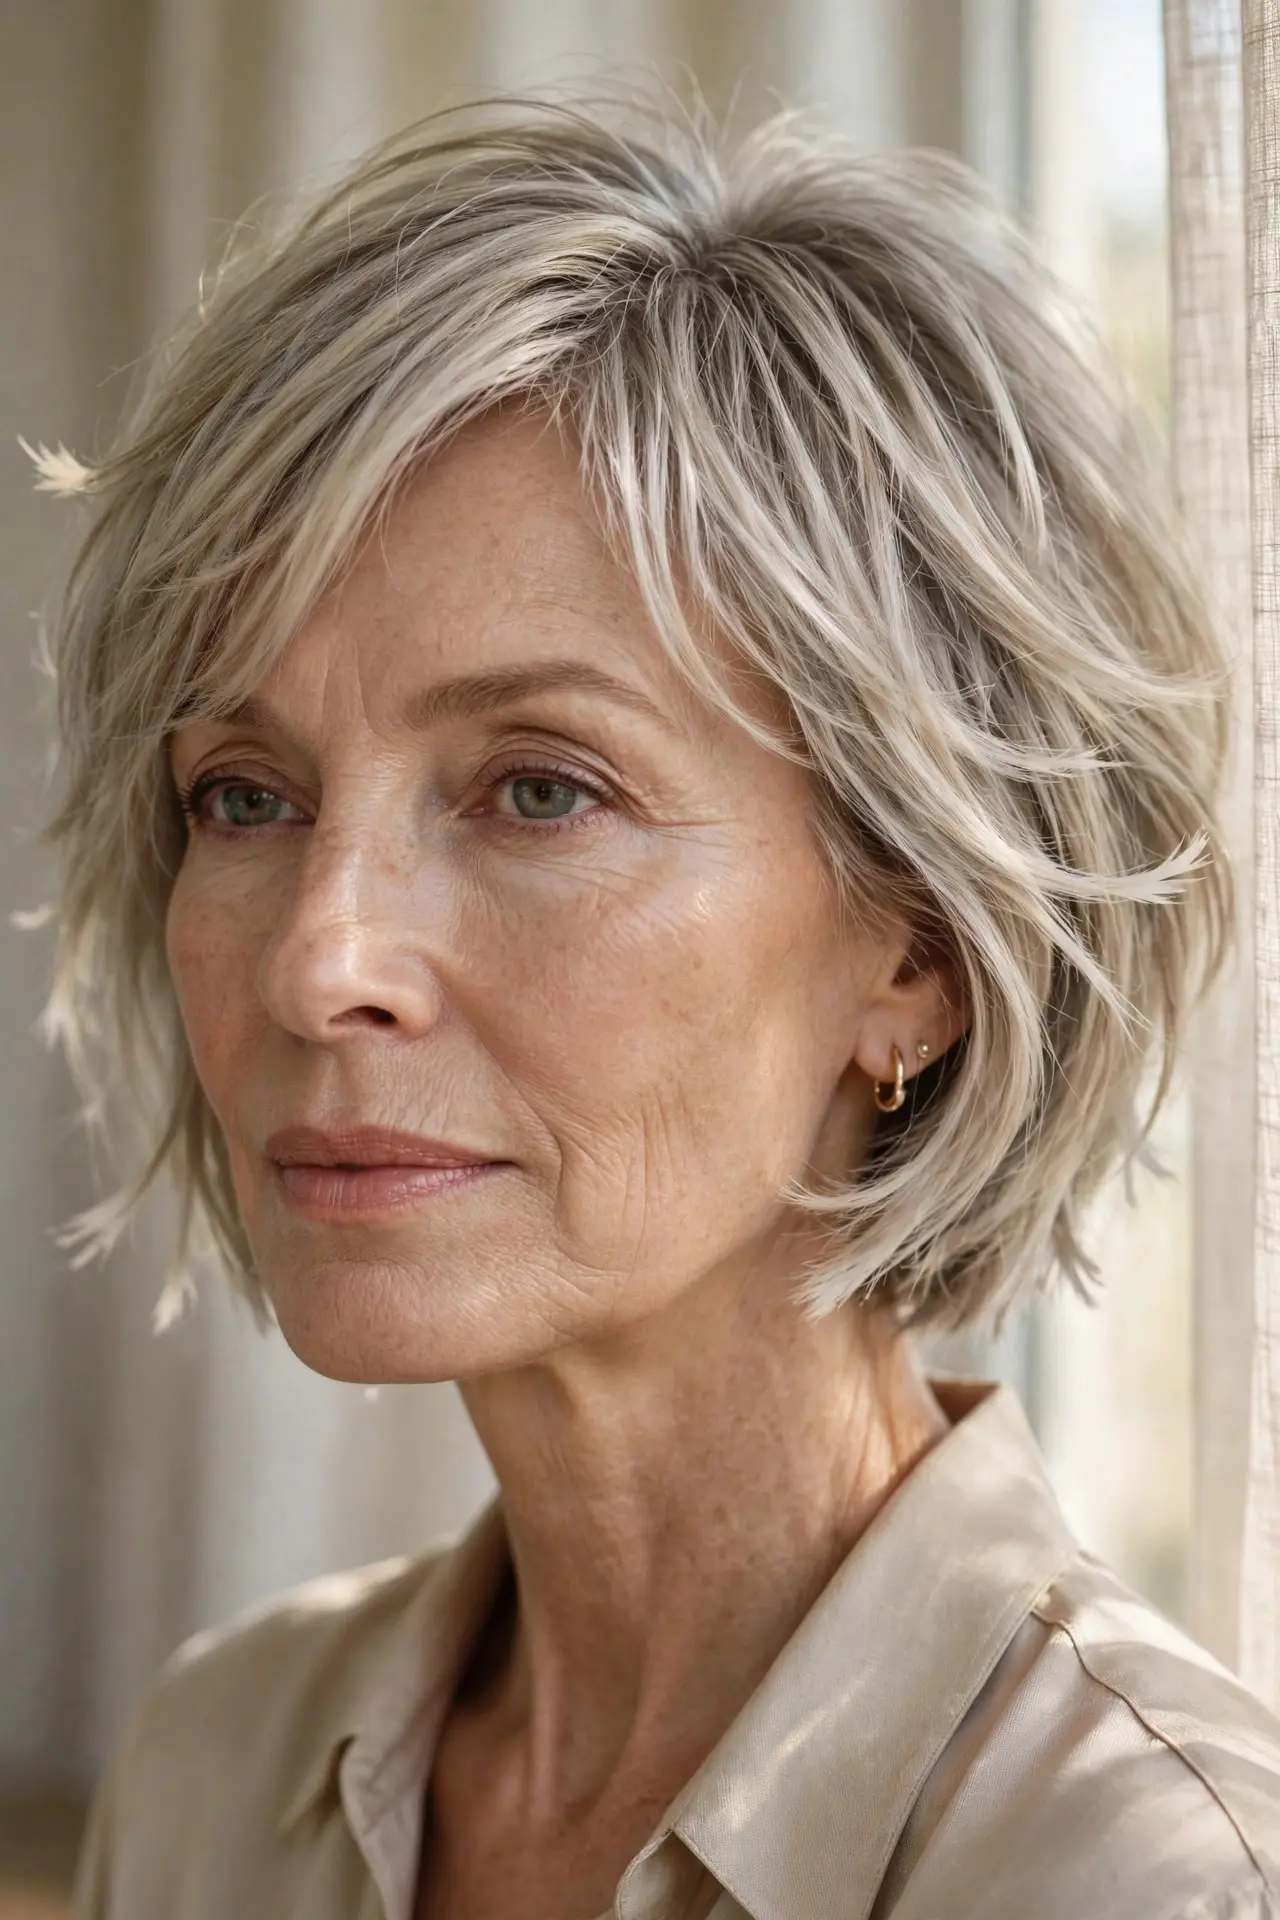
Feathered layering — wispy, tapered ends that blend seamlessly — gives the bob softness without visible layer lines. The oldest layering technique is still one of the most flattering. It whispers where choppy layers shout.
Best for: anyone wanting softness over edge.
Styling tip: a razor or point-cutting creates the feathered effect; ask specifically.
Avoid: blunt-cutting the layers — feathering needs tapered ends.
Try this: blow-dry with a paddle brush for the smoothest feather finish.
3. 🌊 The Cascade Bob
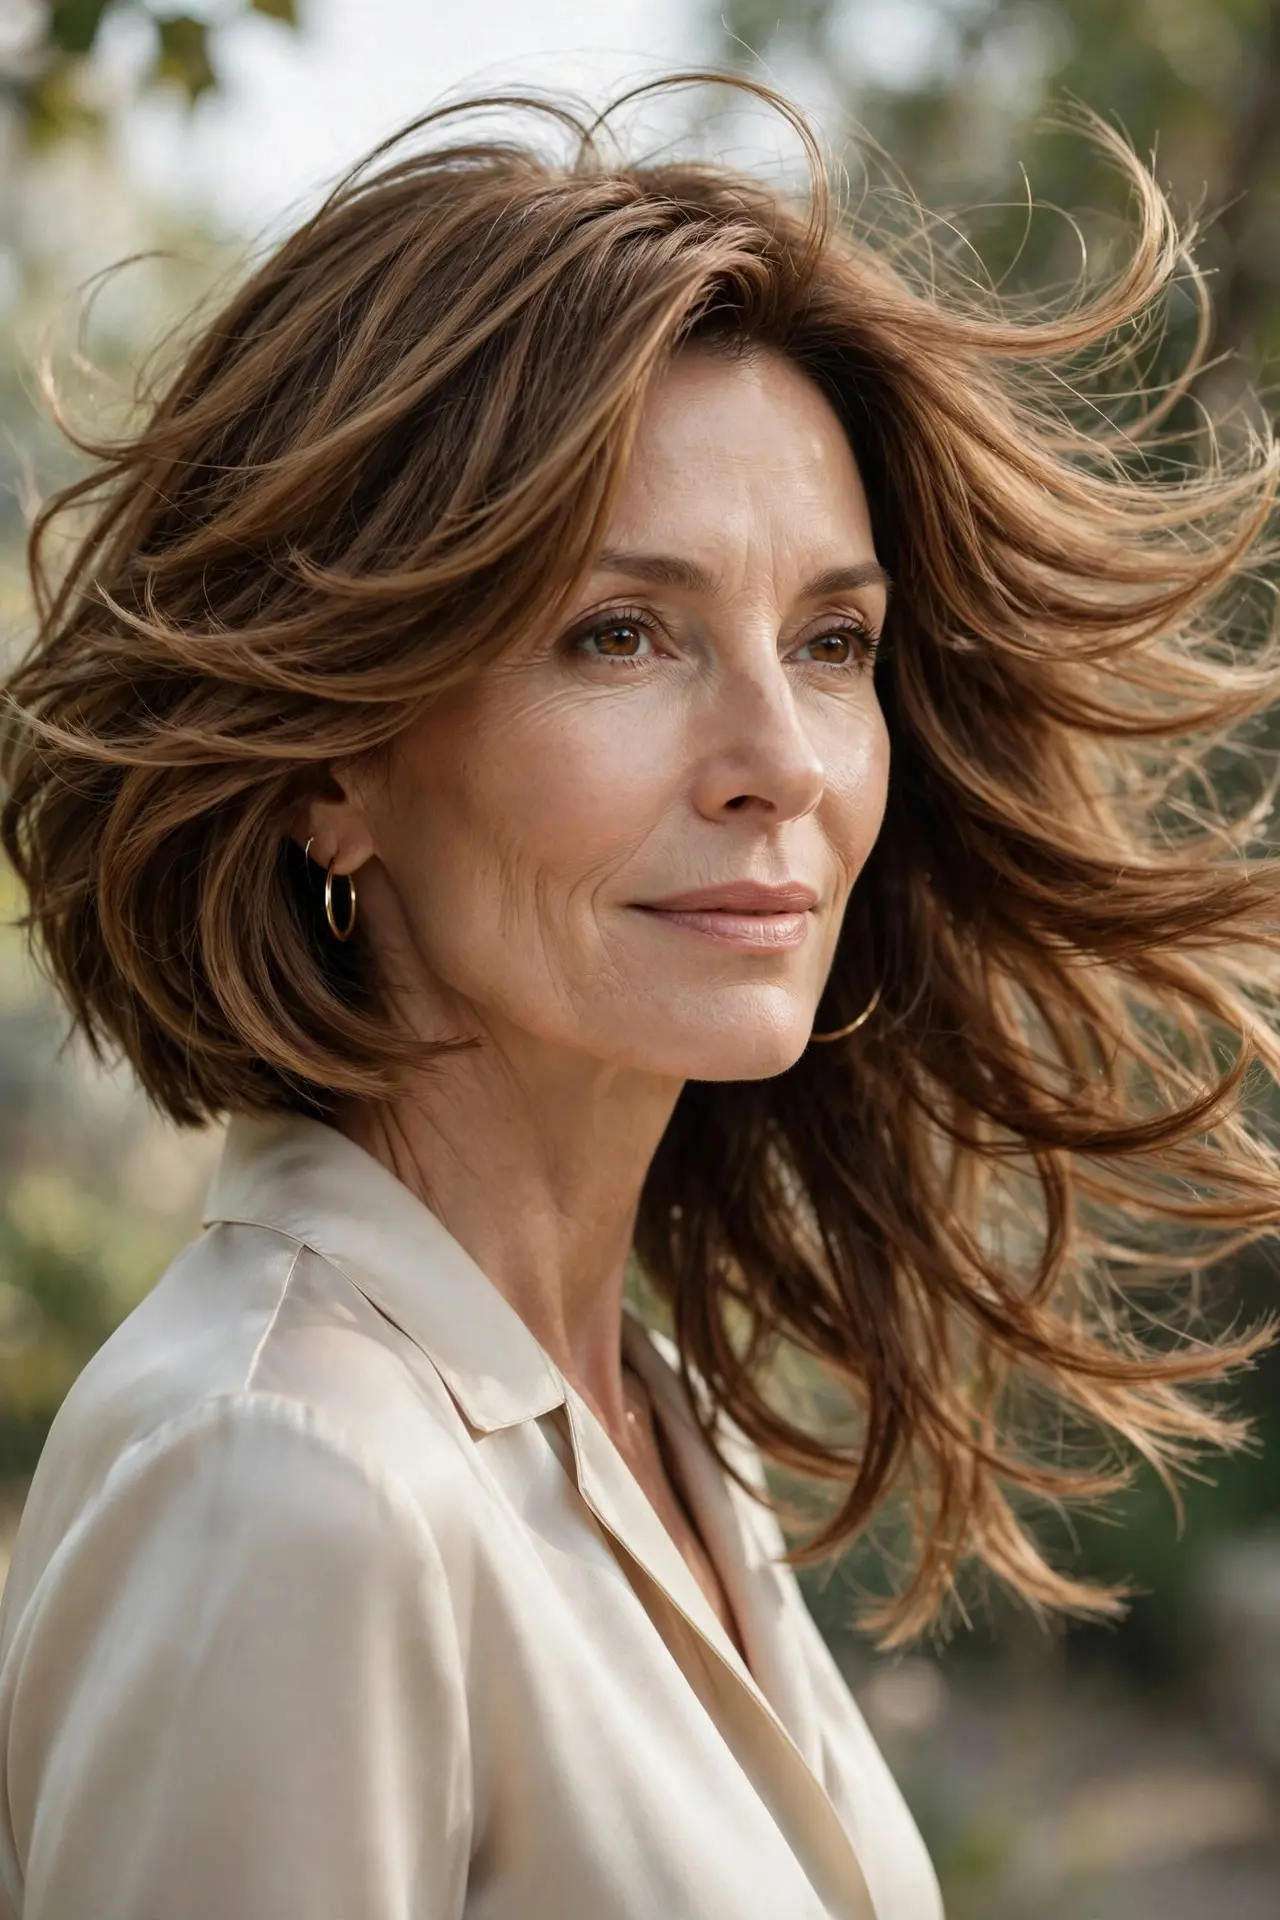
Layers that fall like a waterfall — each one flowing into the next in a continuous cascade. The effect is fluid and feminine, with no harsh transitions anywhere. It is the most graceful layering on this list.
Best for: medium-density hair that can support flowing layers.
Styling tip: long, blended layers are key — ask for “seamless cascade cutting.”
Avoid: short, choppy layers that break the waterfall flow.
Try this: a smooth blowout shows off the cascade best.
4. 🎯 The Precision-Stack Bob
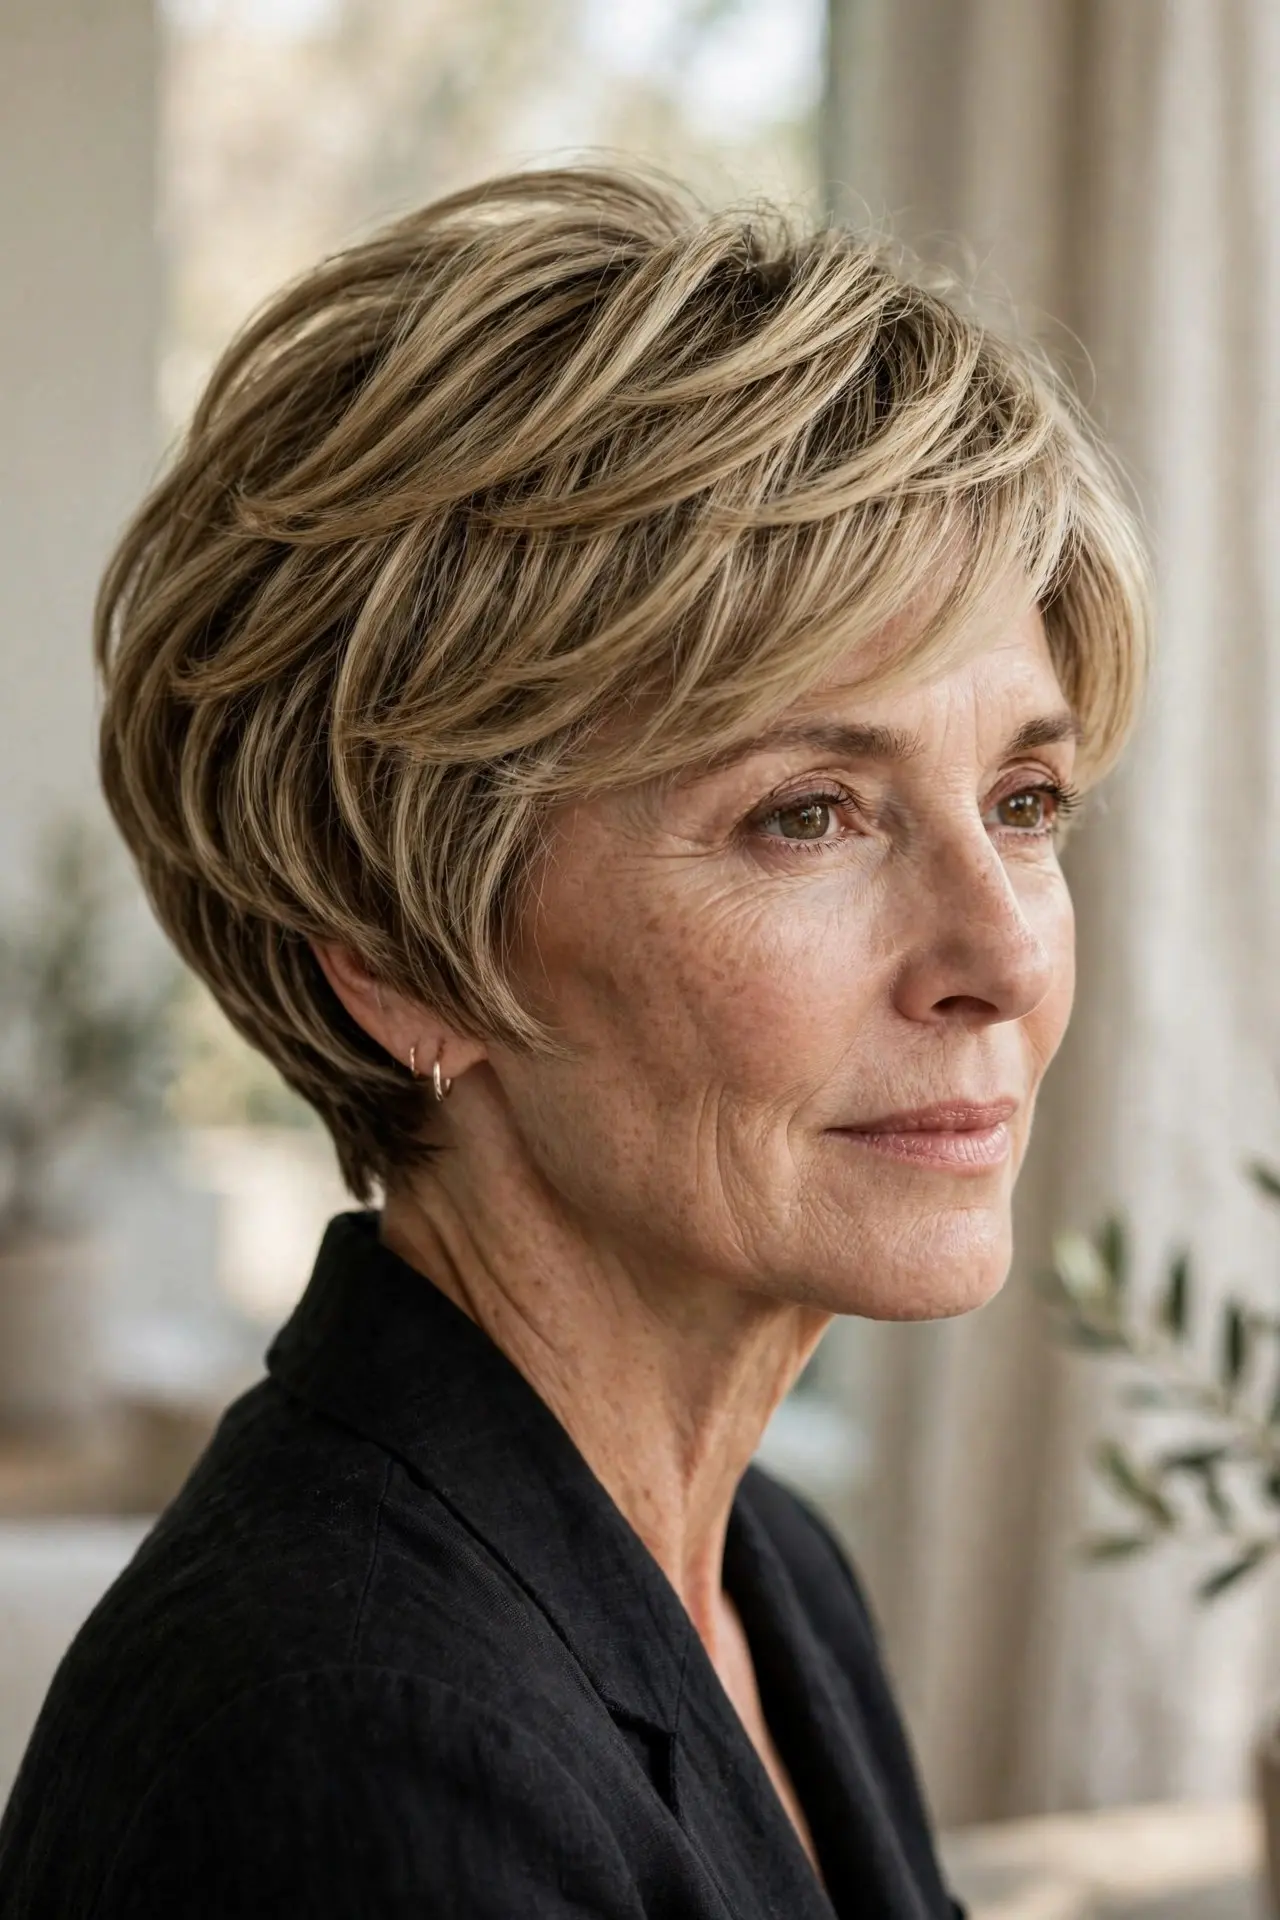
Stacked layers cut with geometric precision — each layer measured to build a perfect rounded shape. The stack creates fullness through the back while the front stays sleek. Architecture you can wear.
Best for: fine hair needing serious back-view volume.
Styling tip: dry the back sections upward to build the precision stack.
Avoid: letting it grow past 8 weeks — precision stacks lose shape fastest.
Try this: highlights through the stack emphasize each precise layer.
5. 💇 The Razor-Textured Bob
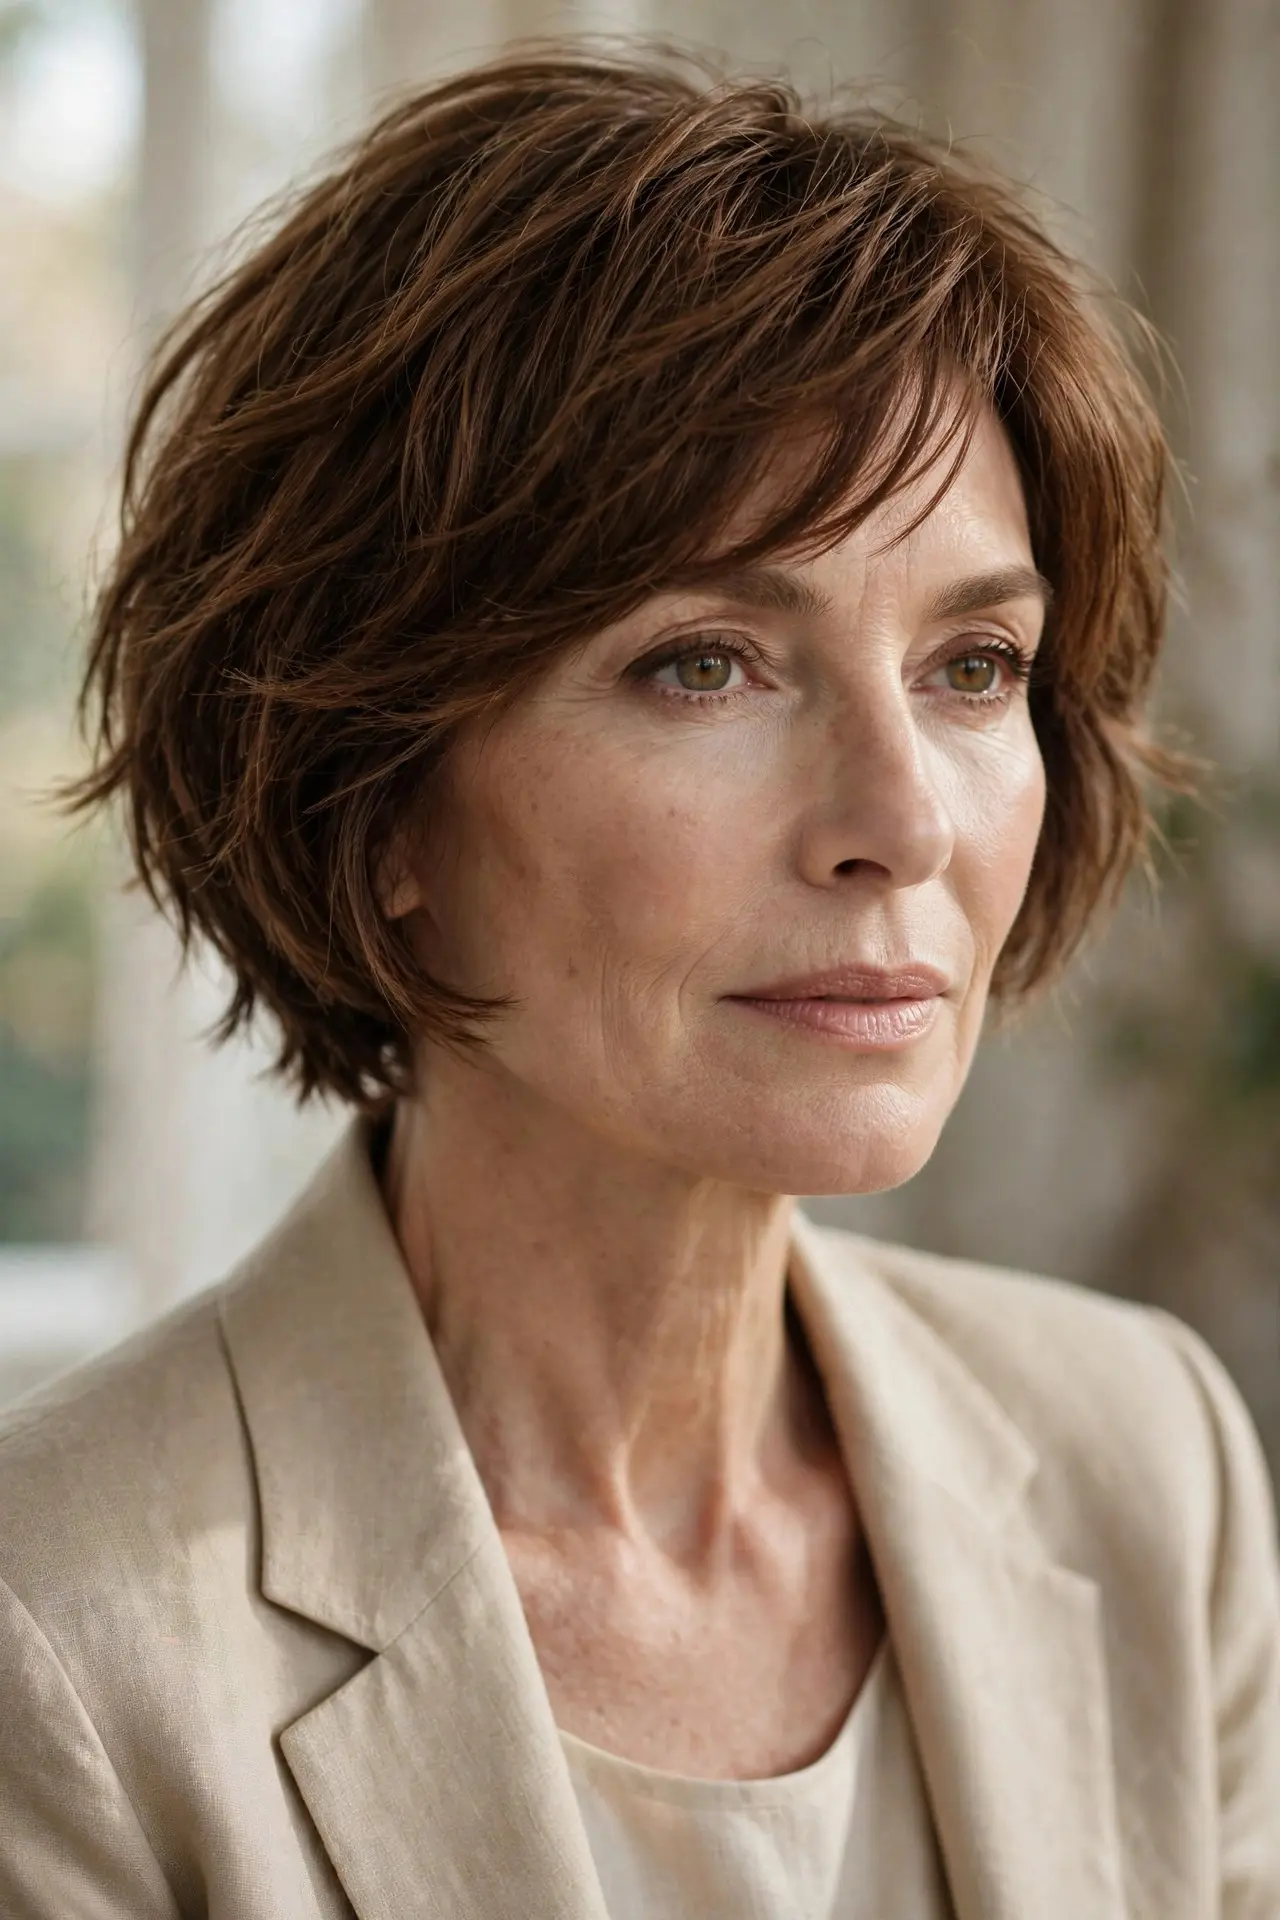
Cut entirely with a razor for soft, lived-in texture that scissors can’t replicate. The razor creates wispy, natural-looking ends with built-in separation. It is the most organic texture on this list.
Best for: thick hair that needs weight removed invisibly.
Styling tip: ask for razor cutting specifically — not every stylist offers it.
Avoid: razor cutting on very fine, fragile hair — it can fray delicate ends.
Try this: air-dry with texture spray for the most natural razor finish.
6. 🌀 The Curved-Layer Bob
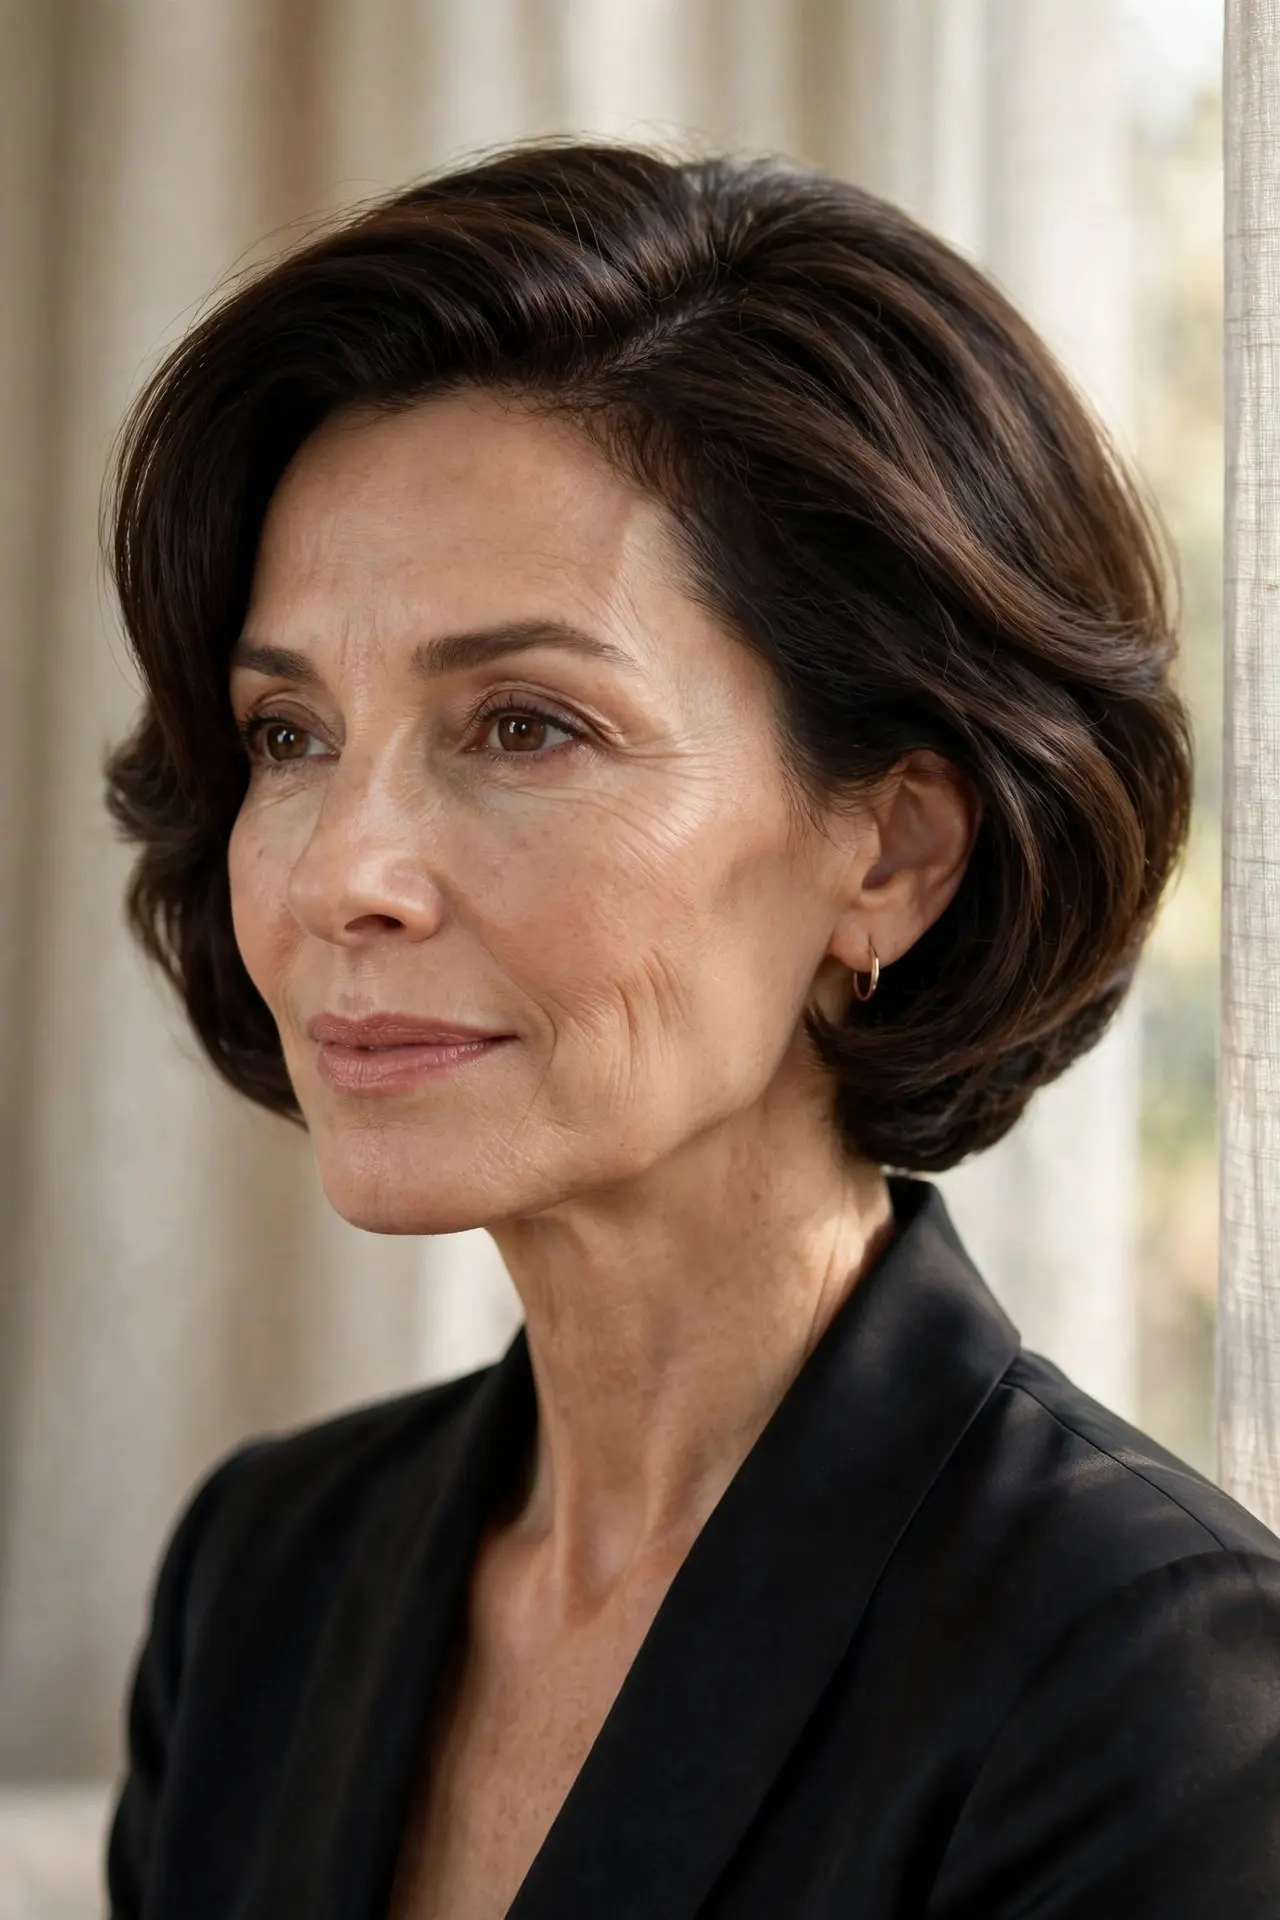
Layers cut on a curve that hugs the head — rounded, smooth, and sculptural. The curved layering creates a beautiful rounded silhouette that flatters from every angle. It is the most polished layering technique here.
Best for: formal styles and polished everyday looks.
Styling tip: a large round brush follows the curve during blow-drying.
Avoid: flat-ironing stick-straight — it erases the beautiful curve.
Try this: a side part adds asymmetry to the rounded shape.
7. 🌸 The Petal-Layer Bob
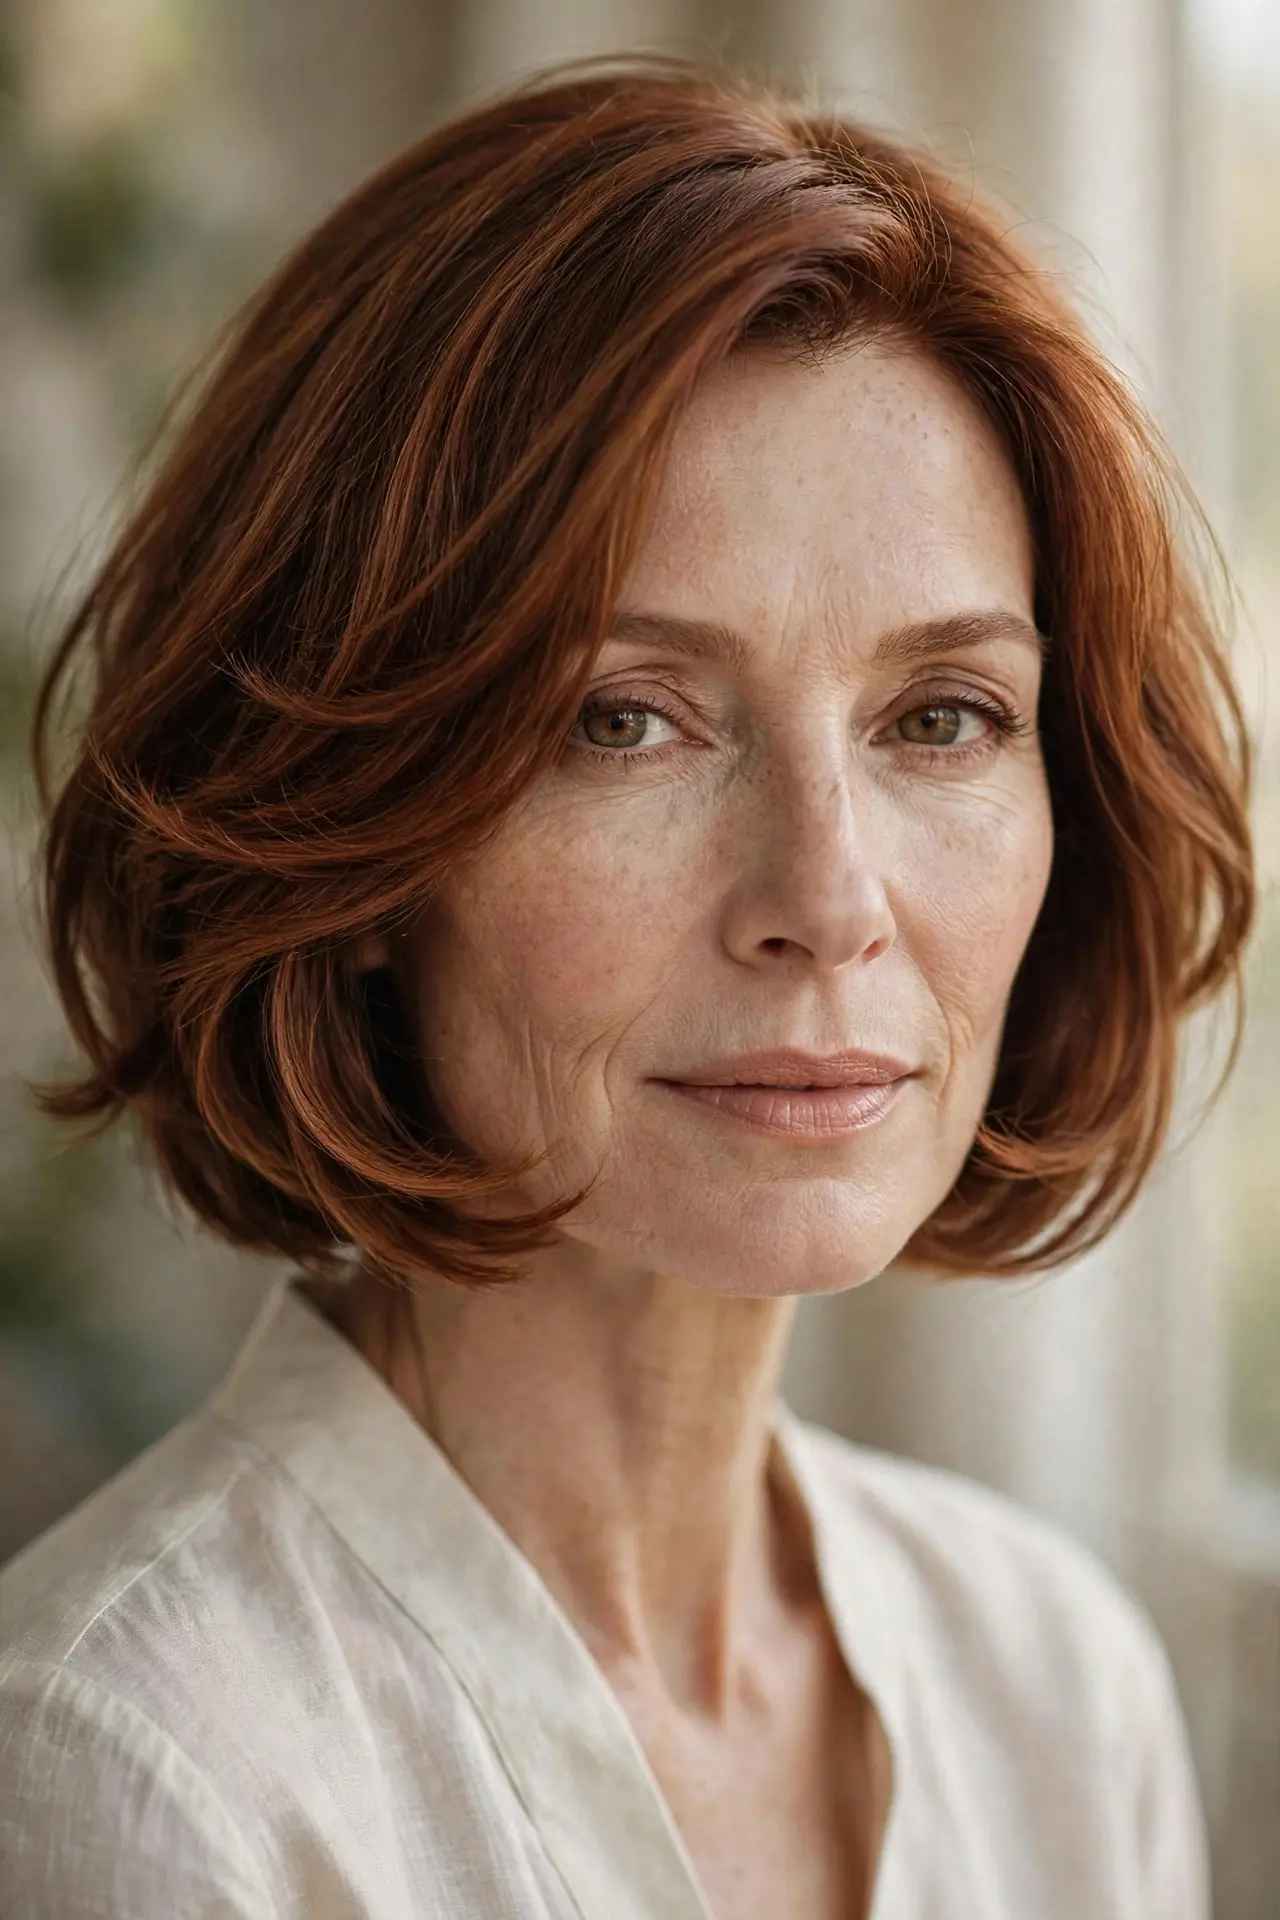
Soft, petal-like layers that overlap delicately around the face — feminine and romantic. Each layer is light and curved like a flower petal. The effect is softness stacked upon softness.
Best for: romantic styles and softening strong features.
Styling tip: point-cutting creates the delicate petal edges.
Avoid: harsh, straight-across layer lines — petals must curve.
Try this: soft waves make the petals bloom beautifully.
8. ⚡ The Shattered-Layer Bob
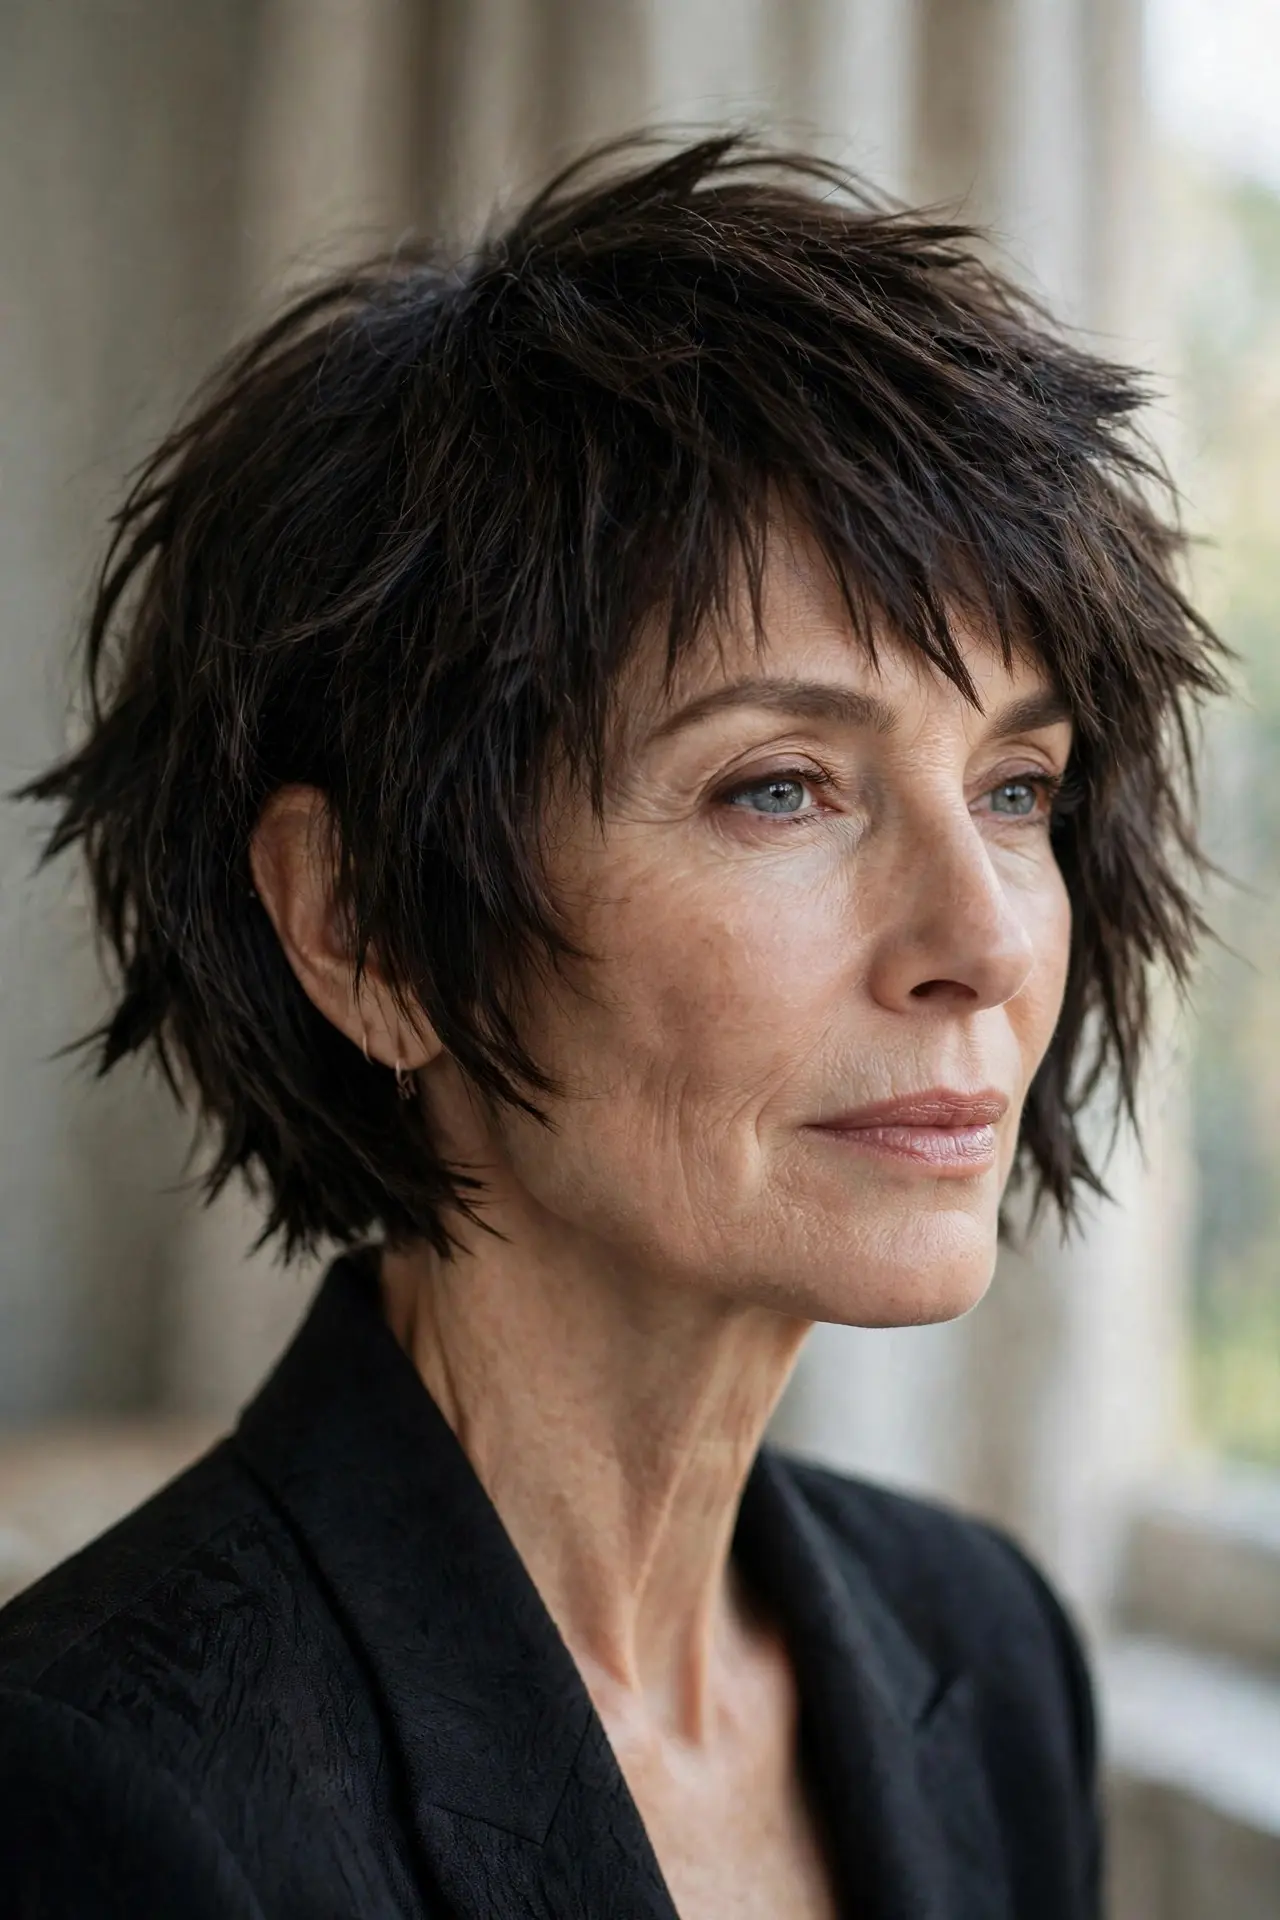
Deliberately broken, irregular layers — “shattered” texture that looks effortlessly cool. The unevenness is the point: it creates edgy separation that never looks overdone. Controlled chaos, precisely cut.
Best for: edgy personal style and thick hair.
Styling tip: deep point-cutting creates the shattered effect.
Avoid: this technique on very fine hair — shattered needs density to work.
Try this: matte texture paste emphasizes the shattered separation.
9. 🍃 The Wispy-End Bob
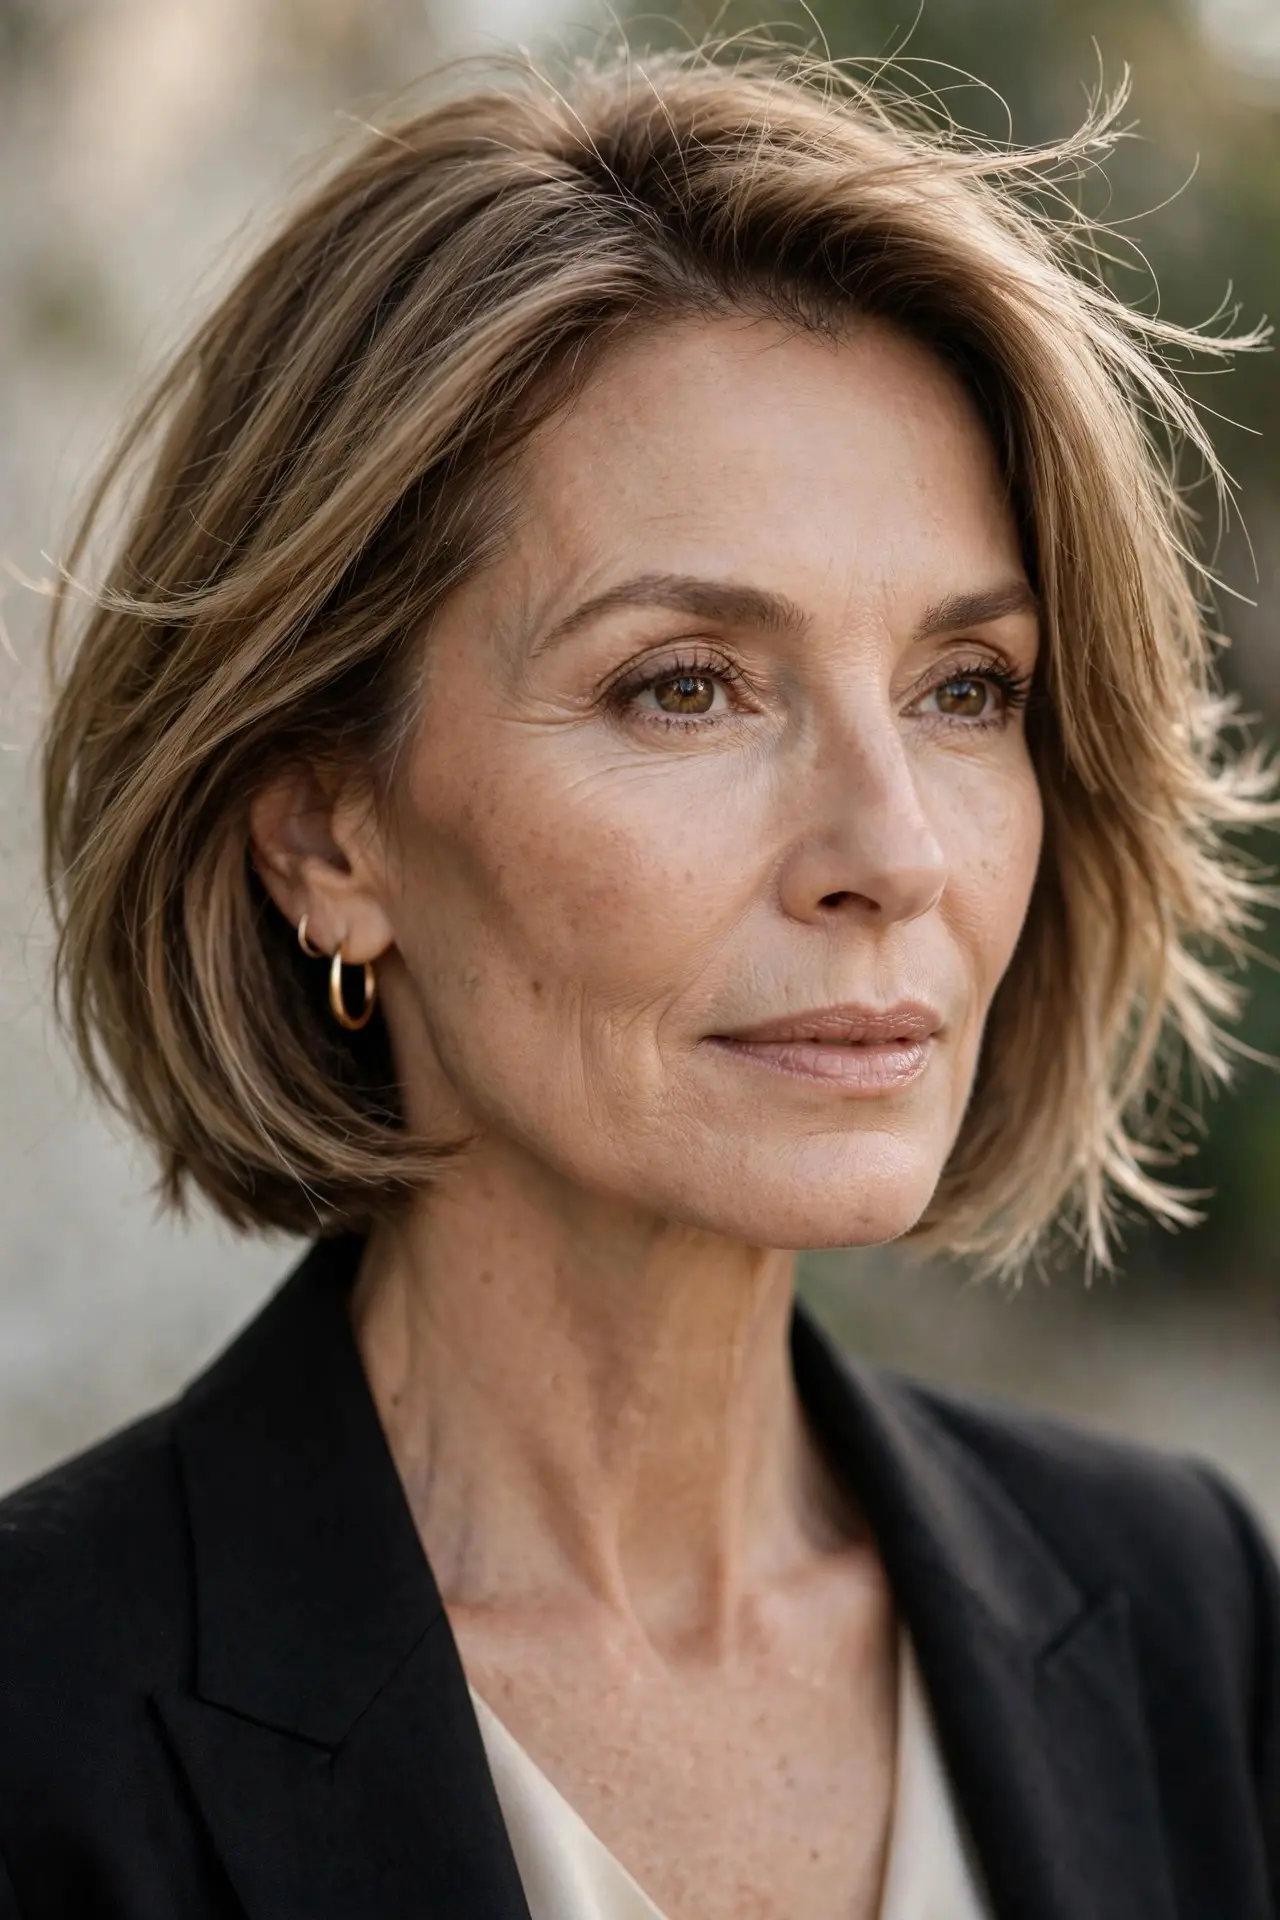
All the layering concentrated at the very ends — wispy, airy tips over a solid base. It is the most conservative layering here: fullness preserved, lightness added exactly where it shows. The safe way to try layers.
Best for: layer beginners and very fine hair.
Styling tip: ask for “layers only in the last two inches.”
Avoid: letting the wisps get too thin — they should whisper, not disappear.
Try this: a light bend with a flat iron shows off wispy ends.
10. 💎 The Beveled-Layer Bob
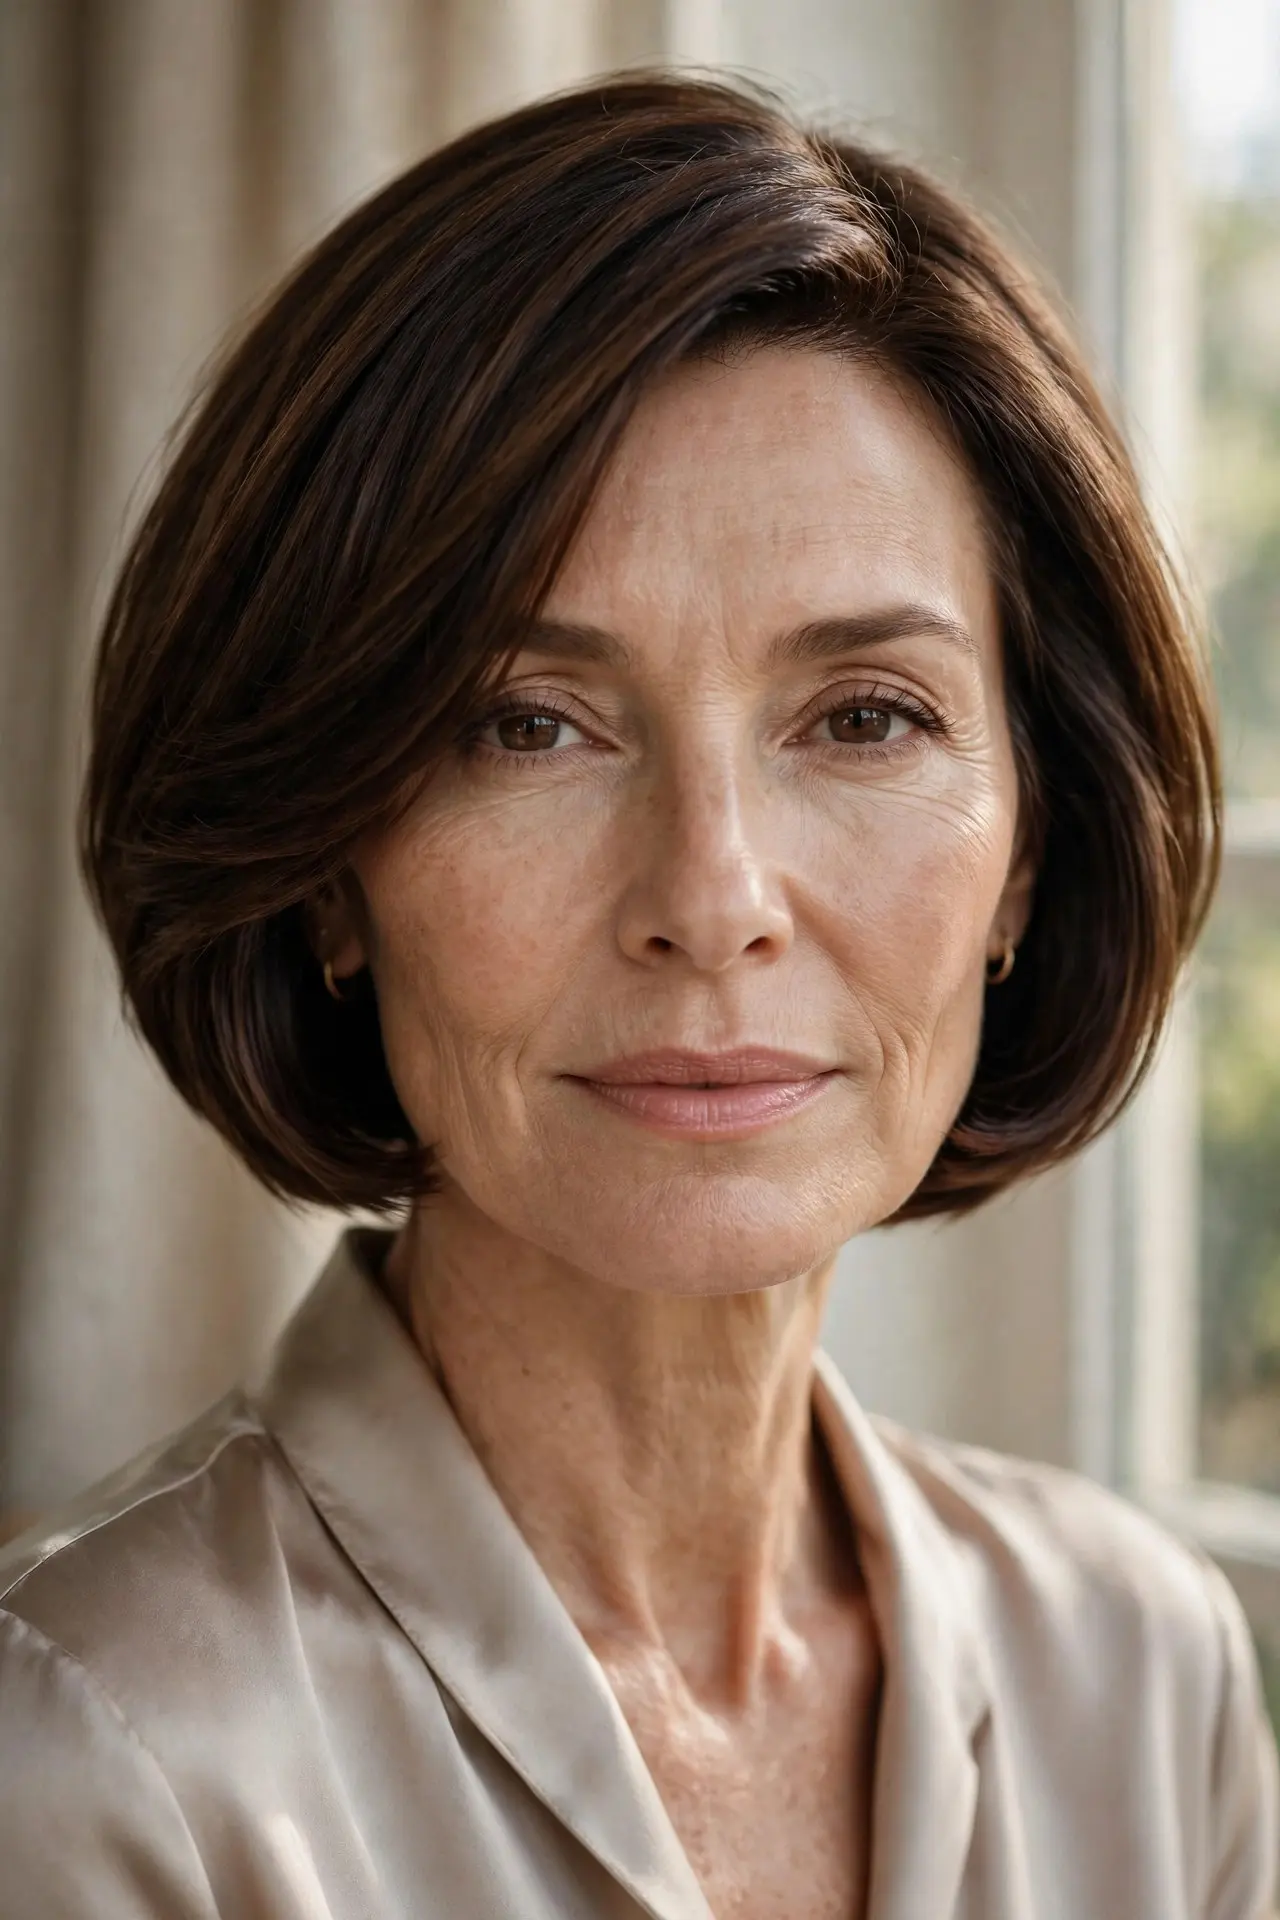
Layers with beveled edges — cut at an angle so each layer tucks neatly under the one above. The beveling creates a smooth, polished surface with hidden layering underneath. Sleek outside, structured inside.
Best for: polished looks with hidden volume.
Styling tip: round-brush the ends under to emphasize the bevel.
Avoid: flipping the ends out — it undoes the beveled design.
Try this: shine spray makes beveled layers gleam.
11. 🎀 The Ribbon-Layer Bob
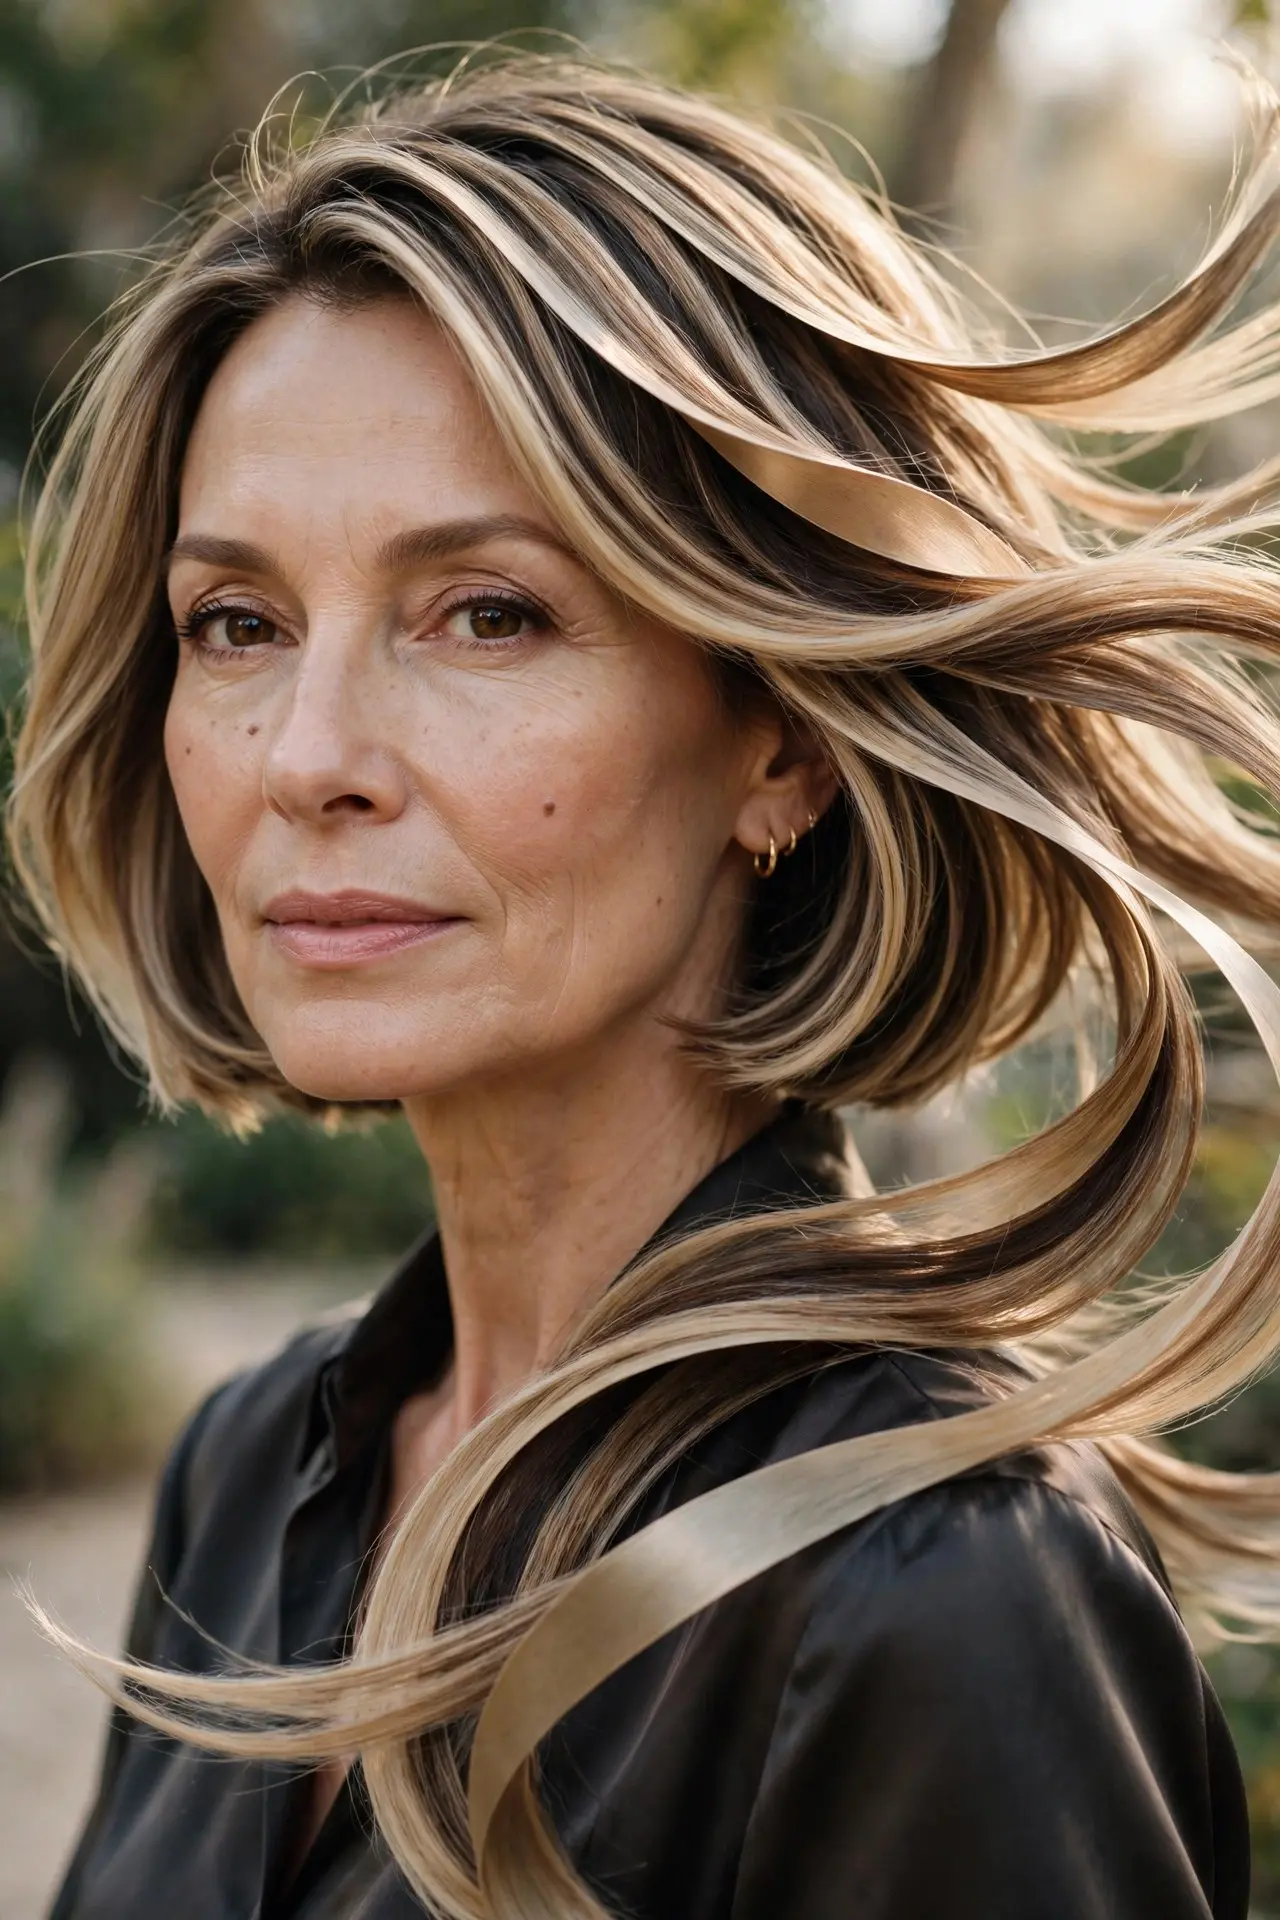
Long, ribbon-like layers that flow in smooth strips — elegant and fluid. The ribbons catch light as they move, creating beautiful dimension. It is layering as decoration: each ribbon a design element.
Best for: showcasing dimensional color through layering.
Styling tip: smooth blow-dry with a paddle brush keeps ribbons defined.
Avoid: over-texturizing — ribbons need smoothness to read.
Try this: balayage along the ribbons multiplies the dimension.
Where your layers BEGIN matters more than how many you have. Layers starting at the cheekbone open up the face; layers starting at the jaw add swing; layers starting at the crown create volume. Before your appointment, decide which effect you want — then tell your stylist the starting point, not just “layers.”
12. 🌟 The Crown-Focus Bob
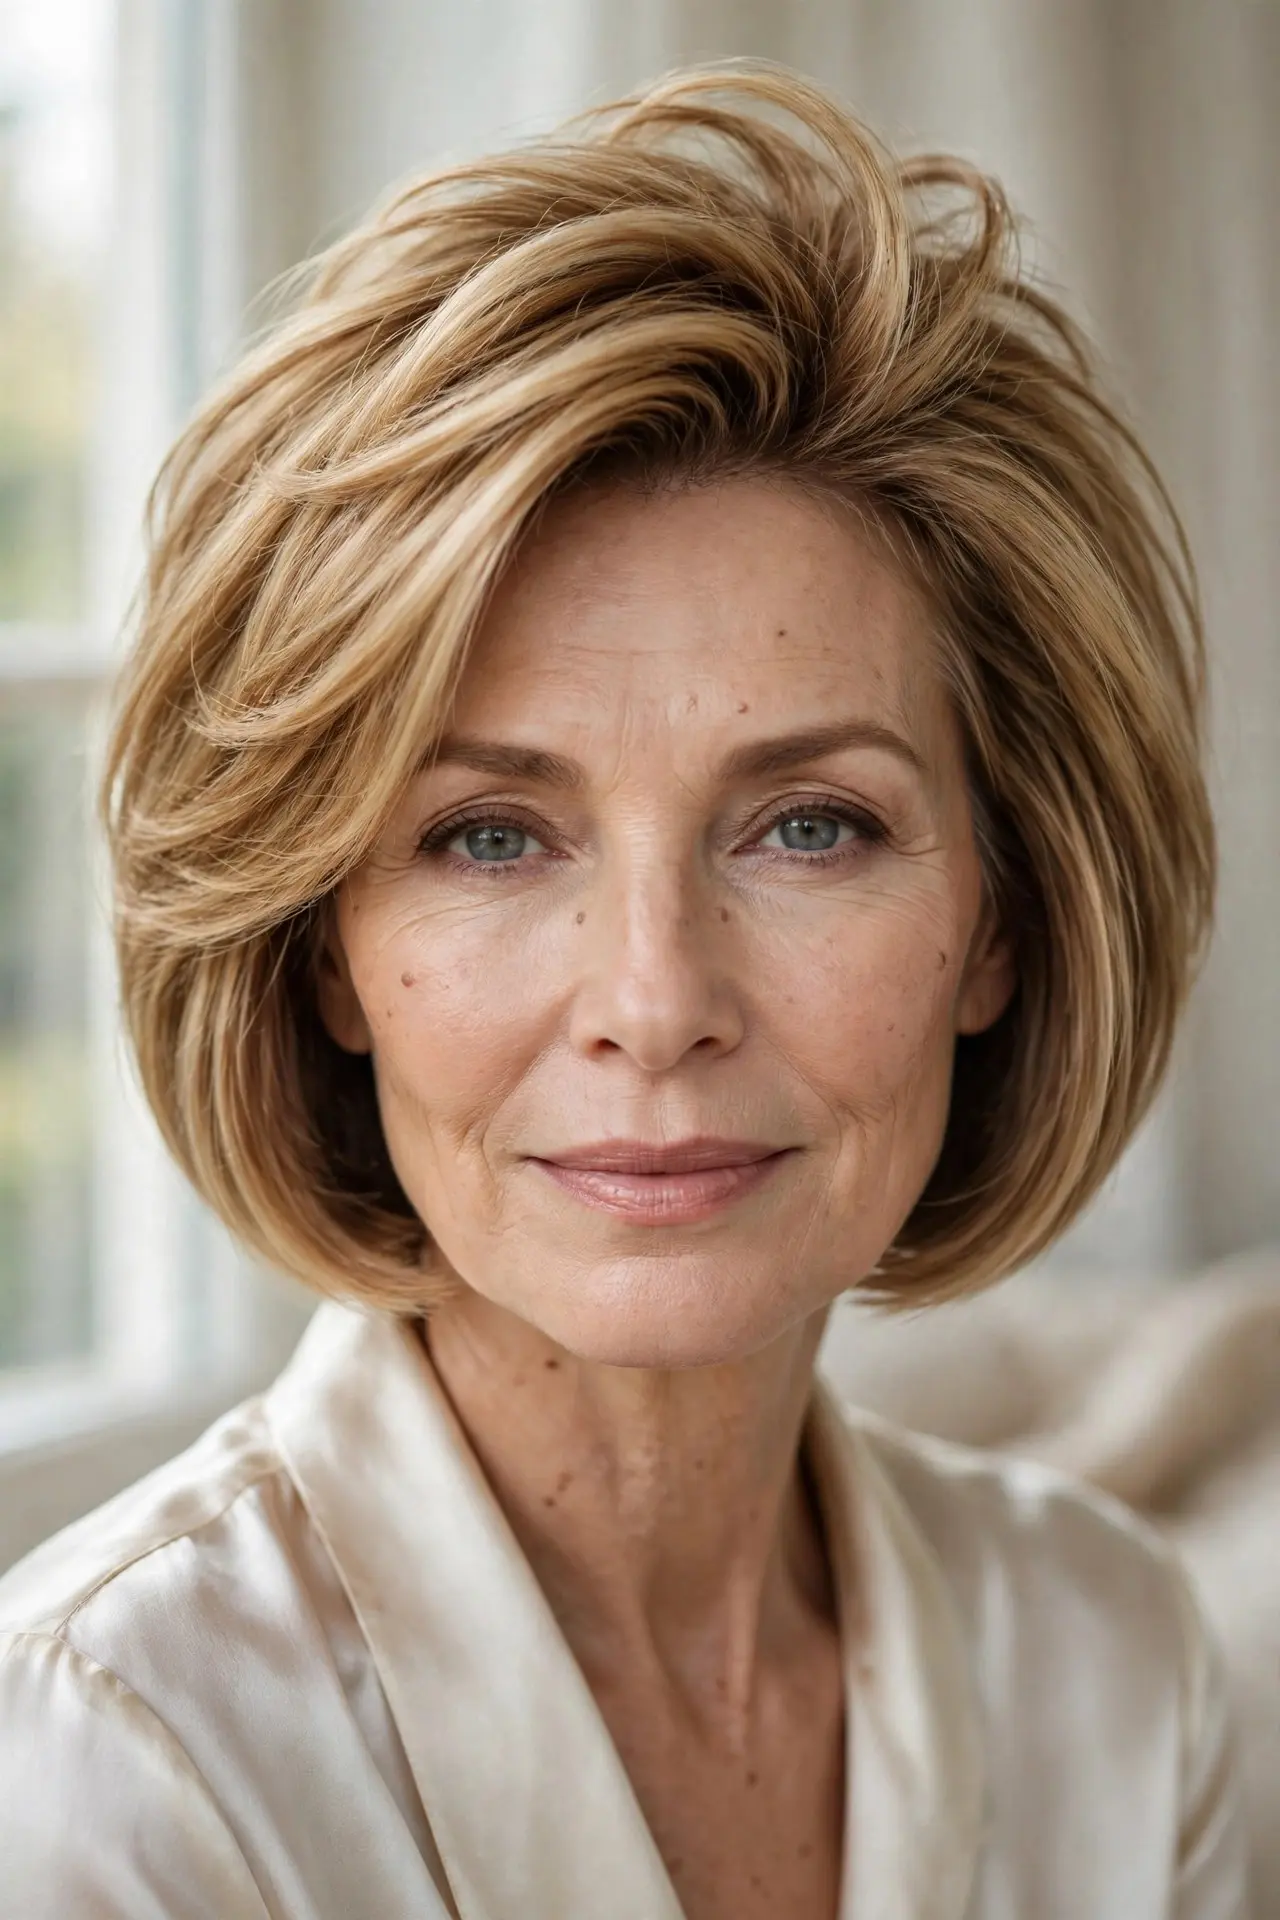
All the layering action concentrated at the crown — shorter top layers that lift while the rest stays sleek. It is targeted volume engineering: lift exactly where flatness lives, nowhere else. Efficient and effective.
Best for: flat crowns with otherwise well-behaved hair.
Styling tip: dry crown sections straight up with a round brush.
Avoid: layering the ends too — the crown is the whole strategy.
Try this: velcro rollers at the crown while you do makeup.
13. 🍯 The Honey-Layer Bob
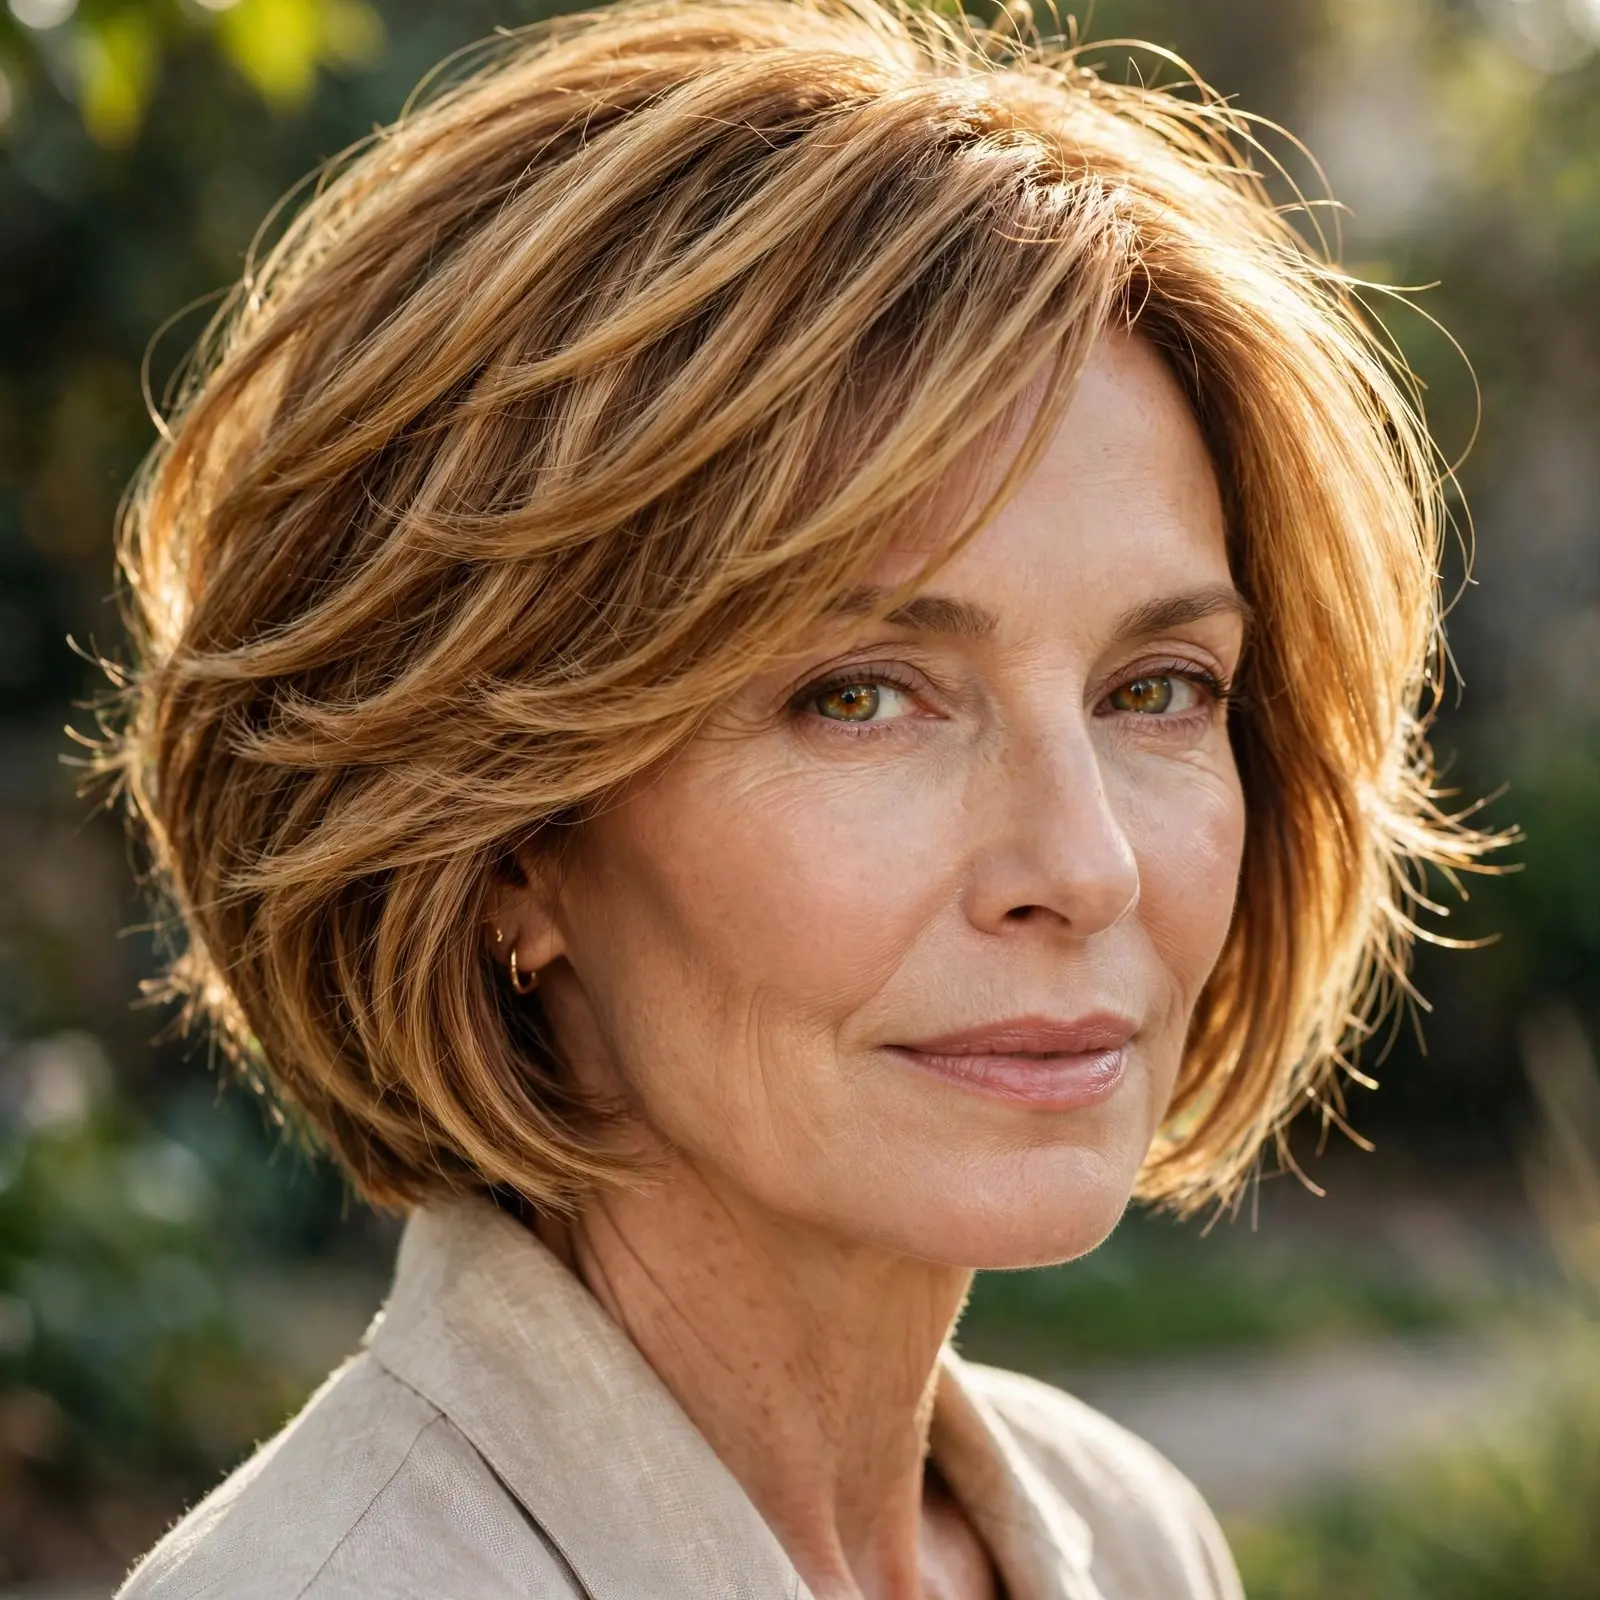
Honey-toned layers that glow — the warm color makes every layer visible, turning the cut into a showcase. Color and layering in perfect partnership: the honey reveals what the layers built. Warmth you can see move.
Best for: making layering visible on darker bases.
Styling tip: ask for honey balayage concentrated through the layers.

Avoid: flat single-process color — honey needs dimension.
Try this: waves make honey layers shimmer.
14. ❄️ The Icy-Layer Bob
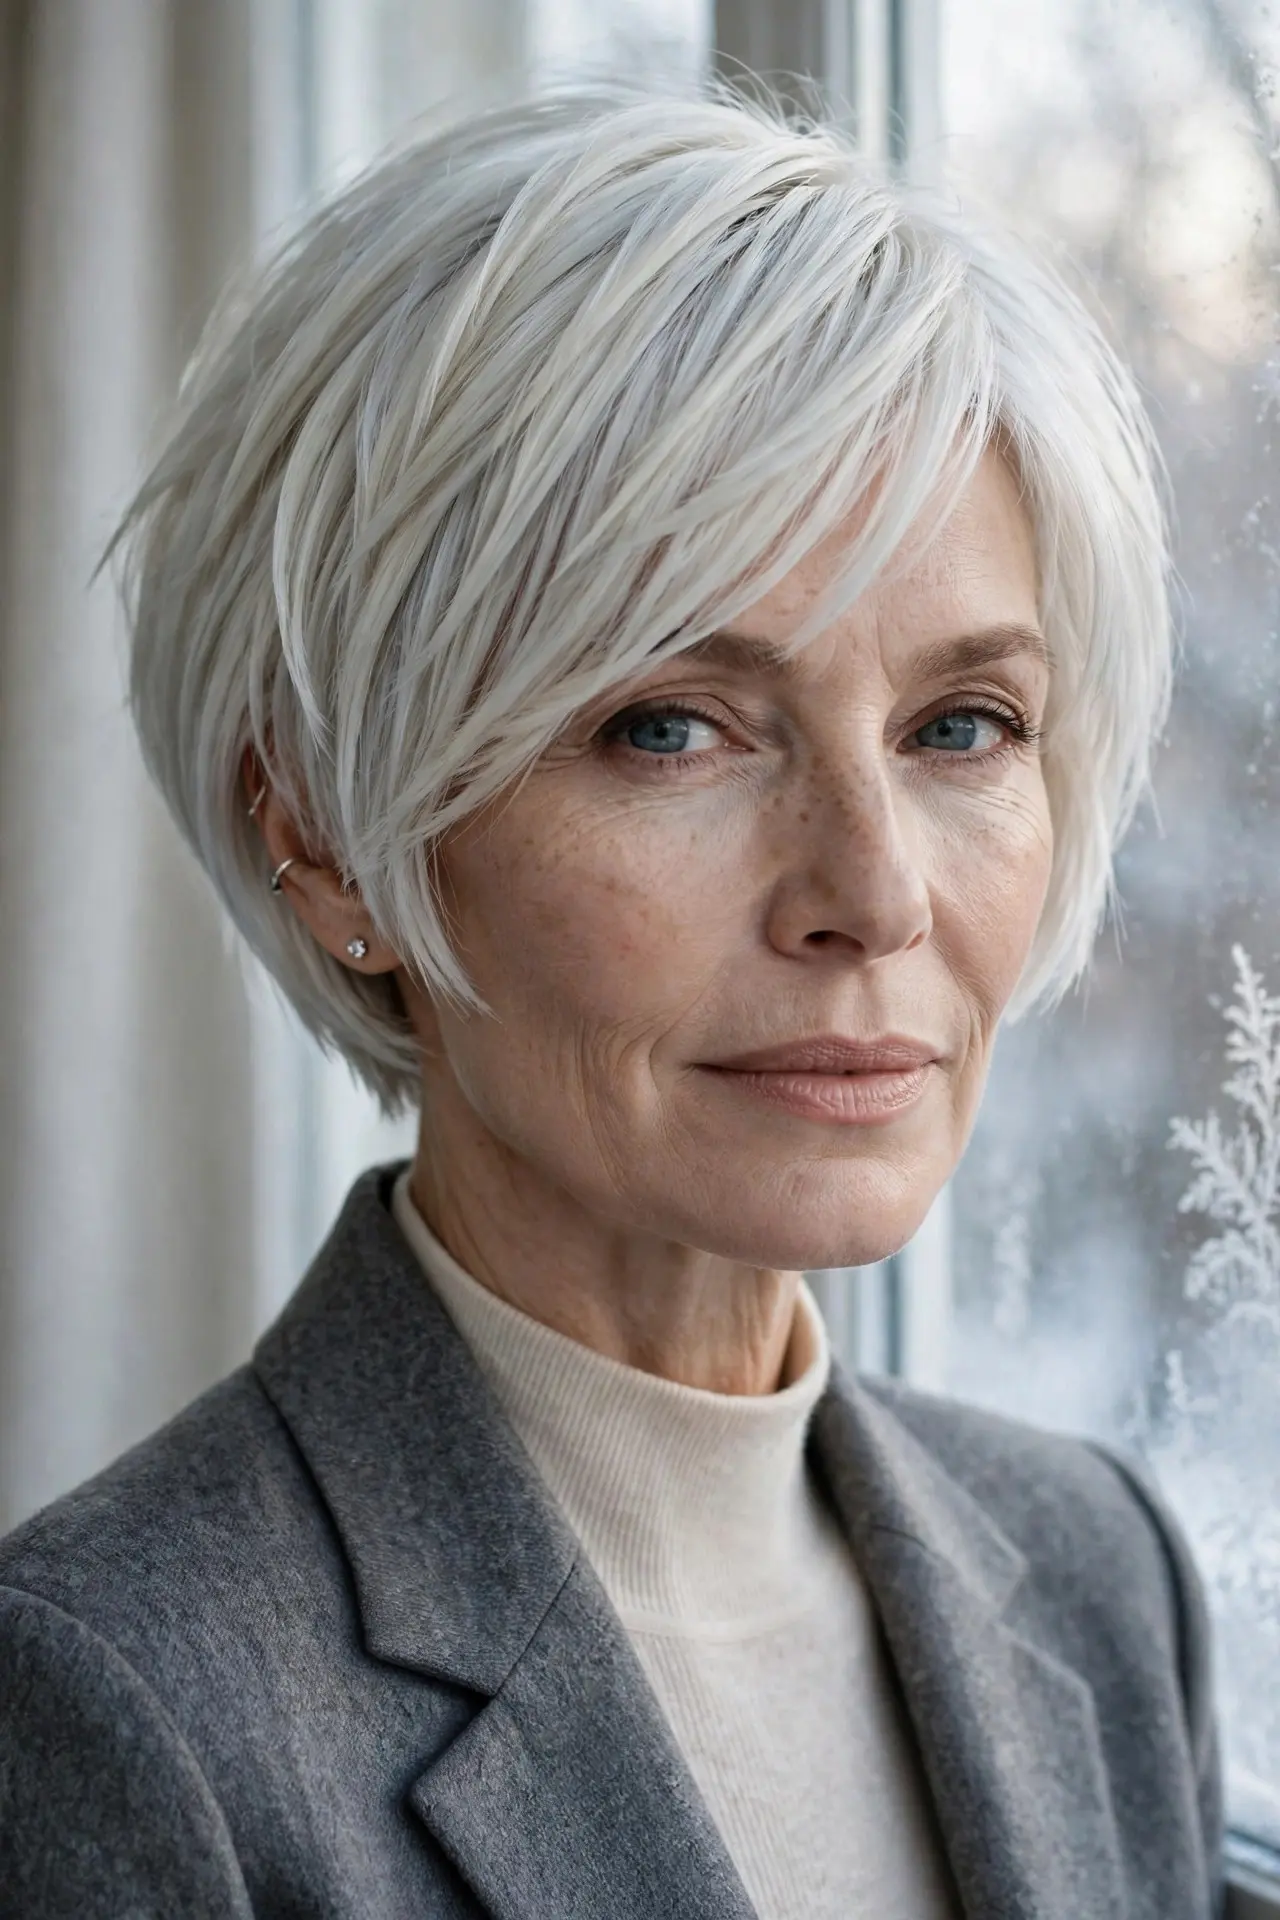
Cool platinum layers with razor-sharp definition — the icy tone makes every layer edge look crystalline. It is winter precision: clean, bright, and strikingly modern. The coolest layering on this list, literally.
Best for: cool undertones and graphic tastes.
Styling tip: purple shampoo weekly; sleek styling shows the icy edges.
Avoid: warm tones mixed in — icy needs color discipline.
Try this: a center part makes the icy layers perfectly symmetrical.
15. 🍫 The Mocha-Layer Bob
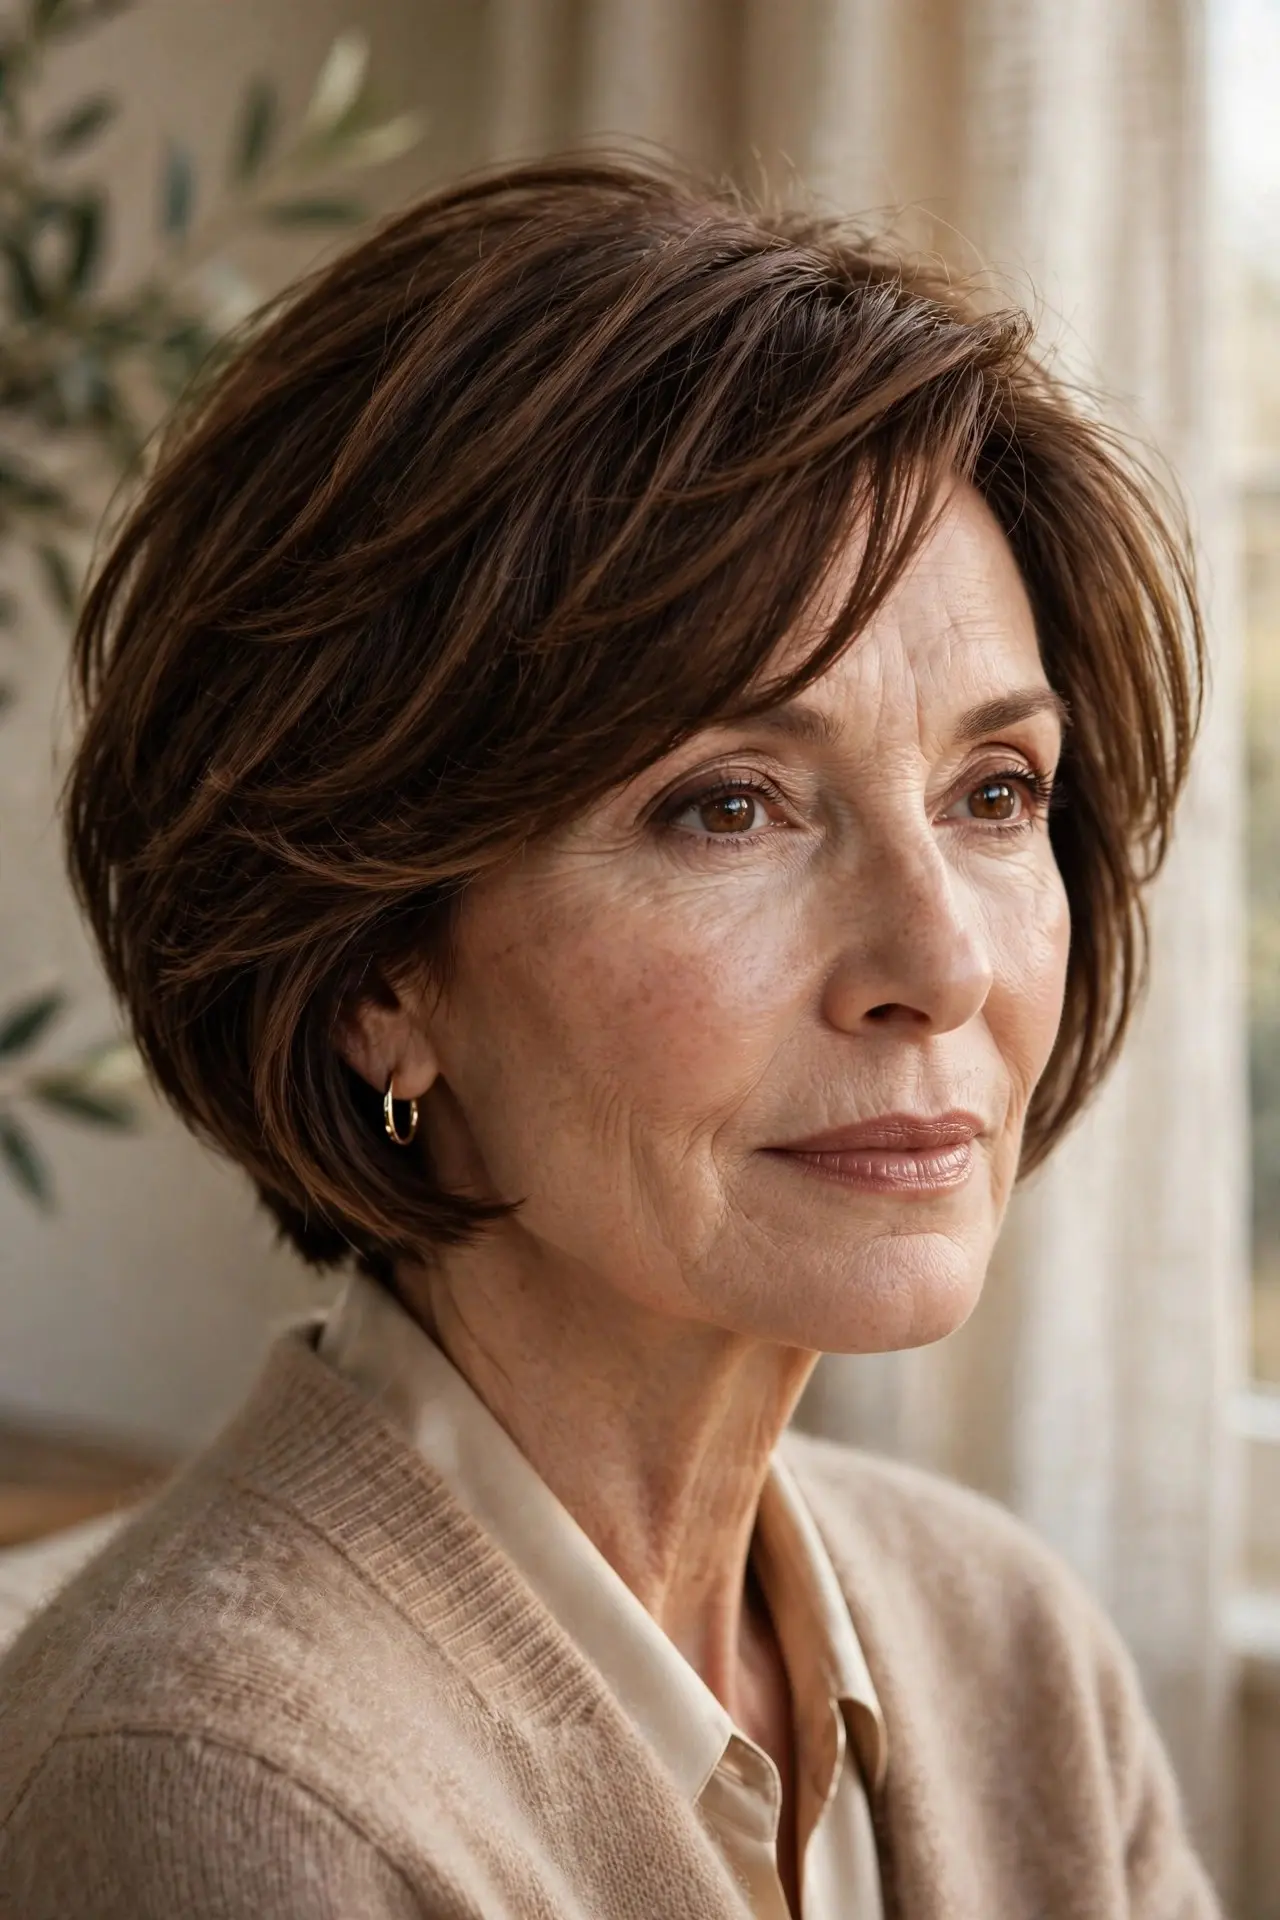
Rich mocha layers with delicious depth — the brown tones make layering look lush and expensive. It is the most universally flattering color-layer combination: depth, warmth, and movement in one. Quiet luxury in a haircut.
Best for: brunettes wanting richness without drama.
Styling tip: a gloss treatment deepens mocha between colors.
Avoid: going too dark — mocha needs its warm mid-tones.
Try this: soft bends show off mocha dimension.
16. 🌹 The Auburn-Layer Bob
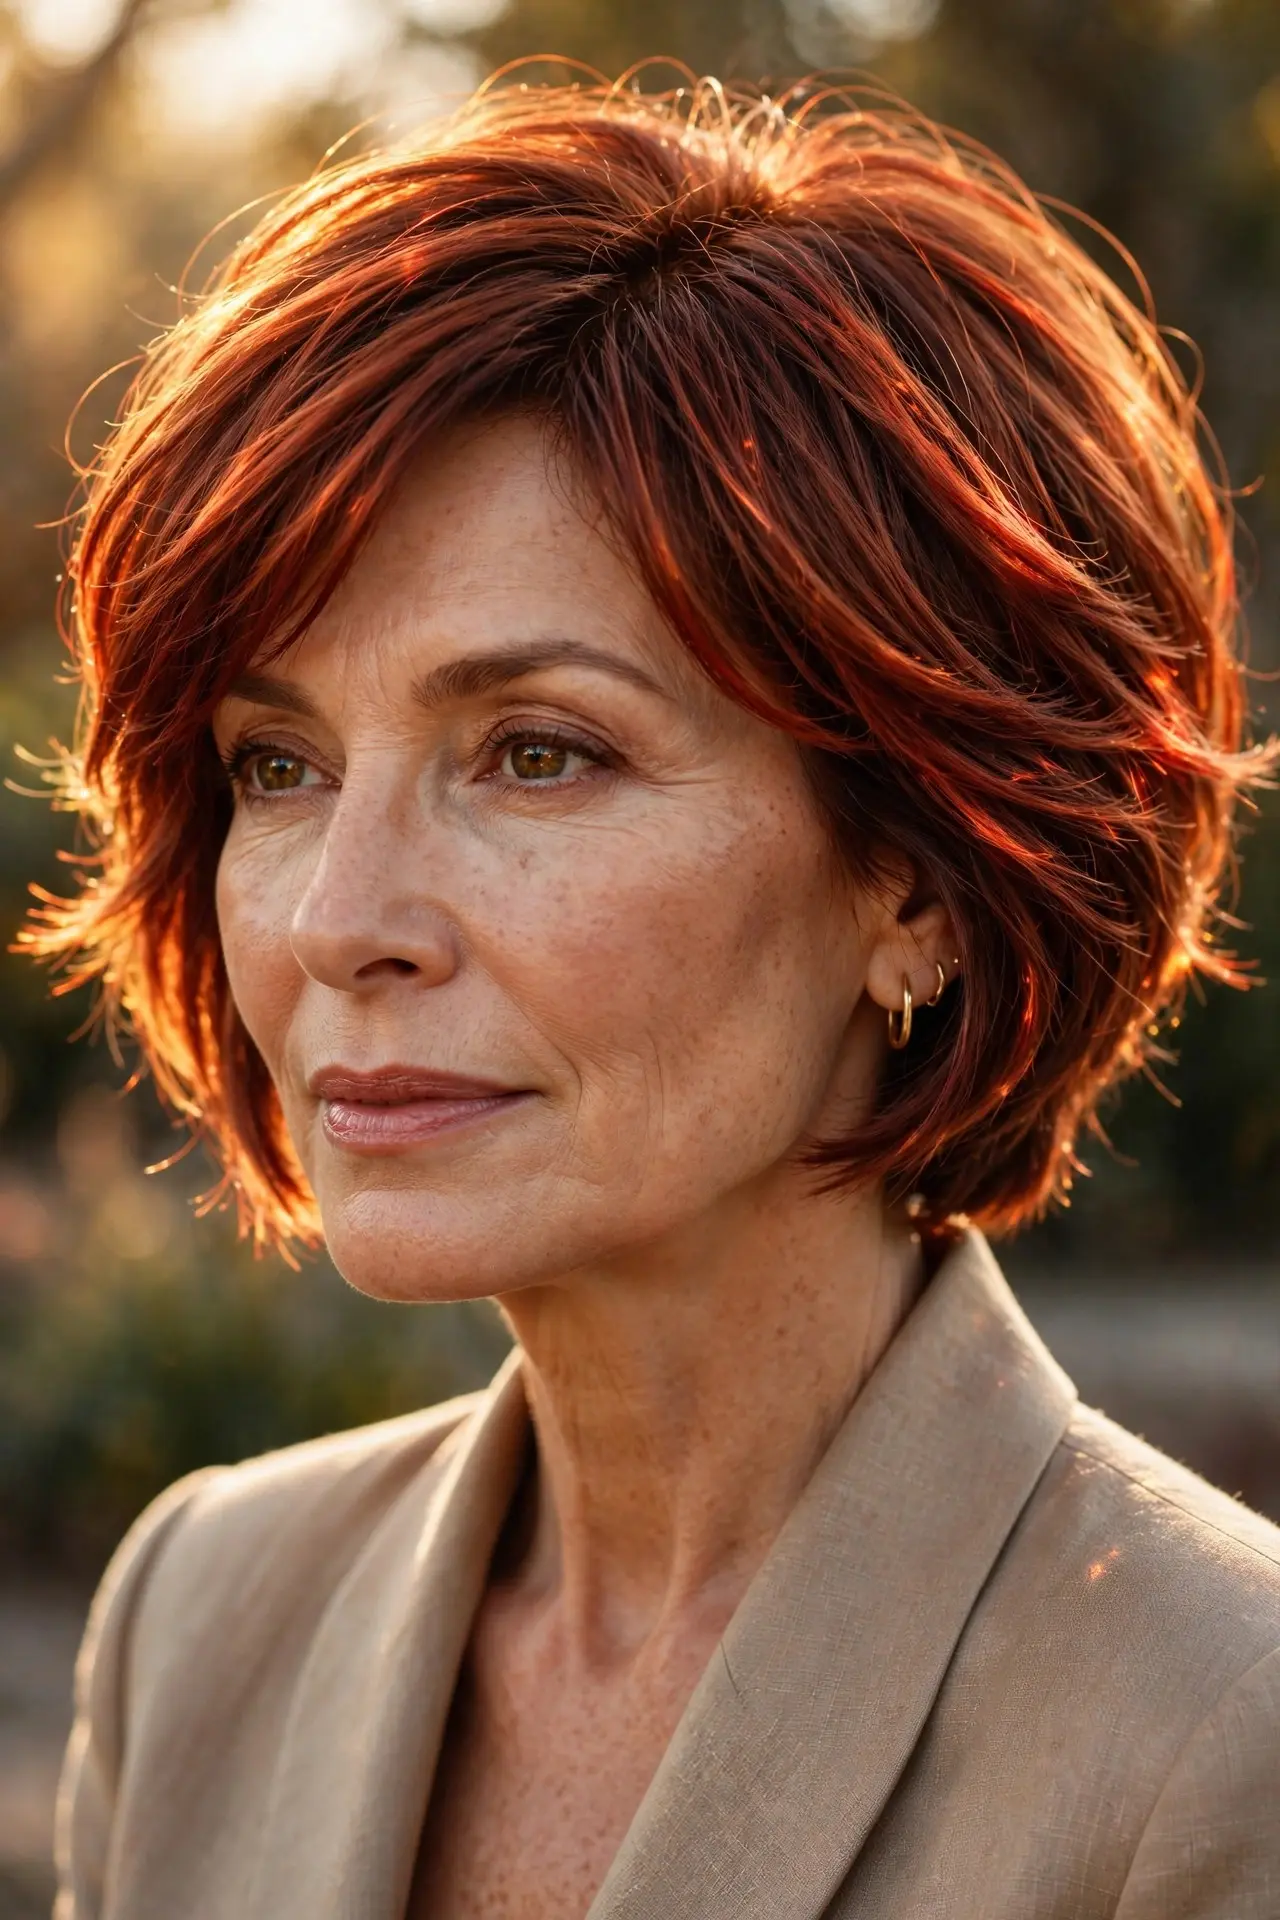
Auburn layers with fiery dimension — the red-brown makes every layer glow like embers. It is the most vibrant layering here: color that demands attention, cut that deserves it. Warmth with wattage.
Best for: green and hazel eyes — auburn makes them ignite.
Styling tip: color-depositing conditioner maintains the fire.
Avoid: daily washing — red fades fastest.
Try this: tousled styling shows auburn dimension best.
17. 🌿 The Silver-Layer Bob
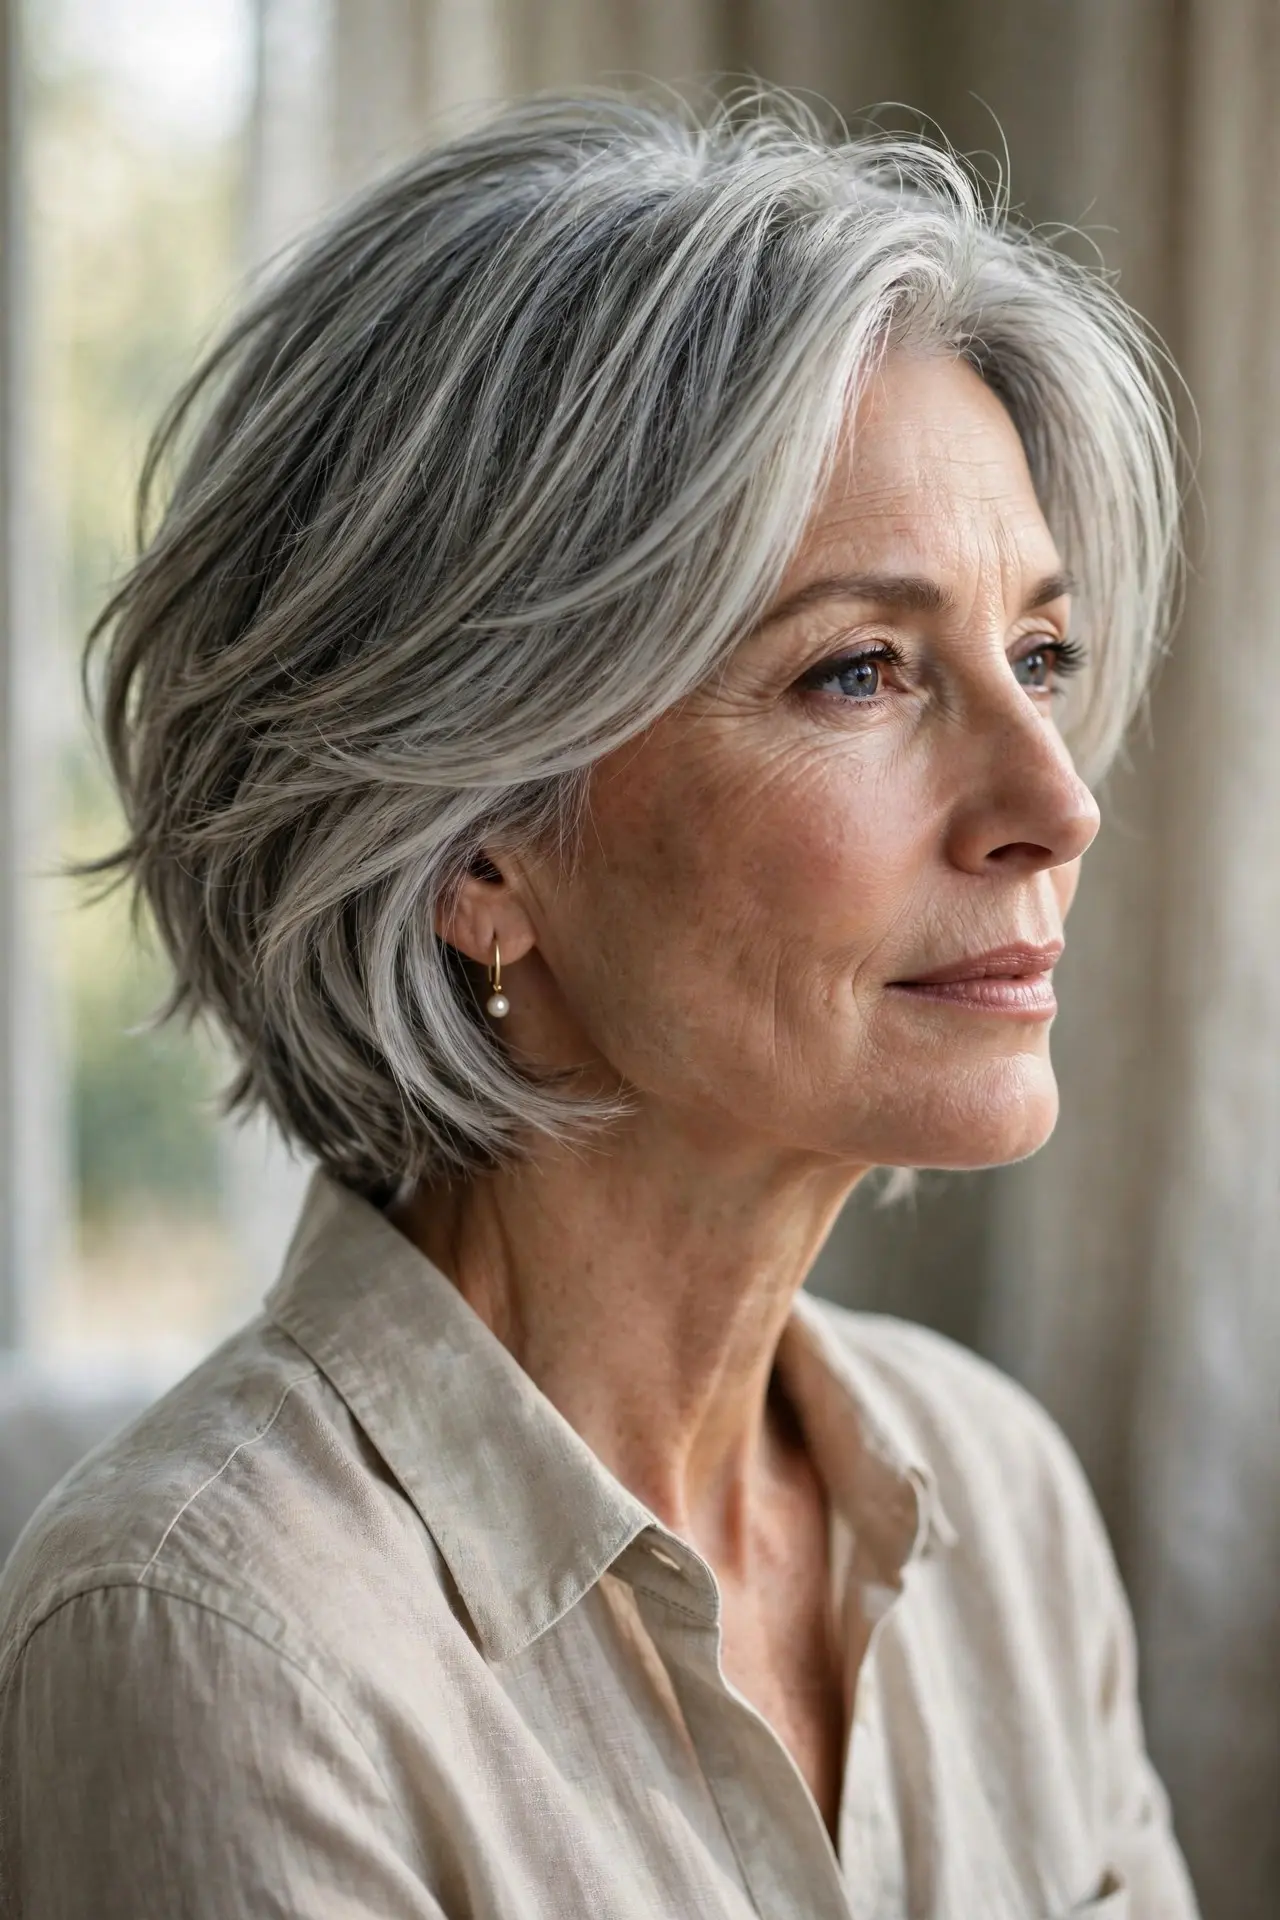
Natural silver with layered dimension no dye can replicate — the gray tones shift through every layer like light on water. It is the most distinctive layering on this list because the color does half the work. Earned elegance.
Best for: embracing natural gray with architectural style.
Styling tip: silver-brightening shampoo; precision trims keep it intentional.
Avoid: imprecise grow-out — silver layers demand sharp maintenance.
Try this: tousle with texture spray for piecey silver dimension.
18. 💃 The Flip-Layer Bob
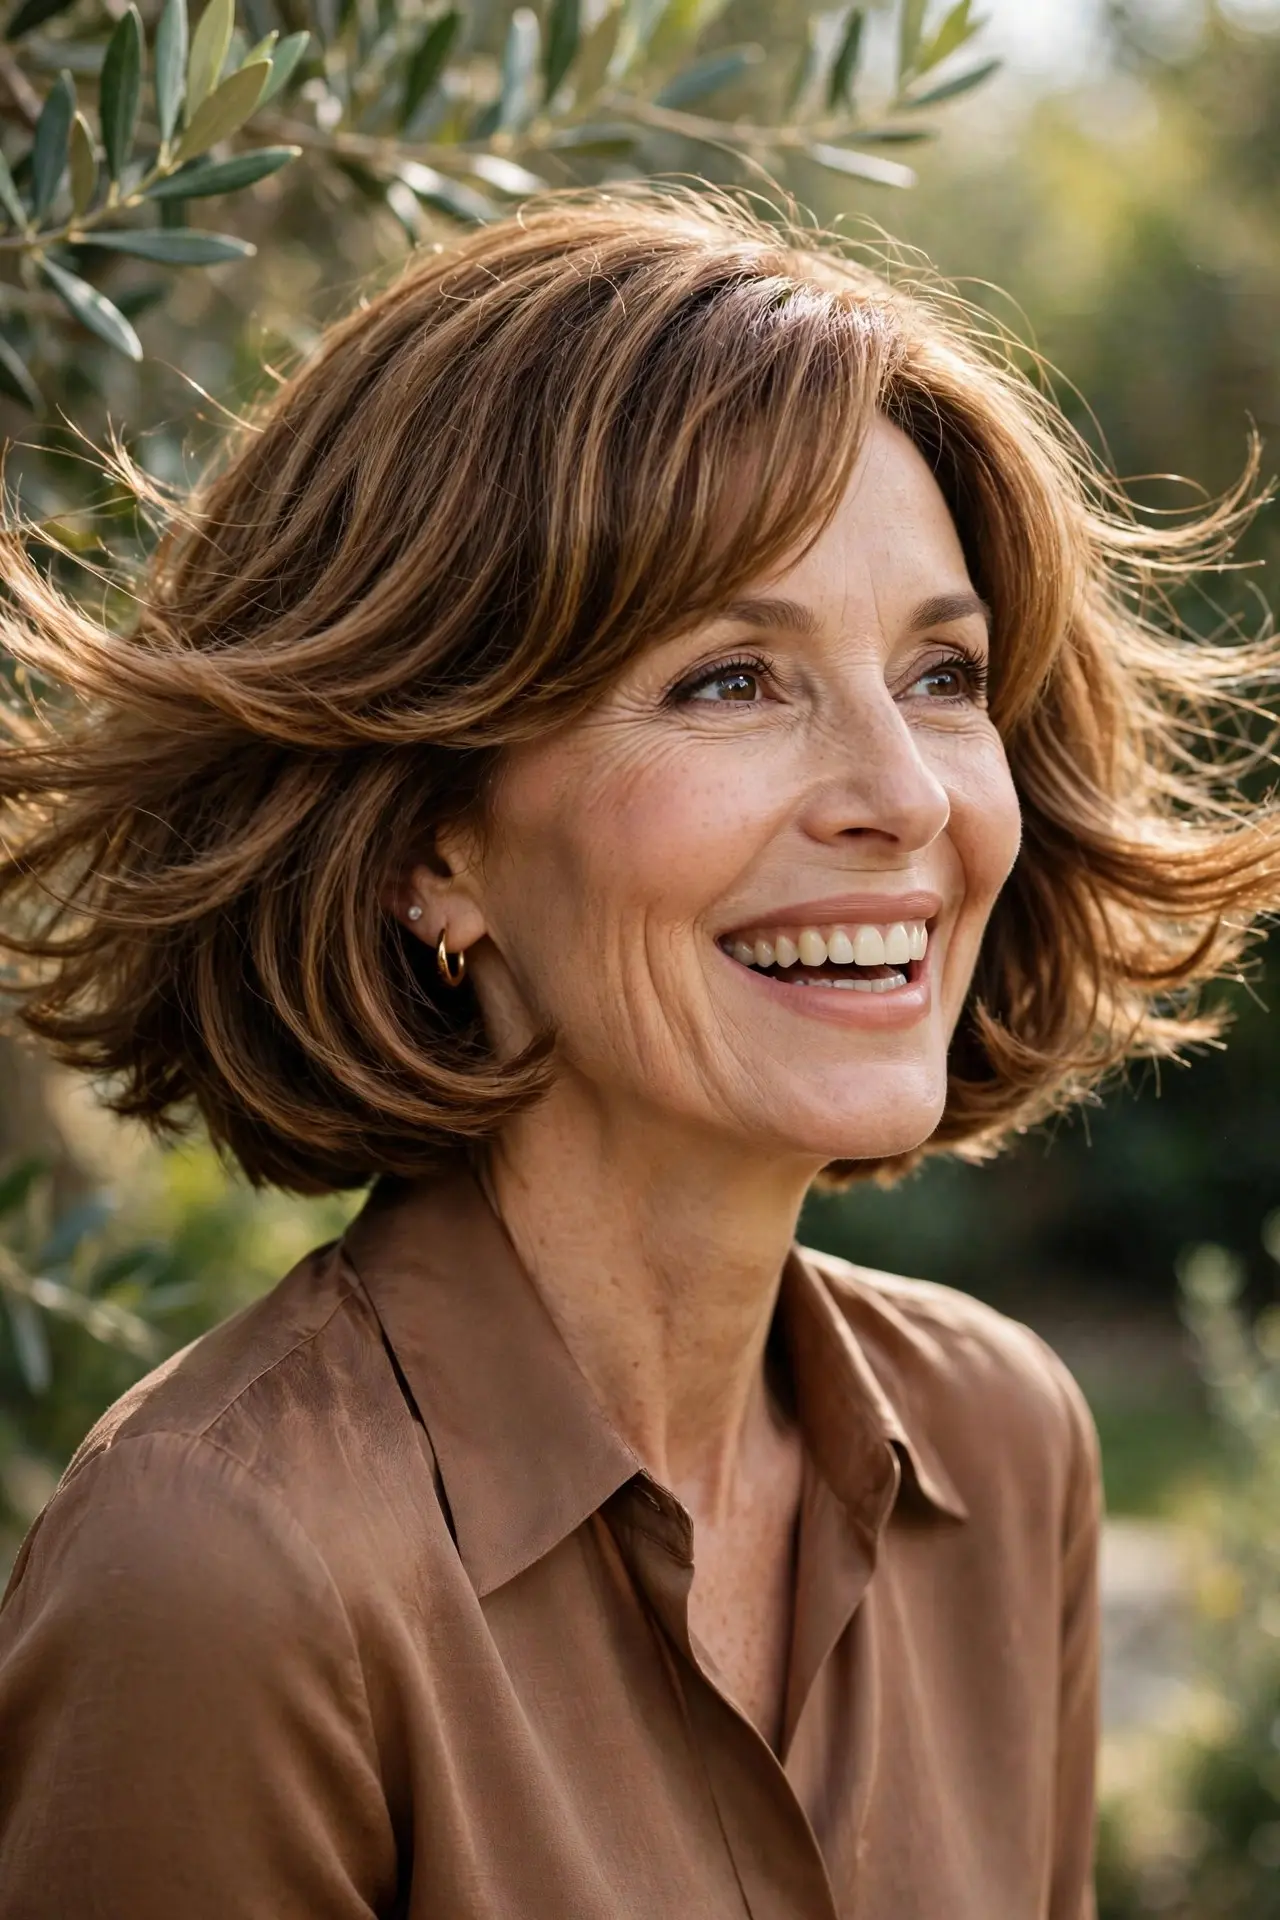
Layers designed to flip — each one kicked outward at the ends for playful movement. The flip makes the layering visible and fun, with retro charm and modern execution. It is the happiest layering on this list.
Best for: playful personalities and retro lovers.
Styling tip: flick ends outward with a flat iron; flexible spray sets the flip.
Avoid: tucking under — the flip is the entire point.
Try this: a bold lip doubles the retro energy.
19. 🎠 The Bounce-Layer Bob
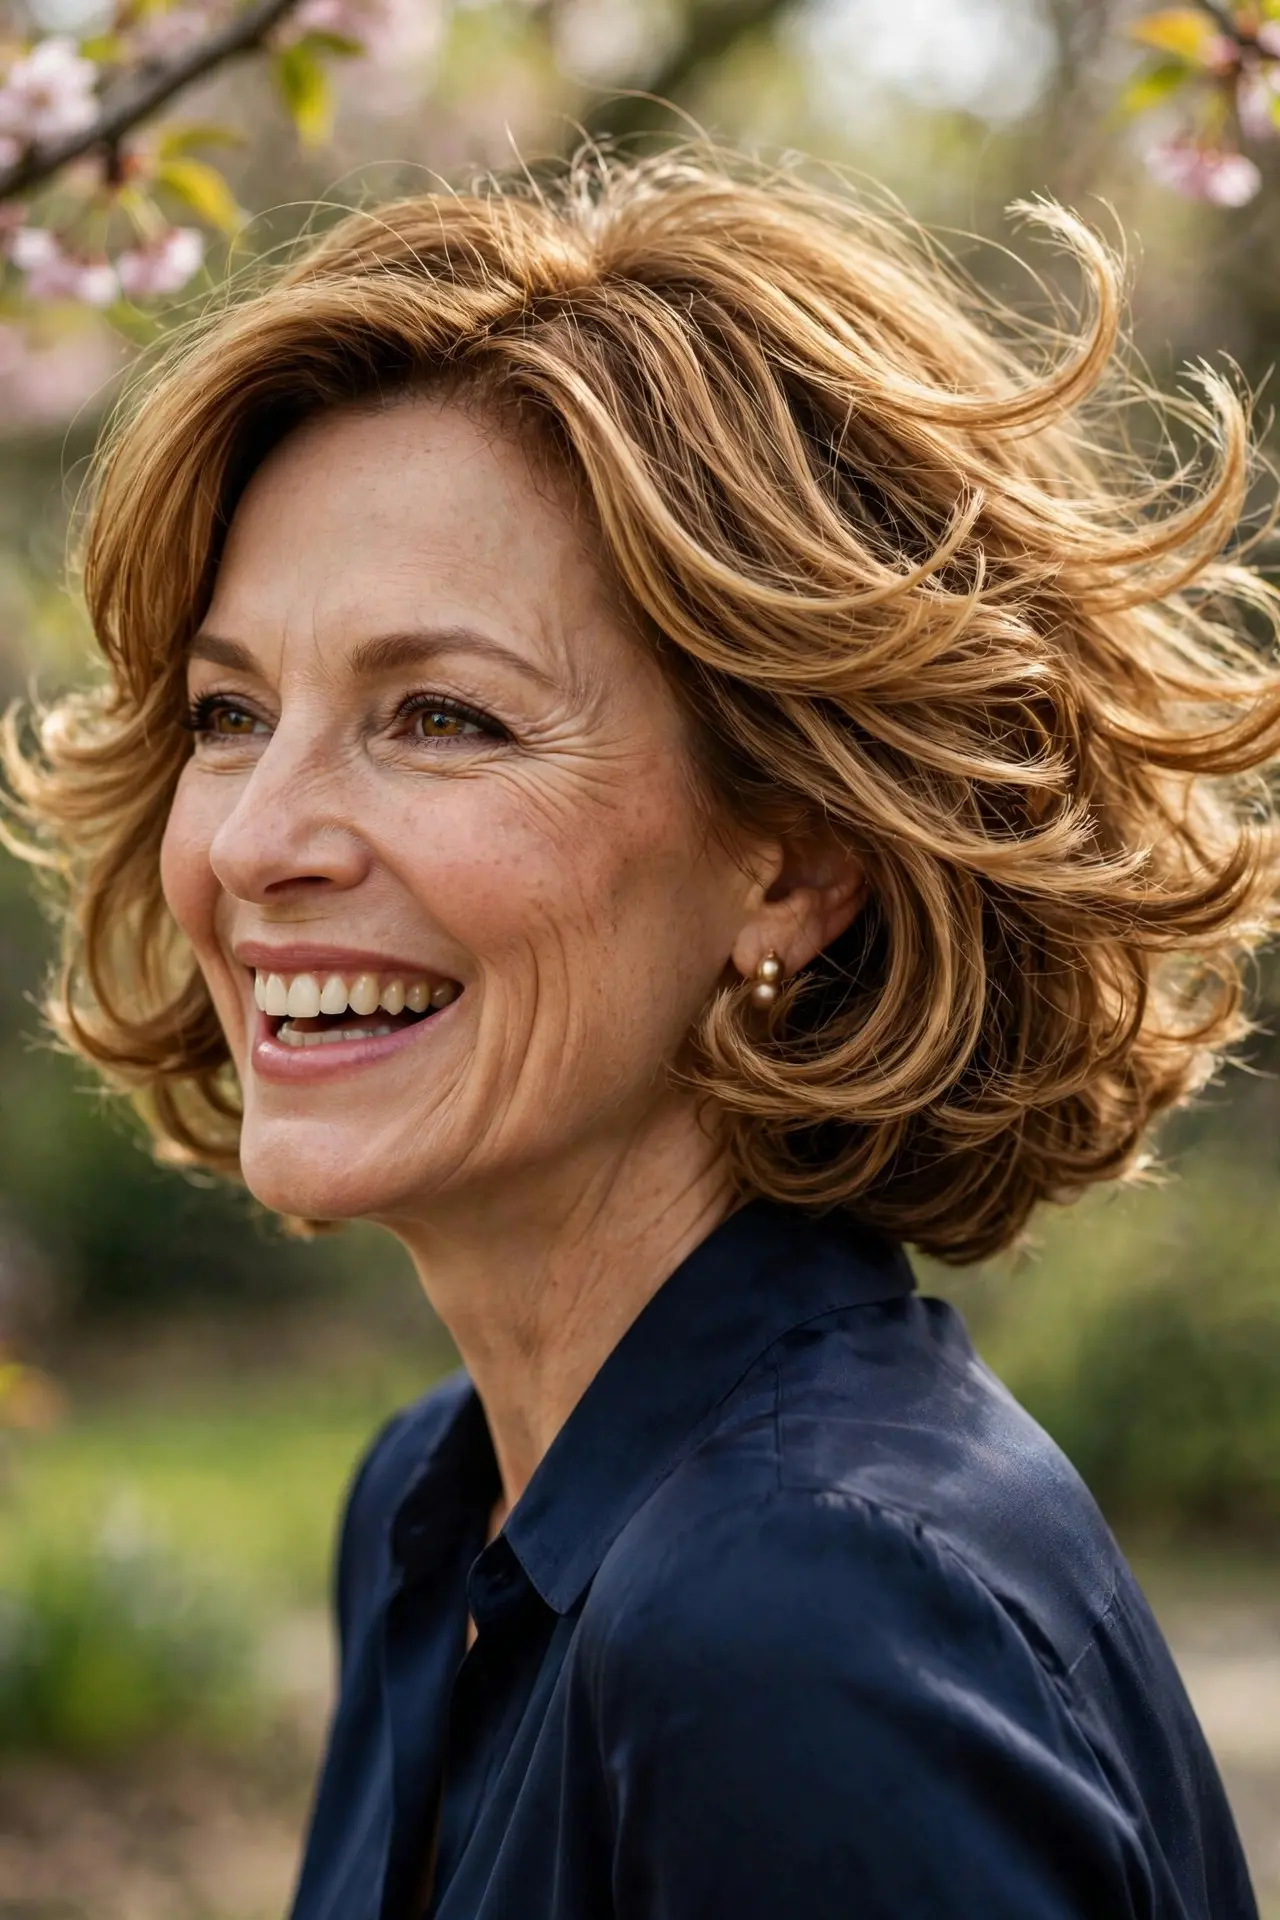
Layers cut to bounce — springy, elastic movement in every layer. The bounce reads as vitality and youth, and it never falls flat. It is the most energetic layering here: hair that can’t sit still.
Best for: adding life to tired, flat hair.
Styling tip: curl ends under with a medium iron, then brush out for bounce.
Avoid: heavy products that kill the spring.
Try this: velcro rollers for ten minutes create heat-free bounce.
20. 🌙 The Sleek-Layer Bob
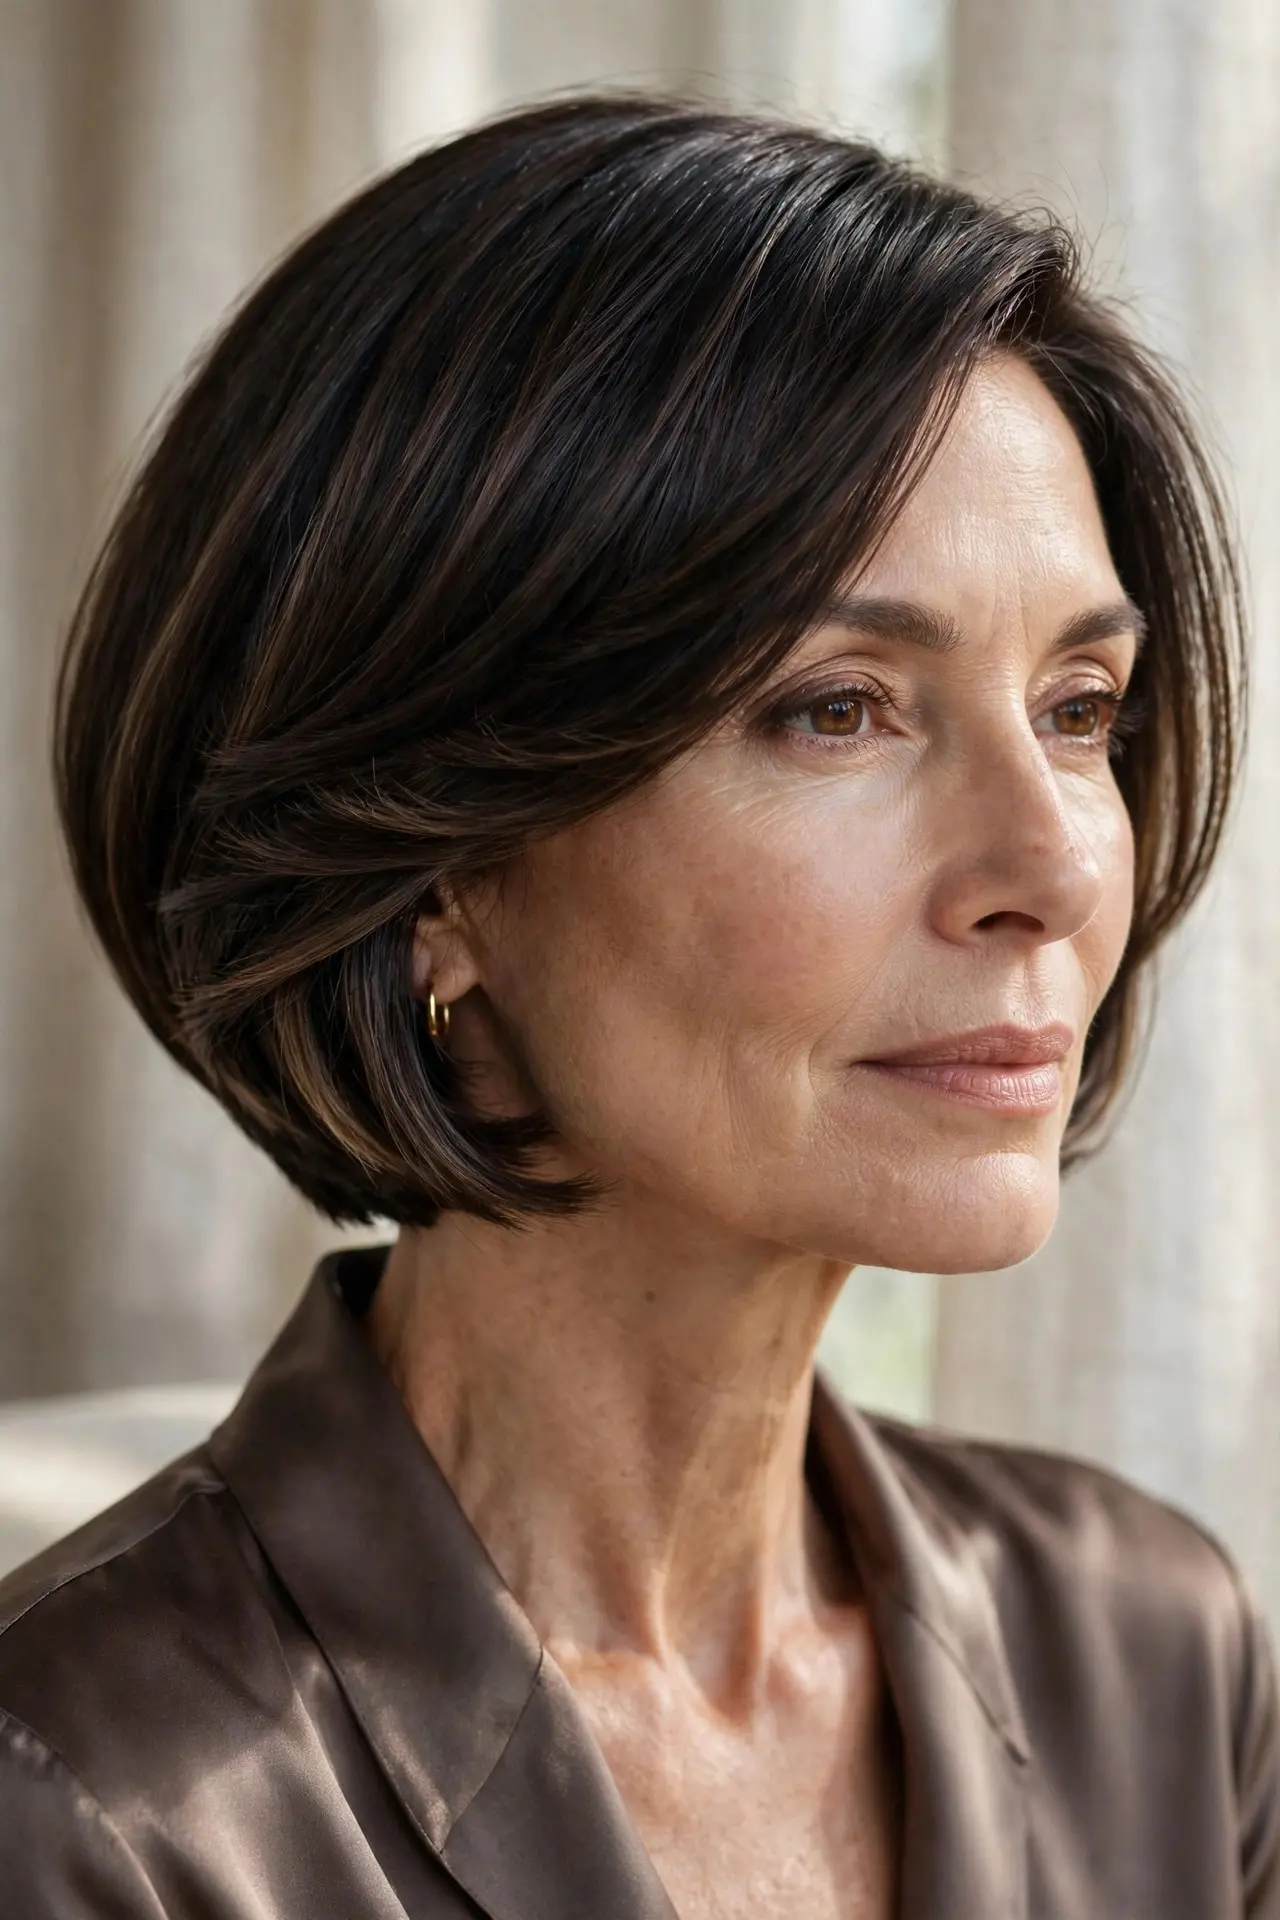
Hidden layers under a sleek surface — all the structure, none of the visible texture. The sleek finish looks one-length, but the interior layering creates movement you feel rather than see. The secret-weapon bob.
Best for: polished looks that still need to move.
Styling tip: ask for “interior layers with a sleek finish.”
Avoid: texturizing the surface — the sleekness is the disguise.
Try this: flat-iron the canopy for maximum sleek contrast.
21. ☁️ The Pillow-Soft Bob
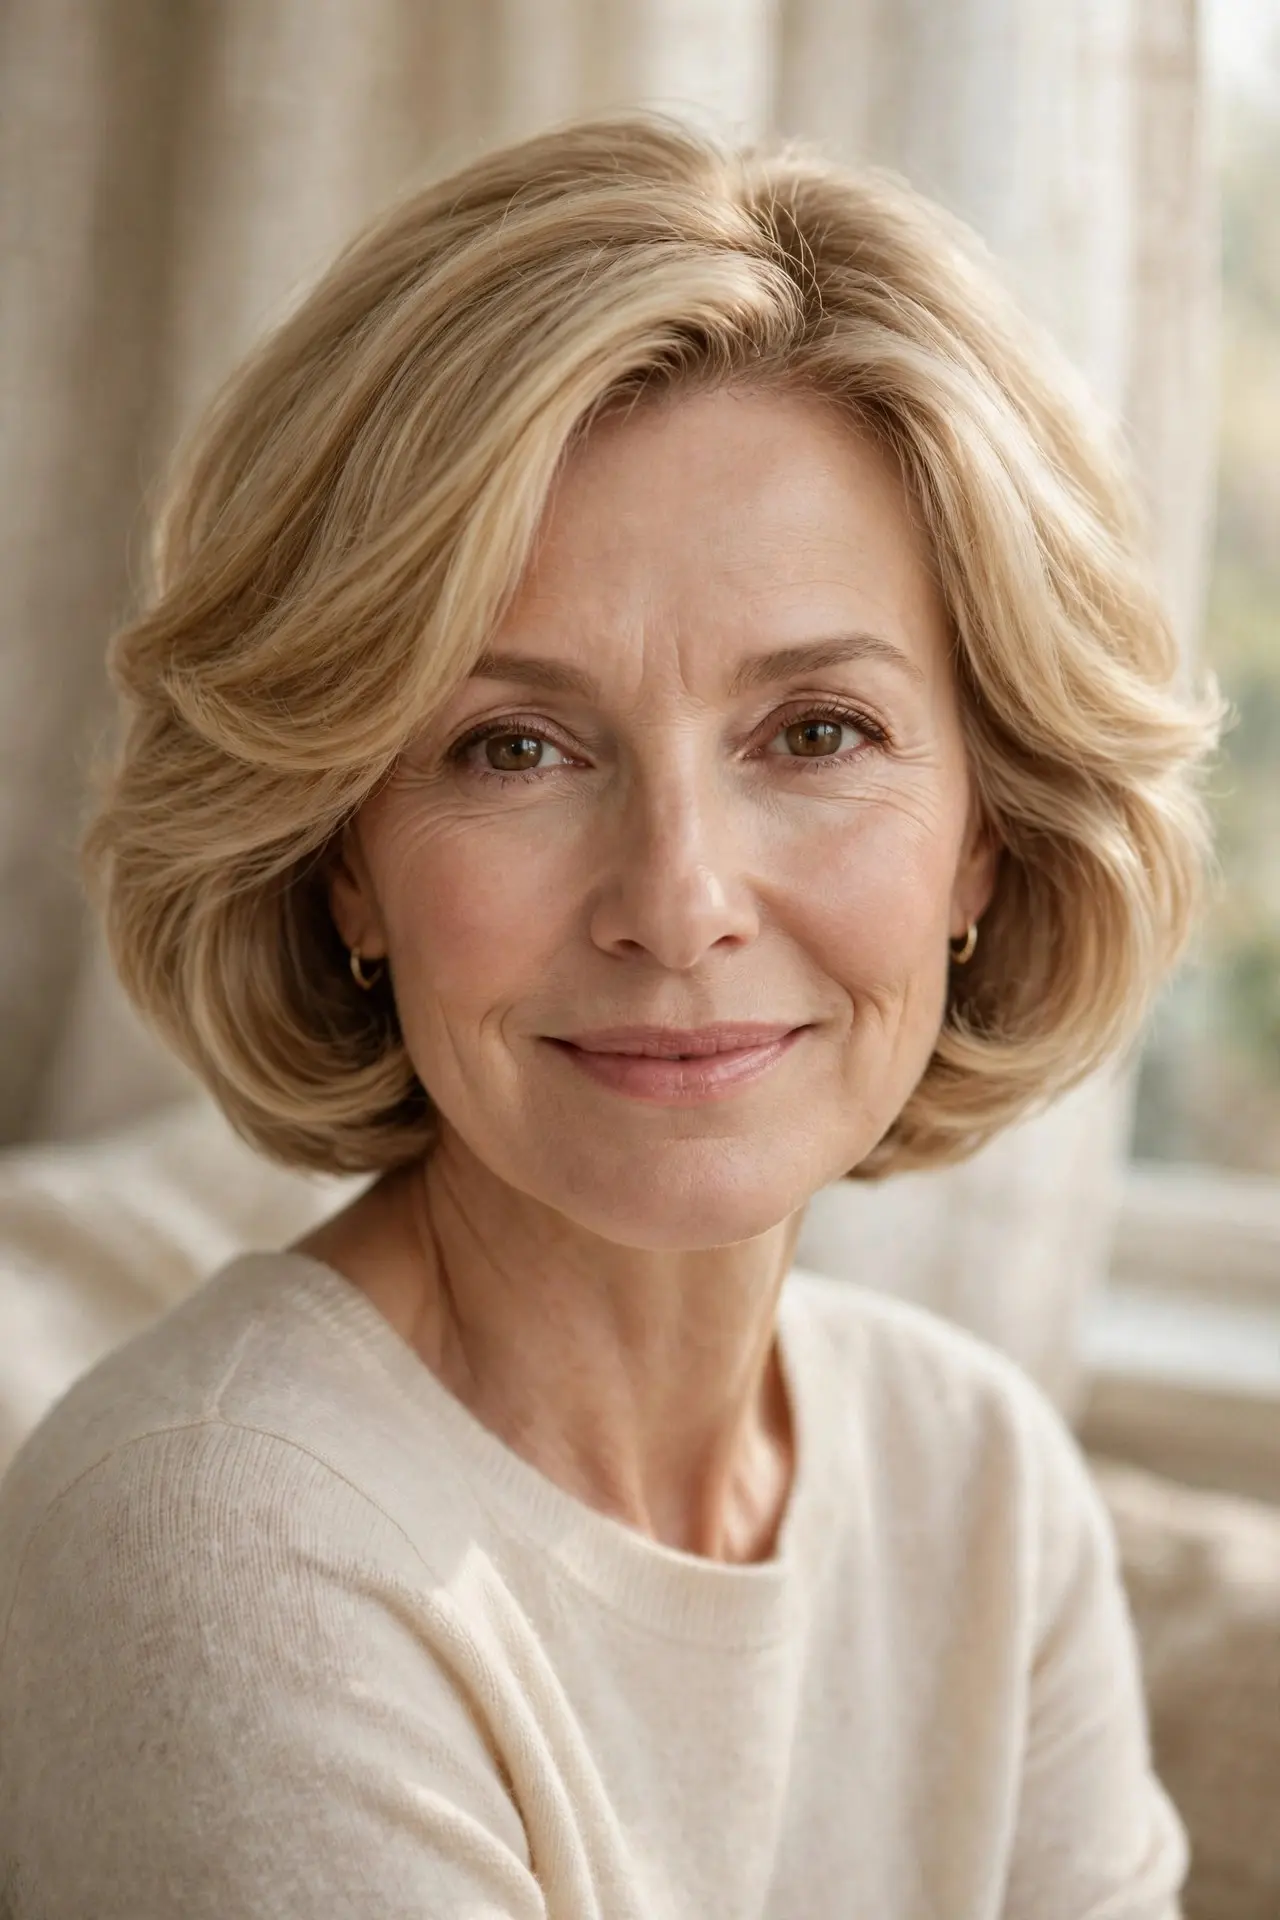
Layers so soft they feel like a pillow around the face — cushiony, gentle, and comforting. The softness flatters every feature while the layering keeps it from looking heavy. It is kindness in haircut form.
Best for: angular faces and anyone craving softness.
Styling tip: large round brush, rolling everything inward for the pillow shape.
Avoid: sharp or piecey texture — pillow-soft means seamless.
Try this: a side part keeps the softness from looking too round.
Color makes layers visible — even the best layering disappears in flat, single-process color. If you want your layers to show, ask for dimensional color: face-framing highlights, balayage ribbons, or even just a gloss with depth. The layering builds the shape; the color builds the spotlight.
22. 🎭 The Two-Texture Bob
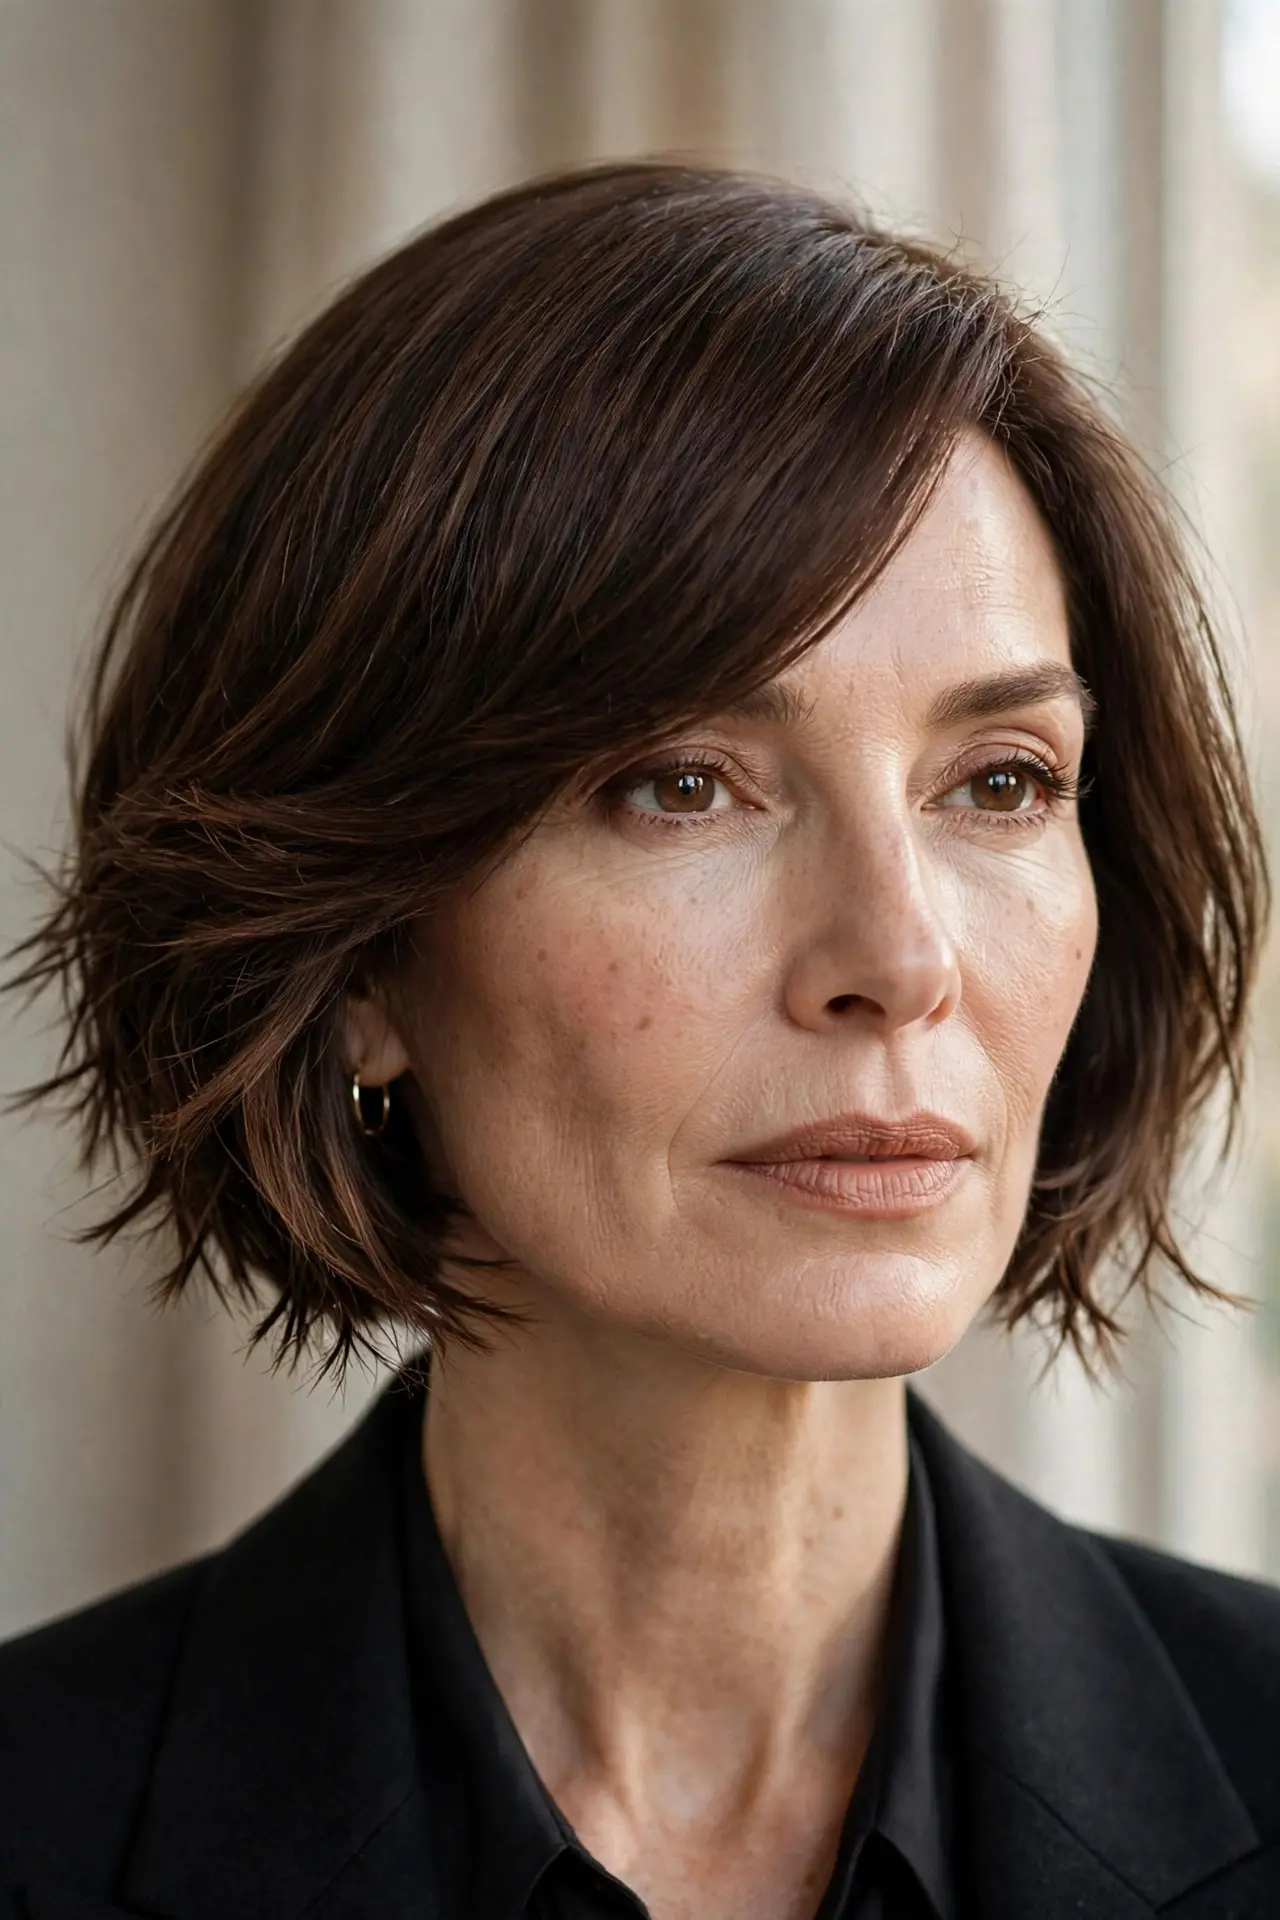
Smooth on top, textured at the ends — two finishes in one haircut. The contrast is striking: polished canopy over piecey, separated tips. It is the most fashion-forward layering here, with built-in visual interest.
Best for: fashion-forward women who like contrast.
Styling tip: smooth the top with a flat iron, then piece the ends with cream.
Avoid: blending the two textures together — the contrast is the design.
Try this: tuck one side to show off the smooth top.
23. 💨 The Airy-End Bob
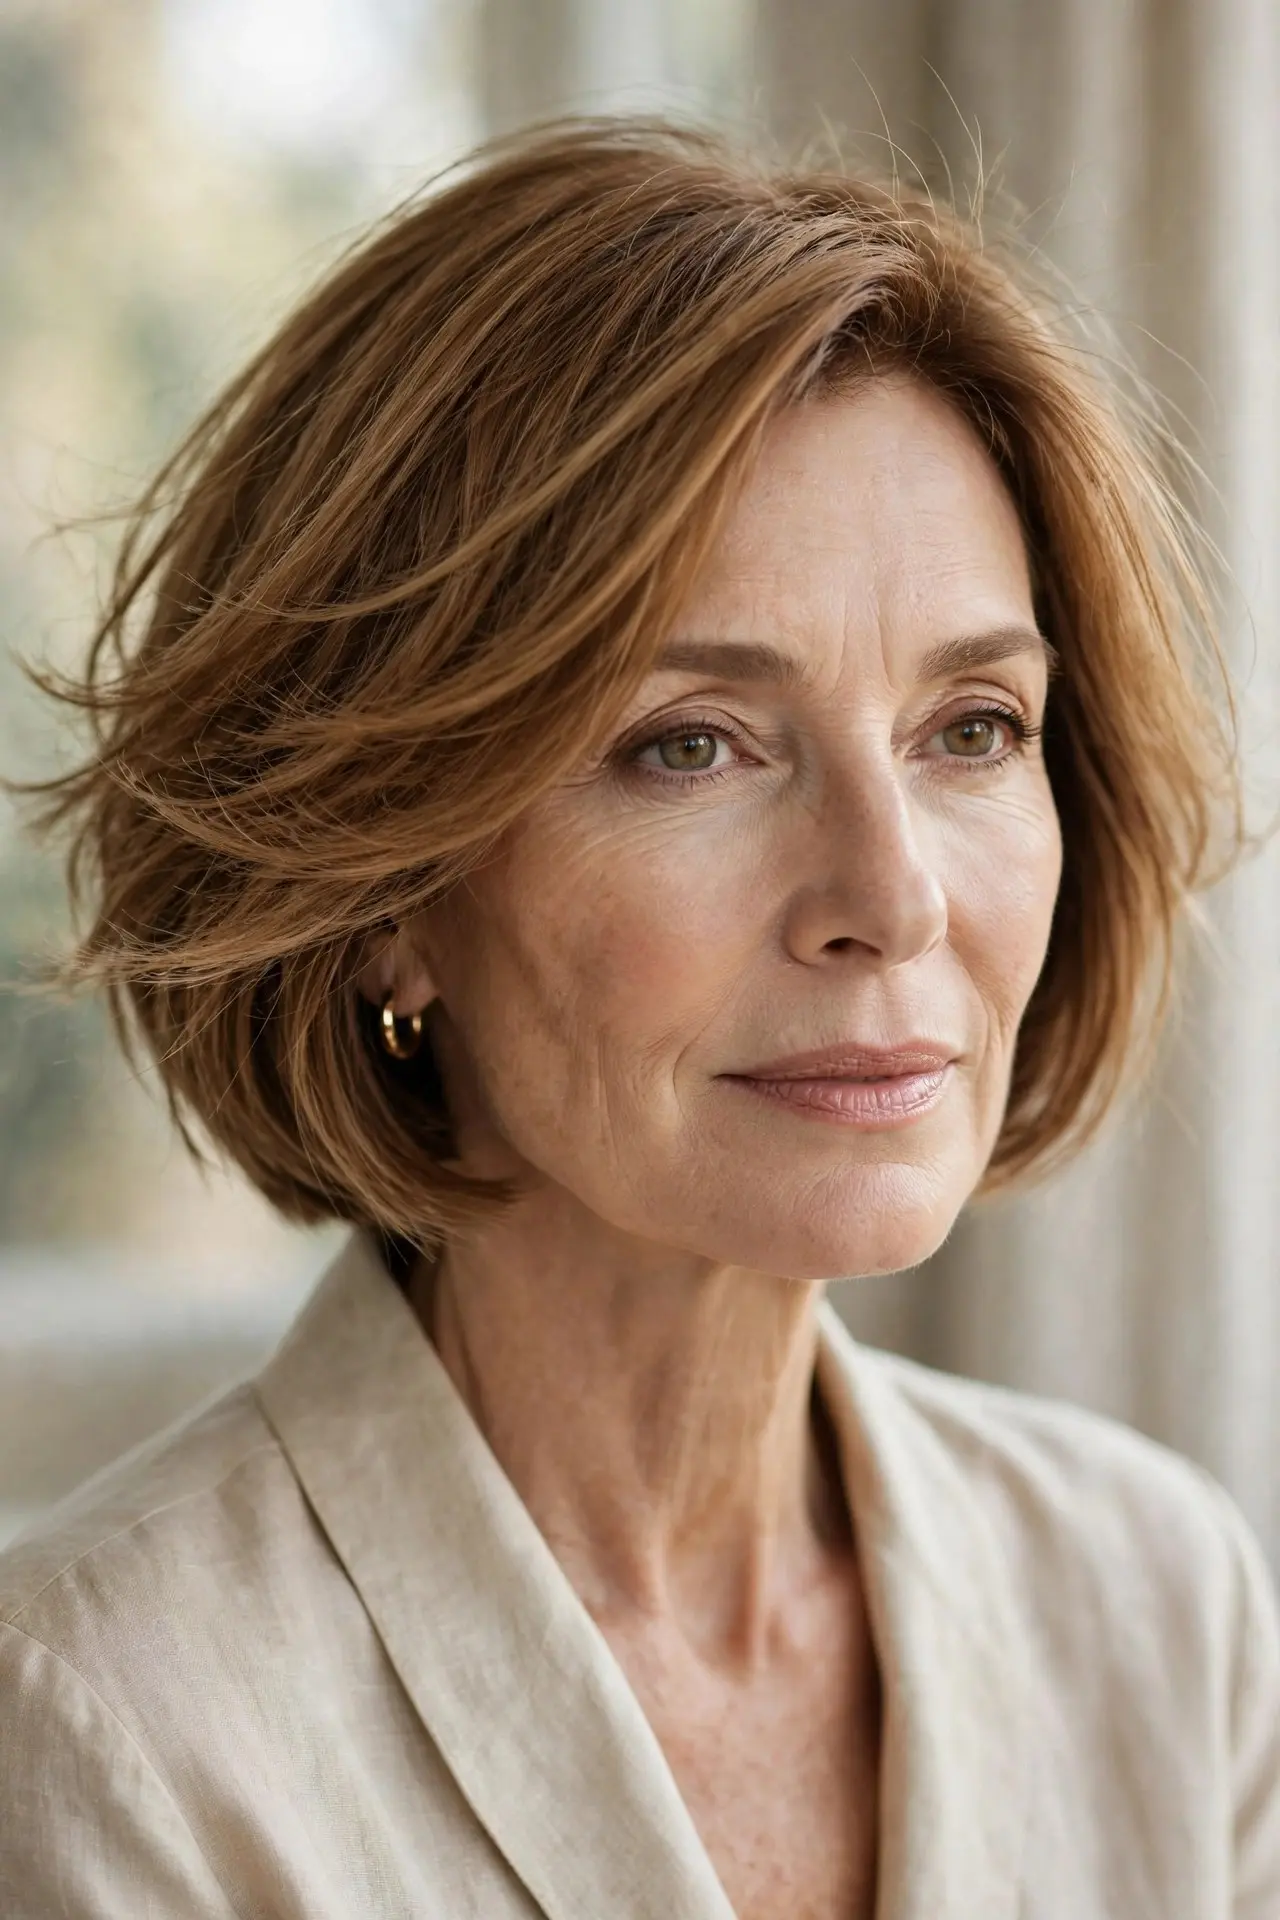
Feather-light ends over a solid mid-length — airiness exactly where it flatters most. The airy tips keep the bob from looking heavy while the base stays full. It is weightlessness, strategically placed.
Best for: thick ends that need lightening without thinning.
Styling tip: point-cutting or razor work creates the airy finish.
Avoid: airy-ing the crown too — the lift belongs at the ends here.
Try this: a light texture spray emphasizes the airy separation.
24. ✨ The Effortless-Layer Bob
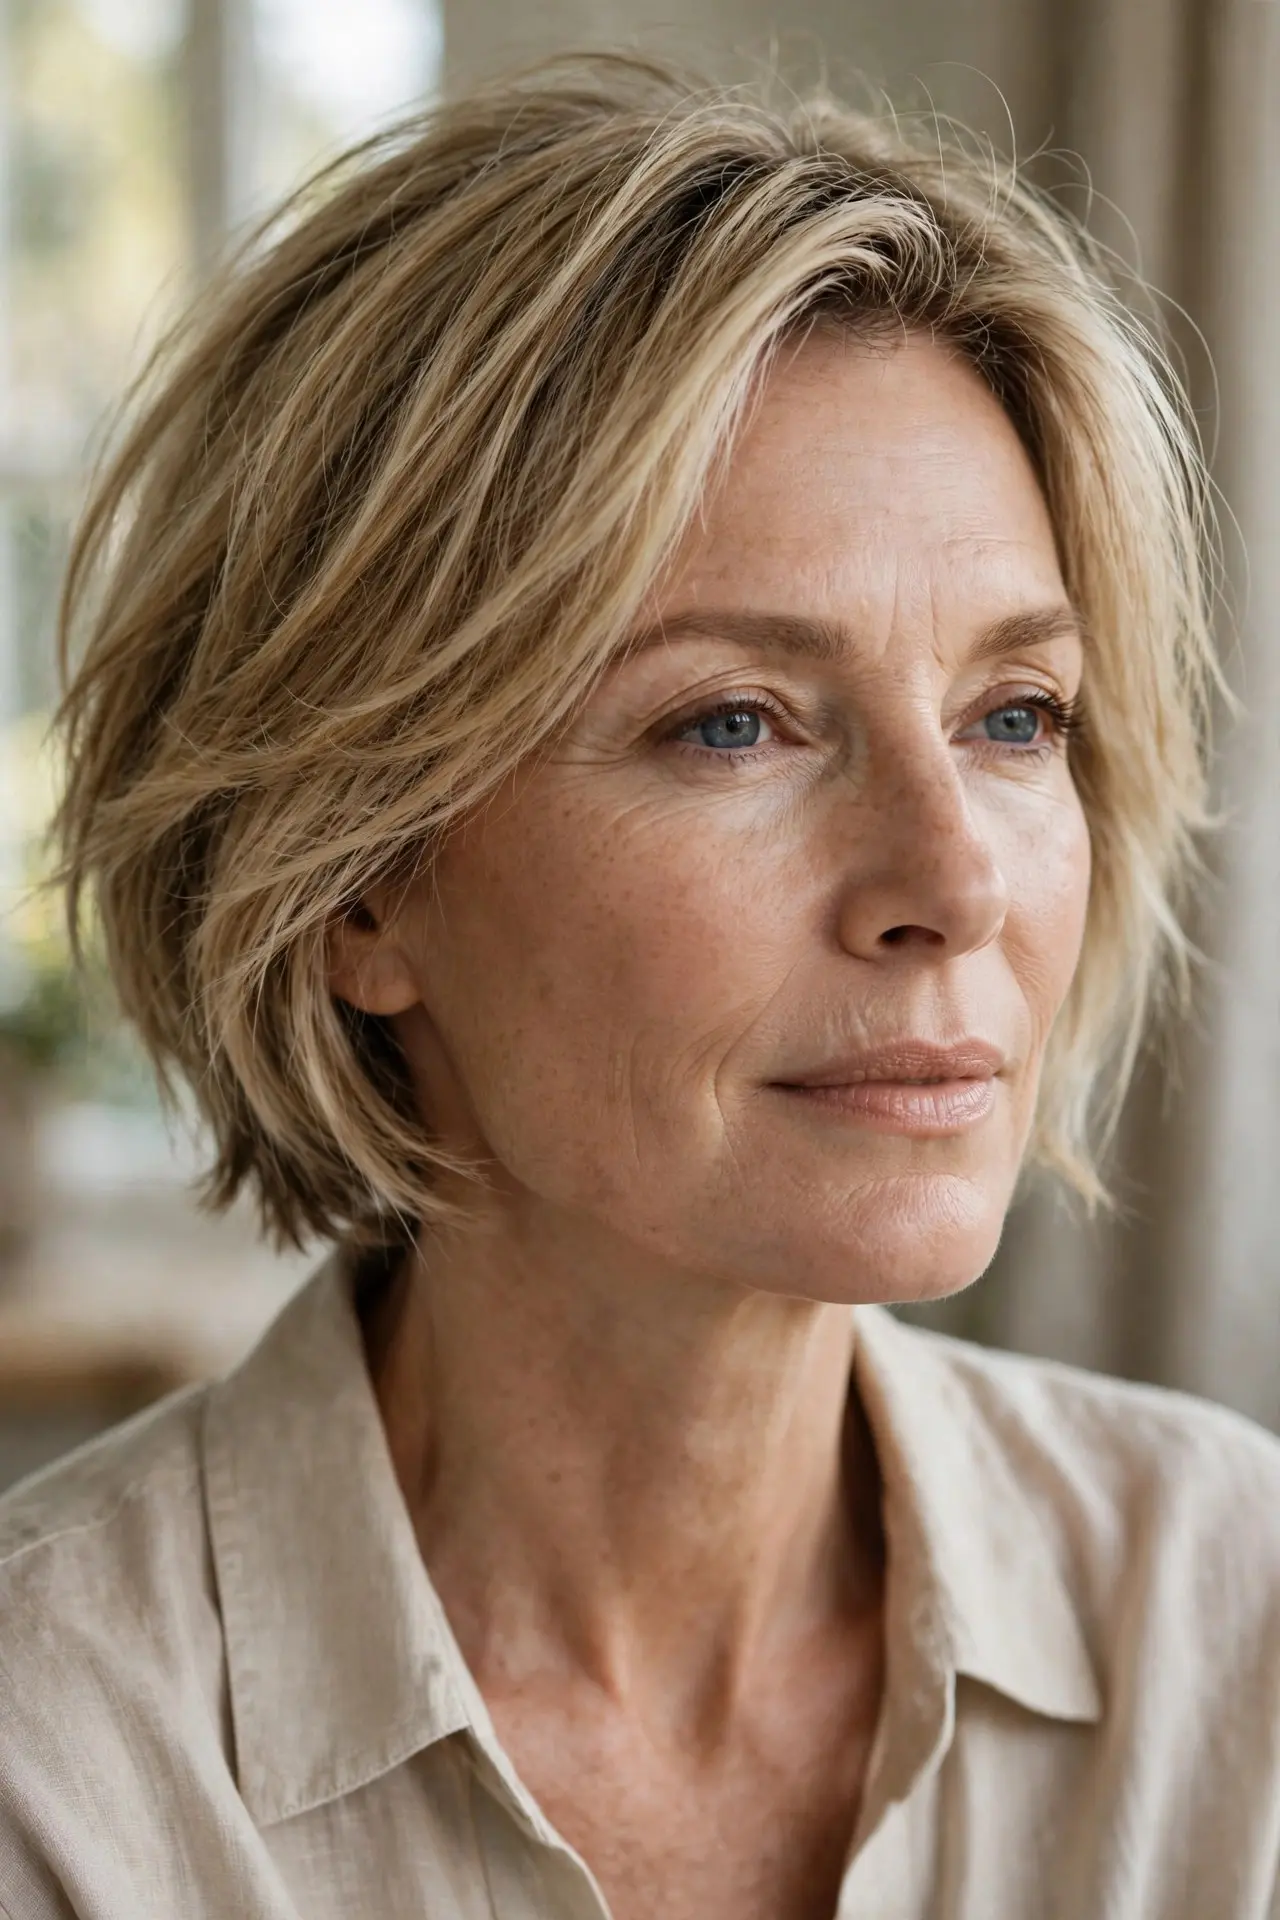
The layers do everything — wash, rough-dry, and the cut falls into place. Designed for real life, this bob asks nothing of you and gives everything. It is the most honest layering on this list: cut well, live freely.
Best for: the lowest-maintenance layered life.
Styling tip: rough-dry with fingers; a dime of cream on the ends is the whole routine.
Avoid: precision styling — effortless means forgiving.
Try this: second-day hair is often the best day — embrace it.
❓ Short Layered Bob FAQs
Where should layers start on a short layered bob?
It depends on the effect you want: cheekbone-grazing layers open up and lift the face, jaw-length layers add swing and movement, and crown layers create volume. Tell your stylist the starting point you want rather than just asking for “layers” — the placement matters more than the quantity.
Are layered bobs good for thin hair?
Yes, when done strategically. The key is keeping the bottom edge fairly solid while placing layers where they create lift — at the crown and around the face. The Wispy-End Bob and Sleek-Layer Bob above are built exactly for this. Avoid heavy thinning through the ends, which is what makes thin hair look thinner.
What’s the difference between a layered bob and a shaggy bob?
A layered bob uses structured, deliberate layering for shape and movement, while a shaggy bob leans into broken-up, undone texture. Think of it as tailored versus relaxed: the layered bob is the blazer, the shaggy bob is the leather jacket. Both are bobs with layers — the difference is attitude and finish.
How do I make my layers more visible?
Color is the answer. Dimensional color — highlights, balayage, or even a gloss with depth — makes every layer catch light differently. The Honey-Layer, Icy-Layer, and Auburn-Layer bobs above demonstrate this. Without dimension, even perfect layering can disappear into flat color.
How often should I trim a short layered bob?
Every 6 to 8 weeks keeps the layering crisp and the shape intentional. Precision techniques like stacking want the 6-week schedule; forgiving cuts like the Effortless-Layer Bob can stretch to 10. Layers grow out faster than one-length cuts, so don’t skip trims if you love the shape.
📖 Keep Reading
- 15 Bob Hairstyles for Fine Hair — more layer-smart bobs for fine strands.
- 22 Pixie Bob Haircut Ideas — shorter still, with the same layering craft.
- 31 Hairstyles for Short Hair — styling ideas for every short layered cut.
✅ Your Layered Bob Checklist
- ☐ Decide where your layers should START: cheekbone, jaw, or crown
- ☐ Choose your layering technique: feathered, razor, shattered, beveled, or stacked
- ☐ Discuss density: fine hair needs solid edges; thick hair needs internal weight removal
- ☐ Plan dimensional color so your layers actually show
- ☐ Book trims every 6–8 weeks to keep the layering crisp
- ☐ Save photos showing the exact layer placement you want
Layers are a language — and now you speak it. You know where they should begin, how they should be cut, and what each technique does for your hair. The layered bob isn’t about having more hair; it’s about making the hair you have do more. Pick the layer story that felt like yours, save the photo, and walk into that appointment like someone who knows exactly what she’s asking for. Because now, you do.
Discover more from Fashinate Style
Subscribe to get the latest posts sent to your email.