
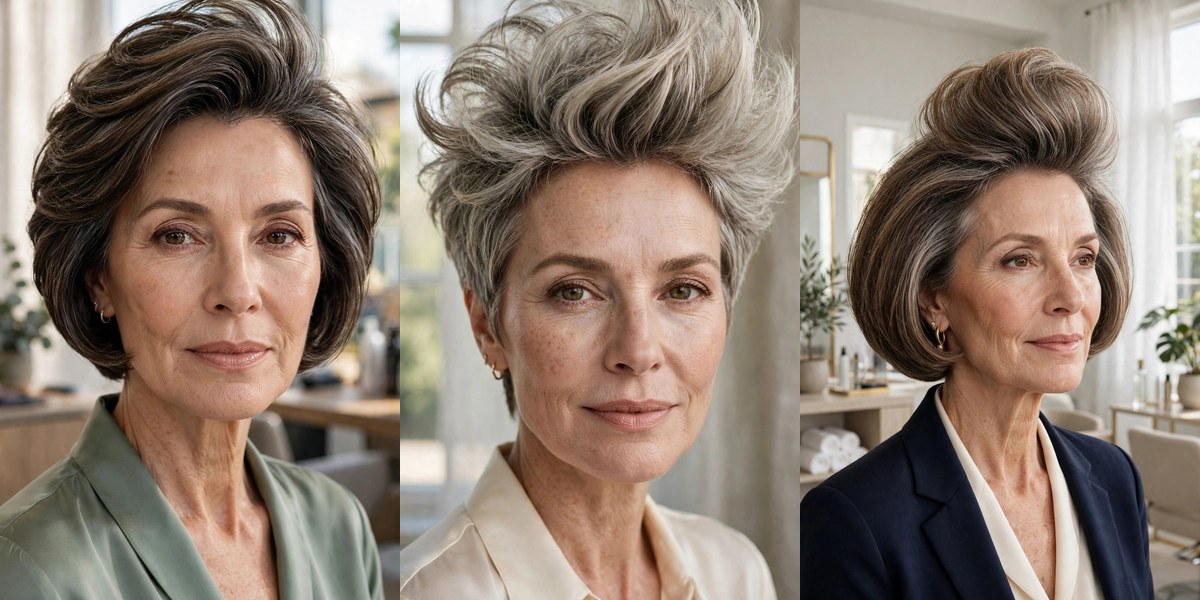
Here’s the myth that keeps flat hair flat: that volume comes from products. The beauty aisle promises lift in a bottle, and for about twenty minutes after styling, it almost delivers. Then gravity collects its debt, and by lunch your hair is sitting exactly where it started.
The truth is simpler — and cheaper. Flat hair is almost always a cut problem, not a product problem. When fine strands fall in one unbroken sheet, they lie flat; but stack the back, lift the crown, or break up the surface, and the cut does the work before you ever touch a dryer. These 21 short haircuts are engineered for exactly that: built-in lift, honest texture, and shapes that refuse to collapse by midday.
1. 🌟 Root-Lift Stacked Back Bob

Flat hair usually collapses first at the back, where there’s no fringe or part to hide it. A stacked bob answers directly: short graduated layers piled at the nape physically support the hair above them, building a rounded, lifted silhouette into the cut itself — not sprayed on in the morning and gone by lunch.
Try this: Dry the back first, lifting small sections upward with a round brush, then smooth the longer front over the top. A light root spray only at the back keeps it airy.
Ask your stylist: Gentle stacking, not a dramatic shelf — too steep a graduation can expose the scalp on very fine hair.
Avoid: Drying the back flat downward; you’ll press the stack into exactly the sheet you’re escaping.
2. 💨 Upside-Down Blowout Pixie

This isn’t a cut so much as a cut-plus-technique: a textured pixie with enough crown length to flip upside down and blast dry. Drying against gravity trains the roots to stand up instead of lying flat, and because the cut is short, the lift actually holds. Two minutes, no round brush required.
Try this: Flip your head over, dry the crown on medium heat until 90% dry, then flip upright and pinch the ends into place.
Make it yours: A dab of volumizing mousse at the roots before flipping doubles the staying power.
Avoid: Heavy pomades — they glue the lifted pieces back down within the hour.
3. ⚡ Double-Part Zigzag Bob

A straight part is flat hair’s enemy — it lets everything fall in one tidy, lifeless sheet. A zigzag part breaks that sheet into sections that can’t lie flat against each other, creating instant texture and root lift with zero cutting involved. On a chin-length bob, the effect is immediate and a little bit chic.
Try this: Use the tail of a comb to zigzag your part while hair is damp, then dry as usual.
Avoid: Re-parting it straight out of habit mid-morning — the zigzag is doing the work.
Budget tip: This trick works on the cut you already have, before you book anything new.
4. ➡️ Brushed-Forward Crown Crop

When the crown goes flat, the answer can be direction, not length. Brushing the whole crown forward piles hair over the forehead and front, covering a widening part and creating fullness exactly where the eye expects it. The close sides keep the silhouette tidy while the top does all the talking.
Try this: Dry the crown forward first with a vent brush, then let it fall — lift without any teasing.
Ask your stylist: Enough length on top to brush forward; too short and there’s nothing to pile.
Avoid: Brushing it back flat — that recreates the exact problem this cut solves.
5. ✨ Undercut Pixie with Hidden Density
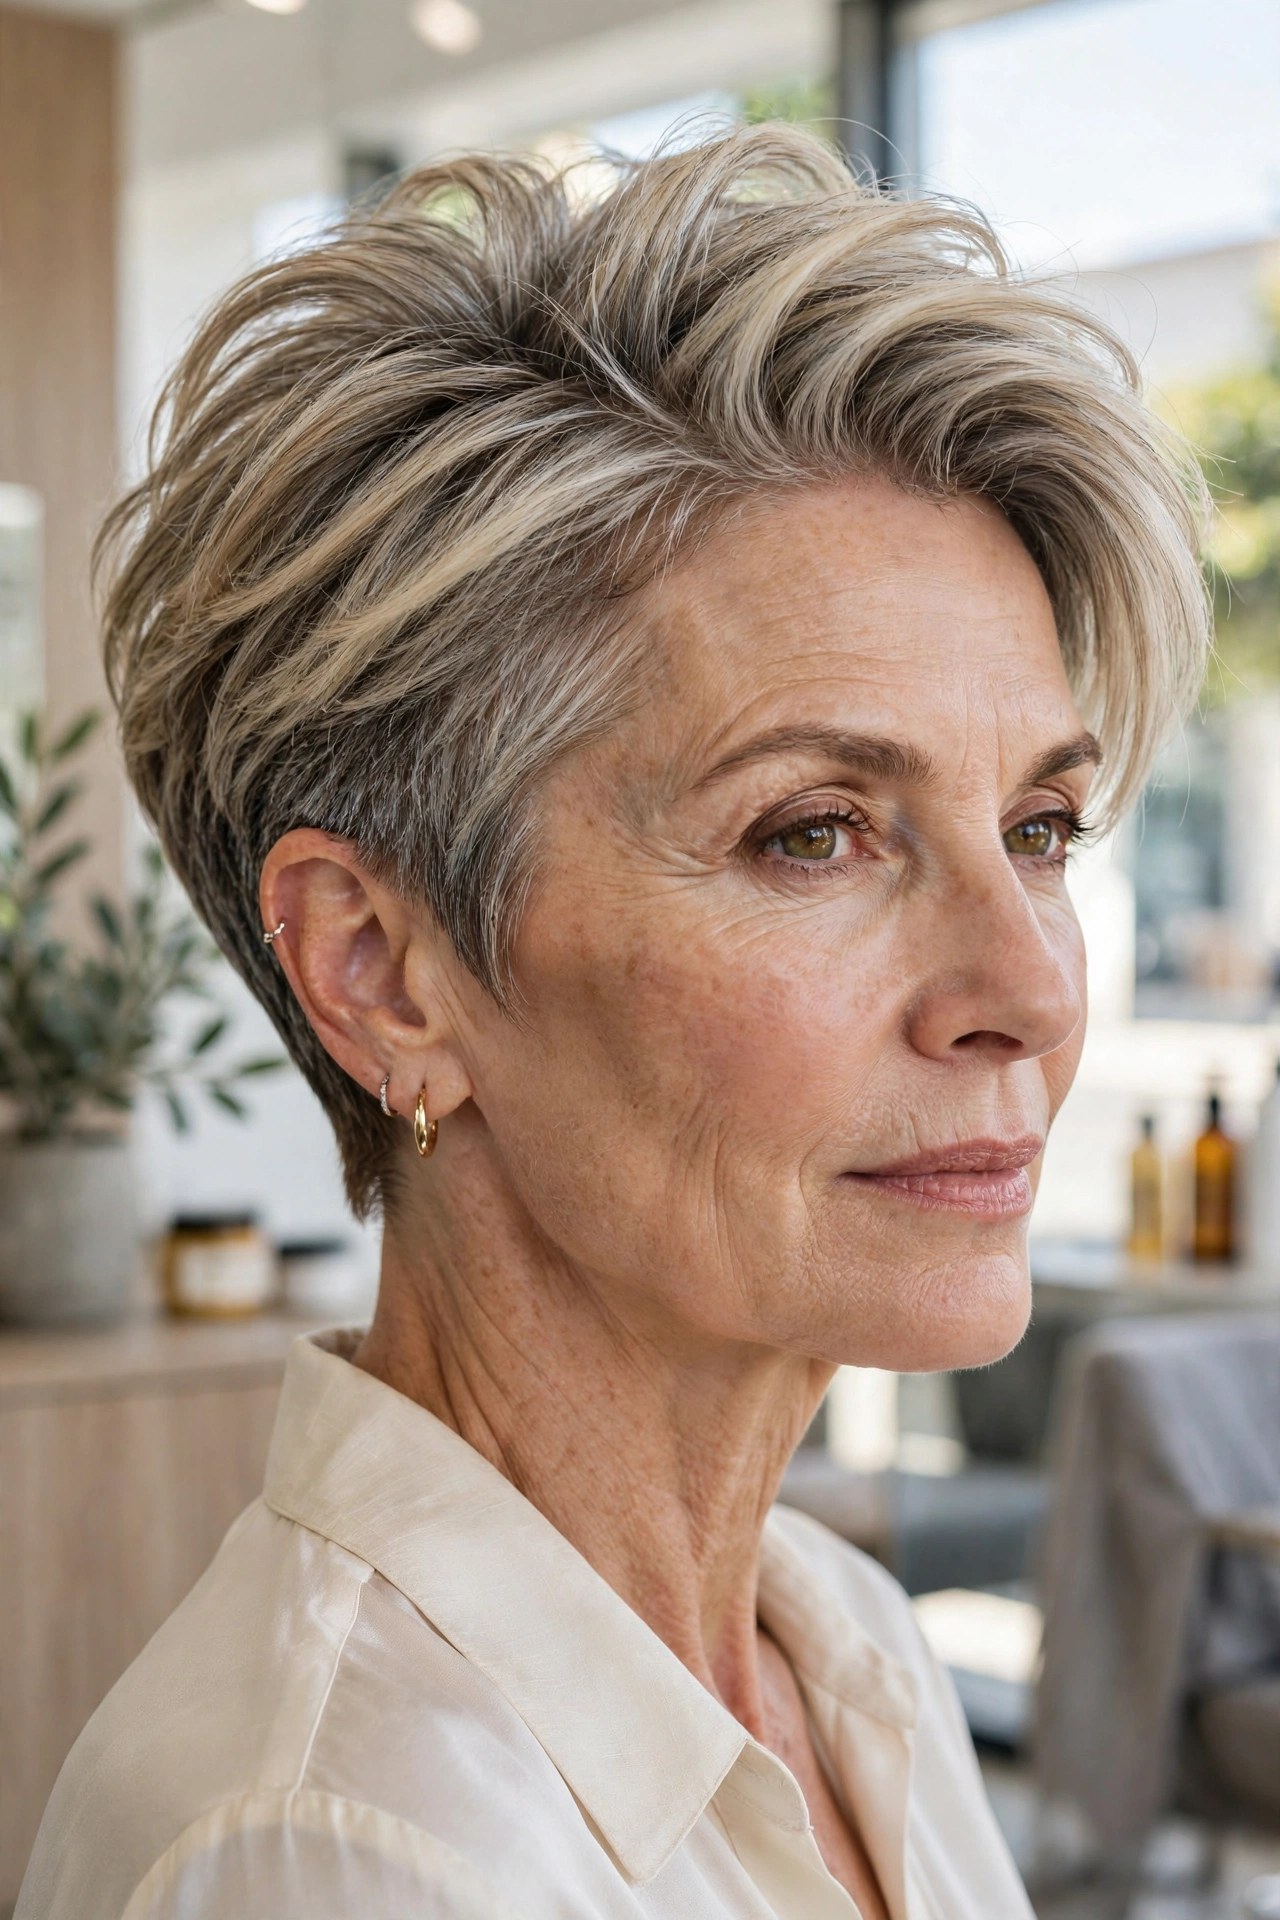
Here’s the counterintuitive move: remove hair underneath to make the top look thicker. A discreet undercut at the nape and sides takes away bulk where it doesn’t matter, so the longer top has nothing weighing it down and nowhere to collapse to. From the outside it reads as a full, dense pixie.
Try this: Style the top forward and slightly to the side; the contrast with the neat nape creates the illusion.
Make it yours: Keep the undercut subtle — this is about lift, not an edgy statement.
Avoid: Growing the undercut out unevenly; a quick nape tidy every few weeks keeps the contrast working.
6. 🔄 Flipped-Up Nape Bob

Instead of fighting the nape flat, this bob flips it upward — ends kicked out and up at the back create a little shelf of volume right where flat hair usually dies. The front stays smooth and chin-length for polish, so the whole cut reads intentional from every angle.
Try this: Wrap the nape sections upward around a round brush, rolling outward as you dry.
Avoid: Tucking the nape under — that’s the flat-hair default this cut is designed to escape.
Budget tip: A medium round brush is the only tool this style needs.
7. 💫 Crown-Forward Fringe Bixie
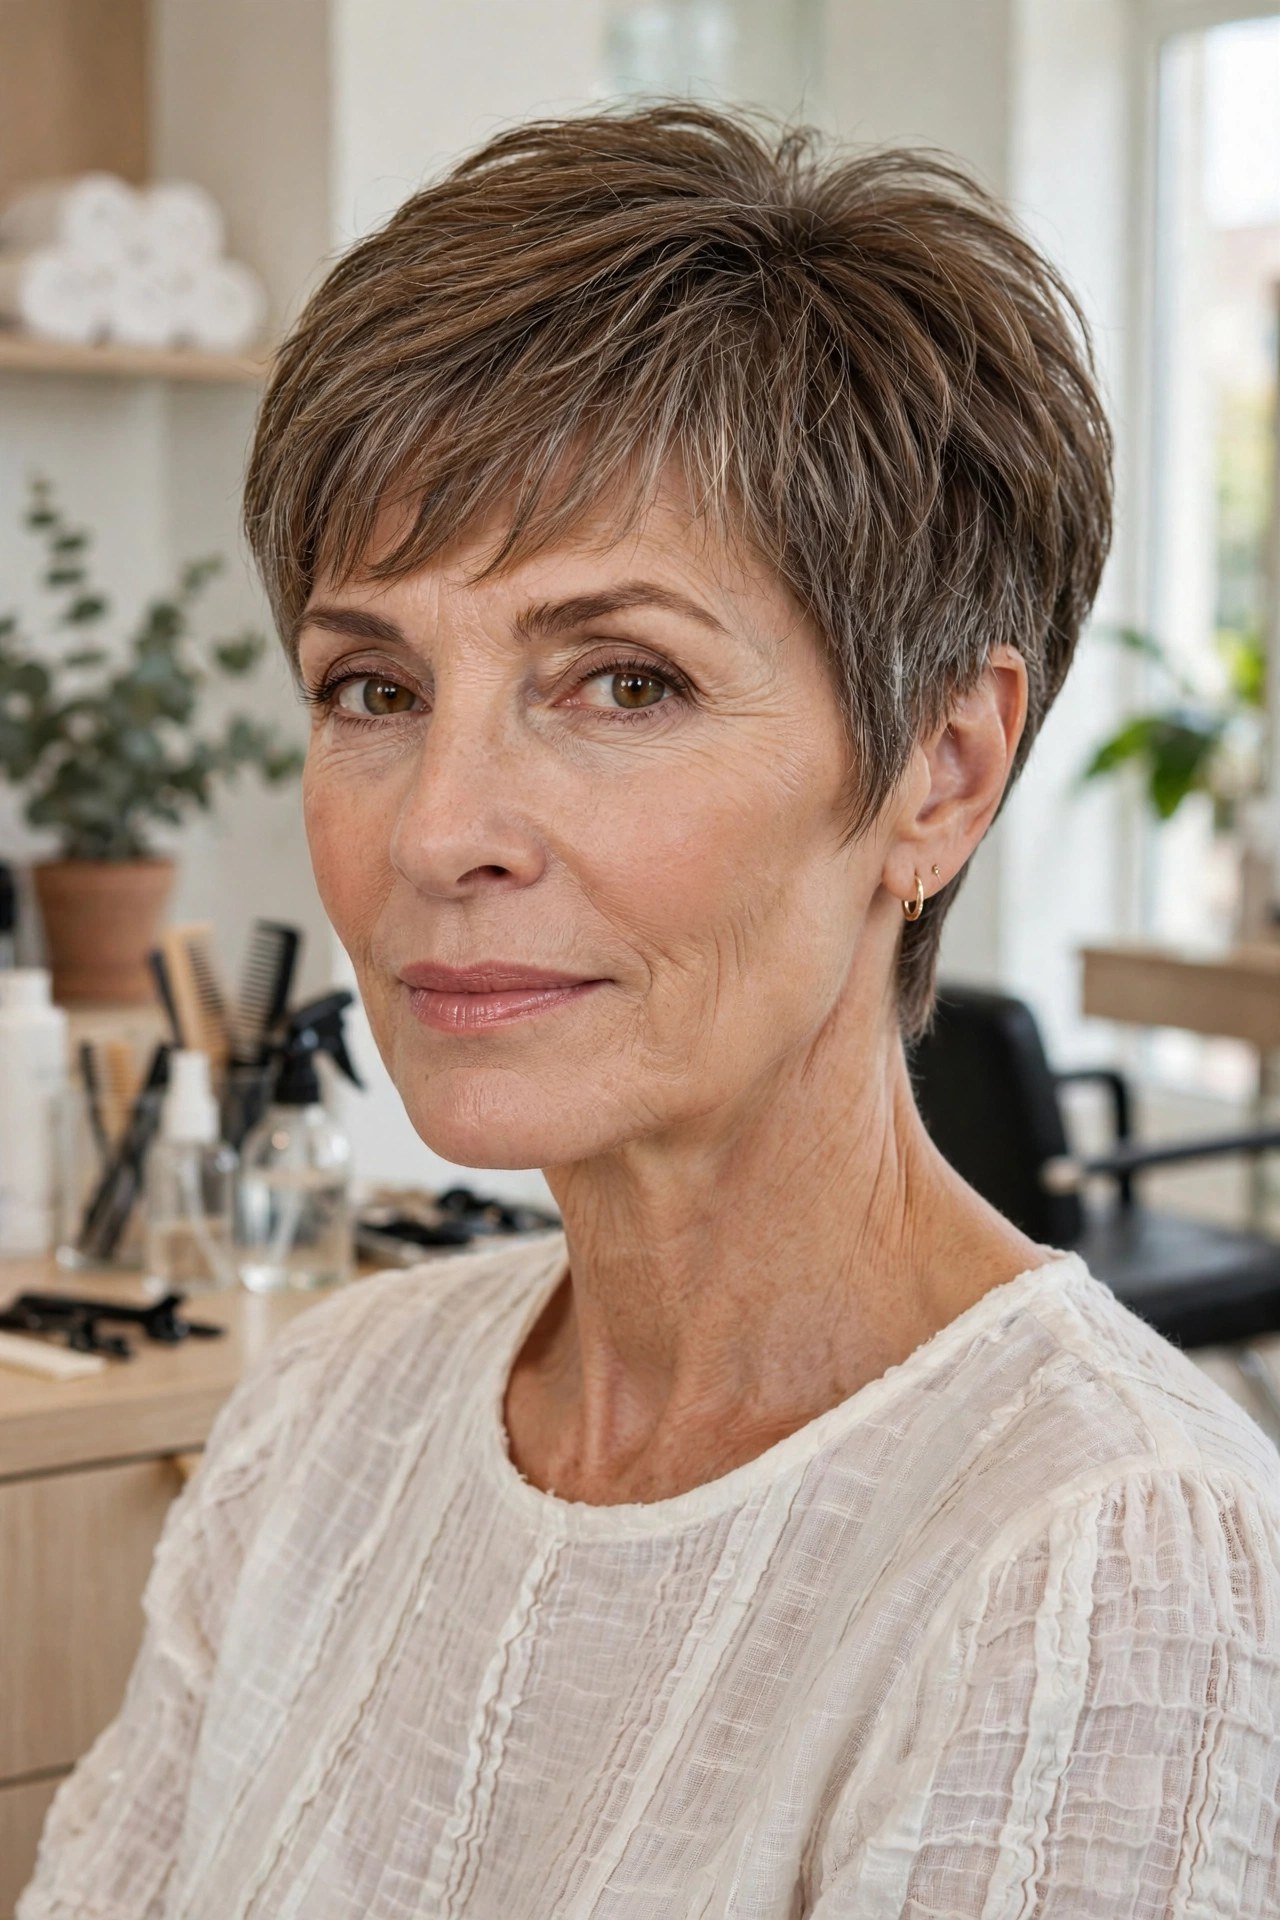
The bixie already lifts fine hair with its mixed lengths; pushing the fringe forward over the crown doubles the effect. Shorter pieces underneath prop up the longer ones on top, and the forward direction covers thin spots at the hairline. It looks soft, modern, and deliberately undone.
Try this: Scrunch a light foam through damp hair, dry with fingers while lifting at the roots, and stop while it still looks a touch imperfect.
Ask your stylist: Feathered, varied lengths through the top — uniformity is what makes flat hair look flat.
Avoid: Over-smoothing with a flat iron; you’ll press out the texture that makes it work.
8. 🌙 Scoop-Back Rounded Bob

Drying everything back and away from the face is a direction trick with real payoff: hair dried backward can’t fall forward flat, and the lifted front opens up the whole face. This rounded bob pairs that technique with a curved silhouette that holds width at the cheeks instead of hugging the head.
Try this: Dry in sections with a medium round brush, rolling away from your face, roots lifted first.
Make it yours: A flexible-hold spray — not a lacquer — keeps it moving naturally.
Avoid: Heavy creams near the roots; they’ll drag the scooped front straight back down.
9. 📐 Lifted Side-Sweep Wedge
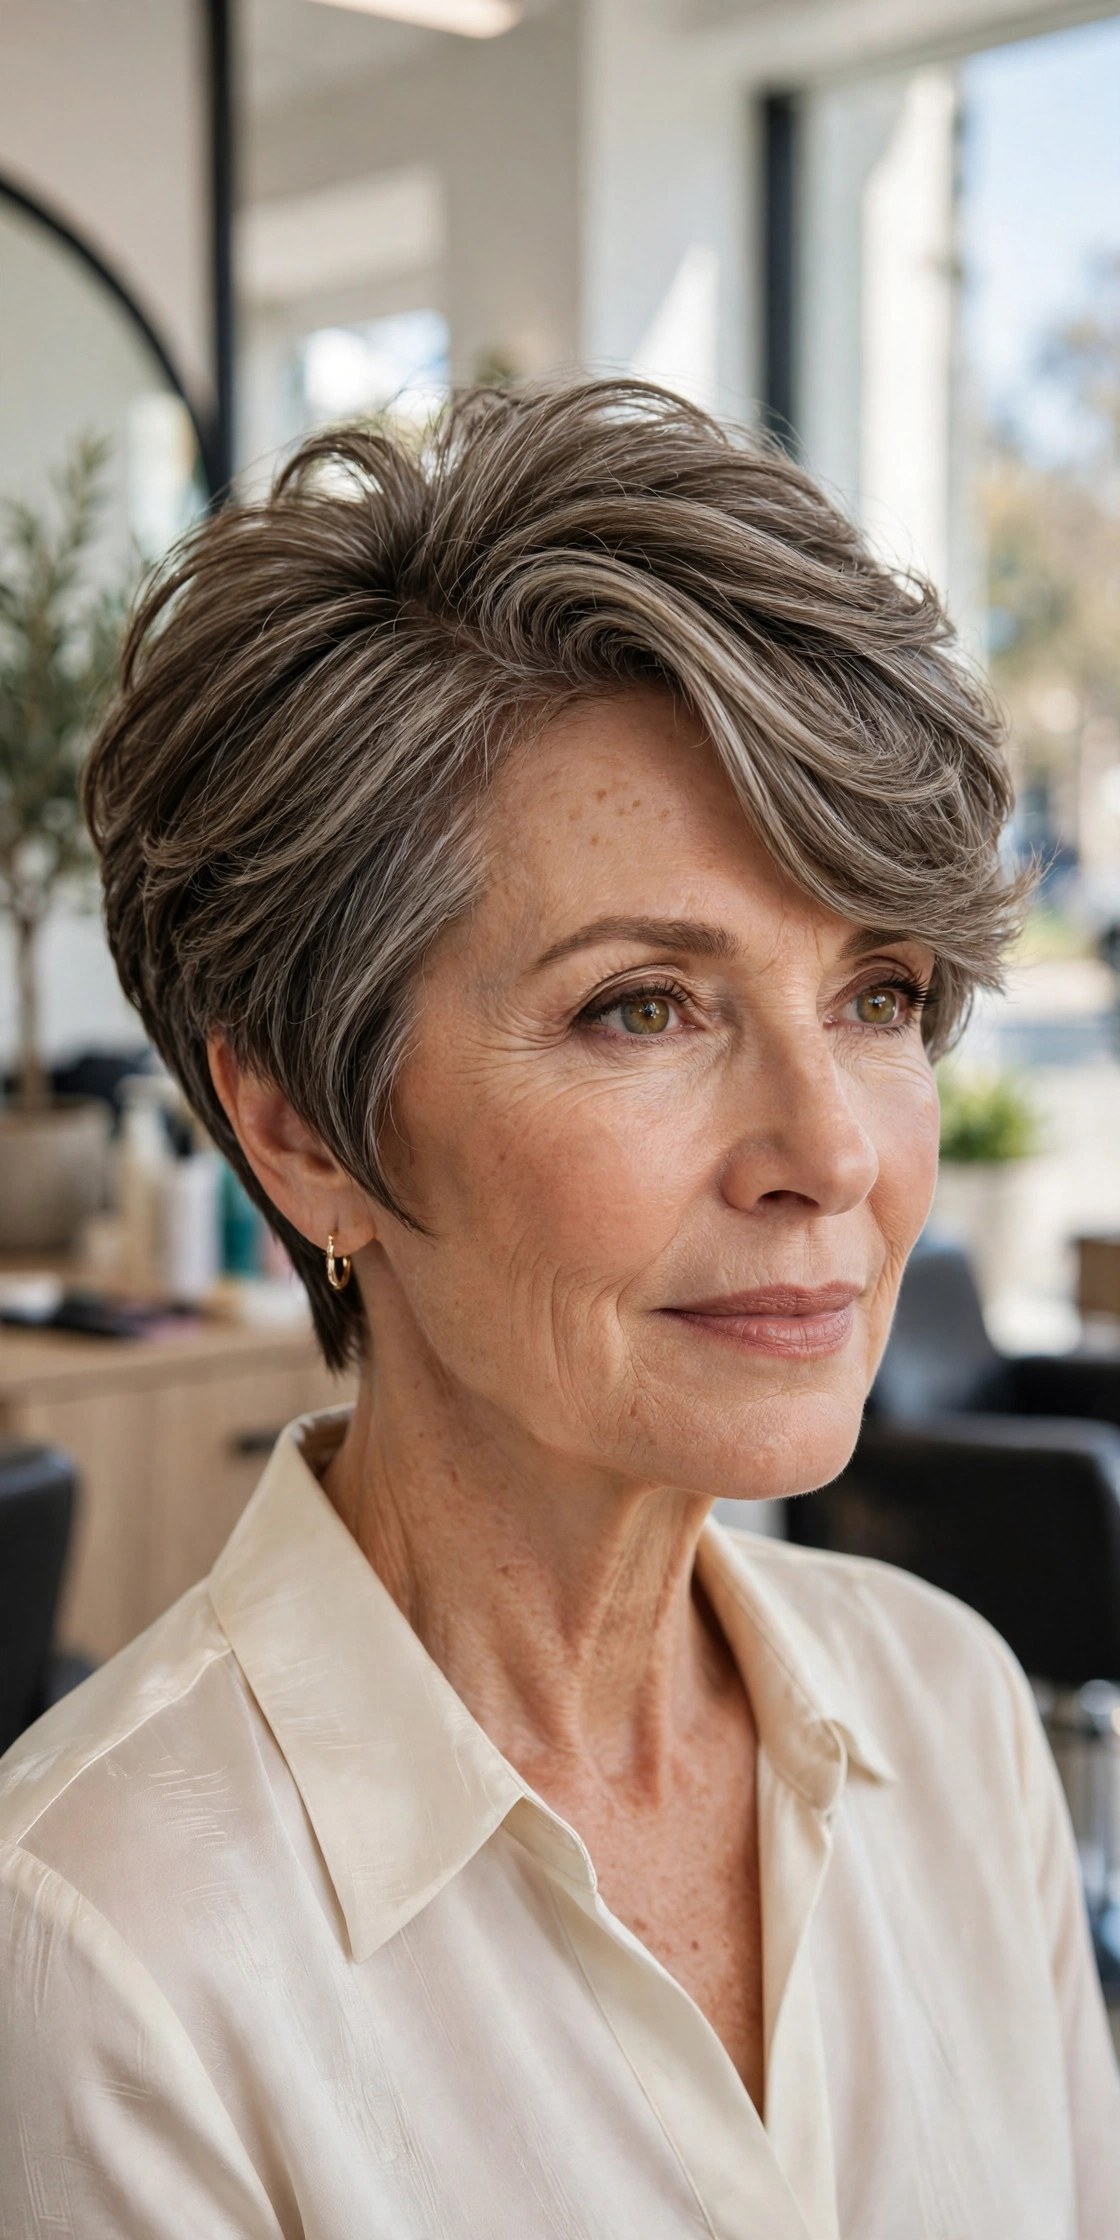
The wedge is geometry working in your favor: a tapered, stacked back that lengthens toward the front, building a firm triangle of volume exactly where flat hair needs it. The deep side sweep piles hair diagonally across the forehead for height no center part can match. It’s been a trusted answer for fine hair for decades because the lift is structural.
Try this: Dry the stacked back upward with a small brush so the layers support each other, then let the longer front fall naturally.
Ask your stylist: Someone confident with graduation — the angle has to be precise to sit smoothly.
Avoid: Skipping trims; the wedge reads best with a tidy-up every five to six weeks.
10. ✖️ Crisscross-Part Bob
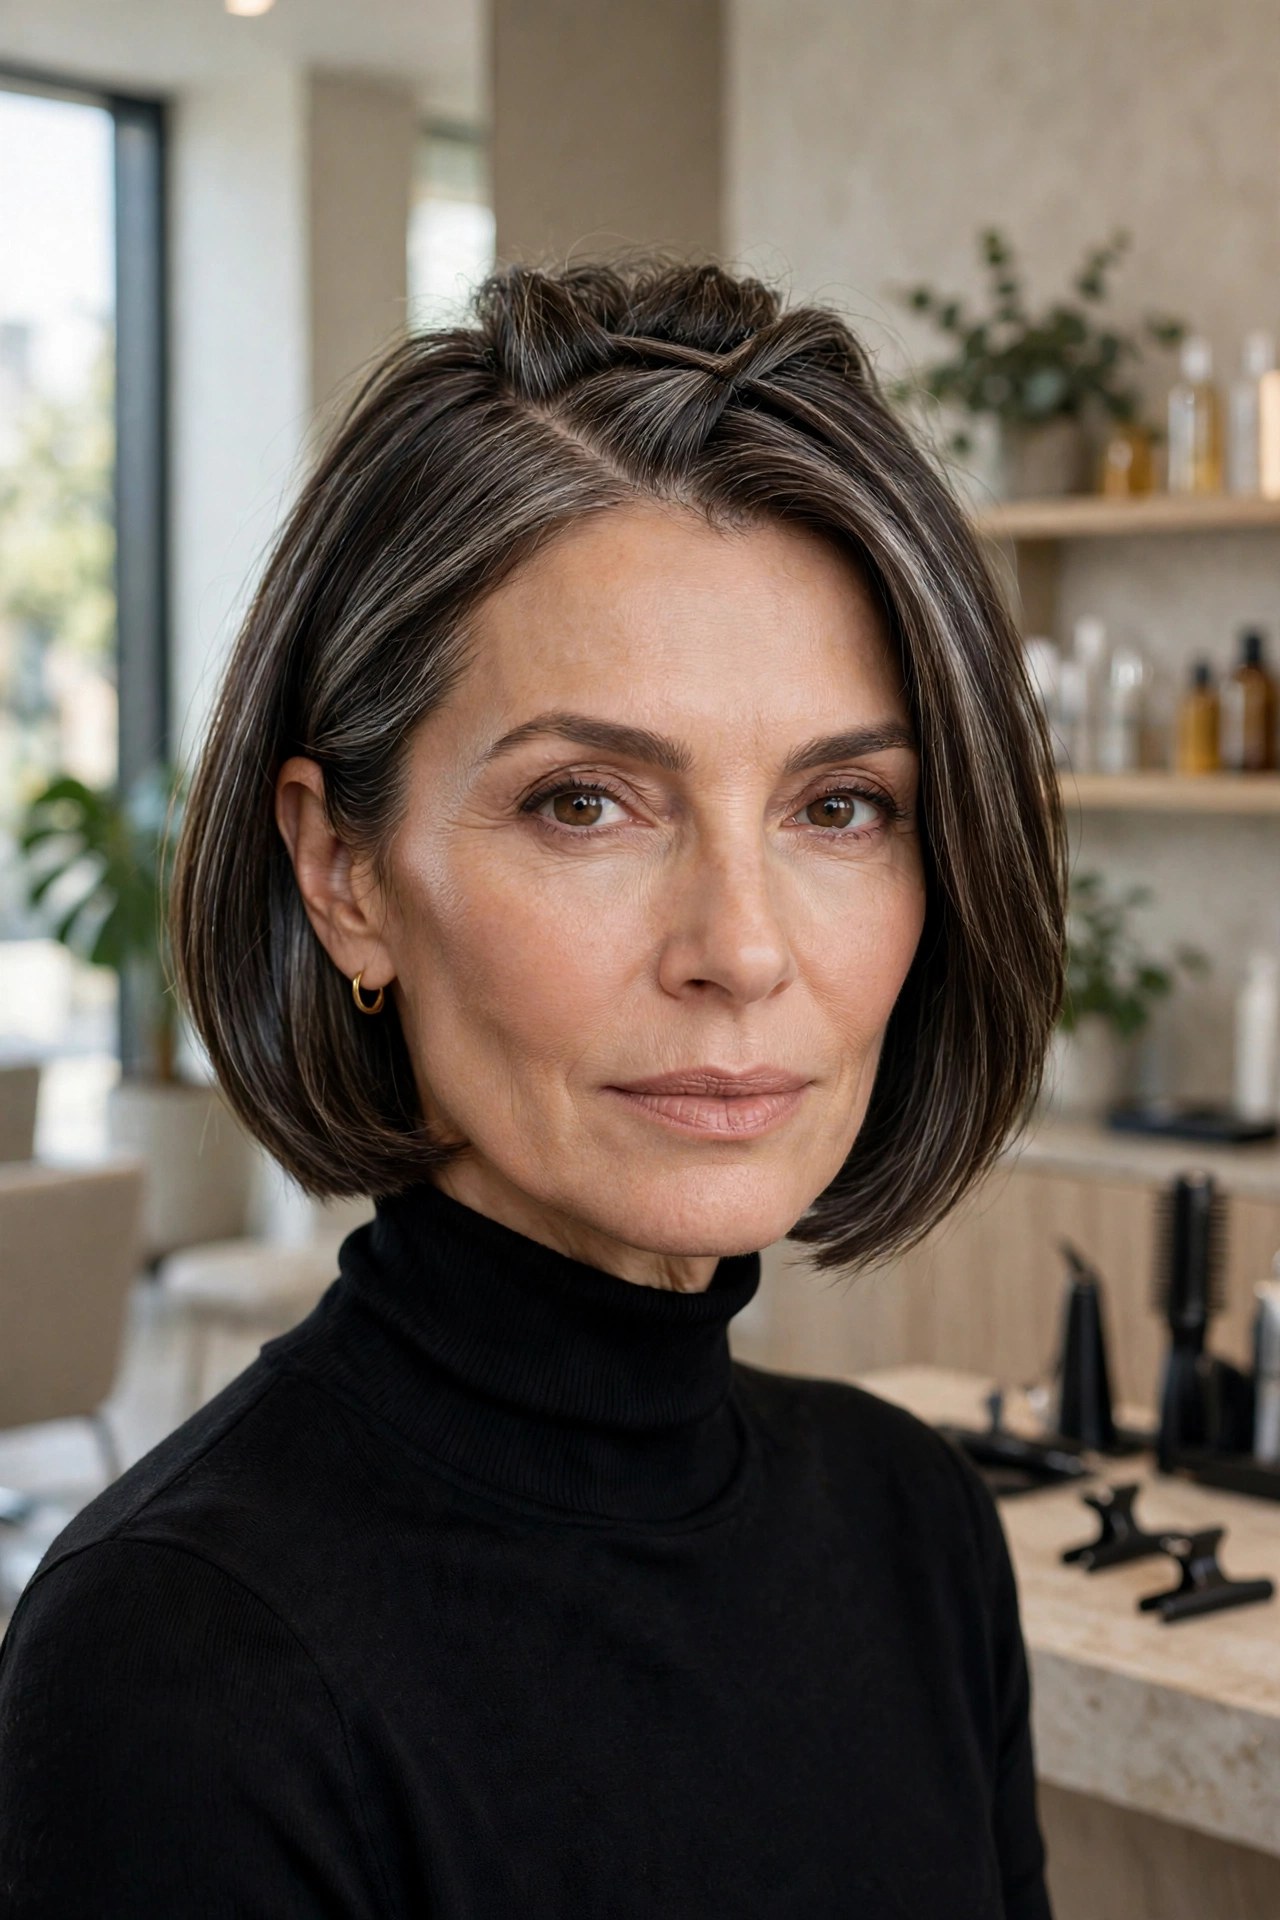
Take the zigzag idea further: two parts crossing near the crown create a lattice of lift at the very spot where flat hair gives up first. The crossed sections prop each other up like tiny scaffolding. On a sleek chin bob, it adds architectural interest without a single extra layer.
Try this: Part damp hair on one side, then cross a small front section over to the other side and clip while drying.
Avoid: Making the cross too deep — a shallow, natural-looking cross is the goal.
Budget tip: Another zero-cost trick that works with the haircut you already own.
With flat hair, the order you dry matters more than the products you use. Always dry the roots first, in the opposite direction of how they’ll fall — lift is built at the root while hair is damp and set as it cools. Let each lifted section cool before you touch it; cooled fine hair holds its height far longer than warm hair does.
11. 🌊 Forward-Fall Pixie Bob

A pixie bob with a longer front that falls forward over the face does two jobs: the forward direction covers a sparse hairline, and the tapered back removes the weight that drags fine hair down. The lifted top keeps it from reading as a curtain — it’s a fall with volume, not a flop.
Try this: Blow-dry the fringe across your face for softness, then add a small amount of texture cream only where you need separation.
Make it yours: Sweep it deeper to one side for evening polish.
Avoid: Cutting the front too short — the length is what creates the soft fall.
12. ⤴️ Upturned-Ends Chin Bob
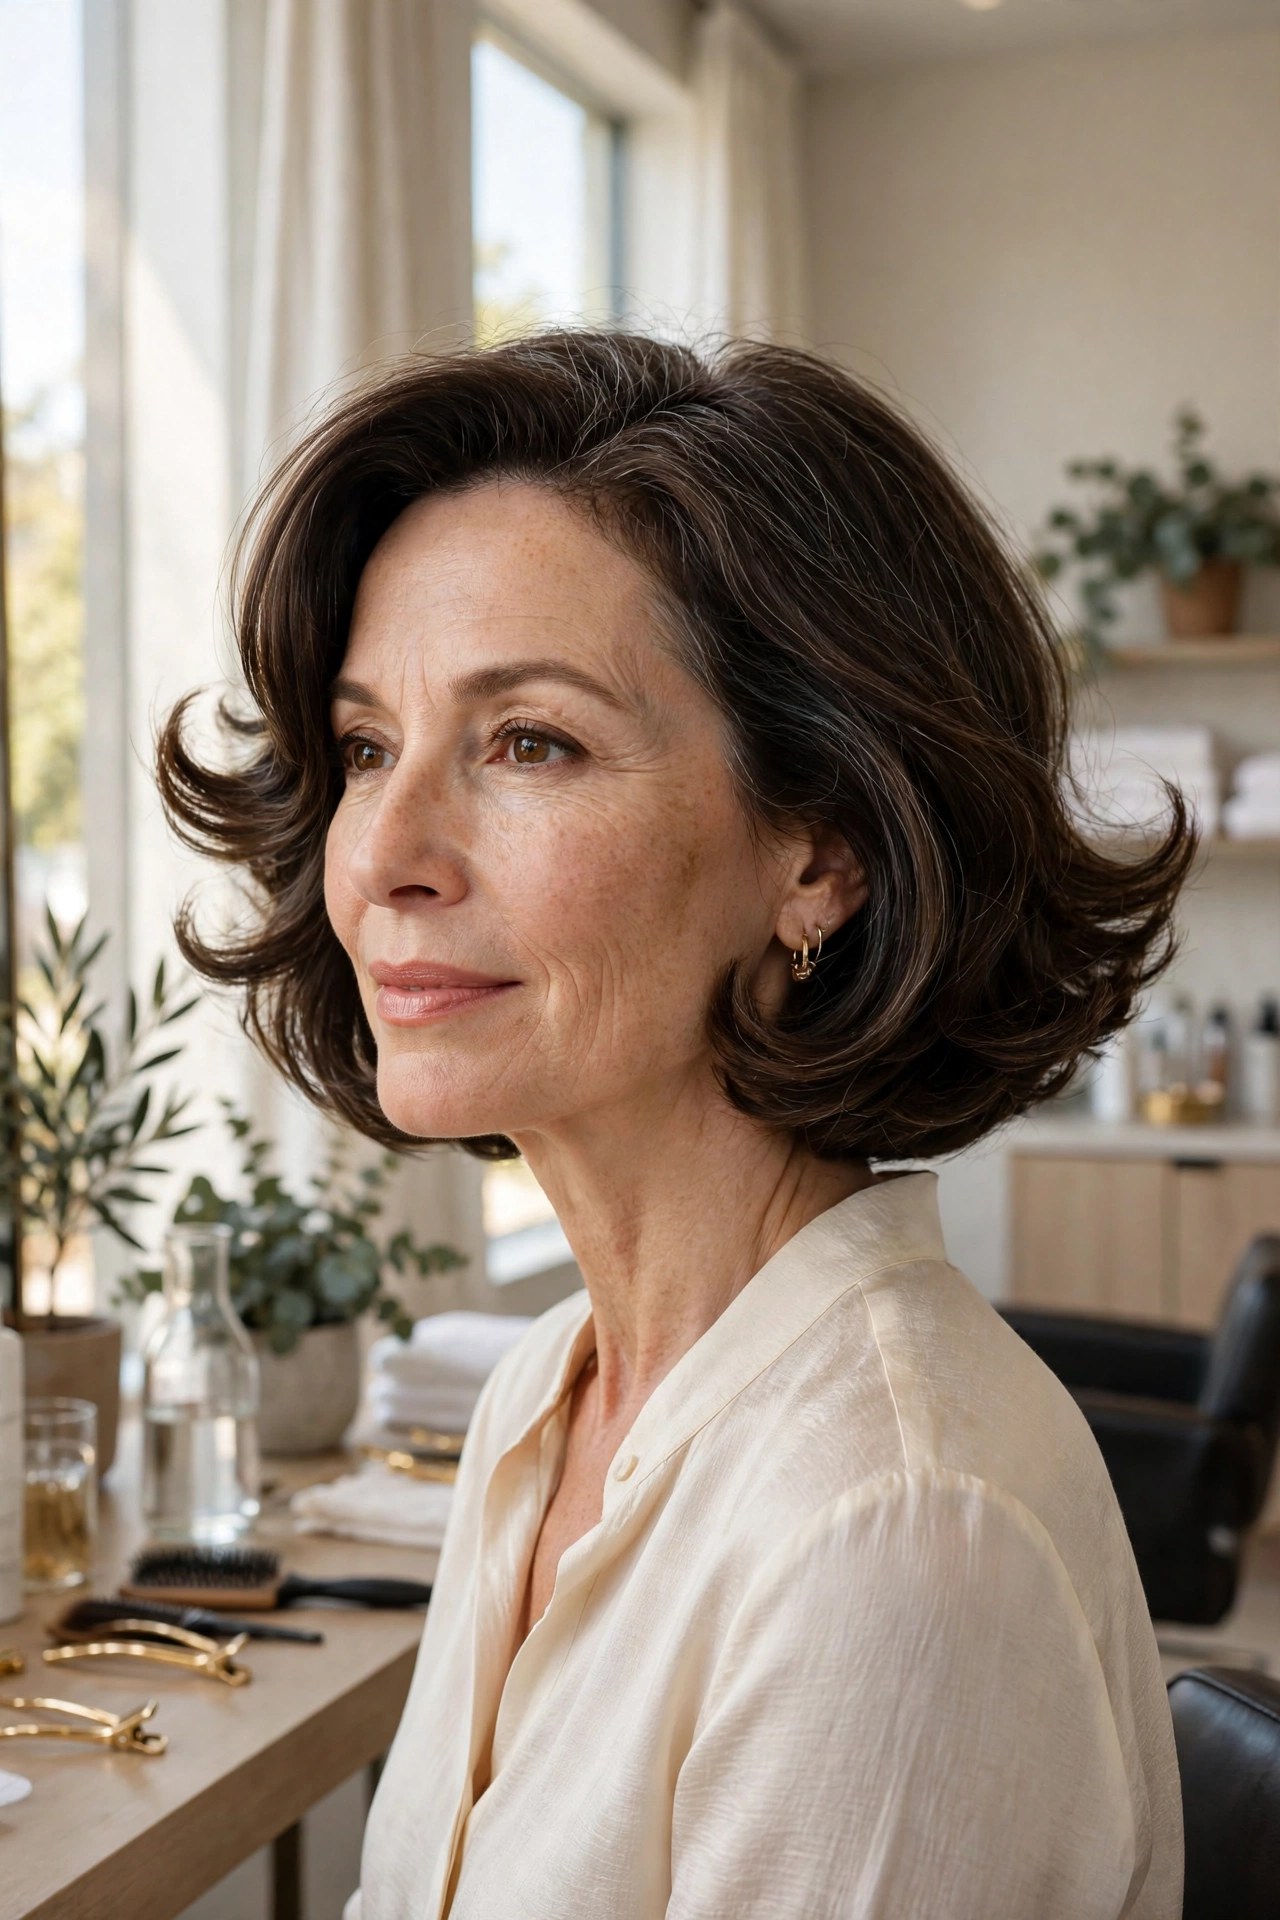
Turn the ends up instead of under and a chin bob gains instant buoyancy. The outward flick at the perimeter creates width and movement, stopping the cut from sitting in a flat, helmet-like sheet. It’s playful, it’s retro in the best way, and it takes about three minutes with a round brush.

Try this: Wrap sections around a round brush and roll outward at the ends — or flip the brush direction at the bottom only.
Avoid: Flicking every section identically; alternate slightly for a natural, undone finish.
Budget tip: This style revives a grown-out bob between appointments.
13. 🏔️ Raised-Crown Rounded Crop

When the crown is the problem, raise it architecturally. This rounded crop is cut with deliberate height on top — hair elevated and shaped so the silhouette peaks at the crown rather than hugging the scalp. Short, neat sides make the raised top look even fuller by contrast.
Try this: Dry the crown upward with a vent brush, then lock it with a light-hold spray once cool.
Ask your stylist: For elevation at the crown, not just short layers — the cutting angle creates the height.
Avoid: Pressing it down with your hands while it cools; let the shape set untouched.
14. 💁 Backcombed Crown Bob with Smooth Sides
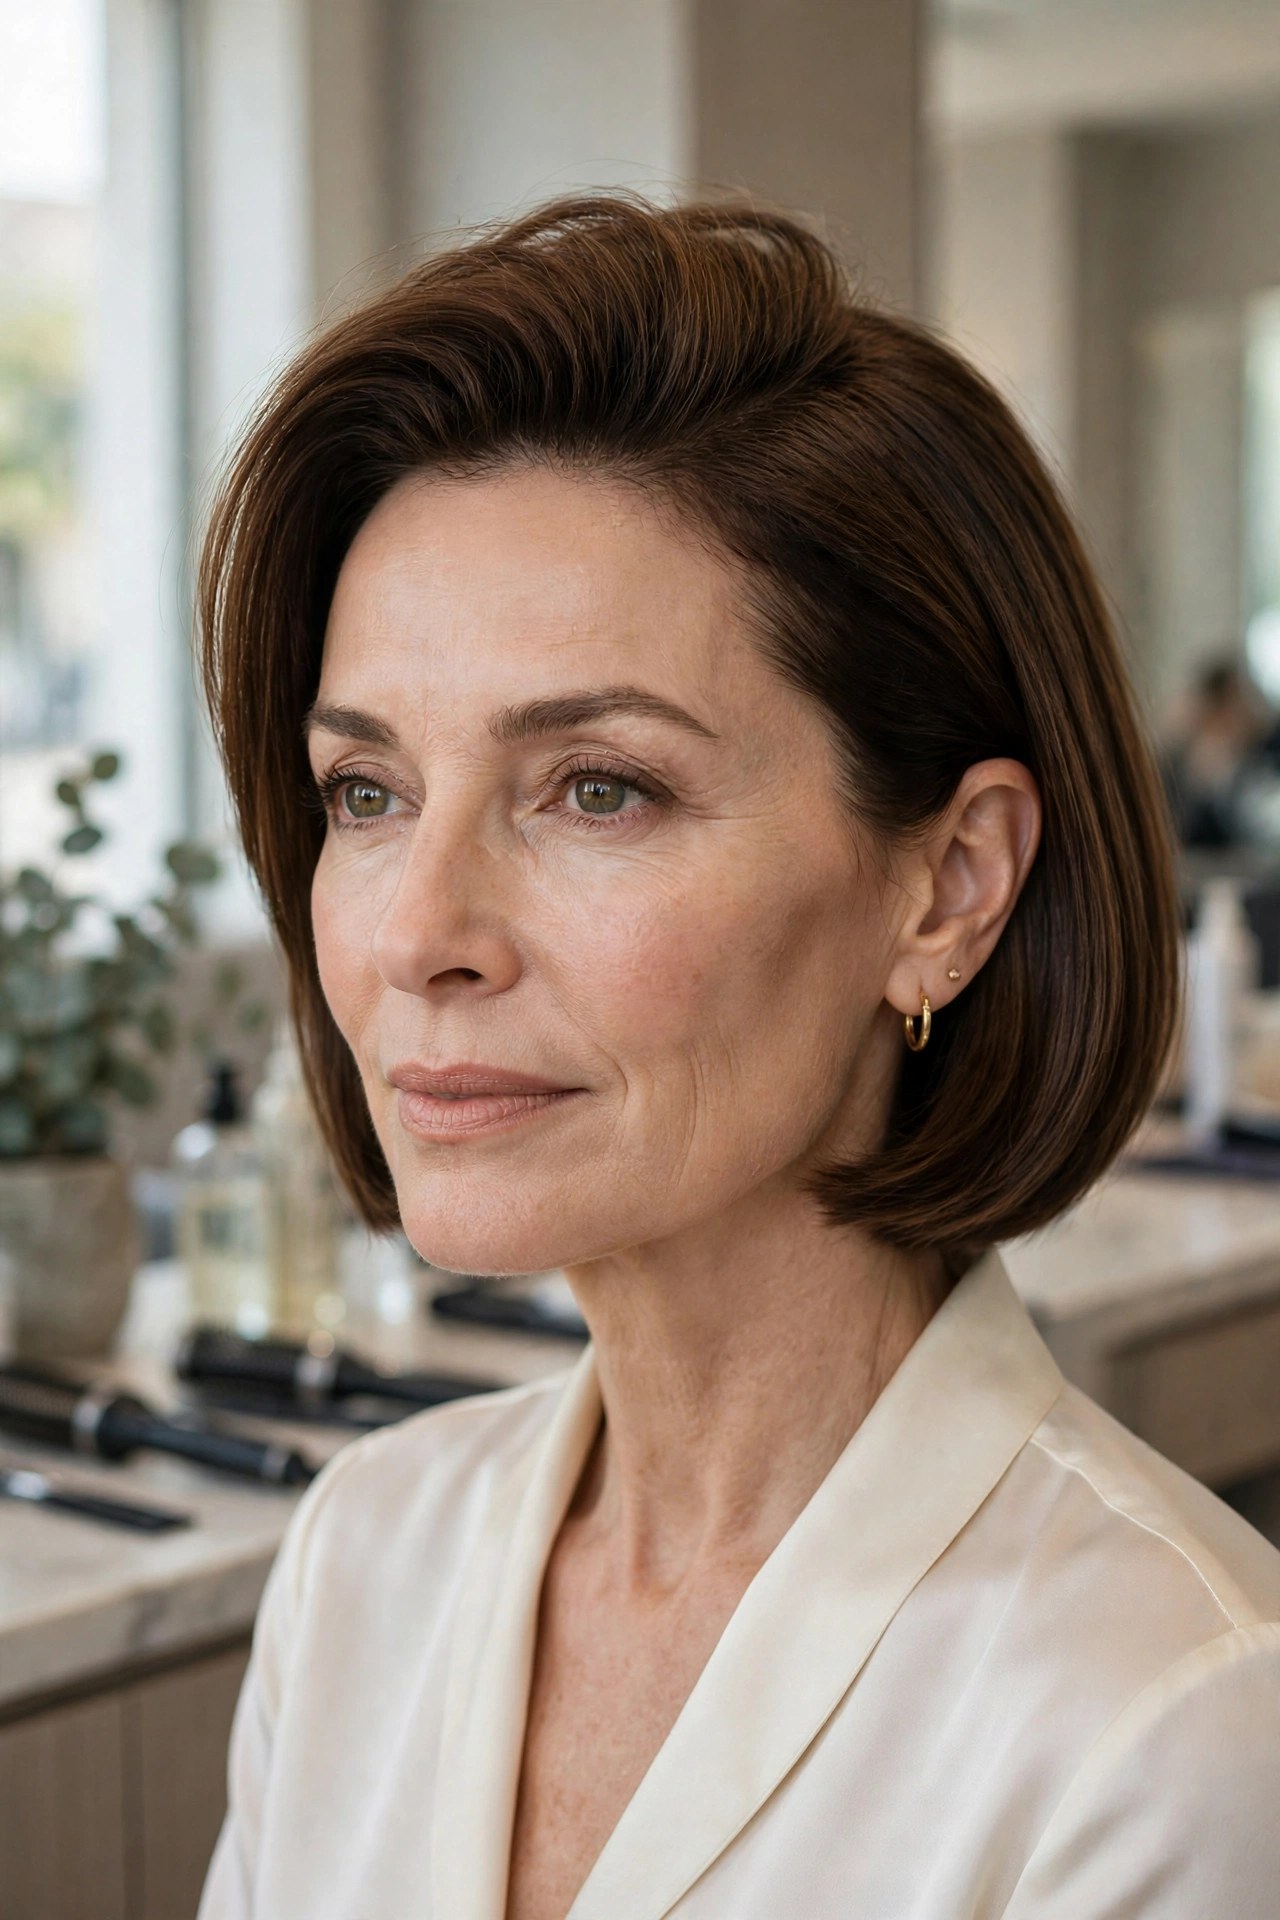
A little strategic backcombing at the crown — just at the crown, nowhere else — gives this bob a cushion of height while the sides stay sleek and smooth. The contrast is the trick: smooth sides make the lifted top look even higher. Done gently on healthy hair, it’s a classic for a reason.
Try this: Backcomb only the under-layers at the crown, then smooth the top layer over — invisible lift.
Make it yours: A light mist of flexible spray holds it without stiffness.
Avoid: Backcombing daily on fragile hair; save it for days that matter and be gentle.
15. 🌀 Lift-and-Flip Pixie
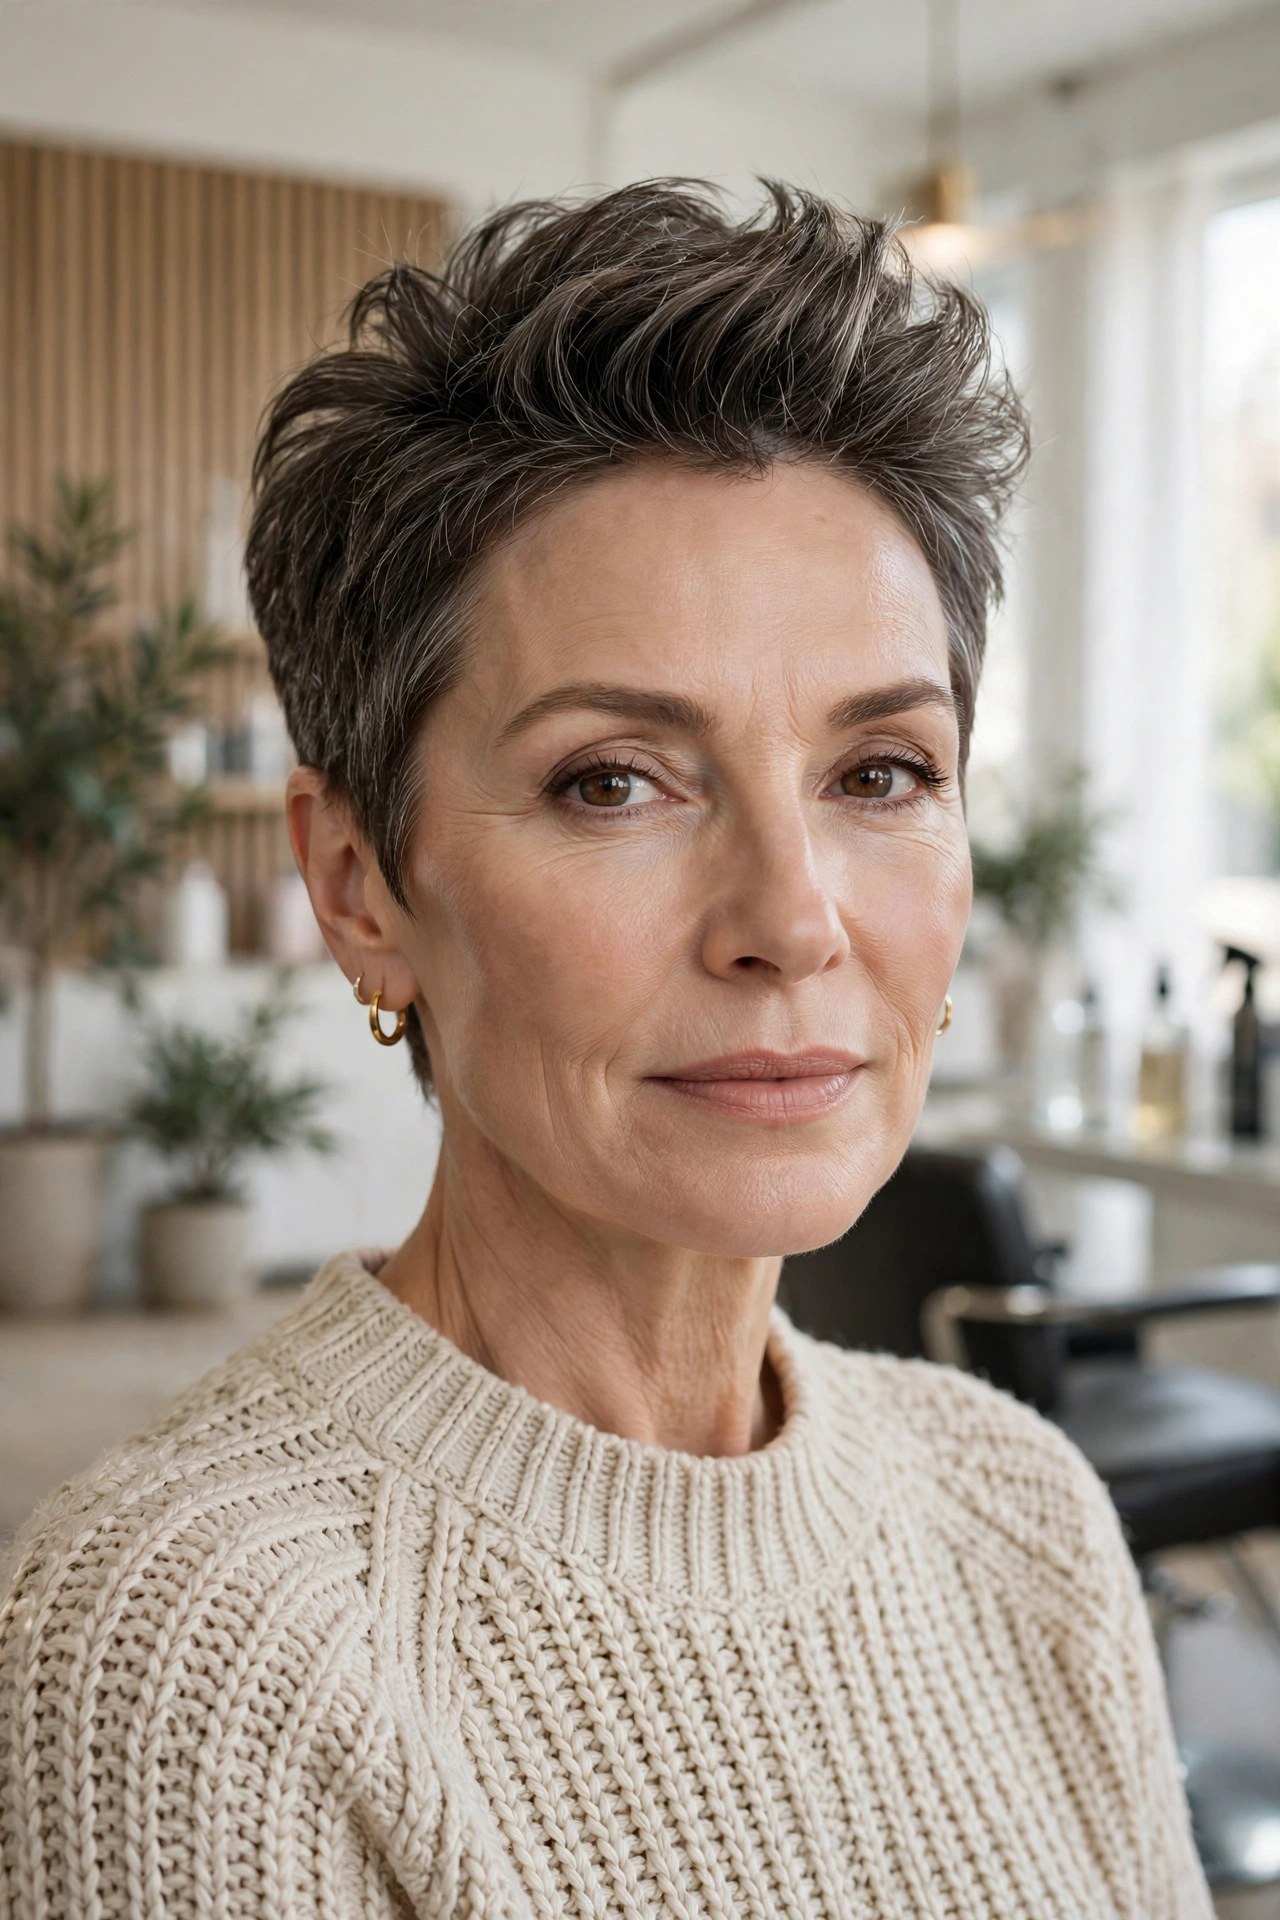
The top is dried up and back, then flipped to one side — a two-direction move that builds height and sweep in one motion. The pixie’s short sides keep everything tidy while the crown carries all the drama. It’s the cut for women who want their hair to look like it has somewhere to be.
Try this: Dry the crown up and back first, then flip it to your preferred side and pinch the ends.
Avoid: Using a heavy wax — a fingertip of light texturizing putty on the ends only.
Budget tip: This is a two-minute style once the cut is right.
16. 🔃 Reverse-Stack Bob
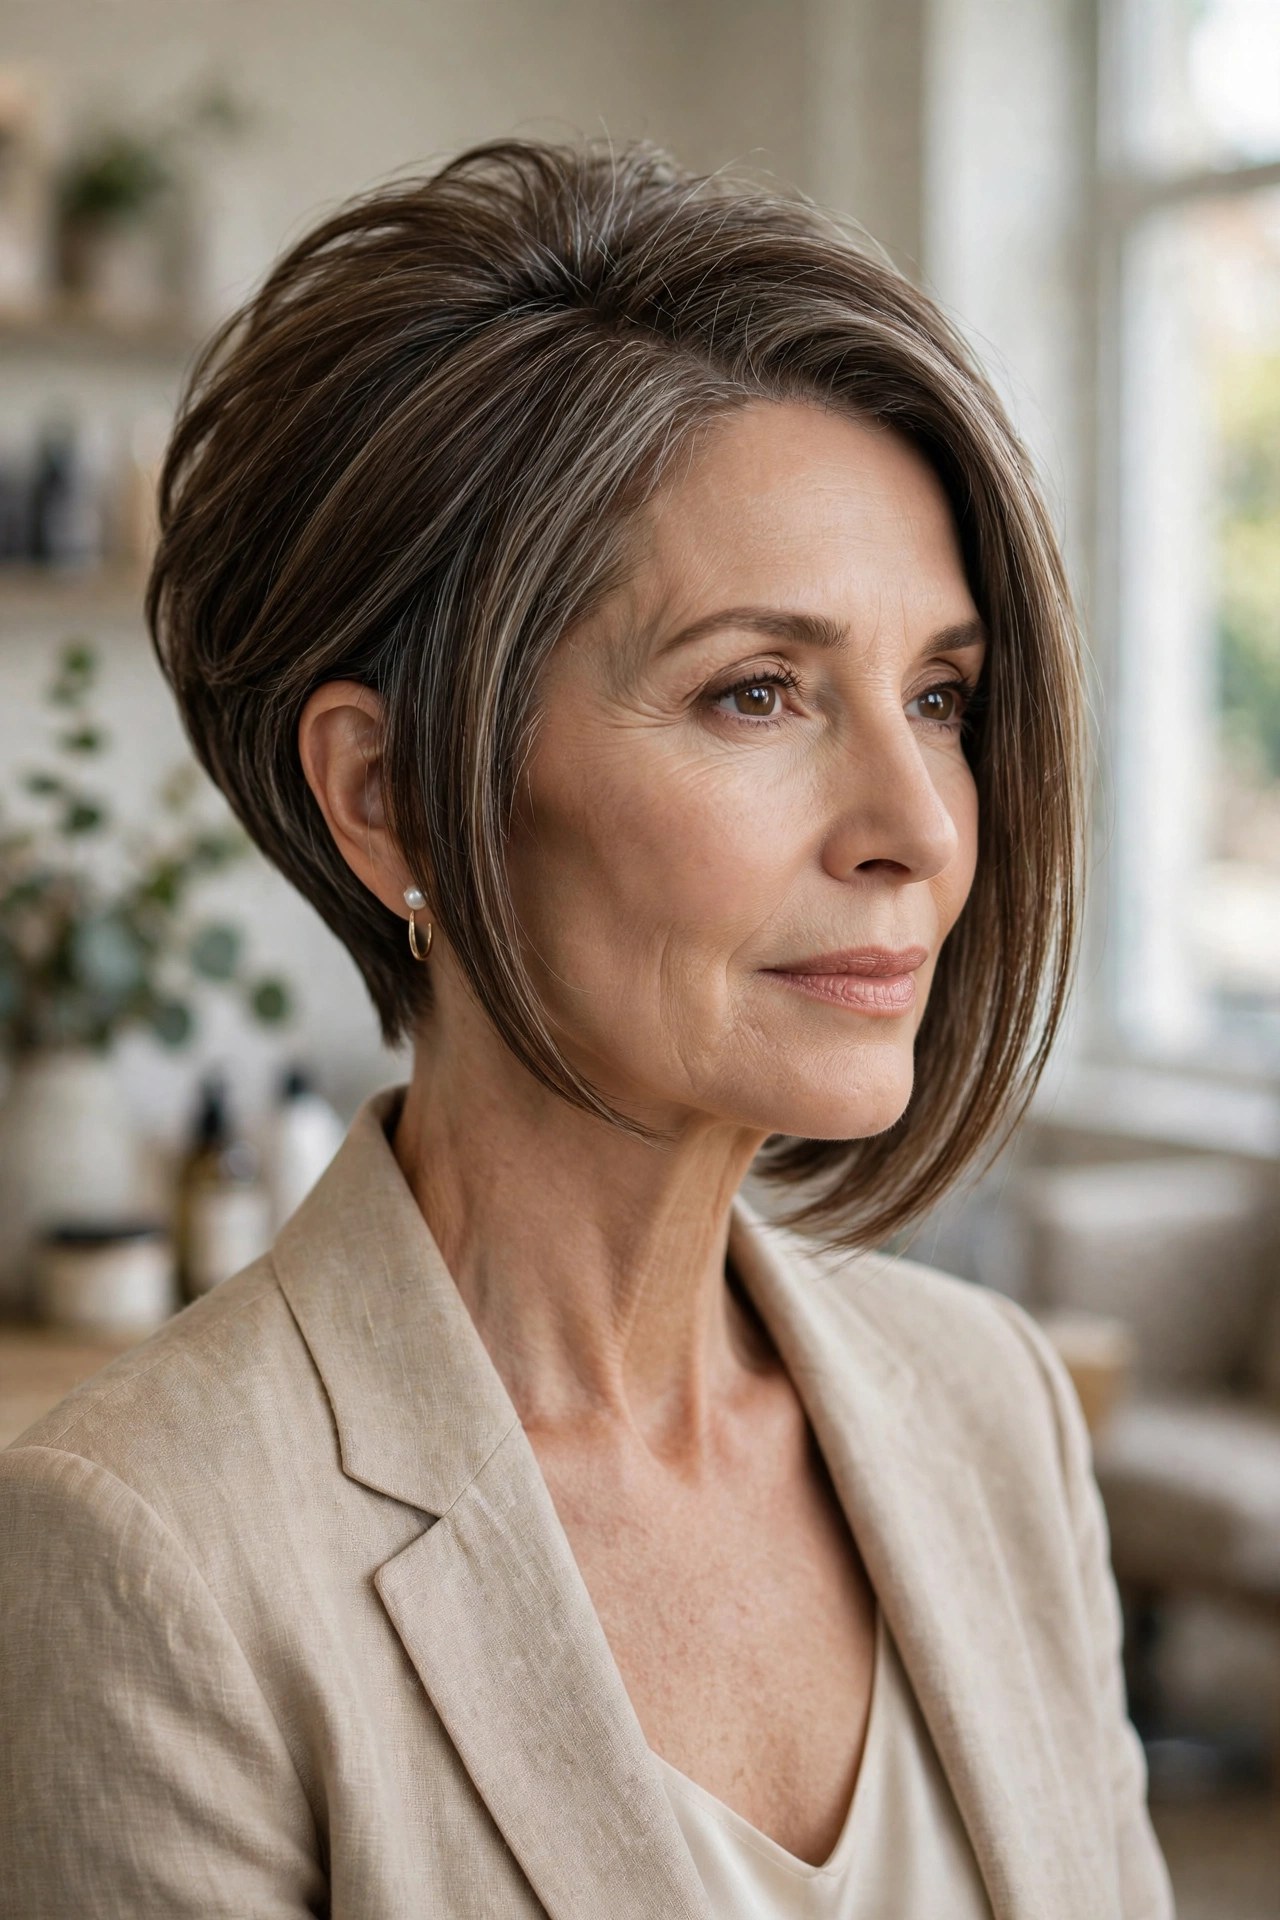
Stack the back in reverse — graduation that builds fullness low and rounds under — and the bob gains a bubble of volume at the occipital bone, exactly where flat hair typically caves in. The front stays longer and sleeker, so the shape reads modern rather than retro.
Try this: A root-lifting spray concentrated at the back emphasizes the stacked silhouette while the front stays smooth.
Ask your stylist: To build the shape through elevation rather than excessive thinning.
Avoid: Over-layering the front; the contrast between full back and sleek front is the point.
17. 🤏 Pinch-and-Push Textured Crop
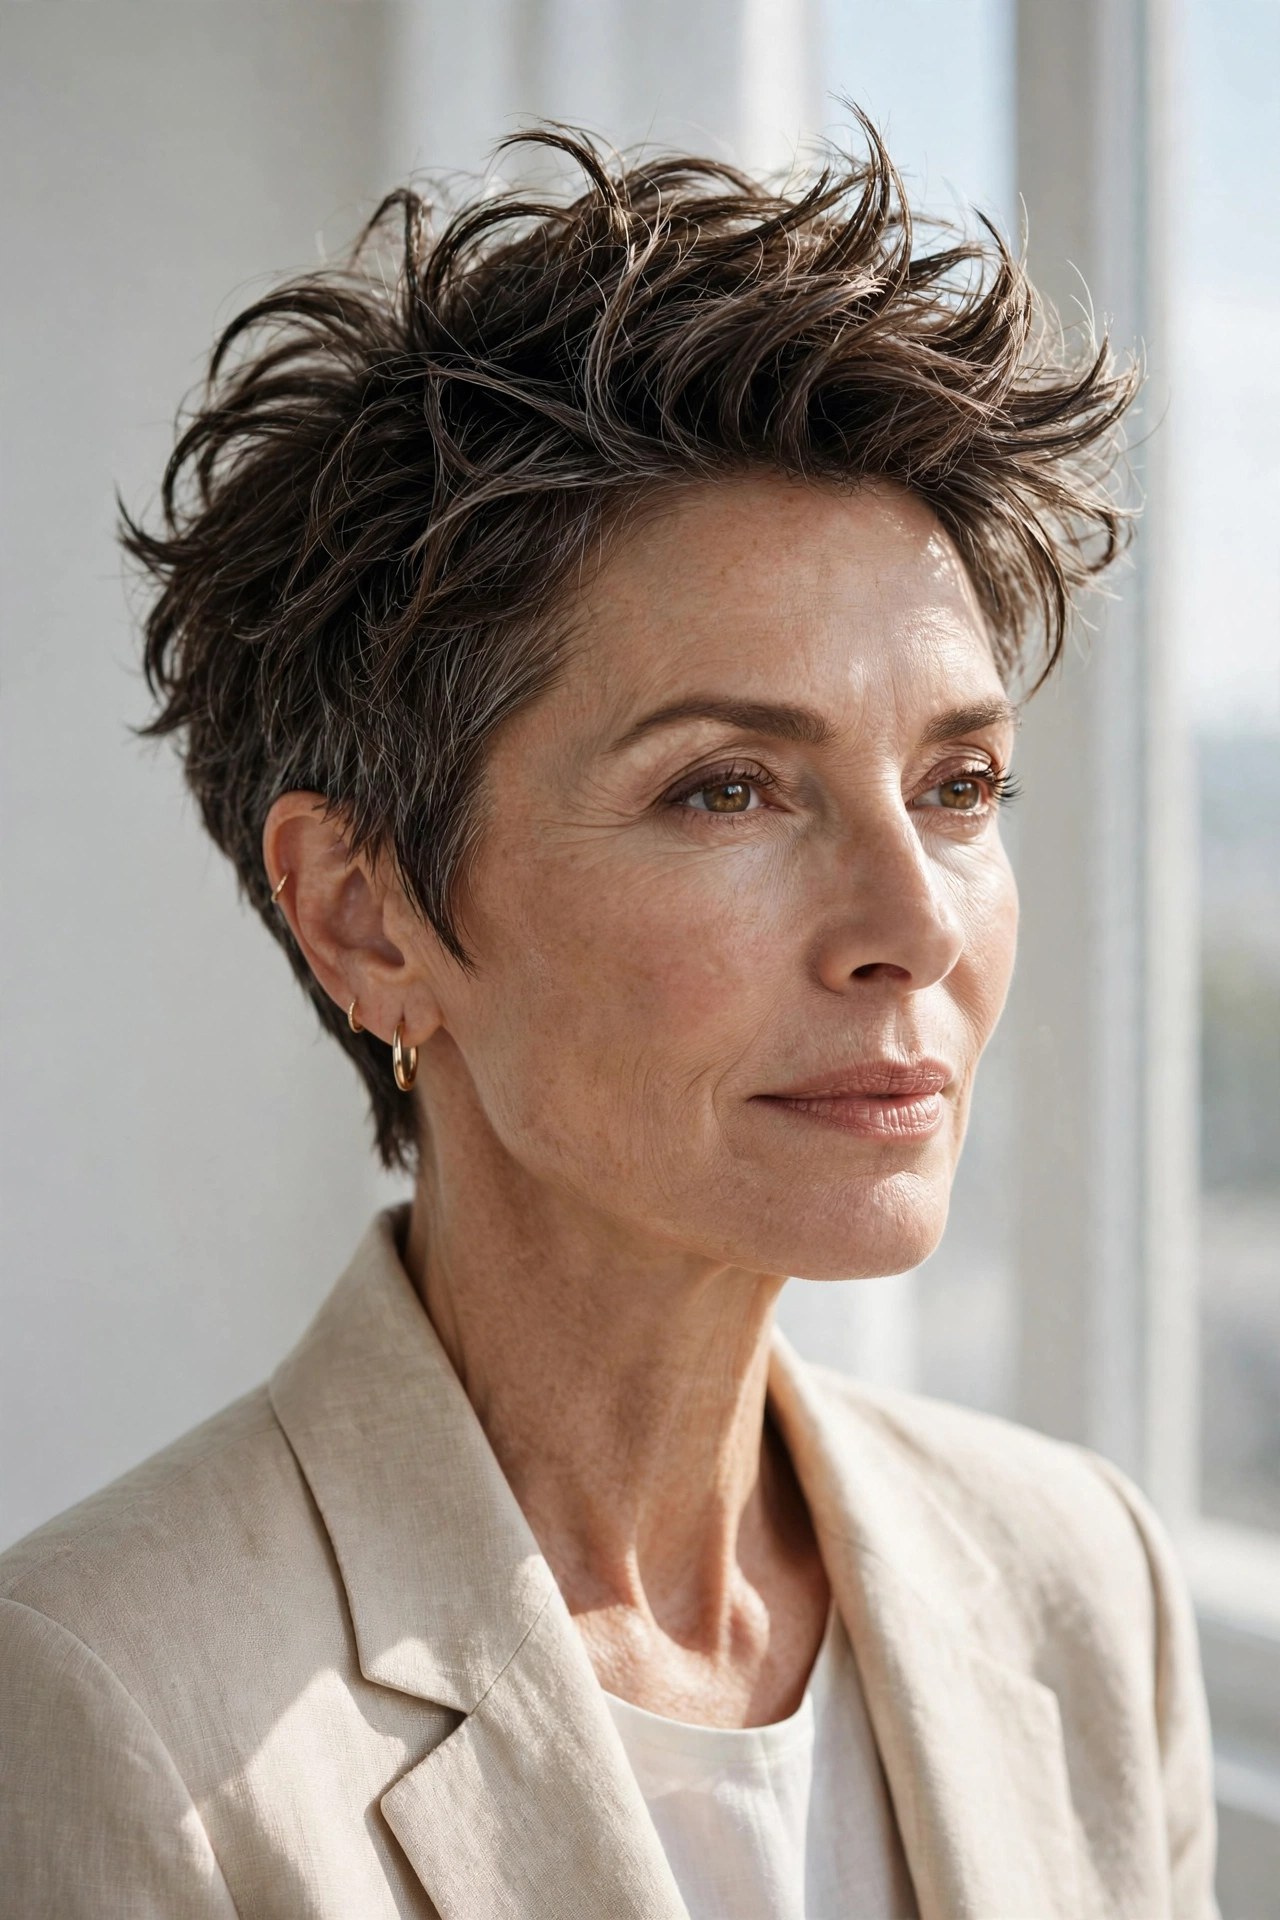
Flat surfaces make fine hair look thin, so this crop eliminates flat surfaces entirely. The top is point-cut into small, separated pieces that catch light at different angles — pinch a piece, push it up, and the texture holds. There’s no single flat plane for the eye to measure, so the hair simply looks more abundant.
Try this: Warm a fingertip of texturizing putty, pinch it through the ends only, keeping roots clean.
Make it yours: On second-day hair, a light mist at the roots revives the separation without washing.
Avoid: Thinning shears — insist on point cutting, which separates without shredding.
18. 👂 Volumized Temple-Tuck Bob

Tucking hair behind the ears usually flattens it — unless you volumize first. This bob is dried with lift at the temples, then tucked loosely so the fullness stays visible above the tuck. The result frames the face with soft, airy volume instead of plastered-down sides.
Try this: Lift the temple sections with a round brush while drying, then tuck loosely — don’t press flat.
Avoid: Tucking wet or product-heavy hair; it will dry glued to your head.
Budget tip: A slim headband worn for an hour trains the tuck to hold its shape.
19. ⬆️ Elevated-Fringe Tapered Pixie
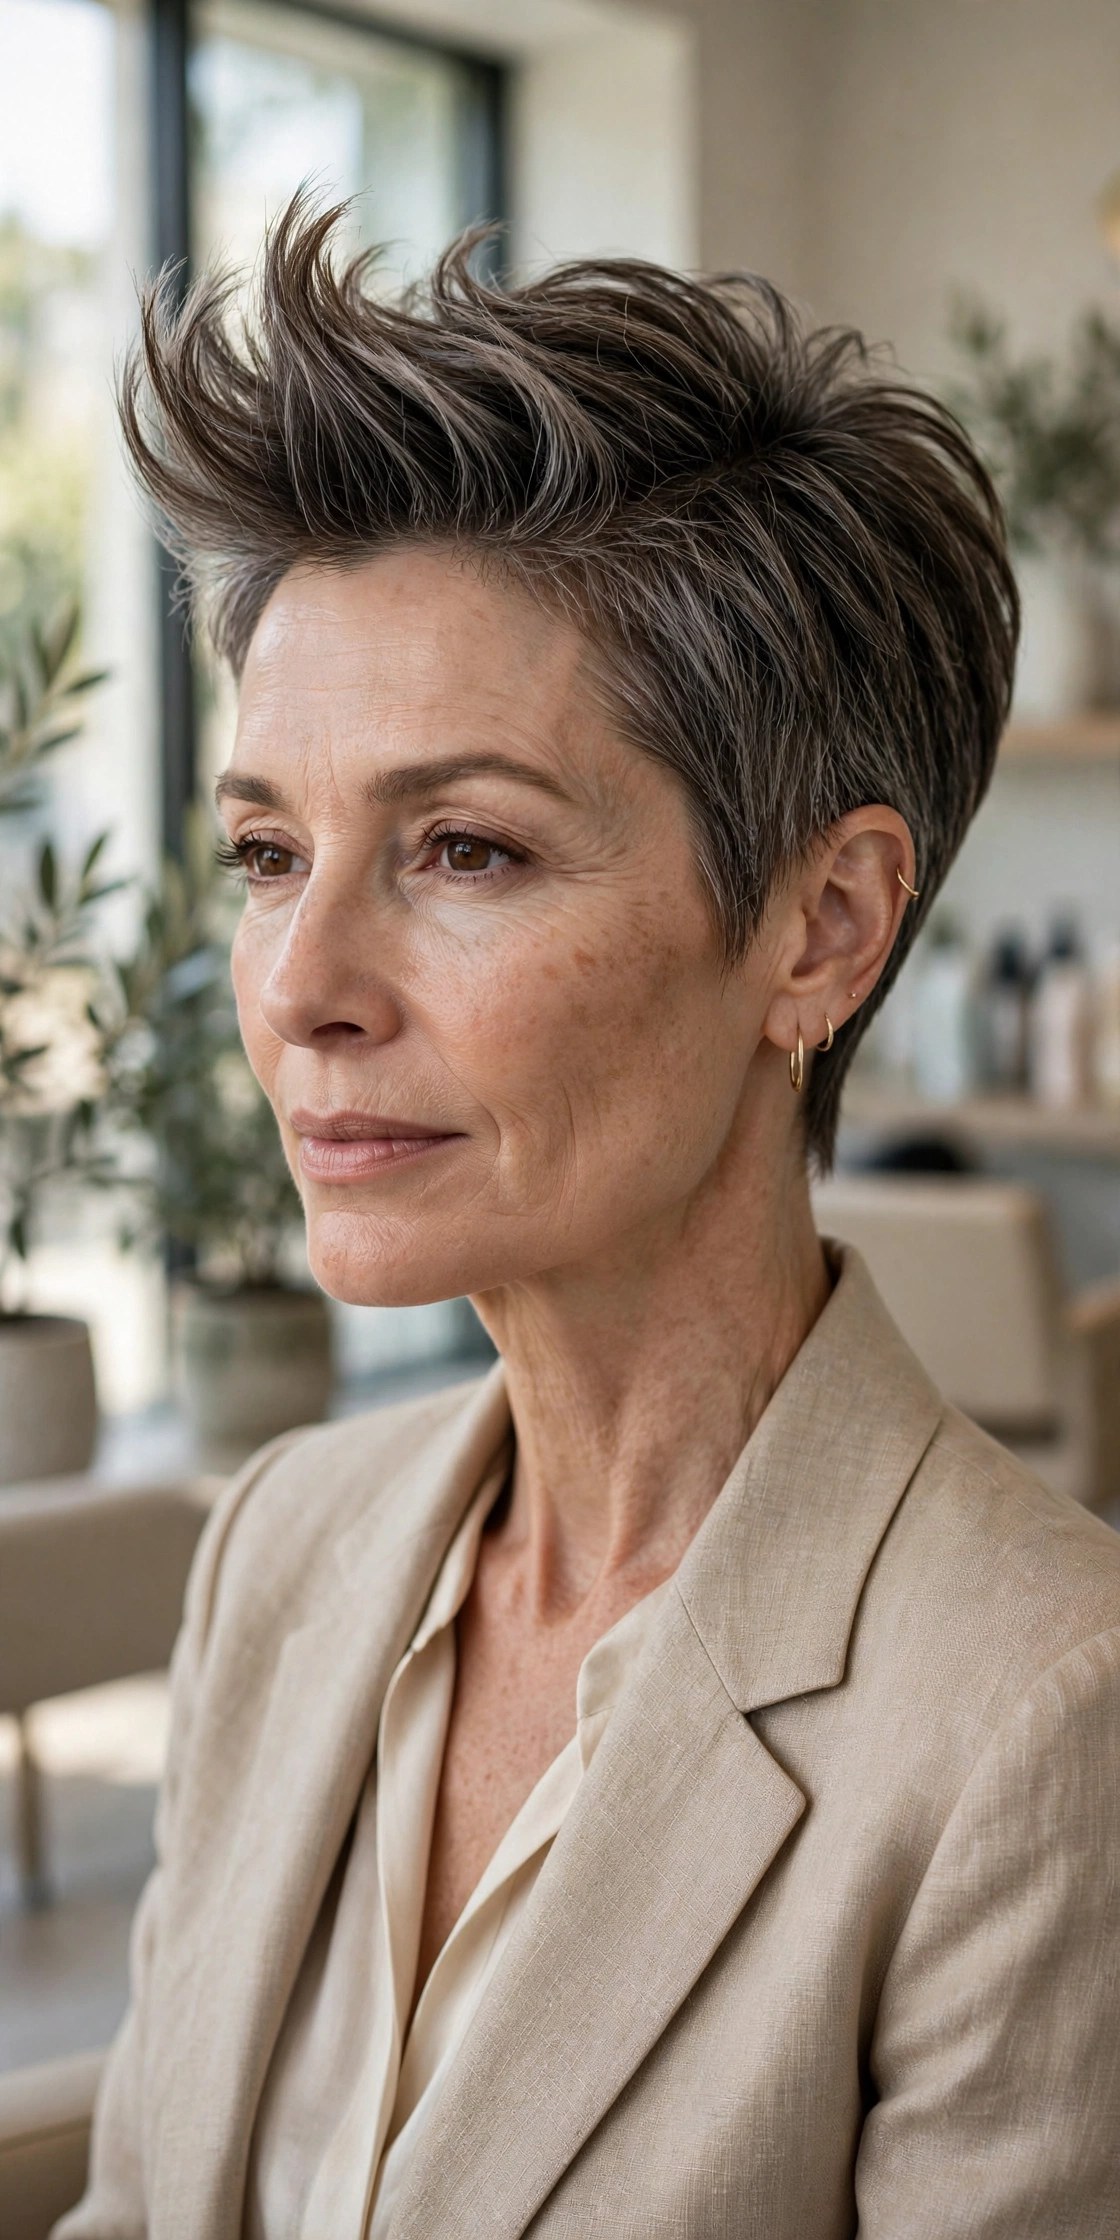
The fringe goes up instead of across: dried upward and back, it creates a wave of height at the front hairline while the tapered nape keeps the back immaculate. It’s a bold, confident shape that puts all the volume exactly where flat hair needs it most — right up front.
Try this: Blow-dry the front upward first with a small round brush, then let it fall naturally into place.
Ask your stylist: For a longer fringe with a close taper — the length gives you something to elevate.
Avoid: Letting the fringe fall forward flat; the elevation is the entire design.
20. 🌤️ Sky-High Crown Bob
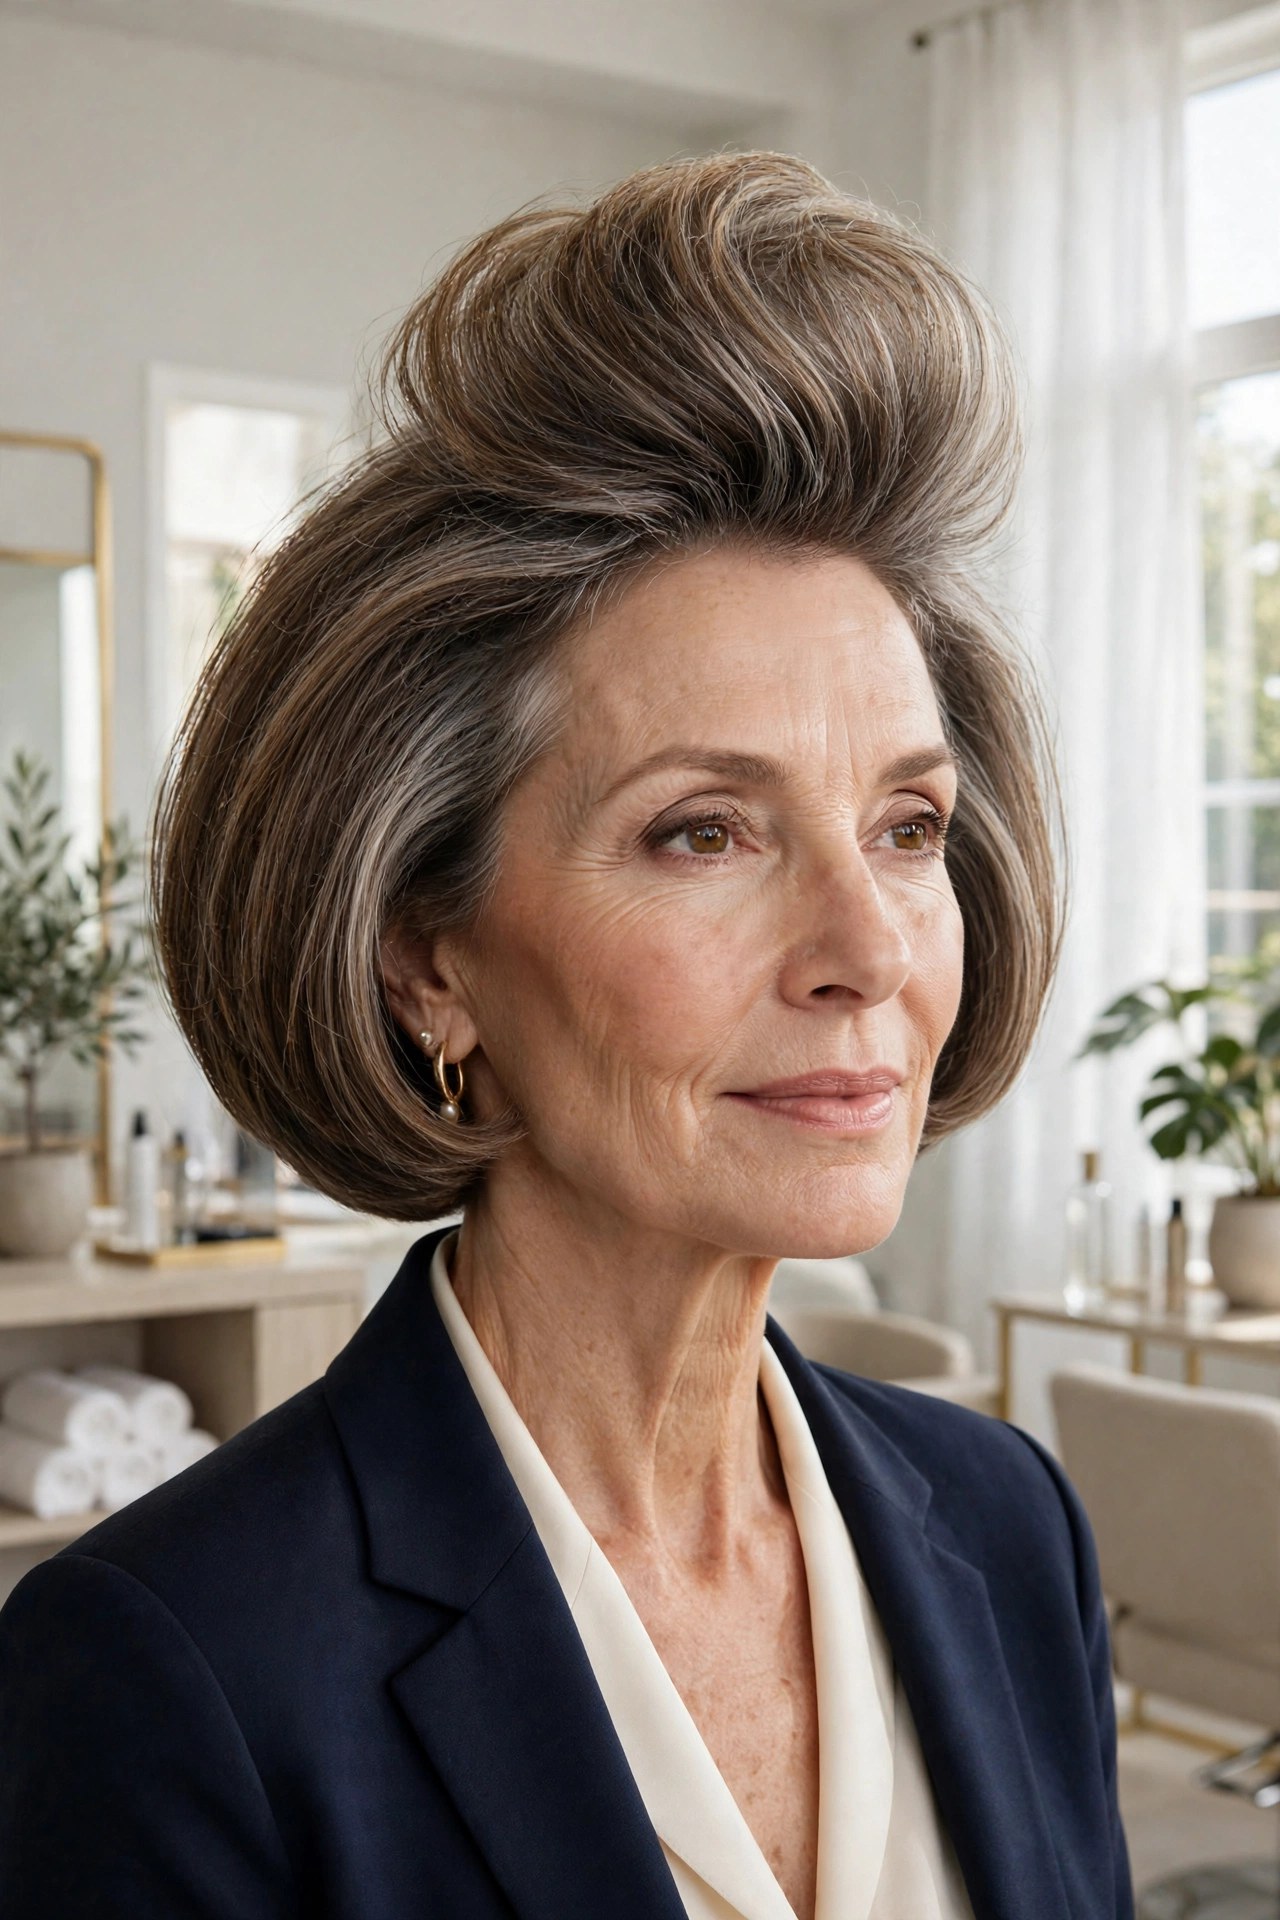
Some bobs whisper; this one doesn’t. Cut with maximum elevation through the crown, it holds a tall, rounded silhouette that fine hair can actually sustain — because there’s no length pulling it down. The chin-length perimeter keeps it wearable while the top reaches for the sky.
Try this: Dry the crown in sections, lifting each straight up with a round brush and cooling before release.
Make it yours: A soft, flexible spray — never a hard lacquer — keeps the height touchable.
Avoid: Sleeping on it without a loose pineapple or silk wrap; the crown needs protection overnight.
Flat hair and heavy products are enemies. Swap rich creams and oils for a lightweight mousse at the roots, a root-lifting spray before drying, and a dry texture mist for midday revival. If a product feels heavy in your hand, it will feel heavier on fine hair — less is genuinely more.
21. 🖤 Full-Perimeter Chin Bob

We close with the simplest fix of all: a chin-length bob cut at one clean length, no layers, no thinning — just a strong, full perimeter. Blunt ends make fine hair look instantly thicker because the bottom line reads as dense. Sometimes the answer to flat hair isn’t more tricks; it’s a sharper line.
Try this: Keep the ends precise with trims every 6 weeks; the blunt edge is the feature.
Avoid: Letting a stylist “thin it out for movement” — that’s how full perimeters die.
Budget tip: The simplest cut is also the cheapest to maintain — and one of the most effective.
❓ Short Haircuts for Fine Flat Hair FAQs
What short haircut is best for hair that always falls flat?
Choose by where the flatness lives. Flat at the back? A stacked bob or wedge builds lift in structurally. Flat crown? A textured pixie or bixie with crown layers. Flat all over? A blunt chin bob with a strong perimeter reads thicker instantly. The cut should fix your specific flat spot, not just look good in a photo.
Are layers good for fine flat hair, or do they make it worse?
Light, well-placed layers help; heavy layering hurts. Soft crown texture, subtle graduation, or hidden internal layers add lift without sacrificing density. What makes flat hair worse is choppy, over-thinned layering that removes the weight your hair needs to hold a shape. Ask for point cutting, never thinning shears.
How do I keep volume in fine hair past midday?
Build it at the root while damp — dry roots upward and let each section cool before touching it. Use lightweight products only (mousse, root spray), and keep a dry texture mist or dry shampoo for a midday root refresh. Heavy creams and oils are the fastest way to lose morning volume.
Is a pixie or a bob better for flat fine hair?
A pixie gives more crown lift because there’s less weight pulling hair down, and it’s easier to style for volume in minutes. A bob gives a fuller outline around the jaw and more styling versatility. If your hair goes flat within hours, the pixie usually wins; if you want polish with body, choose the bob.
What should I tell my stylist if my hair falls flat?
Name the exact flat spot — roots, crown, back, or all over — and how fast it happens after styling. Ask for a cut that keeps fullness in the ends, adds soft lift where you need it, and avoids heavy thinning. Bring a photo, but your description of how your hair behaves day to day is the most useful thing you can share.
✅ Your Anti-Flat-Hair Checklist
- ☐ Identify your flat spot: back, crown, roots, or all over — then pick the cut that targets it
- ☐ Ask for stacked, graduated, or textured shapes — never one-length-and-flat
- ☐ Dry roots first, upward, and let each section cool before touching
- ☐ Switch to lightweight products: mousse, root spray, dry texture mist
- ☐ Try a deeper side part, zigzag part, or forward styling for instant lift
- ☐ Book trims every 5–8 weeks so the shape never goes soft and collapses
Flat hair isn’t a life sentence — it’s a design problem with a design solution. The right short cut builds the lift in before you ever pick up a dryer, and the right drying direction keeps it there. Pick the fix that matches your flat spot, and enjoy hair that holds its own past lunch.
📖 Keep Reading
- ✂️ 32 Short Shag Haircuts That Look Effortlessly Cool in 2026 — texture-heavy cuts that multiply fine hair.
- ✂️ 19 Short Haircuts Over 60 for Thin Hair That Add Instant Fullness — more fullness-first short cuts.
- 🌷 31 Easy Hairstyles for Older Women With Thin Hair That Always Flatter — flattering styles for every day.
Discover more from Fashinate Style
Subscribe to get the latest posts sent to your email.