
15 Snowflake Nail Ideas That Bring Winter Magic to Your Manicure
15 Snowflake Nail Ideas That Bring Winter Magic to Your Manicure
There is something about the first snowflake of the season that makes everything feel softer and prettier — and your manicure can capture exactly that feeling. These snowflake nail ideas range from barely-there flakes on a nude base to full glitter and chrome, so there is a winter look here for every mood and every nail length.
Inside you will find fifteen designs built around the same little motif, each with its own twist: icy blues, deep navy, classic red and white, cozy sweater knits and even gold flakes on black. Some take five minutes with a dotting tool; others are worth a salon visit.
If you are building a full December nail wardrobe, pair this list with our simple Christmas nail ideas for the weeks when you want festive without the detail work. Between the two, you have a design for every party, photo and quiet night in.
Before you start, one honest note: the finest detail brush you own is your best friend here. Snowflakes are just six little lines repeated with care, and once you have painted two or three, your hand learns the rhythm and the rest come easily.
Table of Contents
- 1. Classic White Snowflake Nails
- 2. Icy Blue Snowflake Nails
- 3. Snowflake French Tips
- 4. Glitter Snowflake Nails
- 5. Matte Blue Snowflake Nails
- 6. Silver Chrome Snowflake Nails
- 7. Red and White Snowflake Nails
- 8. Pink Snowflake Nails
- 9. Snowflake and Sweater Nails
- 10. Nude Snowflake Nails
- 11. Navy Blue Snowflake Nails
- 12. Milky White Snowflake Nails
- 13. Gold Snowflake Nails
- 14. Snowflake Ombre Nails
- 15. Snowflake Rhinestone Nails
- Styling Tips
- Common Mistakes to Avoid
- The Best Shapes and Finishes for Snowflake Nails
- Frequently Asked Questions
1. Classic White Snowflake Nails

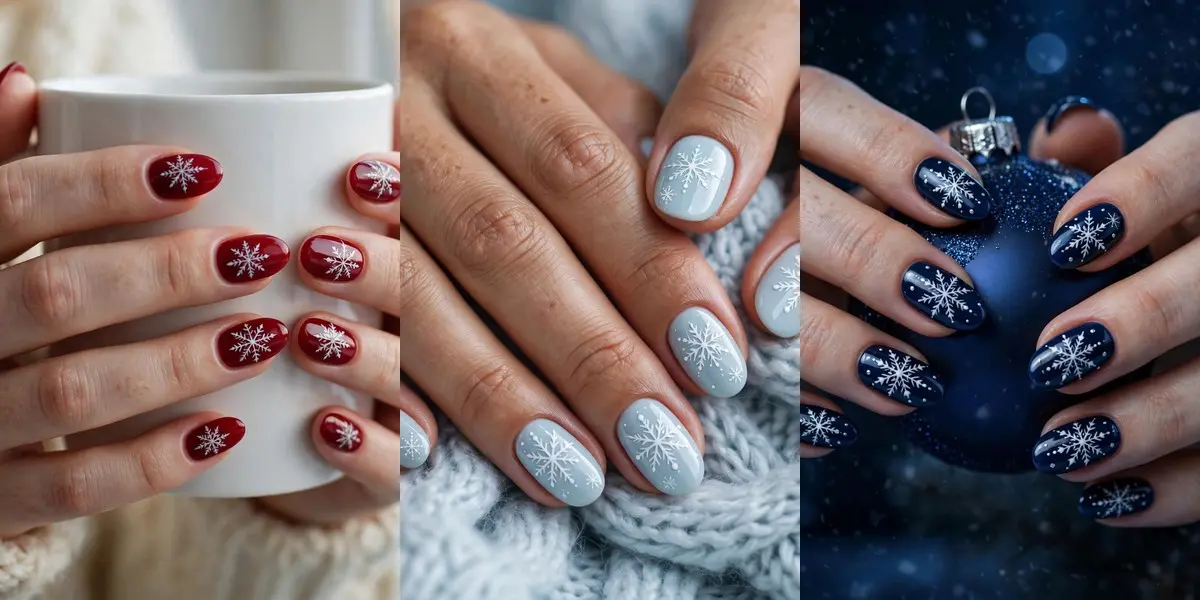
This is the design most people picture first: crisp white snowflakes painted over a glossy deep red base, one flake taking centre stage on every nail. The contrast is what makes it a classic — the white lines stay sharp and bright against the rich red, and the whole set reads unmistakably wintry from across the room.
The deep red matters more than you might think. A brighter scarlet can fight the detail, while this deeper shade gives the flakes a polished, almost vintage-postcard feel and flatters nearly every skin tone. It also hides tiny imperfections in the base better than paler colours do.
Keep the flakes centred and roughly the same size on each nail for that tidy, traditional look. This is one of the easiest versions to recreate at home, because one steady flake per nail is far more forgiving than scattered micro-art.
Tip: Let the red base dry completely before painting — white over tacky red drags pink streaks through your flakes.
2. Icy Blue Snowflake Nails

Pale icy blue is the colour of a frozen lake in morning light, and it gives white snowflakes a soft, frosty backdrop instead of a bold contrast. On a glossy oval nail the effect is calm and clean — wintery without a single Christmas cliché.
The trick in the photo is variety: one large flake per nail, with a couple of tiny ones tucked beside it. Real snowfall never lands in identical sizes, and copying that mix is what makes the design look natural rather than stamped.
This is one of the most wearable designs in the list for work and everyday wear, because the pale palette sits quietly next to any outfit. It looks especially pretty with silver rings and soft grey or white knitwear.
Tip: Paint your largest flake first while your hand is steadiest, then add the tiny satellite flakes around it.
3. Snowflake French Tips

A French manicure is already the definition of polish, and a row of small white snowflakes sitting right along the tips turns it into a winter design without changing its character. The sheer pink base stays clean and natural; all the art lives in the white tip zone.
Because the canvas is small, the flakes here are miniature — simple six-point stars rather than lacy statement pieces. That restraint is exactly why it works: up close you spot the detail, from a distance it is simply an elegant French manicure.
This version suits natural and shorter lengths beautifully, since the tip band is narrow anyway. It is also one of the most forgiving designs for grow-out, because the base near the cuticle is your own nail colour.
Tip: Use the very corner of a fine liner brush for tip flakes; a full brush load will swamp the small space.
4. Glitter Snowflake Nails

Glitter changes the rules for snowflake art: instead of painting flakes onto a smooth base, you lay matte white flakes over a sparkling silver glitter manicure, and the contrast between flat white and all that shine makes every flake pop.
The glitter base is doing quiet favours, too. Sparkle hides a slightly wobbly line far better than a cream polish does, so this is a smart choice if your freehand is still developing. The denser the glitter, the more forgiving the canvas.
This is the party version — it catches candlelight and tree lights with every movement of your hands. Keep the flakes bold and simple, because fine detail gets lost in the sparkle at normal viewing distance.
Tip: Seal the glitter with a smoothing top coat first, then paint flakes on the levelled surface so they sit crisp instead of bumpy.
5. Matte Blue Snowflake Nails

Matte polish changes a familiar colour completely. This cornflower blue is several shades deeper than the icy blue earlier in the list, and its flat, velvety finish — not a hint of shine — makes the crisp white snowflakes look almost chalk-drawn.
That chalkboard softness is the appeal. Where glossy designs feel festive and bright, the matte version feels calm and modern, more January than Christmas Eve. The squoval shape in the photo suits it perfectly: neat, practical and quietly confident.
Matte manicures do show wear a little sooner at the tips, so this design suits a week when your hands are not doing heavy work. A fresh layer of matte top coat midweek brings the velvet finish straight back.
Tip: Apply matte top coat as your very last step and keep cuticle oil off the nail surface — oil leaves shiny patches.
6. Silver Chrome Snowflake Nails

Silver chrome gives you a mirror on every nail, and a single white snowflake floating on that reflection is about as glamorous as winter art gets. The flake looks almost etched into the metal, an effect you cannot get from ordinary silver polish.
Chrome is honest about the nail underneath it: ridges and uneven spots show in a mirror finish, so a ridge-filling base and careful buffing matter more here than in any other design in this list. The payoff is worth the prep on a special occasion.
Because the base is so reflective, keep the art minimal — one well-placed flake per nail, no extra dots or lines competing with it. The mirror is the statement; the snowflake is the signature.
Tip: Finish chrome designs with a no-wipe gel top coat if you have one; regular top coat can dull the mirror slightly.
7. Red and White Snowflake Nails

If the classic design is a solo, this one is a duet: nails alternate between glossy bright red and glossy white, and each nail carries a snowflake painted in the opposite colour — white flakes on the red nails, red flakes on the white.
The alternation keeps the bold red from overwhelming the set, and it gives the design a cheerful, wrapping-paper energy that suits the heart of the Christmas season. It photographs beautifully against plain knitwear and gift boxes alike.
Red flakes on white need a fully opaque red and a steady hand, since any wobble shows against the pale background. Painting the white nails first and letting them dry hard before adding the red art makes the job much easier.
Tip: Map the alternation before you start — red, white, red, white across each hand — so both hands match when they meet.
8. Pink Snowflake Nails

Pink softens the whole snowflake idea. On a glossy blush base, delicate white flakes read less “Christmas card” and more “first frost” — pretty, gentle and easy to wear from December right through February.
The shade of pink does the heavy lifting: a soft blush with a hint of warmth keeps the white flakes visible, while a very pale pastel can let them fade away. If you can barely see the flake under the salon lights, go one shade deeper.
This is the design to choose when your winter wardrobe leans pastel or your workplace prefers quiet nails. It pairs especially well with rose-gold jewellery and cream or blush knitwear.
Tip: Test flake visibility on one nail first — paint, wait two minutes, and check it in daylight before doing the full set.
9. Snowflake and Sweater Nails

Sweater nails are the coziest trick in winter nail art: a raised cable-knit pattern, worked in matte gel or acrylic powder, that genuinely looks — and feels — like a tiny knitted jumper on each nail. Cream and soft grey keep it neutral and wearable.
Not every nail takes the texture. In this set, two smooth accent nails carry white snowflakes, and that contrast is the whole design: rough knit against a clean flake, like snow landing on your favourite sweater sleeve.
The texture is a salon technique for most of us, though confident beginners can try sugaring with acrylic powder over uncured gel. Either way, keep the knit nails matte — gloss flattens the illusion instantly.
Tip: Ask for the knit pattern in a slightly darker shade than the base; tone-on-tone cables can vanish in indoor light.
10. Nude Snowflake Nails
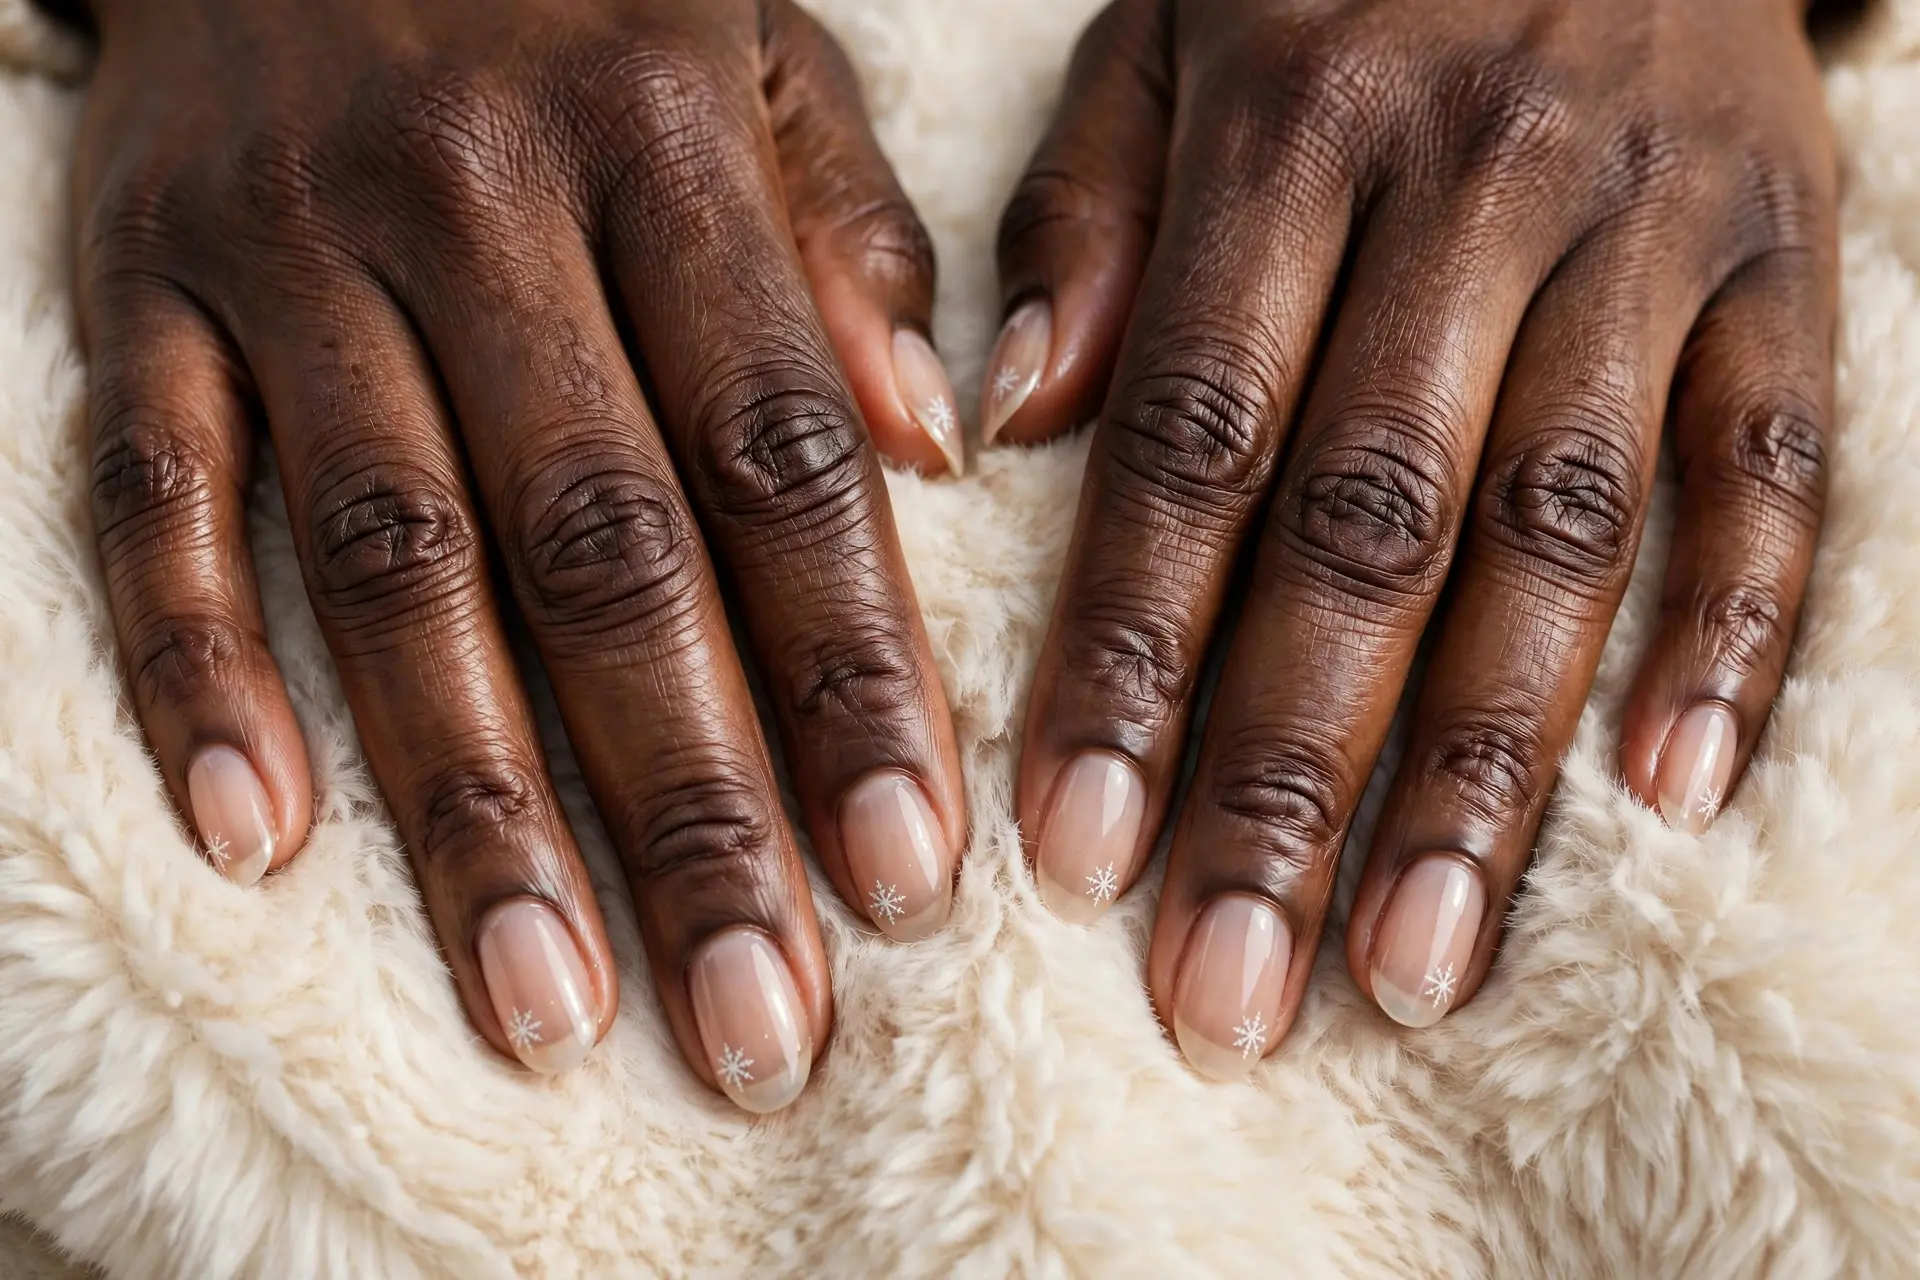
The quietest design in this list is also one of the most elegant: a sheer nude base, glossy and healthy-looking, with one tiny white snowflake placed near the tip of each nail. From a distance it is simply a beautiful nude manicure.
That discretion is the point. The single small flake is a detail people notice when your hands are close — holding a cup, typing, turning a page — which makes it perfect for workplaces and anyone who loves an understated manicure.
Sheer bases are also the most forgiving of grow-out and chips, and the tiny art is quick to repair. If one flake chips midweek, you can repaint that single nail in two minutes and nobody will ever know.
Tip: Place the flake slightly off-centre toward one corner of the tip; perfectly centred art on every nail can look mechanical.
11. Navy Blue Snowflake Nails

Deep navy is the night-sky version of this design: a glossy, almost-black blue base with bright white snowflakes and tiny silver dots scattered around them like stars. It is noticeably darker and moodier than the icy and matte blues earlier in the list.
The high contrast makes it the most striking of the blue family, and the little silver stars stretch the design from Christmas toward New Year without changing a thing. It looks expensive, and it flatters both very fair and deep skin tones.
Because the base is so dark, flakes can be a touch larger and bolder here without looking crowded. A medium almond or oval shape gives you the canvas this design deserves.
Tip: Use a dotting tool dipped in silver polish for the stars — three sizes of dot scattered loosely looks most like a real night sky.
12. Milky White Snowflake Nails

Milky white polish has a soft, translucent jelly quality — like skimmed milk or frosted glass — and snowflakes painted in silver-white seem to float inside it rather than sit on top. The result is dreamy and diffused, quite different from a solid opaque manicure.
The depth comes from layering: a sheer milky coat, the flake art, then another sheer coat over the top softens the lines and sandwiches the design inside the polish. Some flakes peek through clearly; others ghost faintly beneath the surface.
This finish is kind to imperfect nails, because the translucent base blurs small ridges and discolouration instead of highlighting them. It is also a lovely winter-bridal option for anyone marrying in the snow months.
Tip: Keep each milky coat thin — thick layers turn cloudy and yellowish instead of clean and translucent.
13. Gold Snowflake Nails

Gold snowflakes on a glossy black base are pure evening glamour: each nail carries one metallic gold flake that catches the light like jewellery. It is the boldest design in this list, and the one most likely to be asked about at a party.
The flakes here are usually foil rather than paint. Gold transfer foil pressed onto a tacky layer gives that uneven, gilded shimmer that flat gold polish cannot quite match, though a good metallic polish and a fine brush will get you close.
Black is a commitment — chips show quickly against the skin — so this design shines brightest over a single weekend or a special event. On an almond shape, the gold has room to spread into a full, lacy flake.
Tip: If you use foil, seal it with two thin top coats; foil edges lift sooner than paint and need the extra protection.
14. Snowflake Ombre Nails

Ombre gives snowflakes a sky to fall through: the base fades from deep icy blue at the cuticle down to soft white at the tips, and white flakes are scattered across the gradient so each one sits on a slightly different shade.
The gradient is sponged on in two or three thin layers, and the soft transition hides the join completely. Flakes on the dark end look bold and wintry; flakes near the white tips turn subtle and frosty — one design, two moods.
This is an excellent choice if you cannot decide between the blue designs earlier in the list, because it borrows something from all of them. It also grows out gracefully, since the pale tip area forgives a lot.
Tip: Paint flakes only after the gradient is fully dry and sealed with one top coat — painting on a fresh sponged surface can drag the blend.
15. Snowflake Rhinestone Nails

For maximum sparkle, this design pairs white snowflakes on a soft glossy white base with tiny crystals: a rhinestone at the centre of each statement flake and a fine line of stones tracing the cuticle of every nail.
The stones change the design from pretty to jewellery. The cuticle line frames each nail like a setting, and the flake centres catch the light every time your hands move — made for party season and New Year celebrations.
Rhinestones do ask for a little care: they sit proud of the nail, so they prefer a week of lighter duties, and gel or proper nail glue holds them far better than top coat alone. The glamour is worth one careful week.
Tip: Set each stone into a small dot of clear gel or glue, then seal around — never over — the crystal to keep its sparkle.
Styling Tips
Mix your flake sizes. One generous statement flake with two or three tiny satellites around it looks like real snowfall; ten identical flakes can read stamped and flat.
Let two nails do the talking. On busy weeks, put full flake art on the ring finger and thumb of each hand and keep the rest plain or dotted — the set still looks designed, and it takes half the time.
Match the base to your calendar. Navy, chrome and gold-on-black are evening designs; nude, milky and icy blue carry a work week gracefully. Choosing by schedule, not just by taste, means the manicure still looks fresh on day seven.
Refresh, don’t redo. A thin layer of top coat every two or three days keeps flakes looking crisp and protects the points of the design, which are always the first place a manicure wears.
Common Mistakes to Avoid
Painting flakes onto a wet base. White lines dragged through tacky polish smear into grey streaks. Let the base dry fully — or cure it, for gel — before any flake goes on.
Using a brush that is too thick. Snowflakes are six fine lines and a few V-shaped ticks. A liner brush, a stripped-down old brush or even a toothpick gives you control a standard polish brush never will.
Making every flake huge. A flake should fill about half the nail’s width. Bigger than that, the points run off the edges and the design looks crowded instead of lacy.
Piling on extras. Flakes plus glitter plus stones plus dots on every nail is noise. Each design in this list picks one extra — sparkle, texture or crystals — and lets the flakes lead.
Skipping the seal. Fine white lines are fragile. One floated layer of top coat (two over foil or stones) is what stands between a fresh design and a chipped one by Thursday.
The Best Shapes and Finishes for Snowflake Nails
Shape decides how much sky your flakes get. Almond and oval nails offer the longest canvas, and their tapered sides suit a flake’s radiating points — most of the designs in this list sit on them for that reason. Square nails make flakes look graphic and modern, framing the art like a picture, while squoval is the forgiving middle ground for everyday lengths. Short nails are not left out: they simply ask for smaller flakes, one per nail, placed near the tip or centre where there is room to breathe.
Finish controls the contrast, and contrast is what makes a white flake visible. Gloss is the safe classic — it deepens dark bases like navy and red, which throws white lines into relief. Matte softens everything, turning bright colours calm and chalky, but it can mute a pale design, so save it for mid-tone bases like cornflower blue. Chrome needs a perfectly smooth nail and minimal art, because the mirror does the talking; glitter is the opposite — busy, sparkly and wonderfully forgiving of a wobbly line, since the flakes sit matte against the shine.
Flake size is the final strategy. On medium and long nails, one large flake per nail — or one large with tiny satellites — photographs best and reads clearly at arm’s length. On short nails, a single small flake is more elegant than a squeezed-in large one, and placement slightly off-centre looks more natural than dead centre every time. When in doubt, look at your hands at normal distance: if the flakes still read as flakes, the size is right.
Frequently Asked Questions
What colors work best for snowflake nails?
Any base with strong contrast against white: deep red, navy, icy and cornflower blue, blush pink and black all work beautifully. Pale bases like milky white need the flakes in silver or a slightly deeper white to stay visible. The rule is simple — if the flake disappears when you squint, the base is too close in tone.
Are snowflake nails only suitable for Christmas?
Not at all. Red and white versions feel festive in December, but icy blue, navy, milky white and nude designs read simply as winter and look right through January and February. Swapping the holiday reds for blues and neutrals is all it takes to carry the motif past the holidays.
What nail shape looks best with snowflake designs?
Almond and oval shapes give flakes the most room and star in most of the photos above. Square nails give the design a crisp, graphic frame, and squoval suits shorter lengths. There is no wrong shape — only flake size to adjust, smaller on short nails and bolder on long ones.
Can I create snowflake nails at home?
Yes — a snowflake is just six lines with small V-ticks, and a liner brush or dotting tool is all you need. Start with one accent nail until your hand learns the rhythm, or use flake stickers and stamps for a perfect result in minutes. The glitter and nude designs are the most forgiving places to begin.
How can I make snowflake nail art last longer?
Let each layer dry before adding the next, seal the design with a floated layer of top coat, and cap the free edge. Refresh the top coat every two to three days, wear gloves for washing up, and secure rhinestones with gel or glue rather than top coat alone. Treated kindly, flake art stays crisp for a week or more.
Conclusion
From one tiny flake on a nude nail to gold foil on black, snowflake nail ideas prove that a single simple motif can carry a whole season of manicures — the only real decision is how bold you want to go. And if stripes are calling you next, our candy cane nail ideas pair beautifully with the red and white designs in this list. Which snowflake look will you wear first this winter?