
15 Candy Cane Nail Ideas for a Sweet & Festive Christmas Manicure
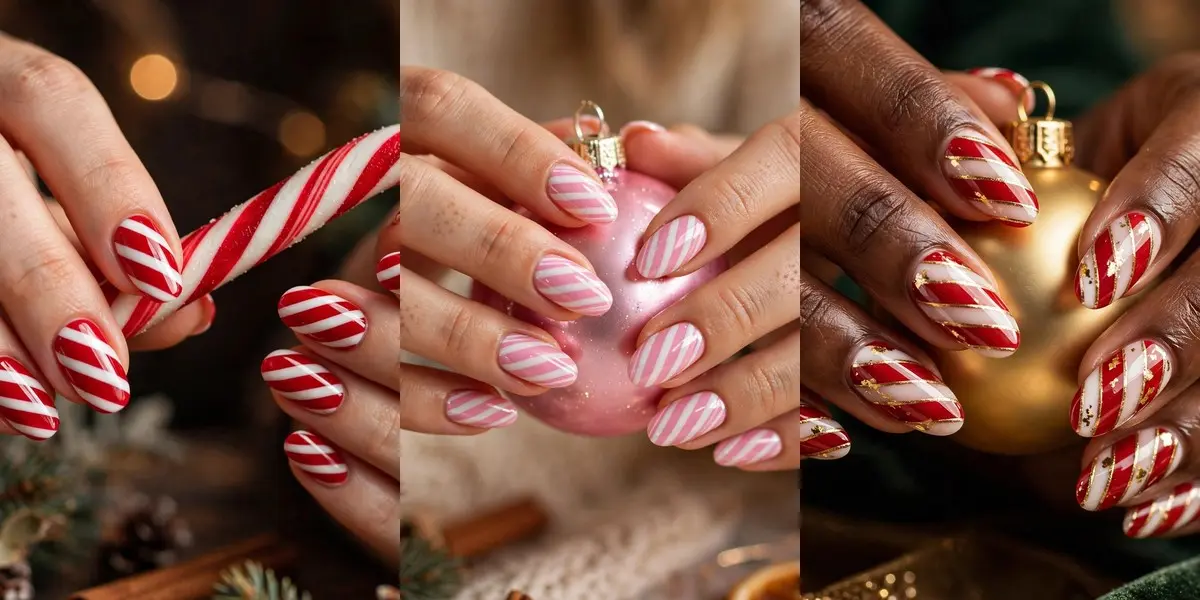
15 Candy Cane Nail Ideas for a Sweet & Festive Christmas Manicure
Nothing says Christmas at first glance quite like red-and-white peppermint stripes. These candy cane nail ideas take that one beloved motif and spin it fifteen ways — glossy, glittery, matte, minimal — so there is a perfect match for every party, photo and quiet night in on your December calendar.
Some looks keep the stripes bold and traditional, painted corner to corner on every nail. Others tuck them onto French tips, fade them into an ombre, or let a single accent nail do all the talking while the rest stay a clean, glossy red.
You will also find softer takes here — pink-and-white stripes, a swirled marble finish, even a minimalist design with a single fine line. And if you prefer timeless red, our red Christmas nail ideas make the perfect companion read.
Every design below is shown on natural-to-medium lengths and real-life shapes, with notes on the finish and the easiest way to wear it. Pick your favorite, save the photo, and show it to your nail tech — or settle in with a striping brush and try it at home.
Table of Contents
- 1. Classic Red and White Candy Cane Nails
- 2. Candy Cane French Tips
- 3. Red Glitter Candy Cane Nails
- 4. Candy Cane and Snowflake Nails
- 5. Pink Candy Cane Nails
- 6. Candy Cane Accent Nails
- 7. Candy Cane Swirl Nails
- 8. Candy Cane Chrome Nails
- 9. Green and Red Candy Cane Nails
- 10. Candy Cane with Christmas Tree Nails
- 11. Minimalist Candy Cane Nails
- 12. Candy Cane Ombre Nails
- 13. Candy Cane Matte Nails
- 14. Candy Cane Glitter French Nails
- 15. Candy Cane and Gold Christmas Nails
- Styling Tips
- Common Mistakes to Avoid
- The Best Shapes and Finishes for Candy Cane Nails
- Frequently Asked Questions
1. Classic Red and White Candy Cane Nails

This is the original and still the one everyone recognizes instantly: bold diagonal stripes of glossy red and white running across every nail, exactly like the peppermint stick itself. On a medium almond shape, the stripes have room to sweep corner to corner, and the high-gloss top coat gives them that hard-candy shine.
Because the pattern is busy, it looks best kept clean — no gems, no extra art, just crisp lines and an even rhythm from nail to nail. It is the most festive option in the whole list, so save it for the days when your manicure is meant to be the outfit’s exclamation point.
At home, paint the white base first, let it dry completely, then lay the red stripes over it with a long striping brush. Working in the same diagonal direction on all ten nails is what makes the set look professionally done.
Tip: Angle every stripe the same way on both hands; matching diagonals read as one intentional design, while mixed angles look accidental.
2. Candy Cane French Tips
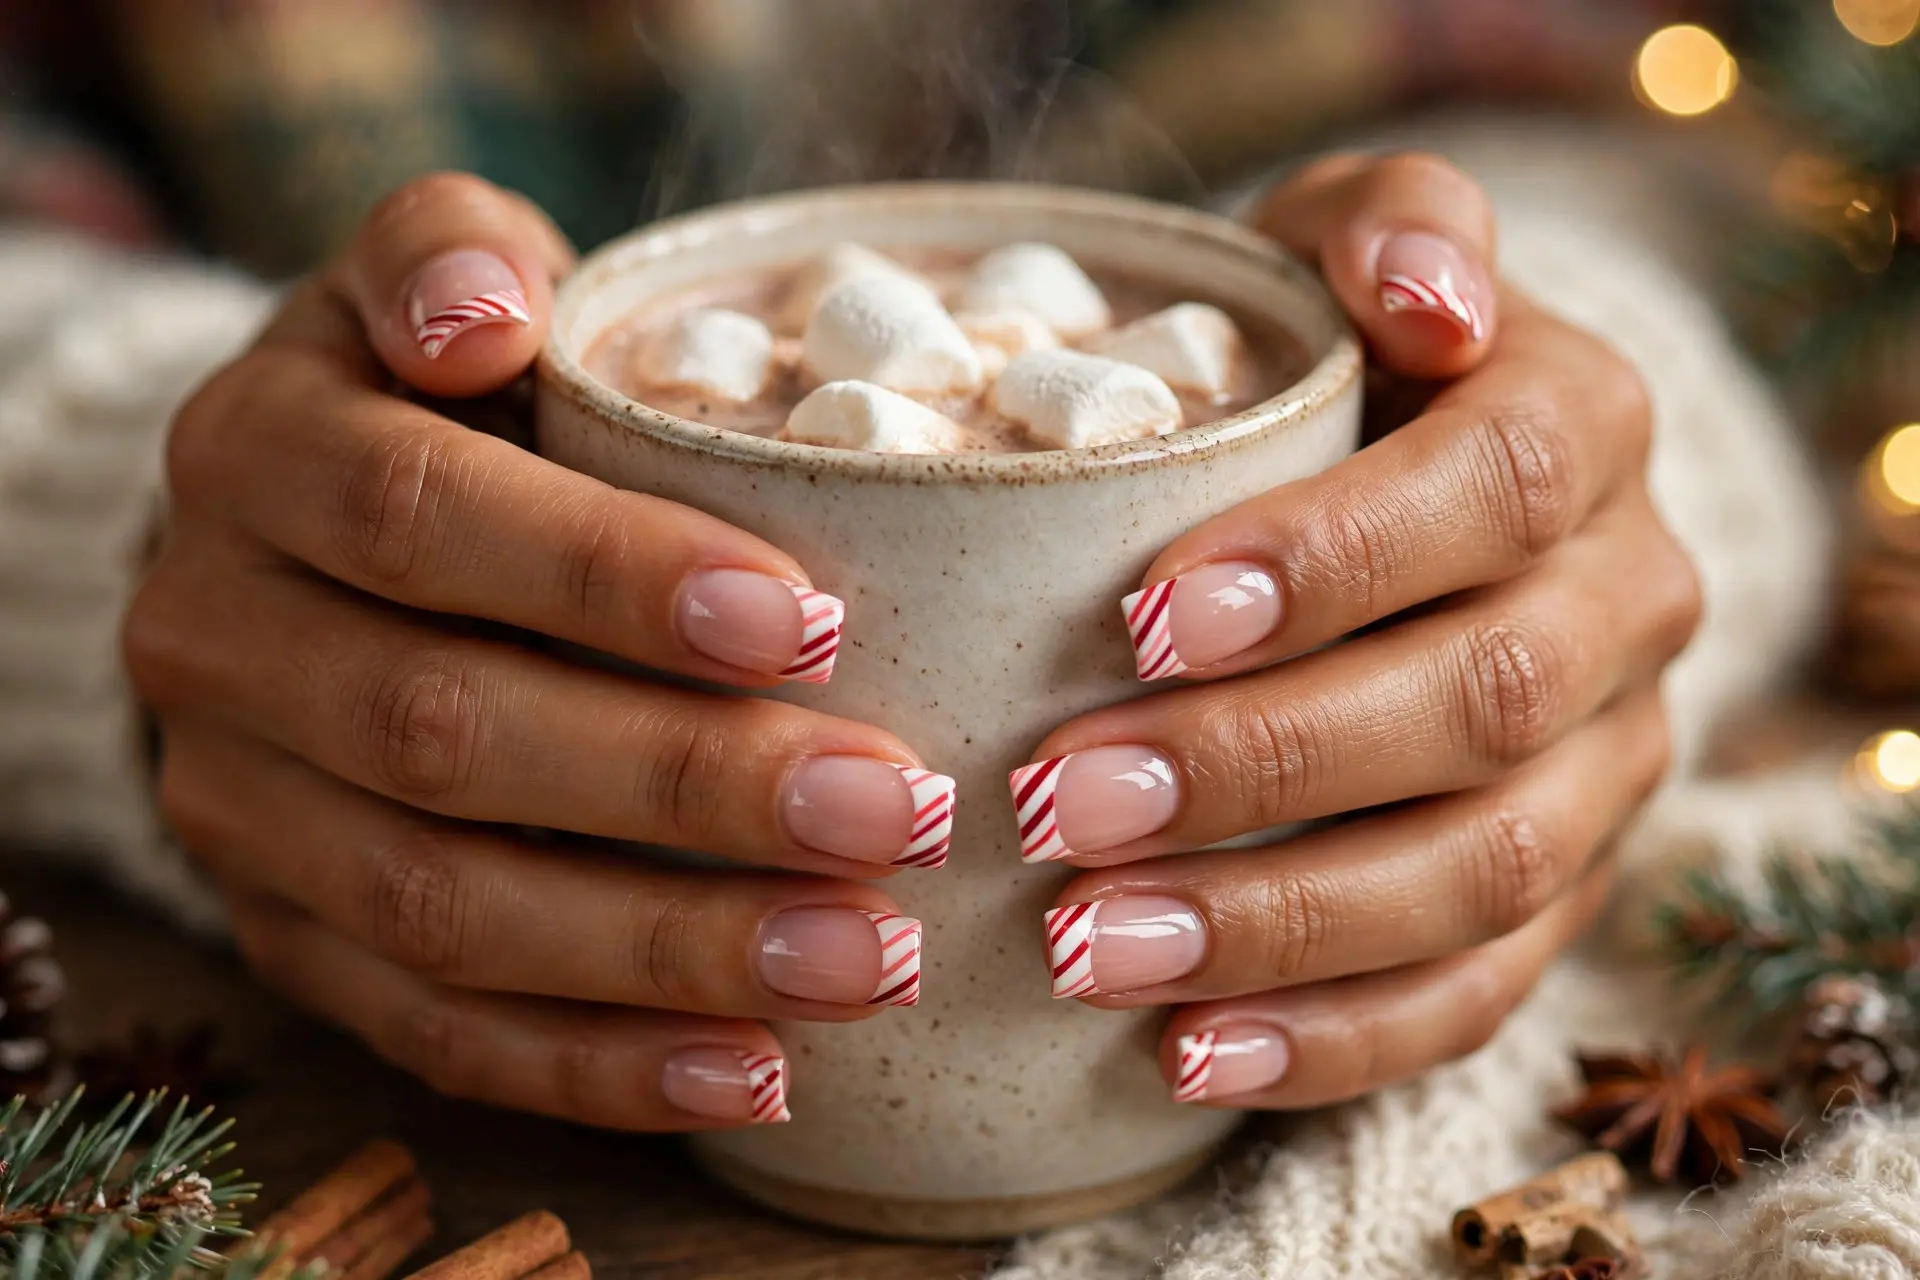
If a full set of stripes feels like a lot, this French version is the gentle way in. The nail bed stays a sheer, healthy pink, and only the tips carry the candy cane stripes — a neat band of red-and-white diagonals where the white French edge would normally sit.
It reads festive up close and tidy from across the room, which makes it the most office-friendly design here. The square shape in the photo suits it beautifully, because the straight free edge gives the striped tip a crisp, defined border.
Grow-out is kind, too: with a natural base, there is no obvious line at the cuticle as the weeks pass, so this is a smart pick early in December when you want one manicure to last.
Tip: Paint the tip band slightly deeper than a classic French — the stripes need a little extra room to show their diagonal movement.
3. Red Glitter Candy Cane Nails

Here the red in the design is not a flat creme but a sparkling red glitter, with clean white stripes painted over the top. The contrast between the twinkling base and the smooth white lines gives the whole manicure a lit-from-within glow that catches every fairy light in the room.
Glitter is also the most forgiving base for stripe work at home. Tiny wobbles in your lines disappear into the sparkle, and the textured finish hides small bumps that a flat color would show immediately.
Choose this one for evening events — it photographs beautifully and looks especially rich against a plain dress. Keep the shape simple, like the medium oval shown here, so the sparkle does the showing off.
Tip: Seal glitter with two layers of top coat; the first fills the texture, and the second gives the white stripes a smooth, glassy surface to sit on.
4. Candy Cane and Snowflake Nails
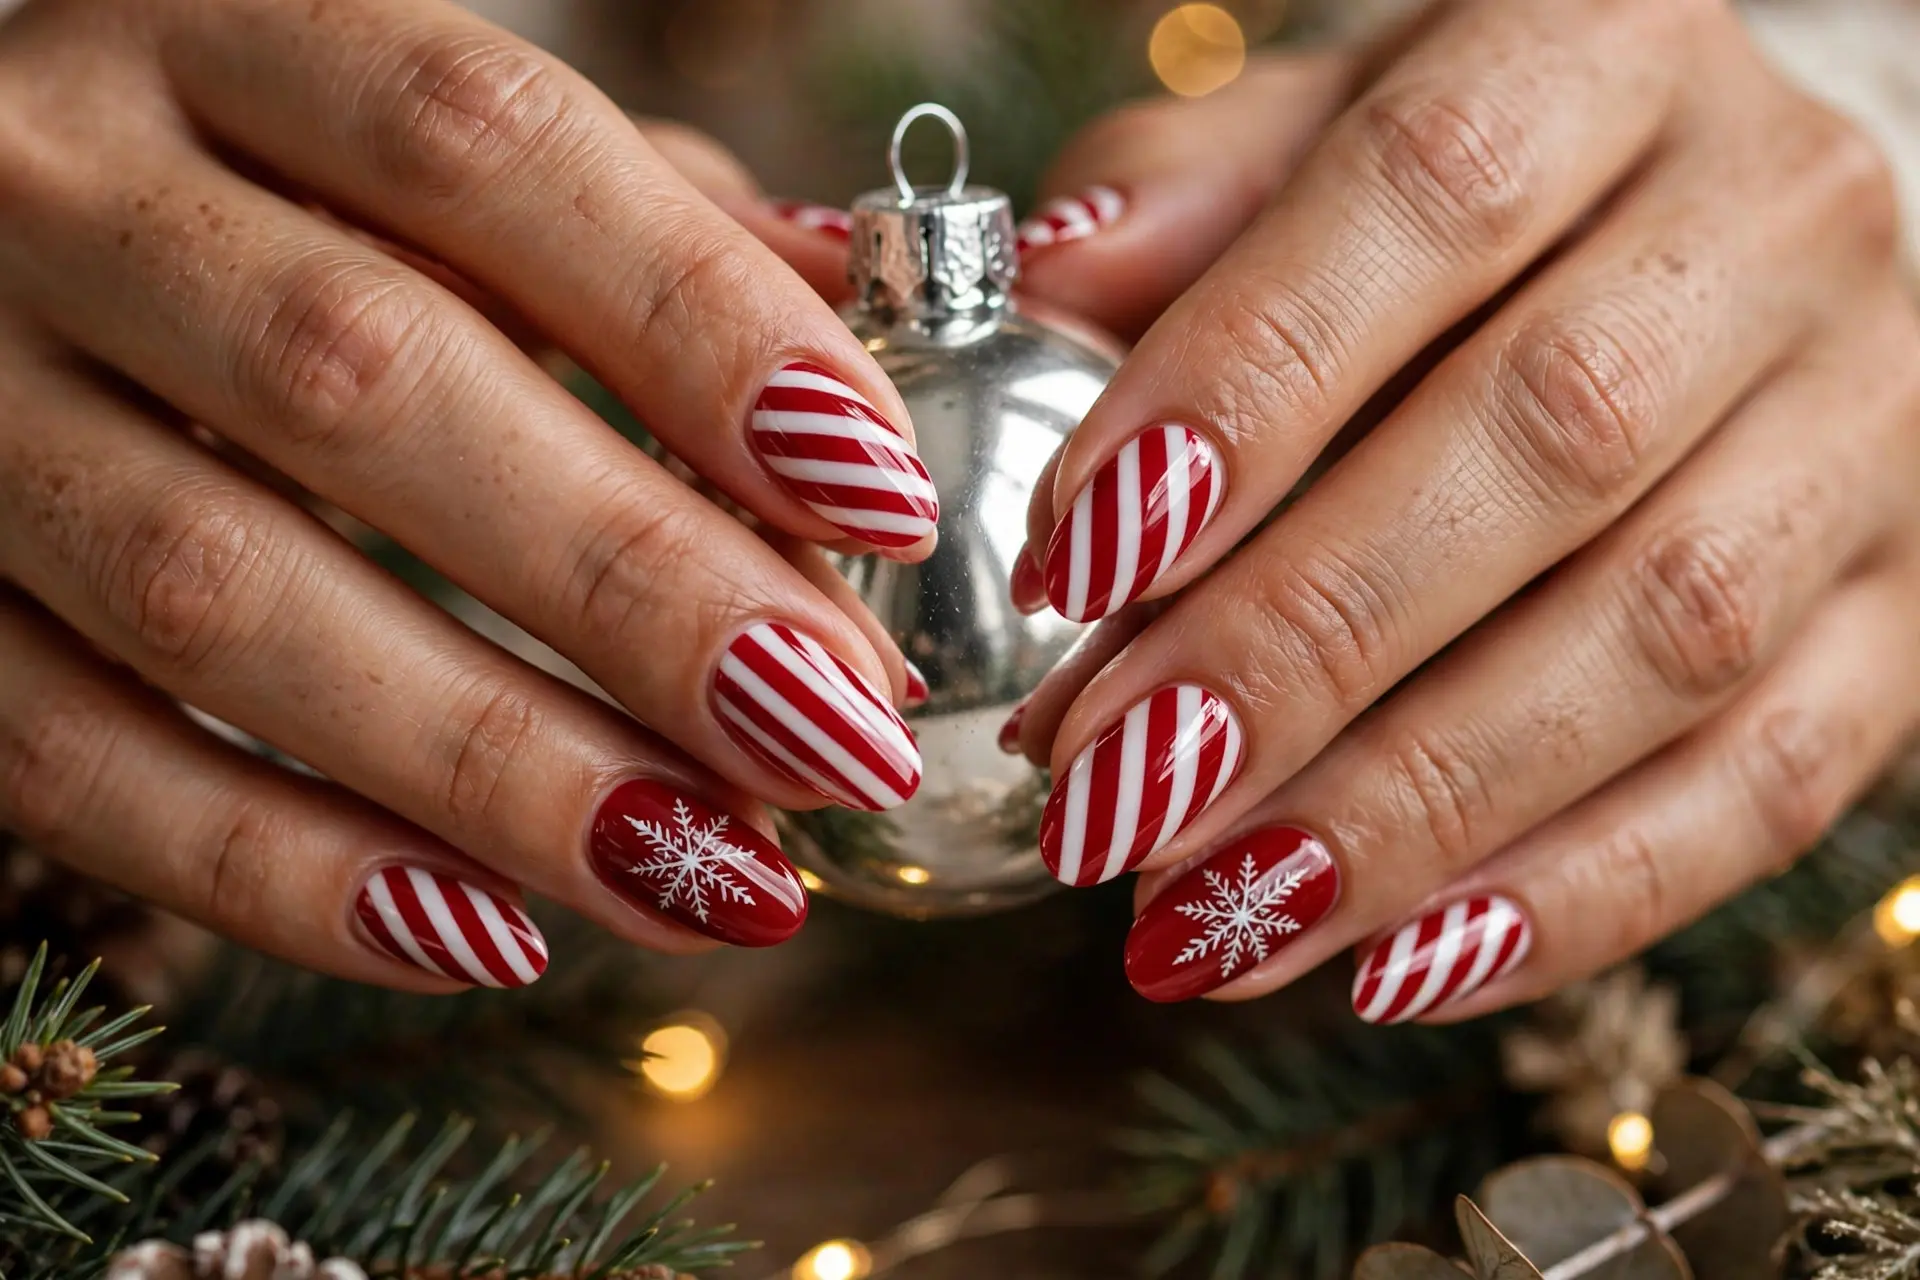
Two Christmas classics share this set: most nails wear the familiar red-and-white diagonal stripes, while each ring finger goes solid red with a delicate white snowflake painted at its center. The break in the pattern is exactly what makes both designs stand out.
The snowflake is the most detailed art in this roundup, but it is easier than it looks — three crossed lines with small V-ticks at the ends, drawn with the finest brush you own. A dotting tool dipped in white polish makes a good practice substitute on paper first.
This is the set to wear if you want nail art that still feels elegant rather than playful. The solid red accents calm the stripes down, and the single motif per hand keeps the balance just right.
Tip: Paint the snowflake last, after the stripes are fully dry, and keep it small — a dainty flake reads more refined than one that fills the nail.
5. Pink Candy Cane Nails

Swap the classic red for a sweet bubblegum pink and the whole mood softens. These pink-and-white diagonal stripes, glossy on a medium almond shape, feel like the candy cane’s gentler sister — still unmistakably festive, but fresh and modern rather than traditional.
Pink is a kind choice if red clashes with your wardrobe or your skin’s undertone. Cool pinks flatter fair skin, while warmer, slightly deeper pinks glow against medium and deep tones; the white stripes keep either version bright.
It is also a lovely bridge design for anyone whose December includes both Christmas and a softer winter palette — it sits happily next to blush coats, cream knits and rose-gold jewelry.
Tip: For the candy-sweet look in the photo, choose a pink with a white-ish pastel base rather than a neon; pastels stripe more cleanly against white.
6. Candy Cane Accent Nails

Most of this manicure is simply a perfect glossy red — and then each ring finger surprises you with full candy cane stripes on a white ground. It is the fastest route to a festive nail look, because you only paint the detailed design twice.
The accent approach suits shorter lengths beautifully, as the photo shows: on a compact squoval nail, one striped ring finger adds all the pattern the hands need without overwhelming smaller nail beds.
It is also the easiest design in the list to touch up. If a stripe chips, you are repainting a single nail; the red nails only need a fresh layer of top coat to look new again.
Tip: Make the red on the solid nails match the red in your stripes exactly — one polish used both ways keeps the set looking deliberate.
7. Candy Cane Swirl Nails

Instead of straight stripes, this design melts the red and white into soft, marbled waves — like the swirl inside a peppermint candy or cream stirred into cocoa. Every nail comes out slightly different, and that organic movement is the whole charm.
The technique is called water marbling or a dry drag swirl: stripes of wet polish are pulled gently sideways with a fine tool before they set. Because the lines are meant to wobble, it is one of the most beginner-friendly looks here — perfection genuinely is not required.
Wear it when you want something artistic that still reads clearly as candy cane. The glossy finish on the almond shape in the photo keeps the swirls looking like hard candy rather than paint.
Tip: Work one nail at a time and drag the swirl while the polish is wet; once it starts to set, the waves will tear instead of flowing.
8. Candy Cane Chrome Nails
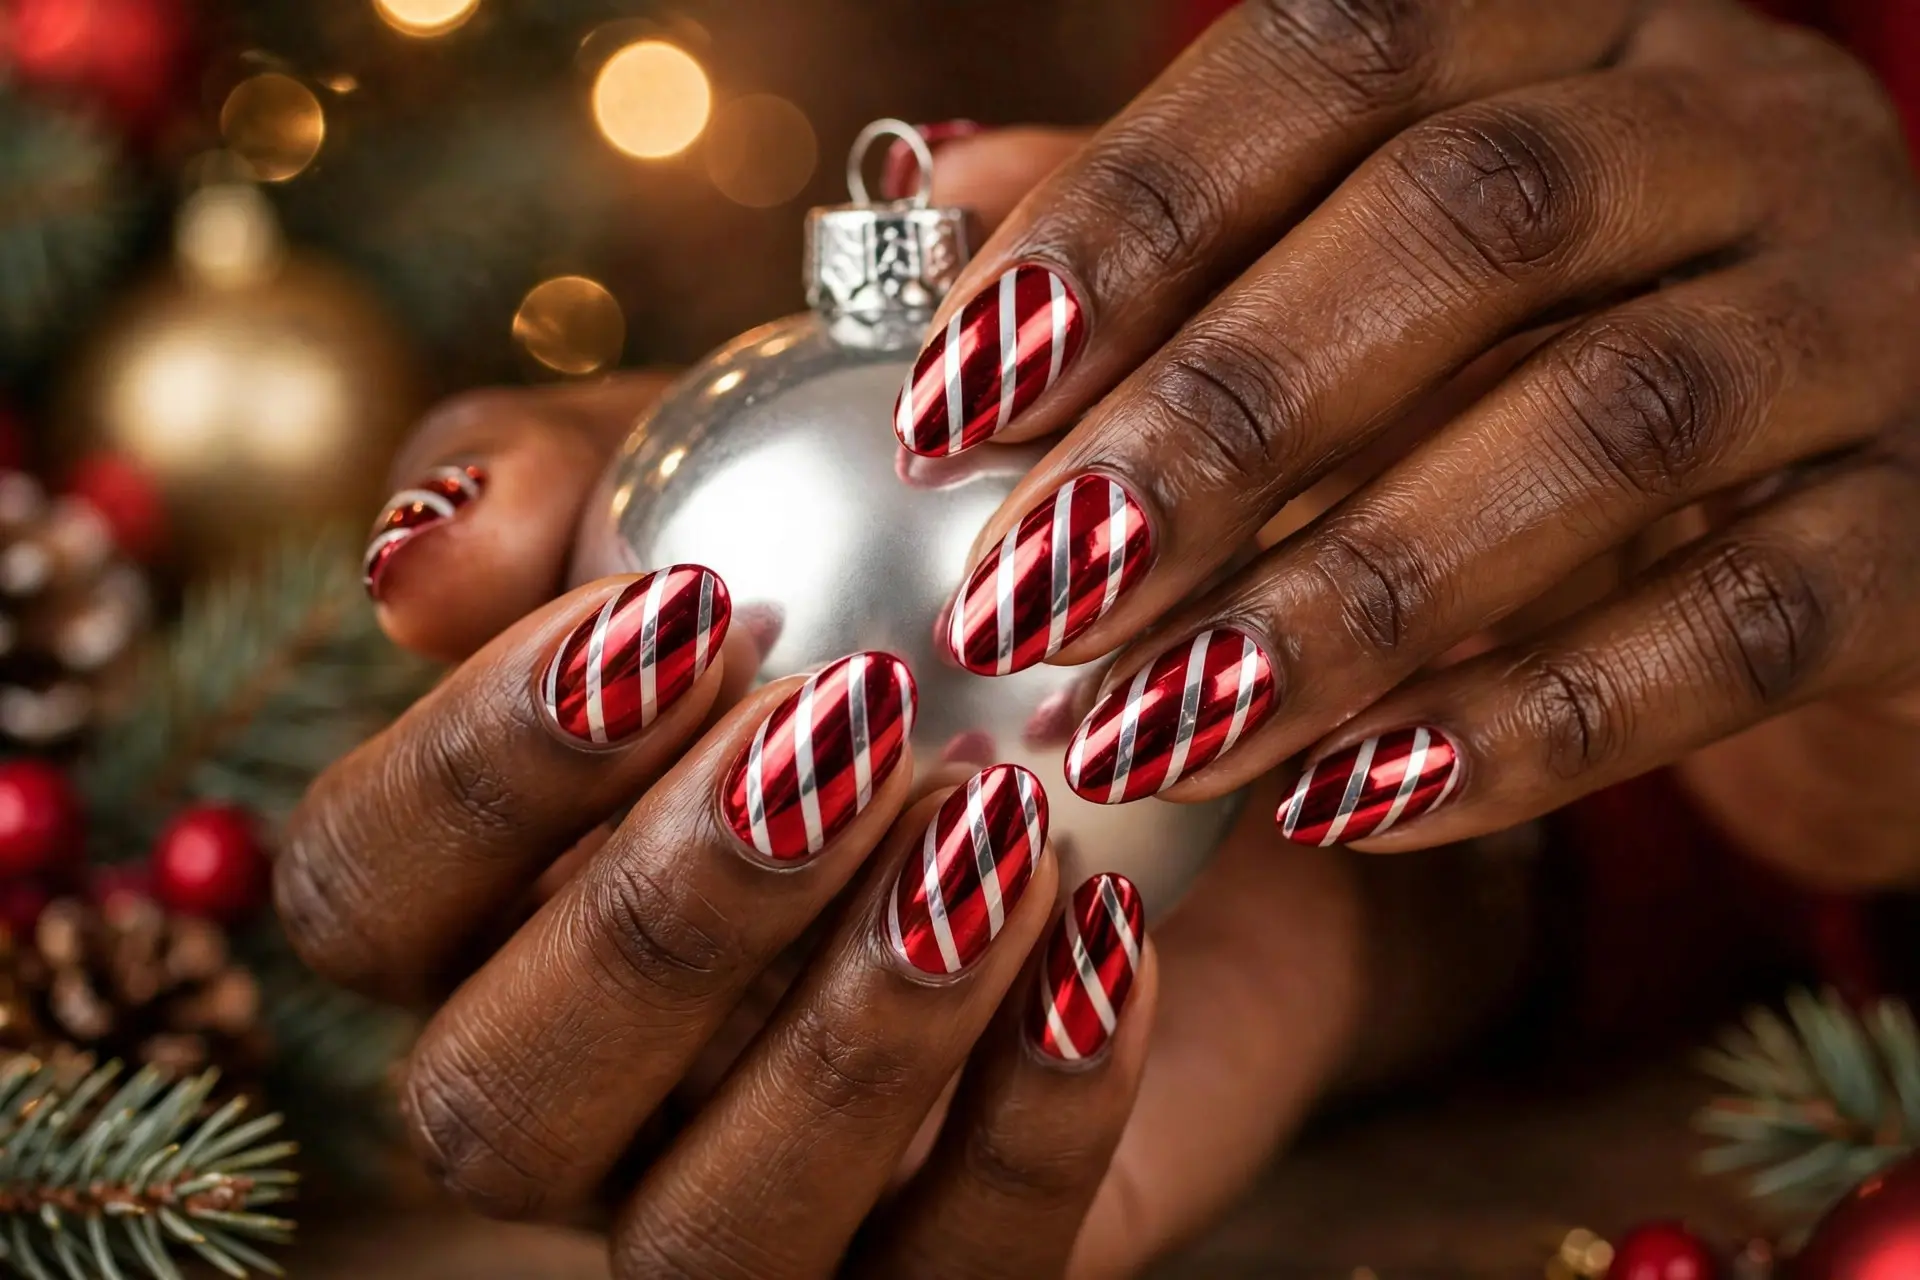
Chrome takes the candy cane mirror-glossy: a molten red metallic base with silvery-white diagonal stripes that shine like tinsel. The reflective finish bends the light as your hands move, so the stripes seem to ripple — the most glamorous interpretation in this collection.
Chrome is usually a salon finish, created by rubbing a metallic powder over a cured gel base, and it rewards a smooth nail: any ridge or bump shows in a mirror shine. A ridge-filling base and careful buffing matter more here than in any other design.
Save this one for parties and evening plans, where low light makes metallic nails glow. On the medium almond shape shown, the chrome reads expensive rather than costume-y.
Tip: Chrome powders show every speck of dust — wipe each nail with a lint-free pad right before applying the powder for a flawless mirror.
9. Green and Red Candy Cane Nails

The classic stripe gets a third color: deep Christmas green joins the red and white in the diagonal pattern, and suddenly the whole set feels more traditional — holly, wreaths and wrapping paper in one manicure. The green also makes the red look richer by contrast.
Balance is the trick. Keep white as the widest stripe so the design stays fresh, and treat green as an equal partner to red rather than a thin afterthought; the square nails in the photo show how smart the trio looks when the bands are even.
This is the design that pairs best with classic Christmas dressing — tartan, deep green sweaters, gold earrings. If your December style leans traditional, this is your stripe.
Tip: Choose a blue-leaning pine green rather than a yellow-green; it harmonizes with classic Christmas red instead of fighting it.
10. Candy Cane with Christmas Tree Nails

Stripes cover most of these nails, but one white ring finger carries a tiny green Christmas tree — a little painted fir with a brown trunk and the tiniest star. It is a small detail that gets noticed every time you pick up a glass or a gift.
The tree is drawn with simple shapes: three stacked triangles or zigzag strokes of green, widest at the bottom. If freehand feels daunting, a tree-shaped nail sticker or stencil gives the same crisp result in seconds.
Because only one nail carries art, the set stays wearable all week. It is a sweet choice for anyone who loves a story in their manicure — the stripes are the wrapping paper, and the tree is the present.
Tip: Keep the tree small and centered, and dot on two or three tiny red baubles only if your brush is fine enough — restraint keeps it charming.
11. Minimalist Candy Cane Nails

For the woman who loves the idea of candy cane nails but not the volume, this is the whisper version: a sheer nude base with one or two hair-thin red lines drawn diagonally across each nail. Most of the nail stays bare, and the effect is clean, calm and quietly festive.
Negative space is what makes it modern. The lines are so fine that from a distance the manicure reads as a glossy nude — the Christmas detail only reveals itself up close, which suits workplaces and minimal dressers perfectly.
It also happens to be the kindest design for short, natural nails, as shown here. Nothing needs length to work, grow-out is invisible, and a chipped line can be redrawn in under a minute.
Tip: Use the very tip of a long striping brush and a light hand; a minimalist line should look drawn in one breath, not painted in.
12. Candy Cane Ombre Nails

This design softens the stripe into a sunset: each nail fades from white at the base to deep red at the tip, and the white diagonal stripes melt into that gradient instead of sitting crisply on top. The result is dreamy rather than graphic.
The fade is sponged on — white and red polished onto a makeup sponge and dabbed over the nail until the middle blends. Painting the stripes while the gradient is fresh, then blending their edges slightly, is what gives the melted, airbrushed finish in the photo.
Ombre is a flattering choice on medium almond nails because the gradient stretches the nail visually, making fingers look longer. It is also forgiving: soft edges hide a multitude of beginner sins.
Tip: Build the gradient in two or three thin sponge layers rather than one thick one; thin layers blend into a true fade instead of a hard line.
13. Candy Cane Matte Nails
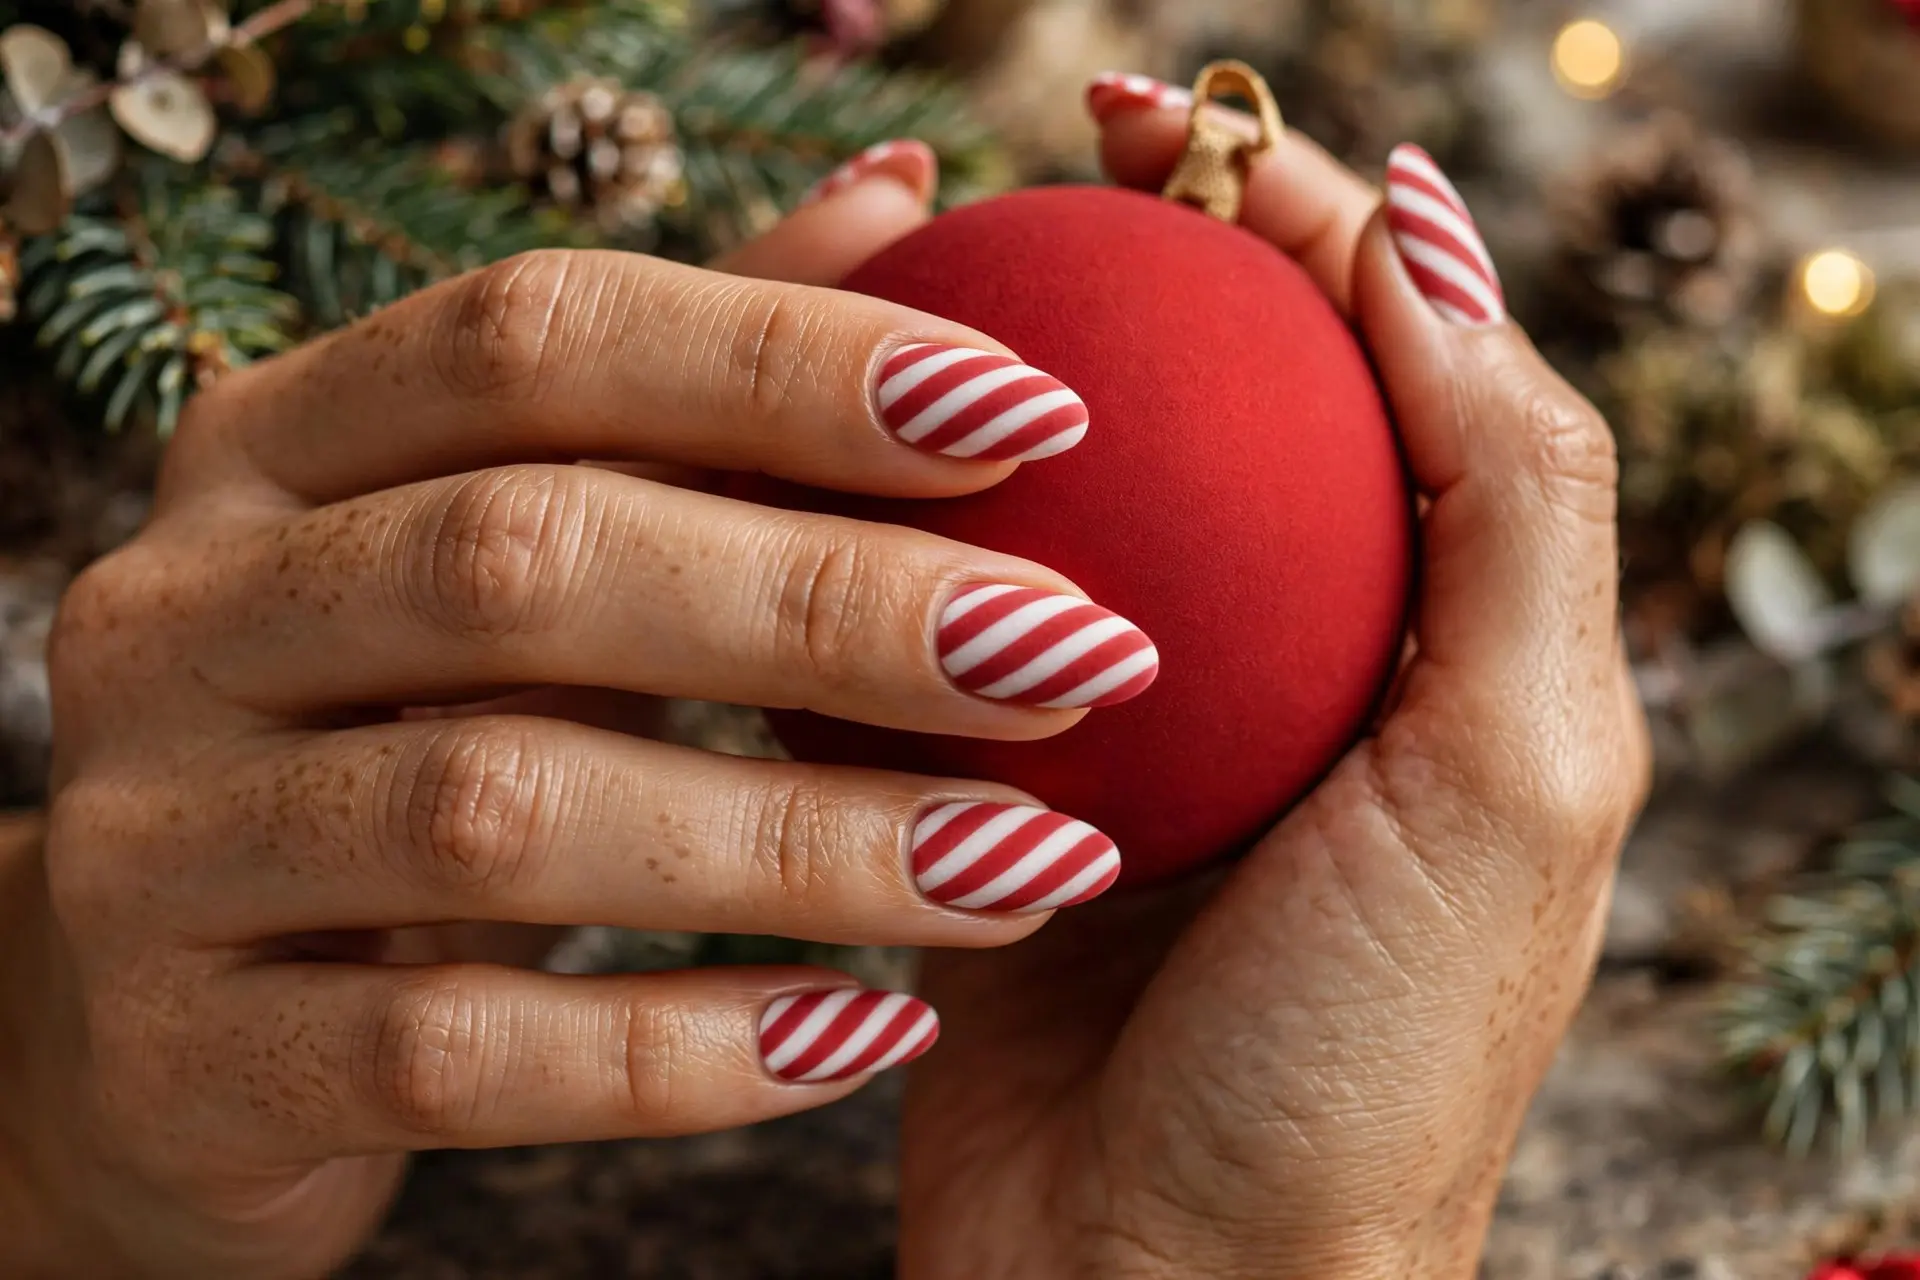
Same beloved stripes, completely different texture: a flat velvet-matte top coat turns the glossy candy shine into something soft and chalky, like the surface of a real peppermint left out of its wrapper. It is the most understated-luxe finish in the roundup.
Matte changes how colors read — the red deepens slightly and the white turns creamy — so this version pairs beautifully with cozy textures: knit sweaters, suede boots, brushed wool coats. The almond shape keeps it elegant rather than edgy.
One honest trade-off: matte top coats show wear faster than glossy ones, softening at the tips after a few days of typing and washing up. Many women refresh the matte coat mid-week, which takes two minutes and restores the velvet look.
Tip: Apply matte top coat over fully glossy stripes; sealing the shine in first keeps the colors saturated under the matte finish.
14. Candy Cane Glitter French Nails

This party-ready French turns the tips to sparkling red glitter and crosses each one with a single fine white diagonal line — just a nod to the candy cane, worn like jewelry. The sheer pink base keeps it graceful, and the square tips give the glitter a smart, tailored edge.
Because the art lives only in the tip band, this is one of the quickest full sets to create: glitter tips freehand or with French guides, one white stroke each, and you are done. It suits the woman who wants Christmas nails that still feel dressed-up rather than themed.
Wear it to evening events, as in the photo — it catches candlelight beautifully against a glass in hand, and it will not clash with a single outfit in your wardrobe.
Tip: Draw the white line after the glitter tip is completely dry, using a nearly dry brush; too much polish bleeds into the glitter texture.
15. Candy Cane and Gold Christmas Nails
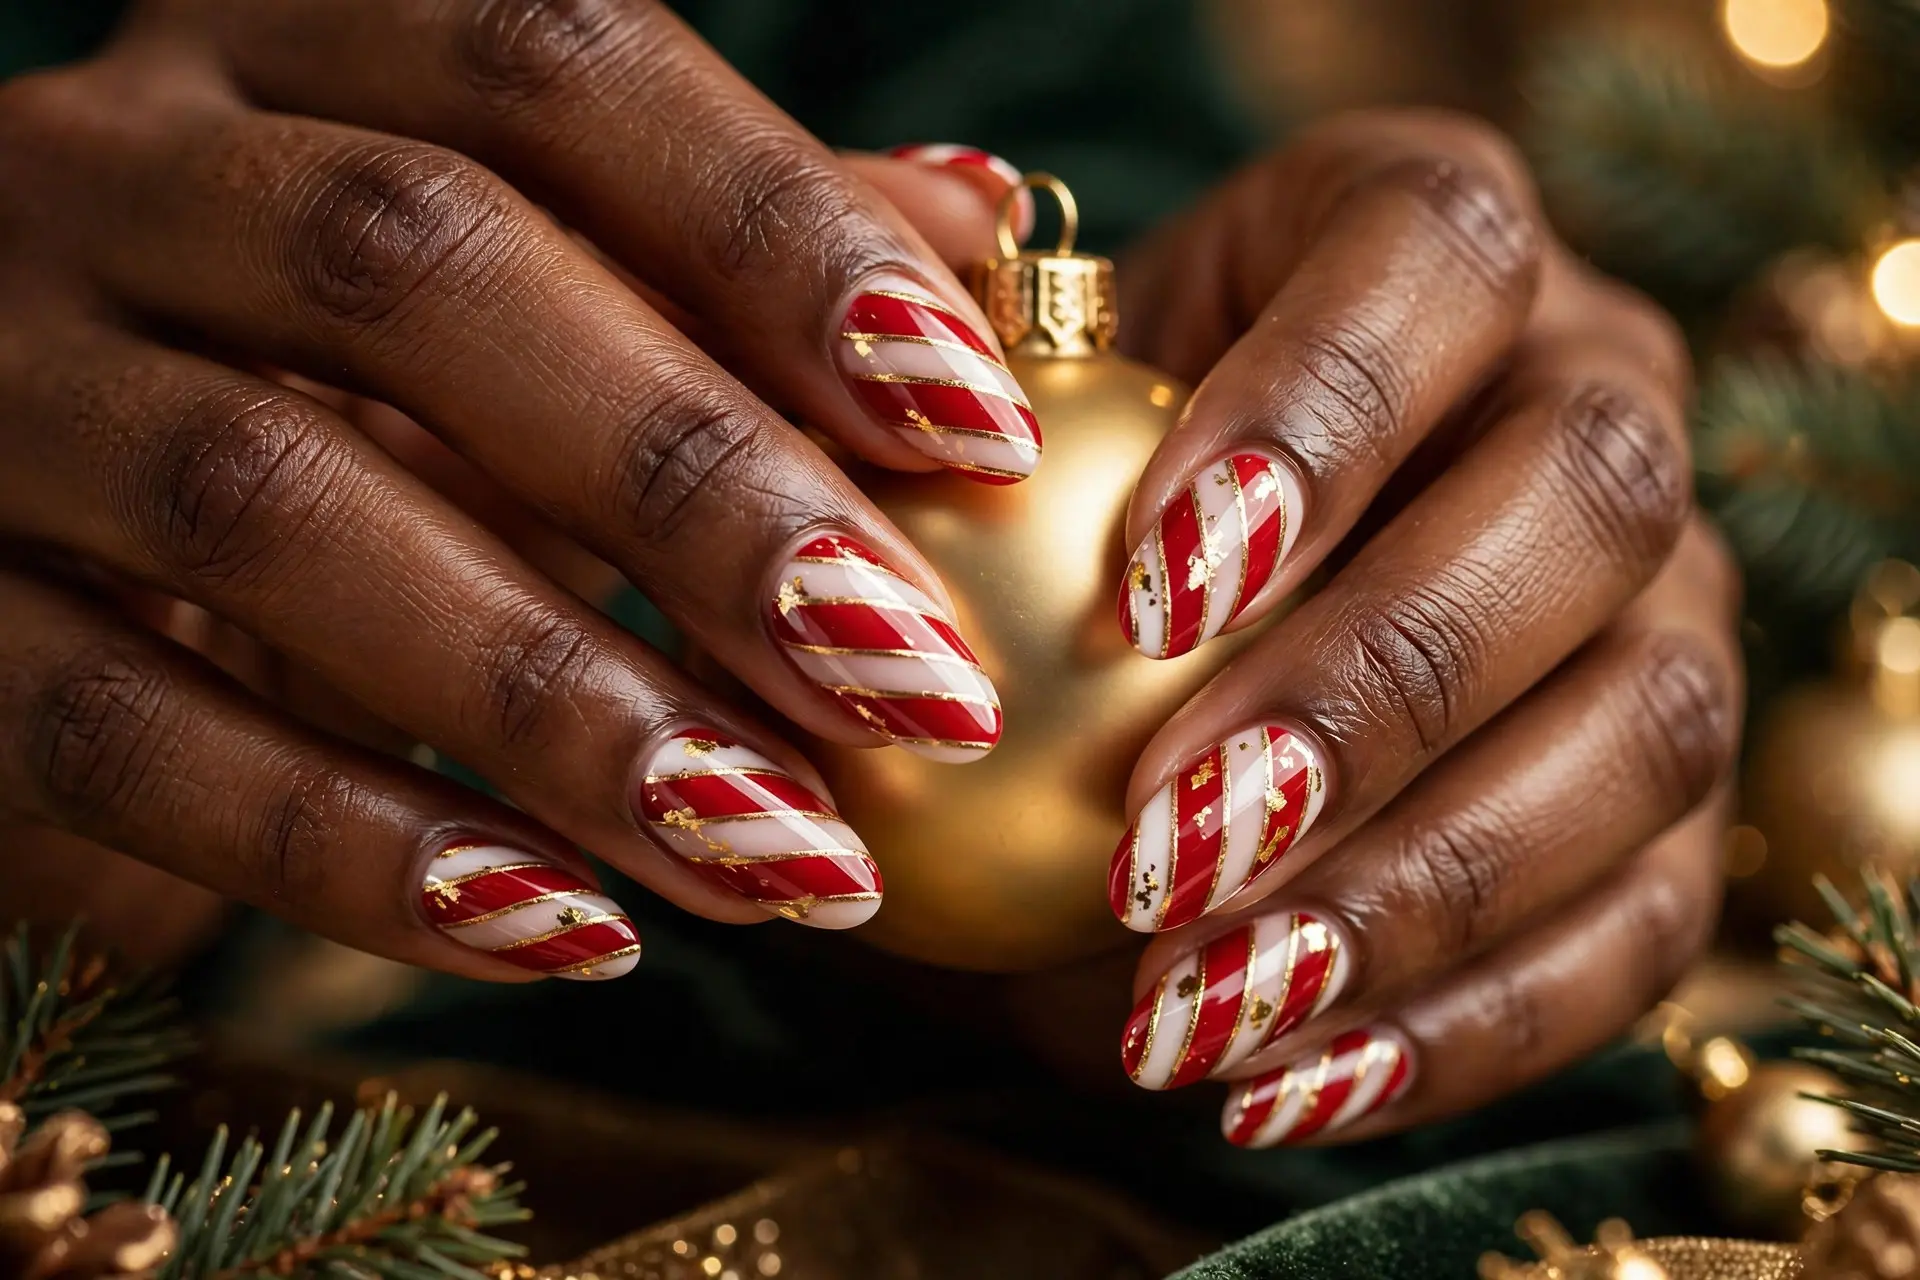
The grand finale adds gold: the red-and-white diagonal stripes are edged with hair-thin metallic gold lines, and tiny flecks of gold foil are pressed between them. It turns a playful candy design into something genuinely luxurious — Christmas Eve, rather than the school fair.
Gold works here because it warms both neighbors: it deepens the red and softens the white, tying the whole palette to gold jewelry and warm lamplight. On the medium almond nails in the photo, the effect is rich without ever looking heavy.
Foil flecks are easier than they look — they are pressed onto tacky polish with tweezers and sealed under top coat. No two nails come out identical, which only adds to the handcrafted, expensive feel.
Tip: Keep the gold lines thinner than the colored stripes; gold should outline the design, not compete with it.
Styling Tips
Keep the diagonal direction consistent. Stripes that all lean the same way across both hands look like one designed set. Before you start, decide on your angle — and if a nail tech is painting them, say it out loud, because mixed directions are the most common reason a candy cane set looks “off.”
Match stripe width to nail length. Short nails look best with two or three wider stripes; more than that turns to visual noise. Medium and long nails can carry four or five slimmer stripes and still read cleanly from a normal distance.
Let the manicure set the jewelry tone. Classic red-and-white stripes love silver and pearl jewelry, while the gold-accented and green versions call for gold. Keeping metals in the same family as your nail accents makes the whole look feel pulled together.
Plan the design around your week. Full stripes and chrome are high-impact but show chips sooner. If your December is full of cooking, wrapping and washing up, the accent-nail or French versions survive the chores with far less maintenance.
Common Mistakes to Avoid
Painting stripes over a wet base. The number-one cause of smeared candy cane lines. The white base must be fully dry — or fully cured, for gel — before red stripes go on, or the colors bleed into pink streaks.
Skipping base coat under red. Red pigments stain natural nails yellow-pink, and the stain shows through sheer designs like the French and minimalist looks for weeks. A proper base coat is non-negotiable with any red in the set.
Freehanding without a guide when you need straight lines. There is no prize for struggling. Striping tape, French guides or even a piece of washi tape give crisp edges; remove the tape while the stripe polish is still slightly wet for the cleanest line.
Loading the brush with too much polish. Thick stripes blob at the edges and take forever to dry, which leads to smudging. Two thin passes beat one thick one, every time — wipe the brush well before each stripe.
Forgetting to cap the free edge. Stripes that stop short of the nail tip wear away first and the pattern chips from the end. Run your top coat — and each color — lightly along the edge to seal the design in.
The Best Shapes and Finishes for Candy Cane Nails
Shape decides how much room your stripes have to travel. Almond and oval nails are the natural home of the candy cane design: their tapered sides let diagonal stripes sweep long and elegant, exactly as you see through most of this roundup. Square nails make the same stripes look graphic and modern — the crisp corners frame the pattern like a picture — while squoval is the forgiving middle ground that suits shorter lengths. If your nails are short, do not abandon stripes; simply paint fewer of them, a little wider apart, and the design reads perfectly at small scale. Very long coffin shapes can carry the boldest versions, but the stripes need to stay proportionally wider or they get lost.
Finish is where the personality lives. A glossy top coat is the classic choice and the most practical: it gives that hard-candy shine, deepens the red, and hides minor imperfections in your stripe work, which is why it suits beginners and busy weeks alike. Matte is the fashion editor’s pick — soft, velvety and modern — but it shows tip wear within days and needs a mid-week refresh. Glitter and chrome sit at the glamorous end: glitter sparkles forgivingly over small wobbles, while chrome demands a flawless base because a mirror finish reflects every ridge. Choose the finish the way you would choose a party outfit — glossy for everywhere, matte for style points, glitter and chrome when the night calls for it.
Finally, think of stripe width as a strategy, not an afterthought. On short nails, two or three bold stripes photograph best and keep the candy cane identity unmistakable. Medium nails carry three or four medium stripes — the sweet spot you see in most of these photos. Save the fine, hair-thin lines for minimalist designs and accent details, where delicacy is the point; a full set of overly thin stripes tends to blur into pink from a distance. When in doubt, step back and look at your hands at arm’s length: if the stripes still read clearly, the width is right.
Frequently Asked Questions
Are candy cane nails good for short nails?
Yes — some of the prettiest versions here were made for short nails. The accent-nail design, the French tips and the minimalist fine-line look all work beautifully at short lengths. Just keep the stripes a little wider and fewer in number so the pattern stays clear on a smaller nail.
What colors work best for candy cane nails?
Classic Christmas red and white is the starting point, but the family is bigger than that: pink and white for a softer look, red-white-and-green for tradition, and gold or silver accents for glamour. The only rule is strong contrast — the stripes need to stand apart from each other to read as candy cane.
Can I create candy cane nails at home?
Absolutely. A long striping brush or striping tape, a white base and a good red are all you need for the classic design, and the swirl and ombre versions are even more forgiving. Start with the accent-nail design if you are a beginner — you only paint two detailed nails while you build confidence.
What nail shape looks best with candy cane designs?
Almond and oval shapes let diagonal stripes sweep at their most flattering, and they star in most of the photos above. Square shapes give the stripes a crisp, graphic frame, and squoval is the best all-rounder for short nails. There is genuinely no wrong shape — only stripe widths to adjust.
How can I make candy cane nail art last longer?
Start with clean, dry nails and a base coat, seal everything with a quality top coat, and cap the free edge so the stripes cannot chip from the tip. Reapply a thin layer of top coat every two to three days, wear gloves for washing up, and your stripes should stay crisp for a week or more.
Conclusion
Whichever way you wear them — bold and classic, soft and pink, or pared right back to a single fine line — candy cane nail ideas are the quickest way to make your whole December feel festive, right down to your fingertips. For a playful change of pace, pair these stripes with the character art in our Grinch nail ideas and mix one cheeky green accent into your next set. Which of these fifteen will you be wearing on Christmas morning?