

Last spring my ends were telling on me. They were dry, they were splitting, and every wash day ended with more hair in the drain than I wanted to admit. So I did what I should have done months earlier: I gave my hair a real break. Eight weeks of a protective style, and my hair came out of it longer, softer, and calmer than it had been in a year.
That is what protective styling actually is. Not hiding your hair, but resting it: tucking the fragile ends away so they stop breaking faster than your roots can grow. These 22 styles do exactly that, from twists you can do on your own hair to braids and locs worth booking a stylist for. Pick the one that fits your calendar, not someone else’s routine.
1. 🪢 Two-Strand Twists on Your Own Hair

The simplest protective style there is: two sections of your own natural hair twisted together, no extensions needed. The ends stay tucked, moisture stays in, and you can wear them for one to two weeks. Perfect for the week you want to give your hair a rest without an appointment.
Try this: Clean, conditioned hair + leave-in + two-strand twists
**Make it yours:** Twist on damp hair for smoother, longer-lasting results.
**Budget tip:** This style costs nothing but your time and a good leave-in.
2. ➡️ Flat Twists Along the Sides

Flat twists work like cornrows but with a twisting technique, lying close to the scalp in neat rows. They are quicker than individual twists and give a sleek, intentional look. Wear them alone or unravel them into a twist-out later in the week.
Try this: Damp hair + curl cream + flat twists on each side
**Make it yours:** Leave the back in loose twists for a mixed texture.
**Avoid:** Twisting too tightly at the hairline; comfort matters more than neatness.
3. 🔬 Mini Twists
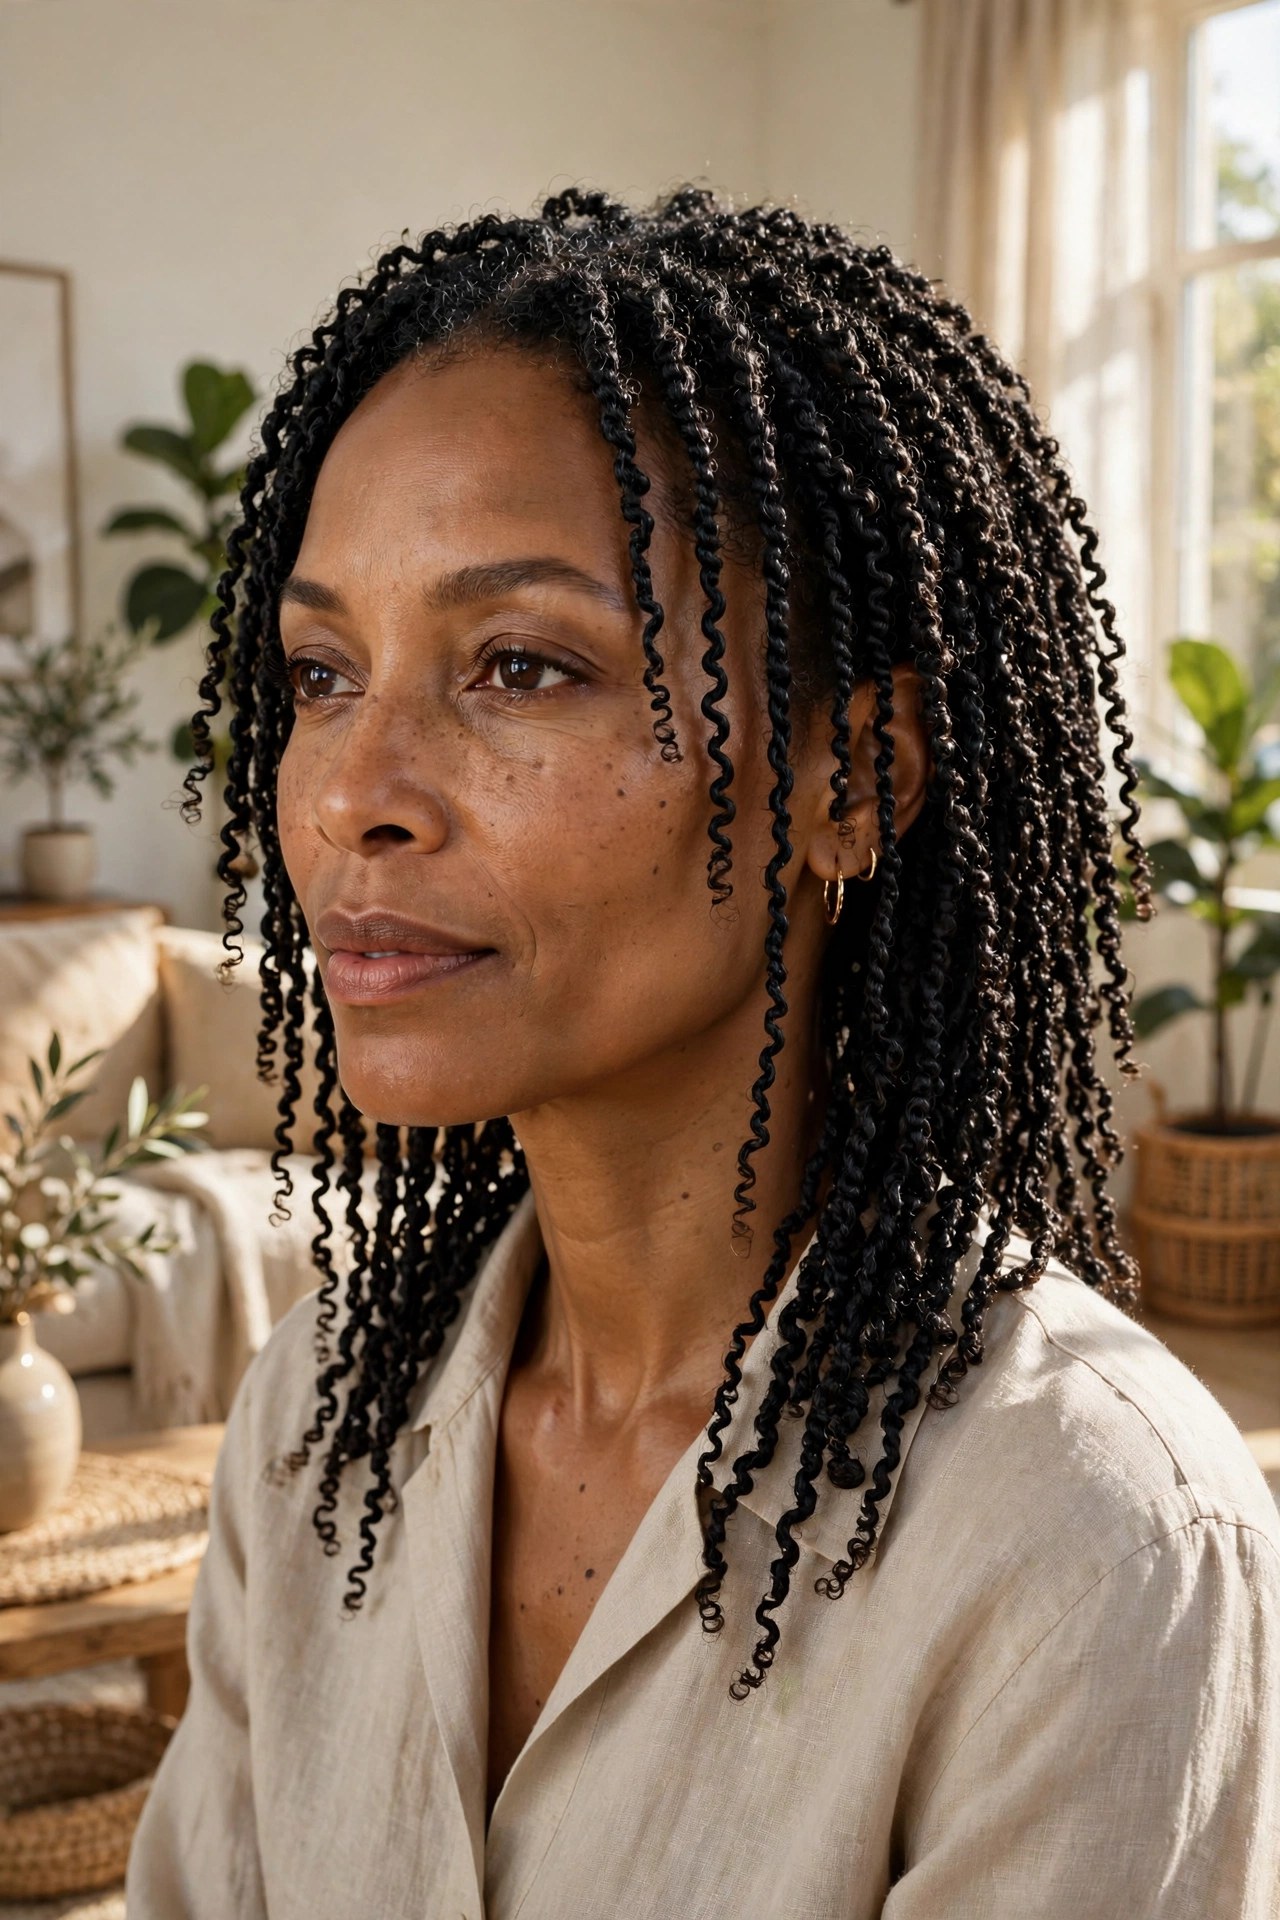
Mini twists are two-strand twists done in very small sections, and they can last up to eight weeks with care. They look delicate and can be styled like loose natural hair. The trade-off is install time: set aside a full afternoon or split it over two evenings.
Try this: Small sections + light twisting butter + mini twists
**Make it yours:** Gather them into a puff or bun for second-month styling.
**Budget tip:** No added hair needed, so the only cost is product.
4. 🪢 Senegalese Rope Twists

Senegalese twists use a smooth, rope-like technique that gives a sleek, polished finish. Installed with extension hair, they can last up to eight weeks and your own hair stays completely tucked away. They move beautifully and style easily into updos.
Try this: Kanekalon braiding hair + rope-twist technique + medium size
**Make it yours:** Try a deep side part for an elegant drape.
**Avoid:** Very long, heavy installs if your edges are fragile.
5. 🌾 Marley Twists
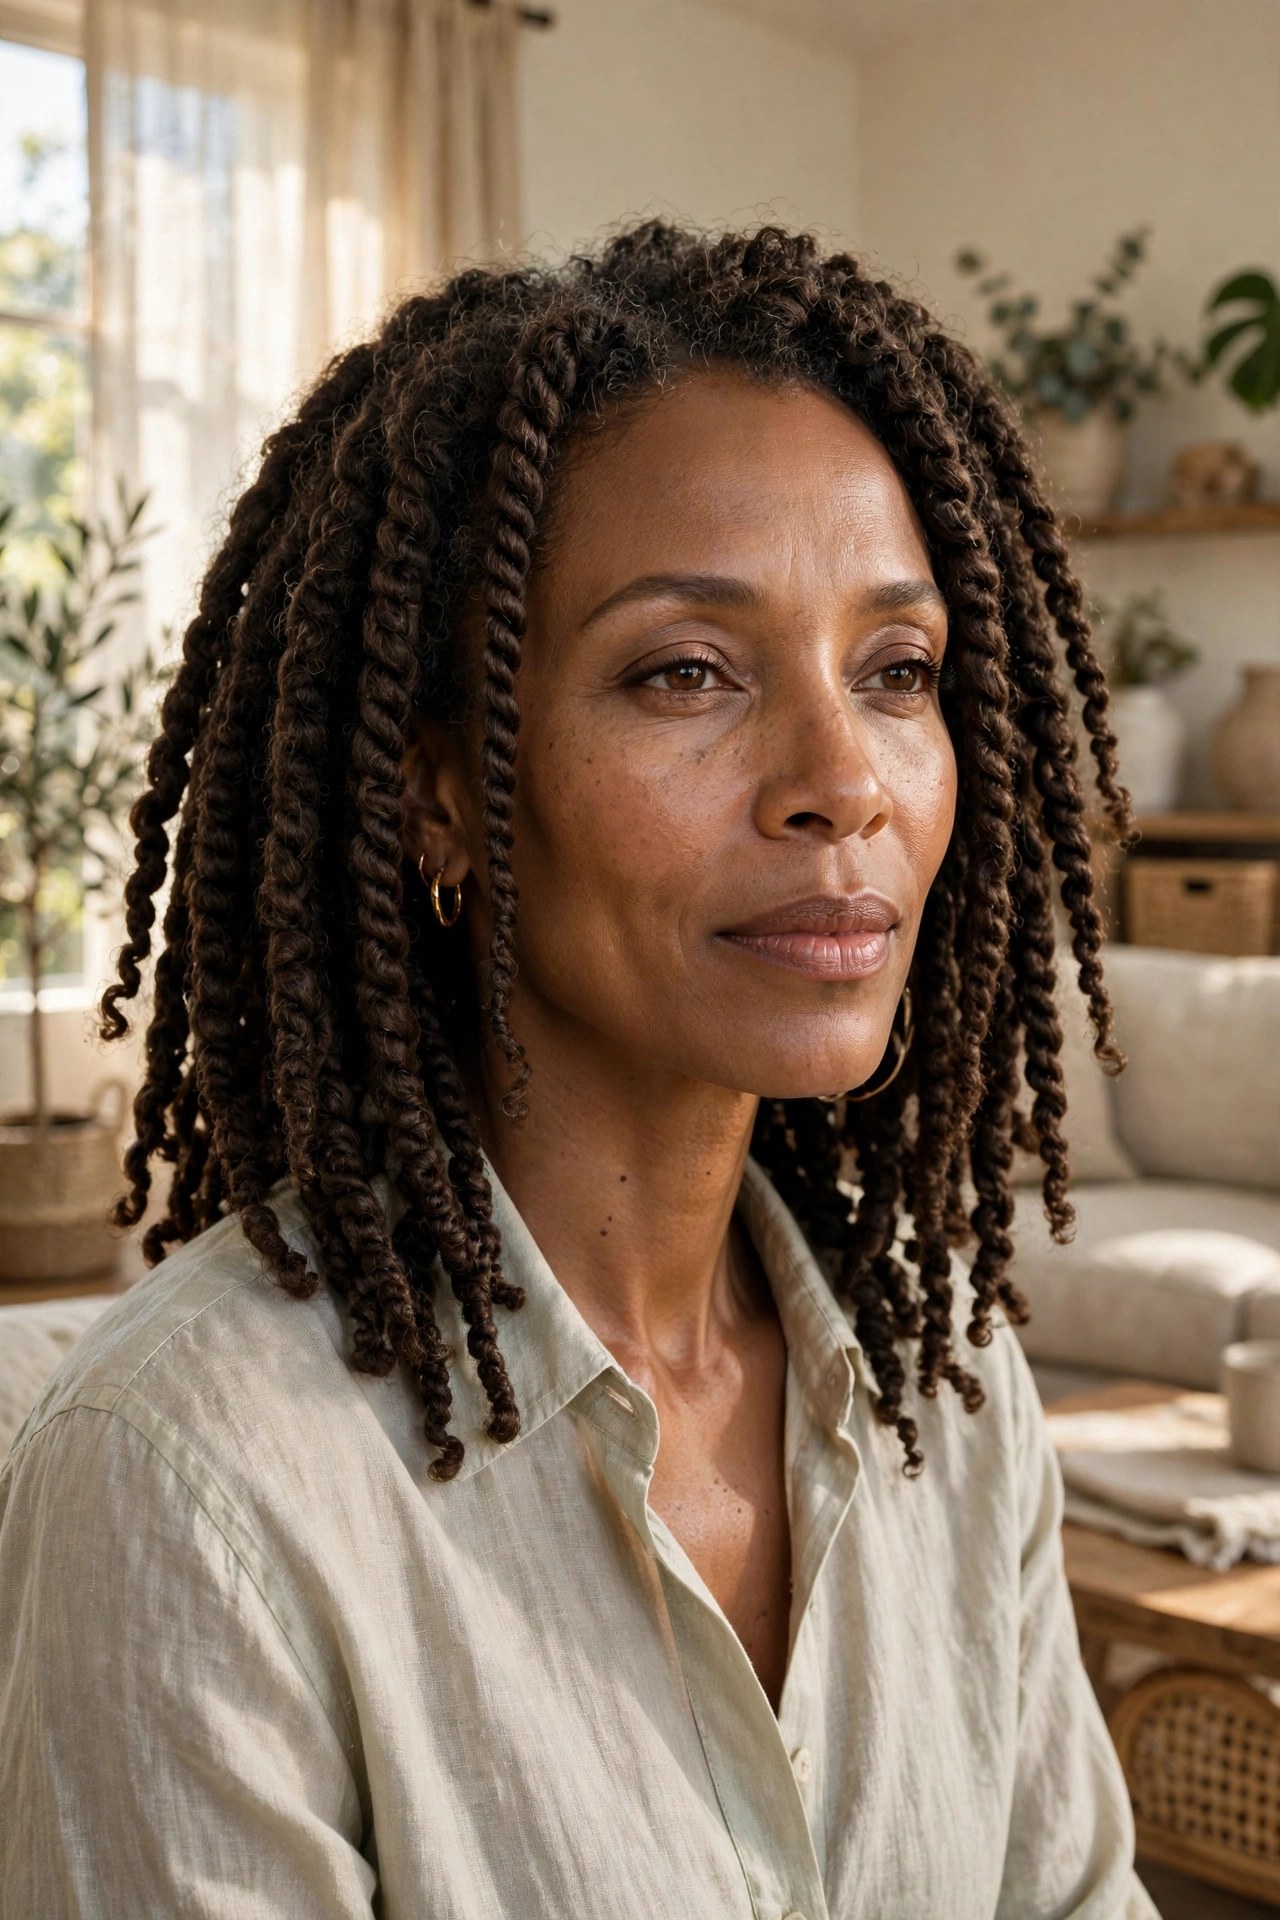
Marley twists use textured Marley hair, so the finished style looks remarkably like thick natural hair. They are installed with an invisible-root method that makes the twists appear to grow from your scalp. A great choice if you want fullness without anyone guessing it is extensions.
Try this: Marley hair + invisible root method + medium-full twists
**Make it yours:** Keep them shoulder length for a natural-looking shape.
**Budget tip:** Marley hair is inexpensive and widely available.
6. 💧 Passion Twists

Passion twists are made with curly, water-wave extension hair, giving a soft, romantic texture. They are lighter than they look and have a beautiful bohemian feel. The curls hide new growth well, so the style ages gracefully.
Try this: Water-wave braiding hair + passion twist technique + mid-back length
**Make it yours:** Separate a few curls at the ends for extra softness.
**Avoid:** Over-moisturizing the extensions; they get heavy when soaked.
7. ⬛ Classic Medium Box Braids
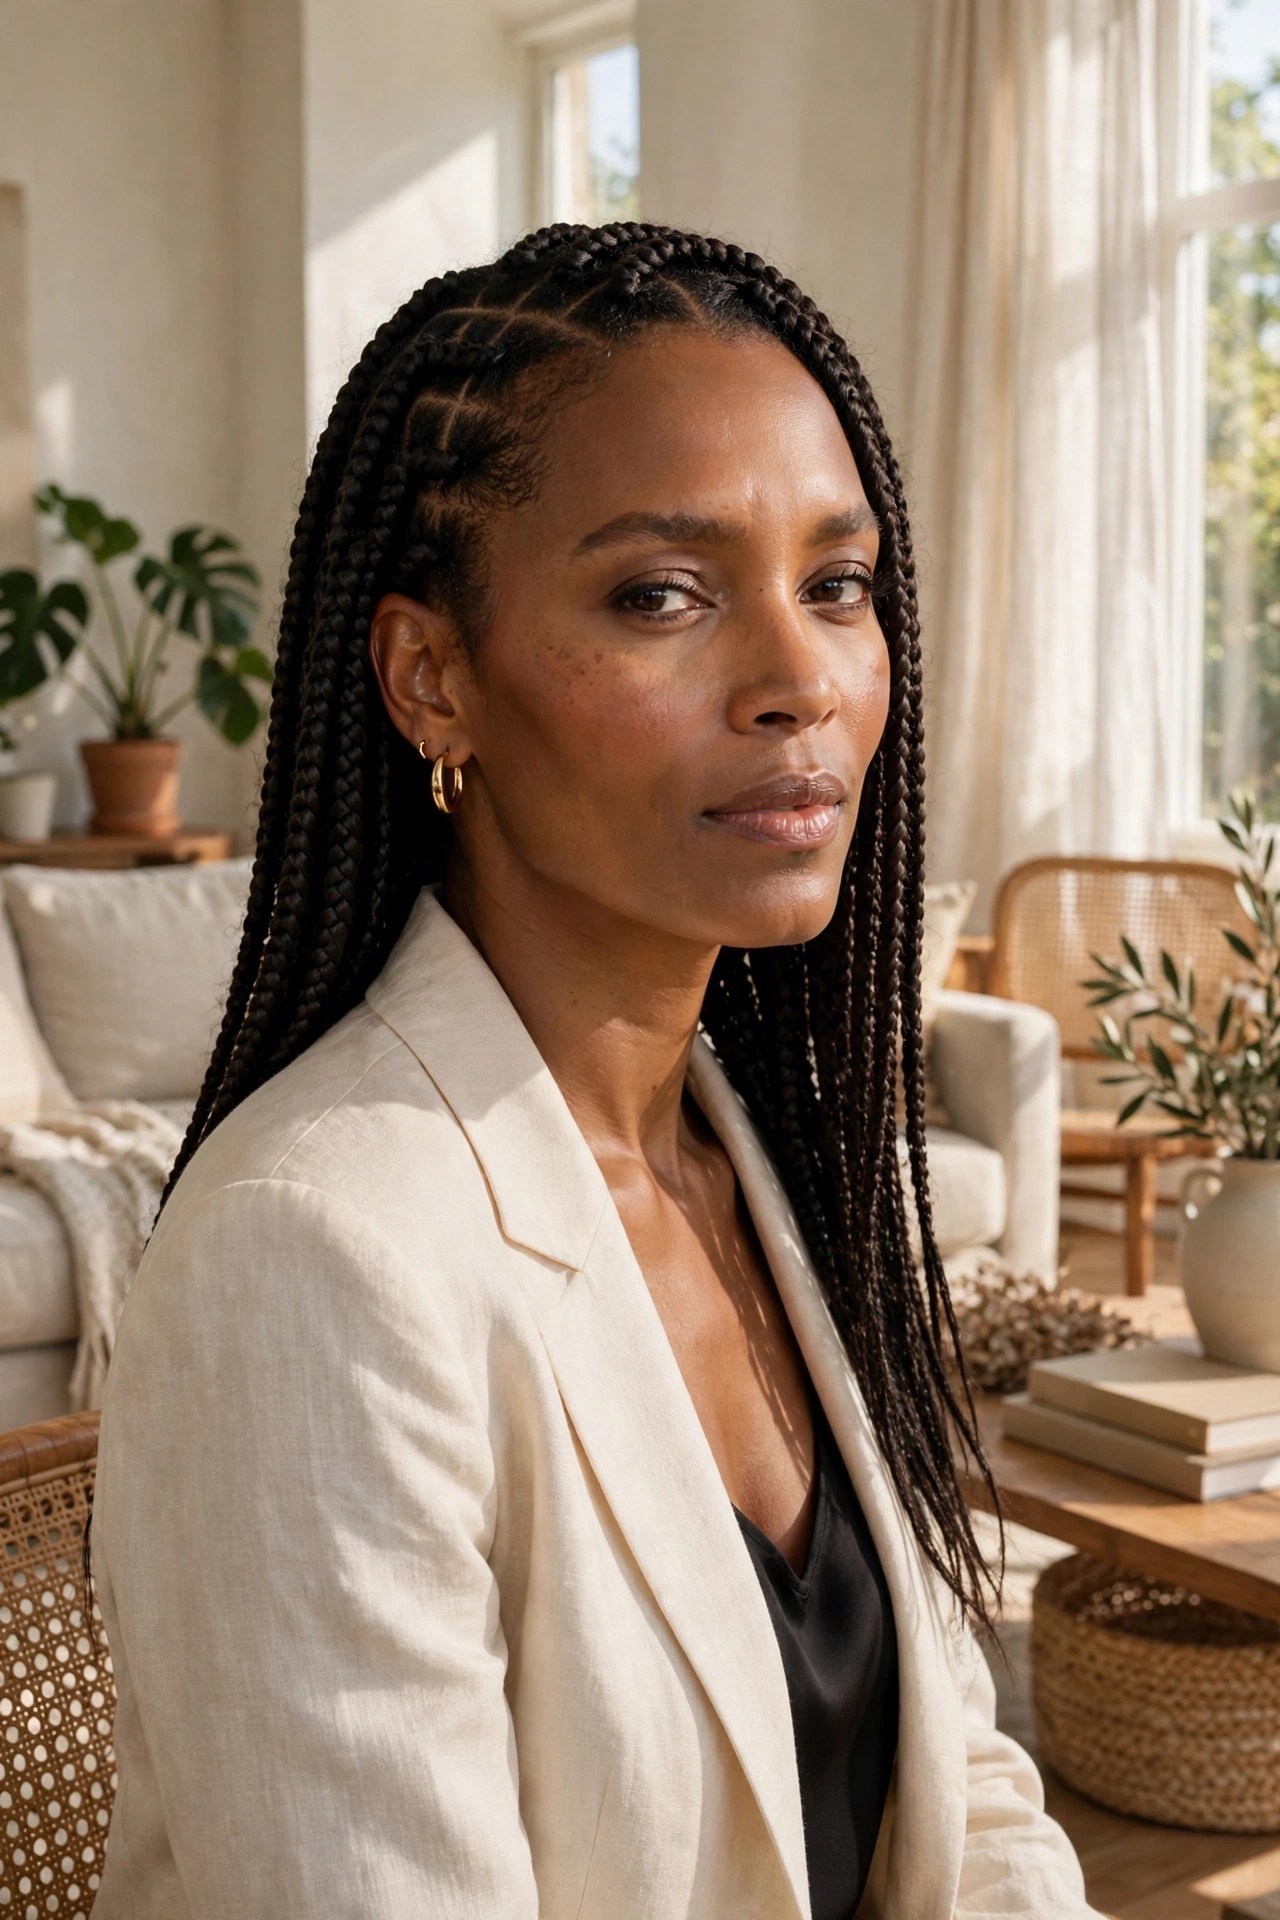
The timeless protective style: medium box braids that last six to eight weeks and style a dozen ways. The square parts give structure, and medium size balances durability with comfort. If you only learn one protective style, make it this one.
Try this: Braiding hair + medium square parts + mid-back length
**Make it yours:** Dip the ends in hot water and let them hang straight.
**Budget tip:** Medium braids mean fewer braids and a shorter appointment.
8. 🕊️ Knotless Box Braids
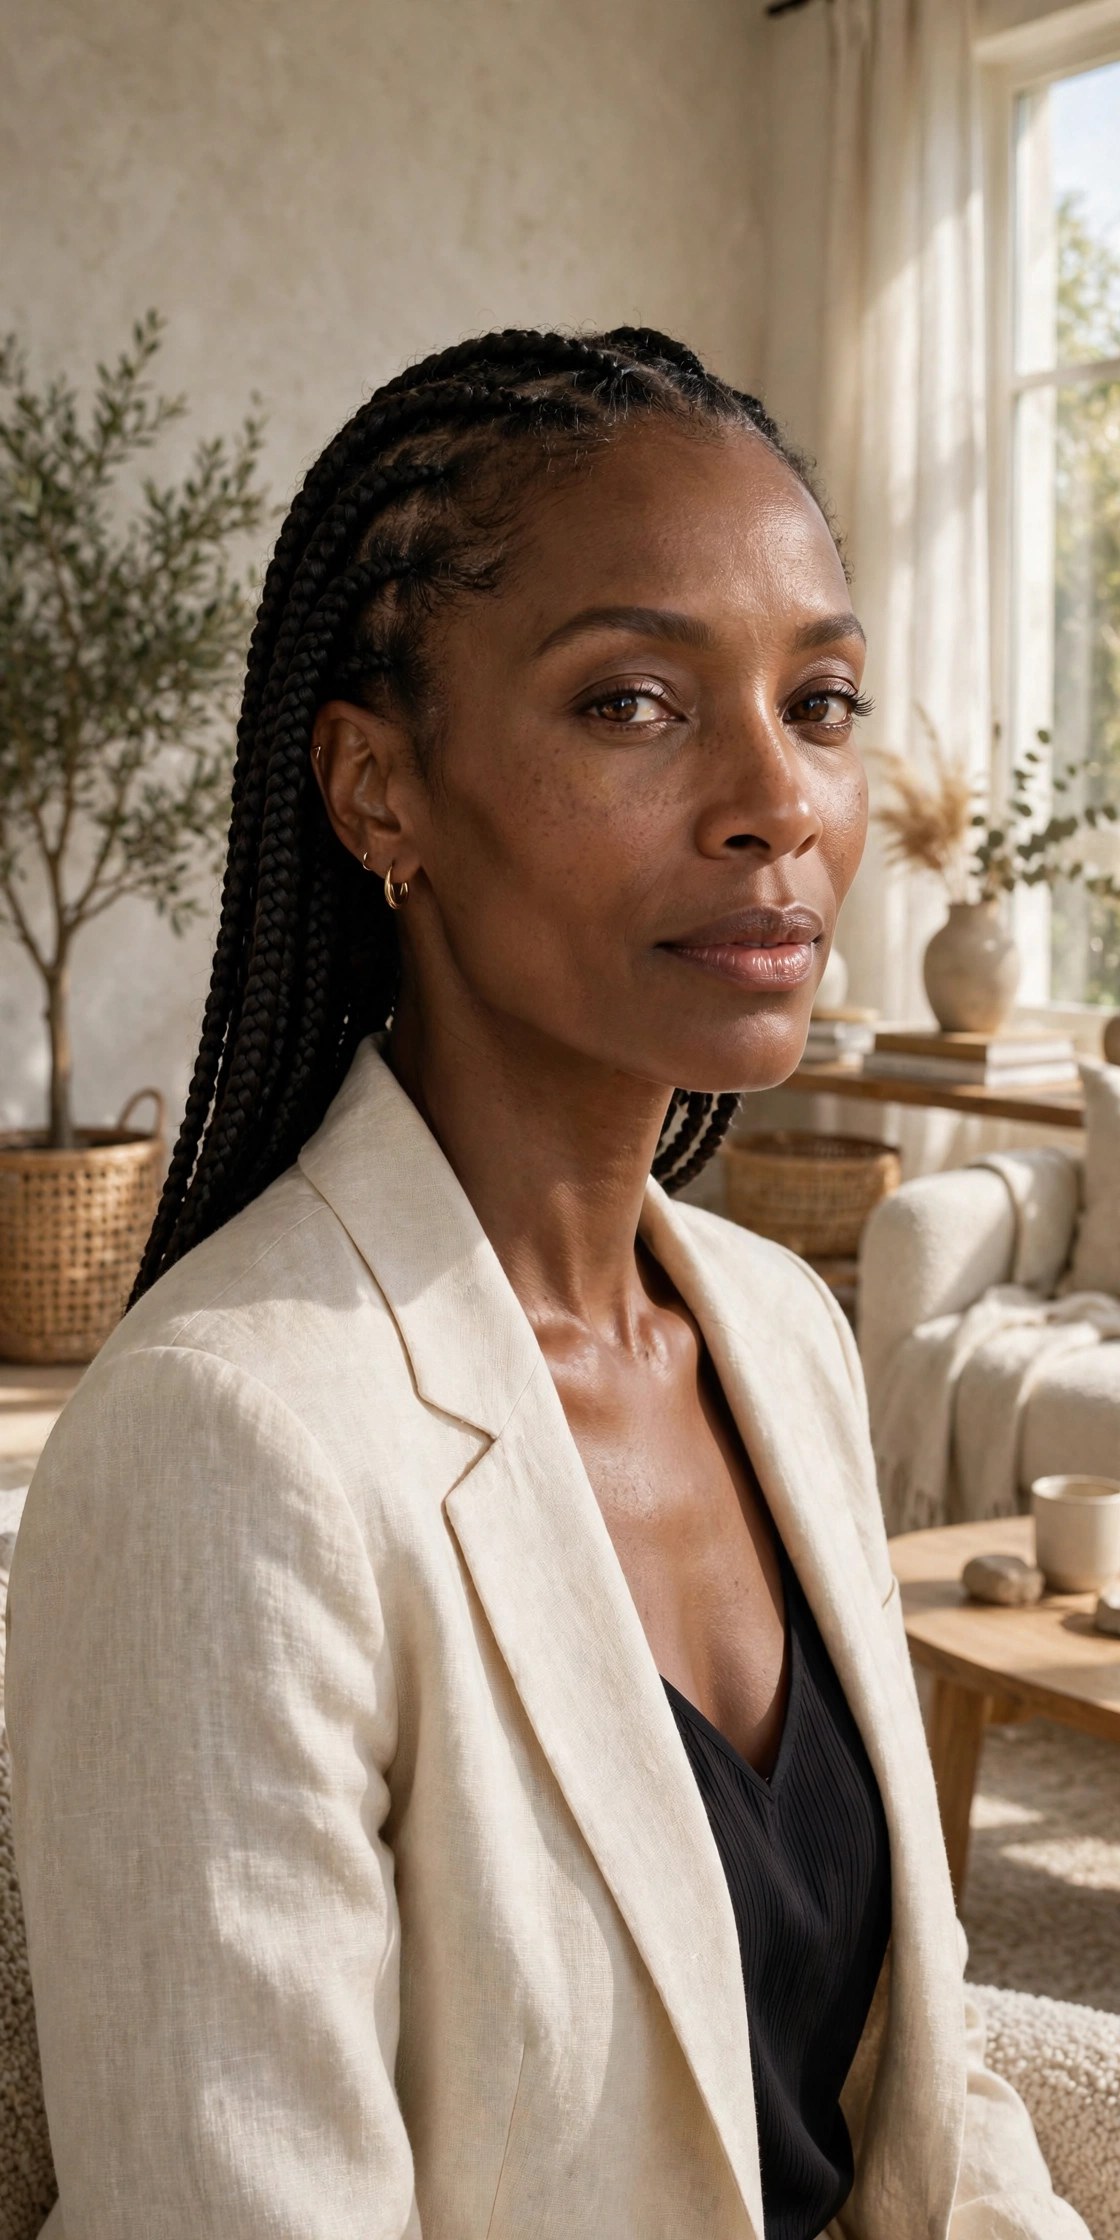
Knotless braids skip the tight knot at the root, feeding hair in gradually for a flatter, gentler base. They are kinder to edges and look more natural at the scalp. Many women find them noticeably more comfortable for sleeping.
Try this: Feed-in technique + box braids + natural-looking roots
**Make it yours:** Style them in a high ponytail on day one; no break-in needed.
**Avoid:** Skipping the follow-up: even knotless braids need scalp care.
9. 🧵 Stitch Braids
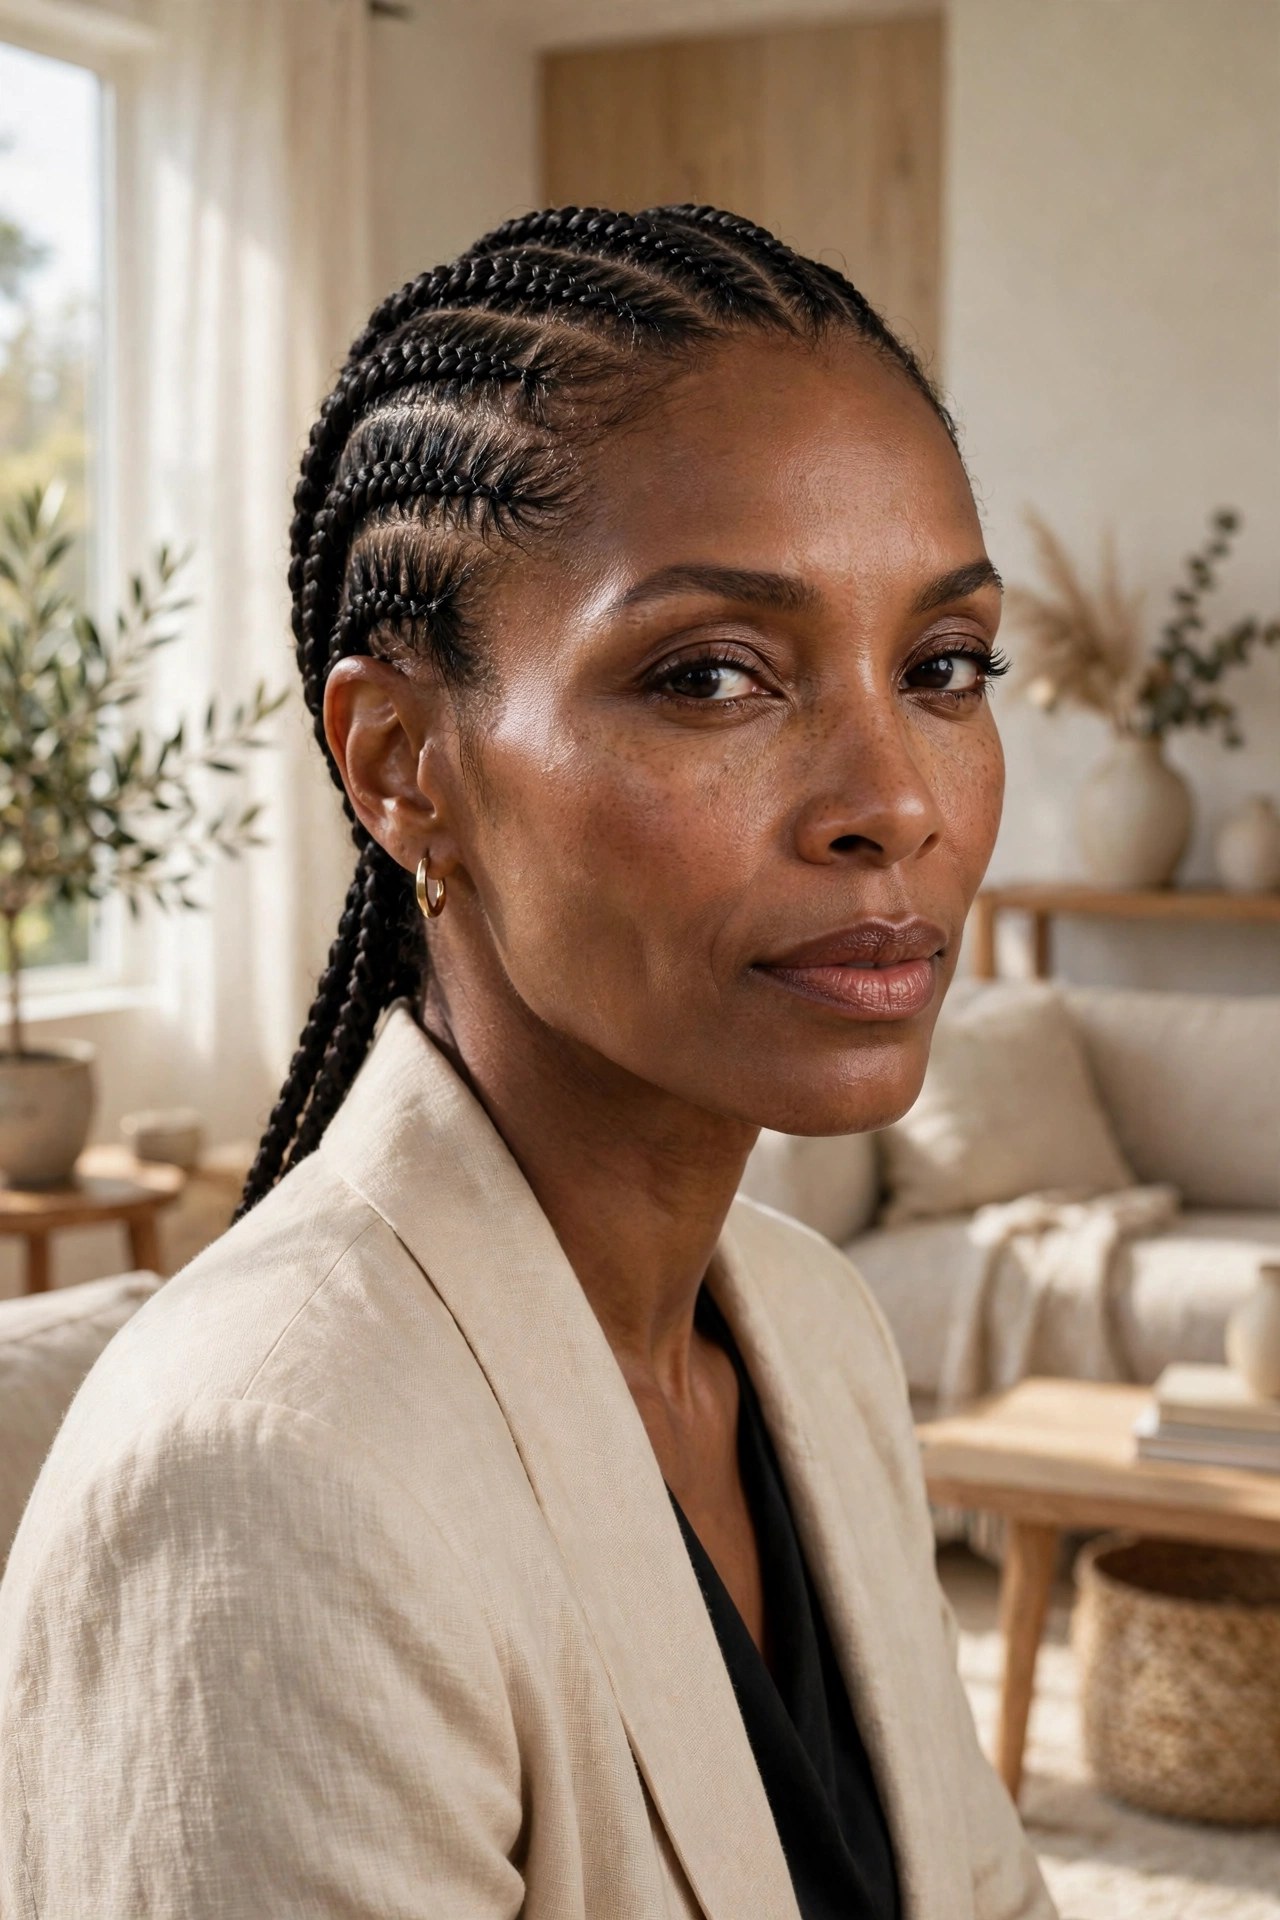
Stitch braids use a feed-in technique that creates crisp, clean lines between cornrows, almost like stitching. The result looks sharp and graphic. They sit flat against the scalp, which makes them excellent under wigs later.
Try this: Feed-in cornrows + precise stitching + straight-back pattern
**Make it yours:** Add a curved or heart detail at the front.
**Avoid:** Wearing longer than three weeks; the crisp lines grow out fast.
The install matters more than the style name. Gentle tension, clean parts, and braids that are not too heavy will protect your hair far better than any specific braid type done too tightly. Speak up in the chair if it hurts.
10. 🌽 Feed-In Cornrows
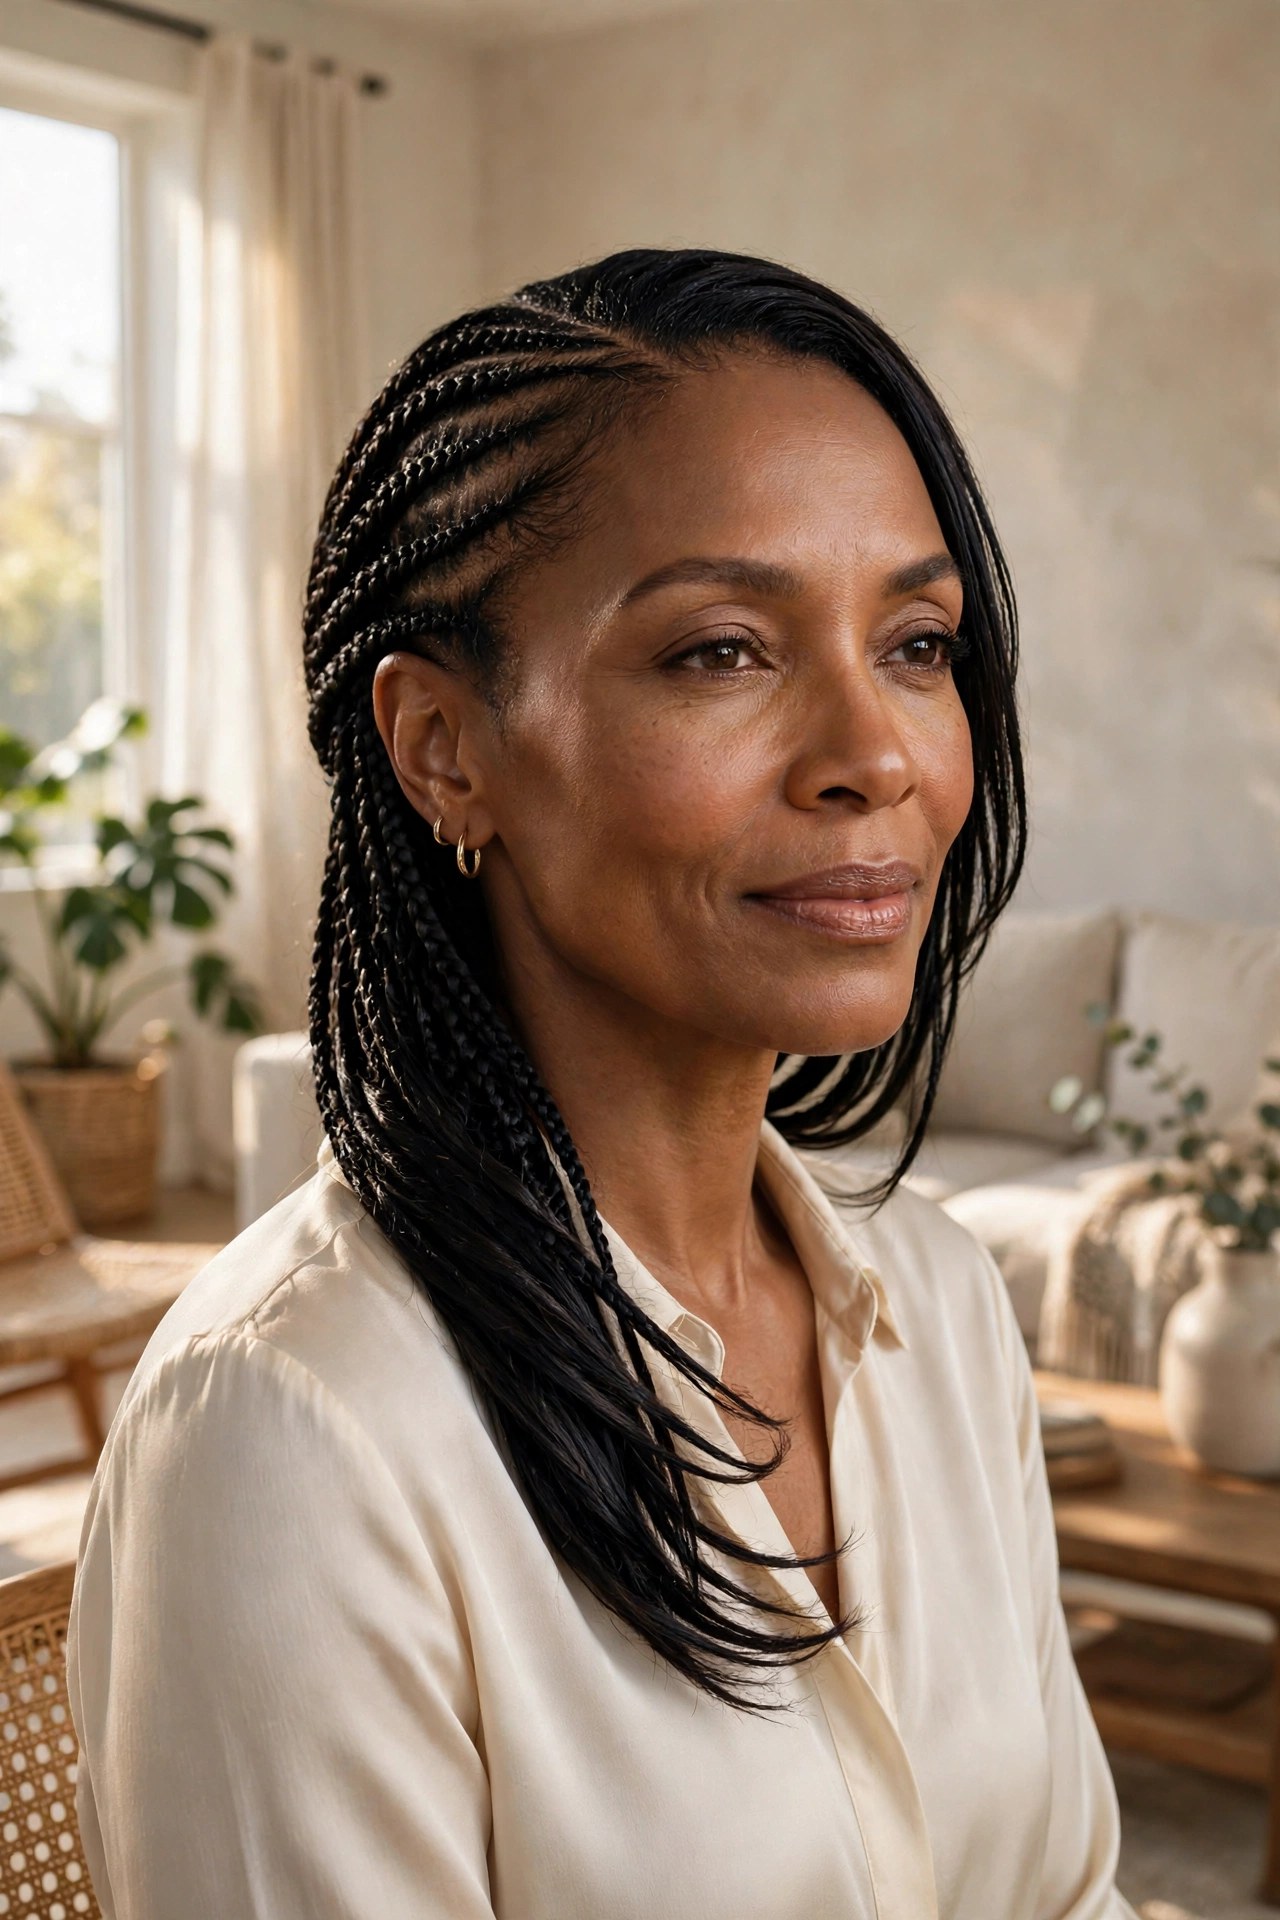
Feed-in cornrows build thickness gradually, so there is no bulky knot at the front and less tension on the hairline. They look sleek and can be styled straight back, to the side, or into a bun. A low-tension classic.
Try this: Gradual feed-in + cornrows + your choice of pattern
**Make it yours:** Sweep them into a low bun for week two.
**Budget tip:** Cornrows are among the quickest salon installs.
11. 🌺 Goddess Braids with Curly Ends

Goddess braids are large, raised cornrows, and leaving curly ends loose at the finish softens the whole look. The scale makes a statement while the curls keep it feminine. Fewer braids also means less time in the chair.
Try this: Large cornrows + curly loose ends + center or side part
**Make it yours:** Let the curls fall over one shoulder.
**Avoid:** Sleeping without a bonnet; the curls tangle fast.
12. 🎡 Bantu Knots
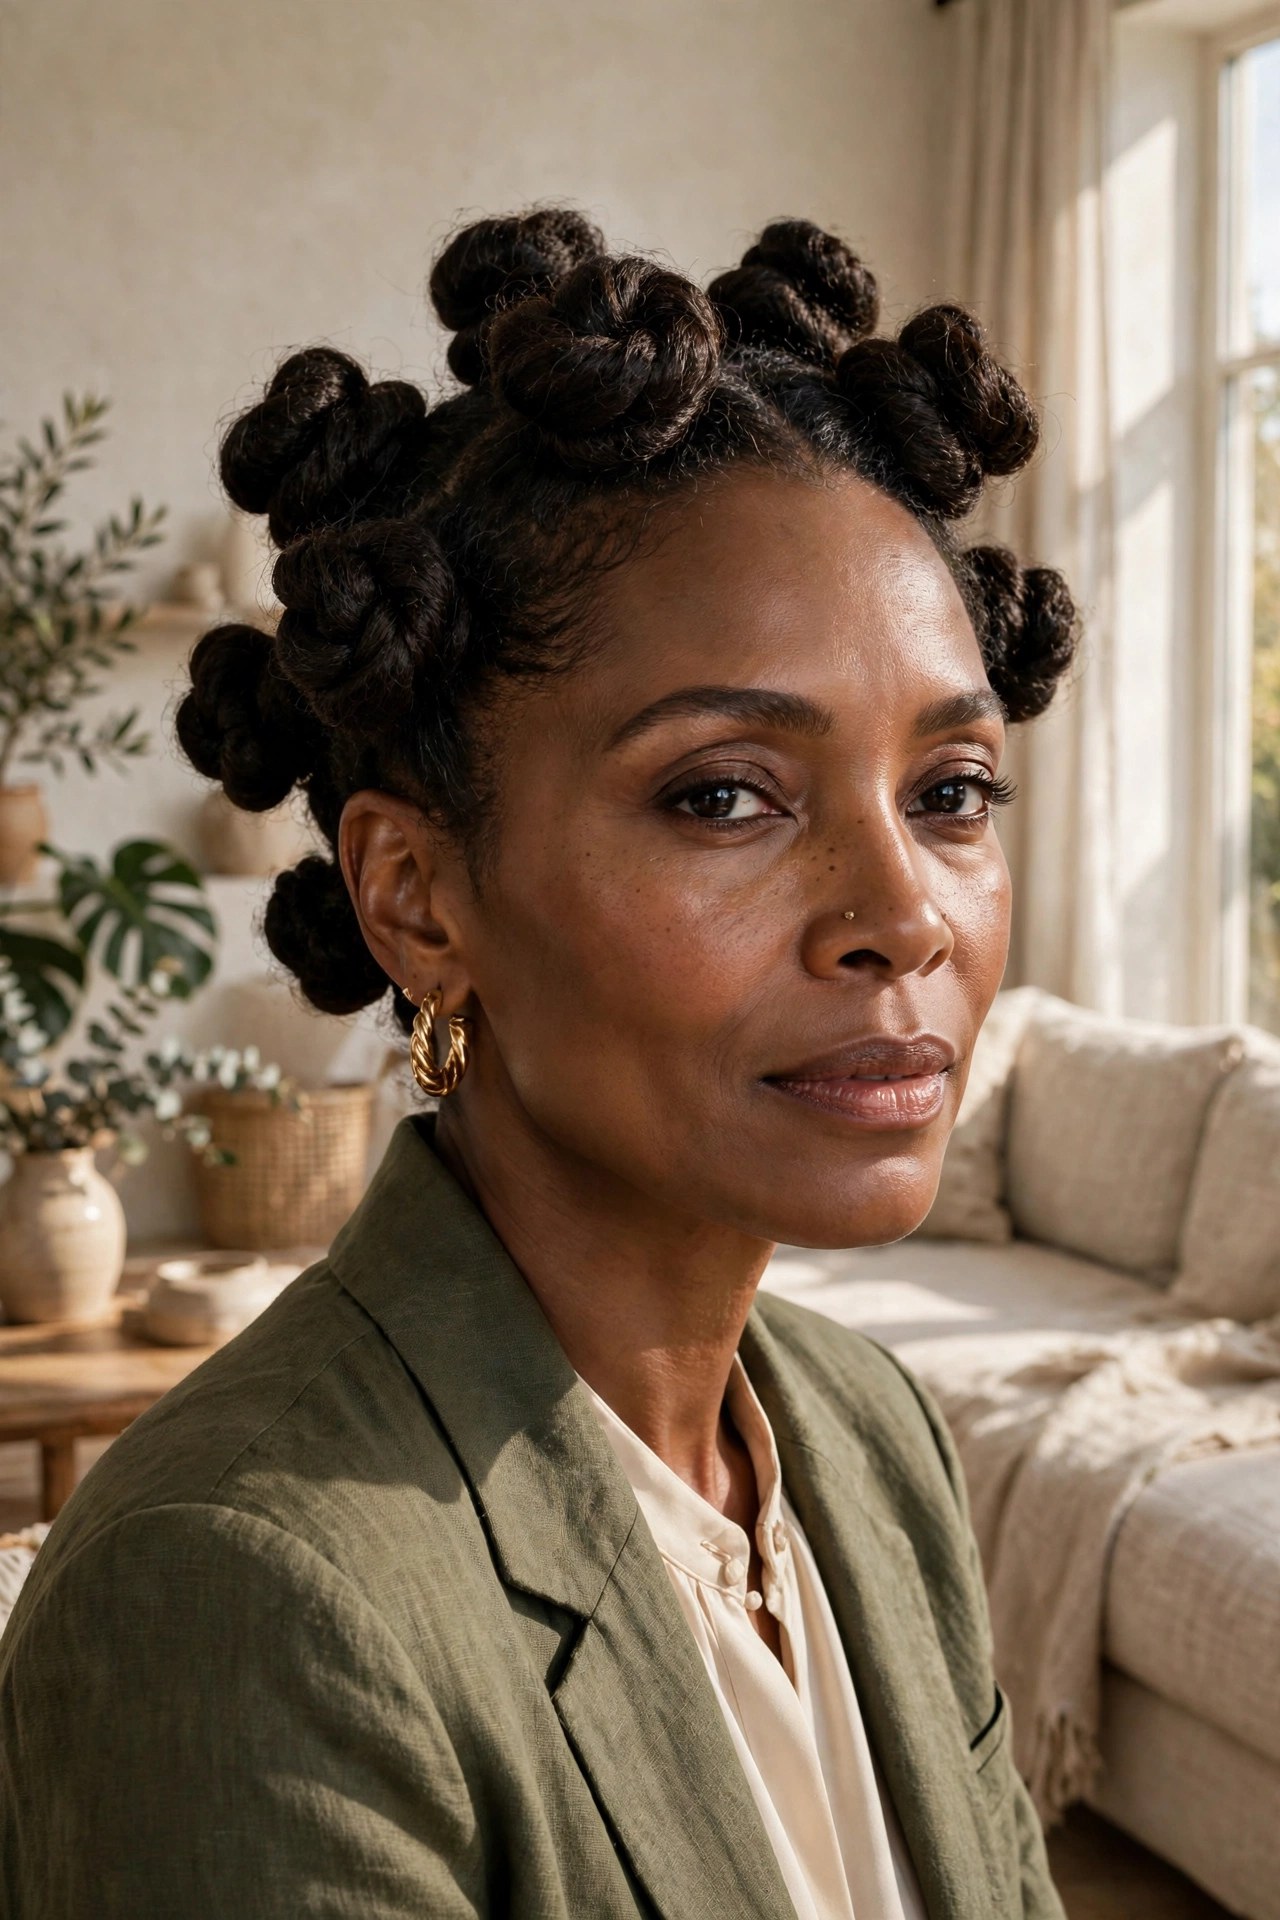
Sections of hair twisted and coiled into small knots across the head. Bantu knots protect every strand while doubling as a heat-free curl set when you take them down. Playful, cultural, and endlessly photogenic.
Try this: Twisted sections + coiled knots + light holding cream
**Make it yours:** Make them chunky for a bold look or small for a delicate one.

**Budget tip:** A true DIY style; no extensions required.
13. 🖤 Waist-Length Faux Locs
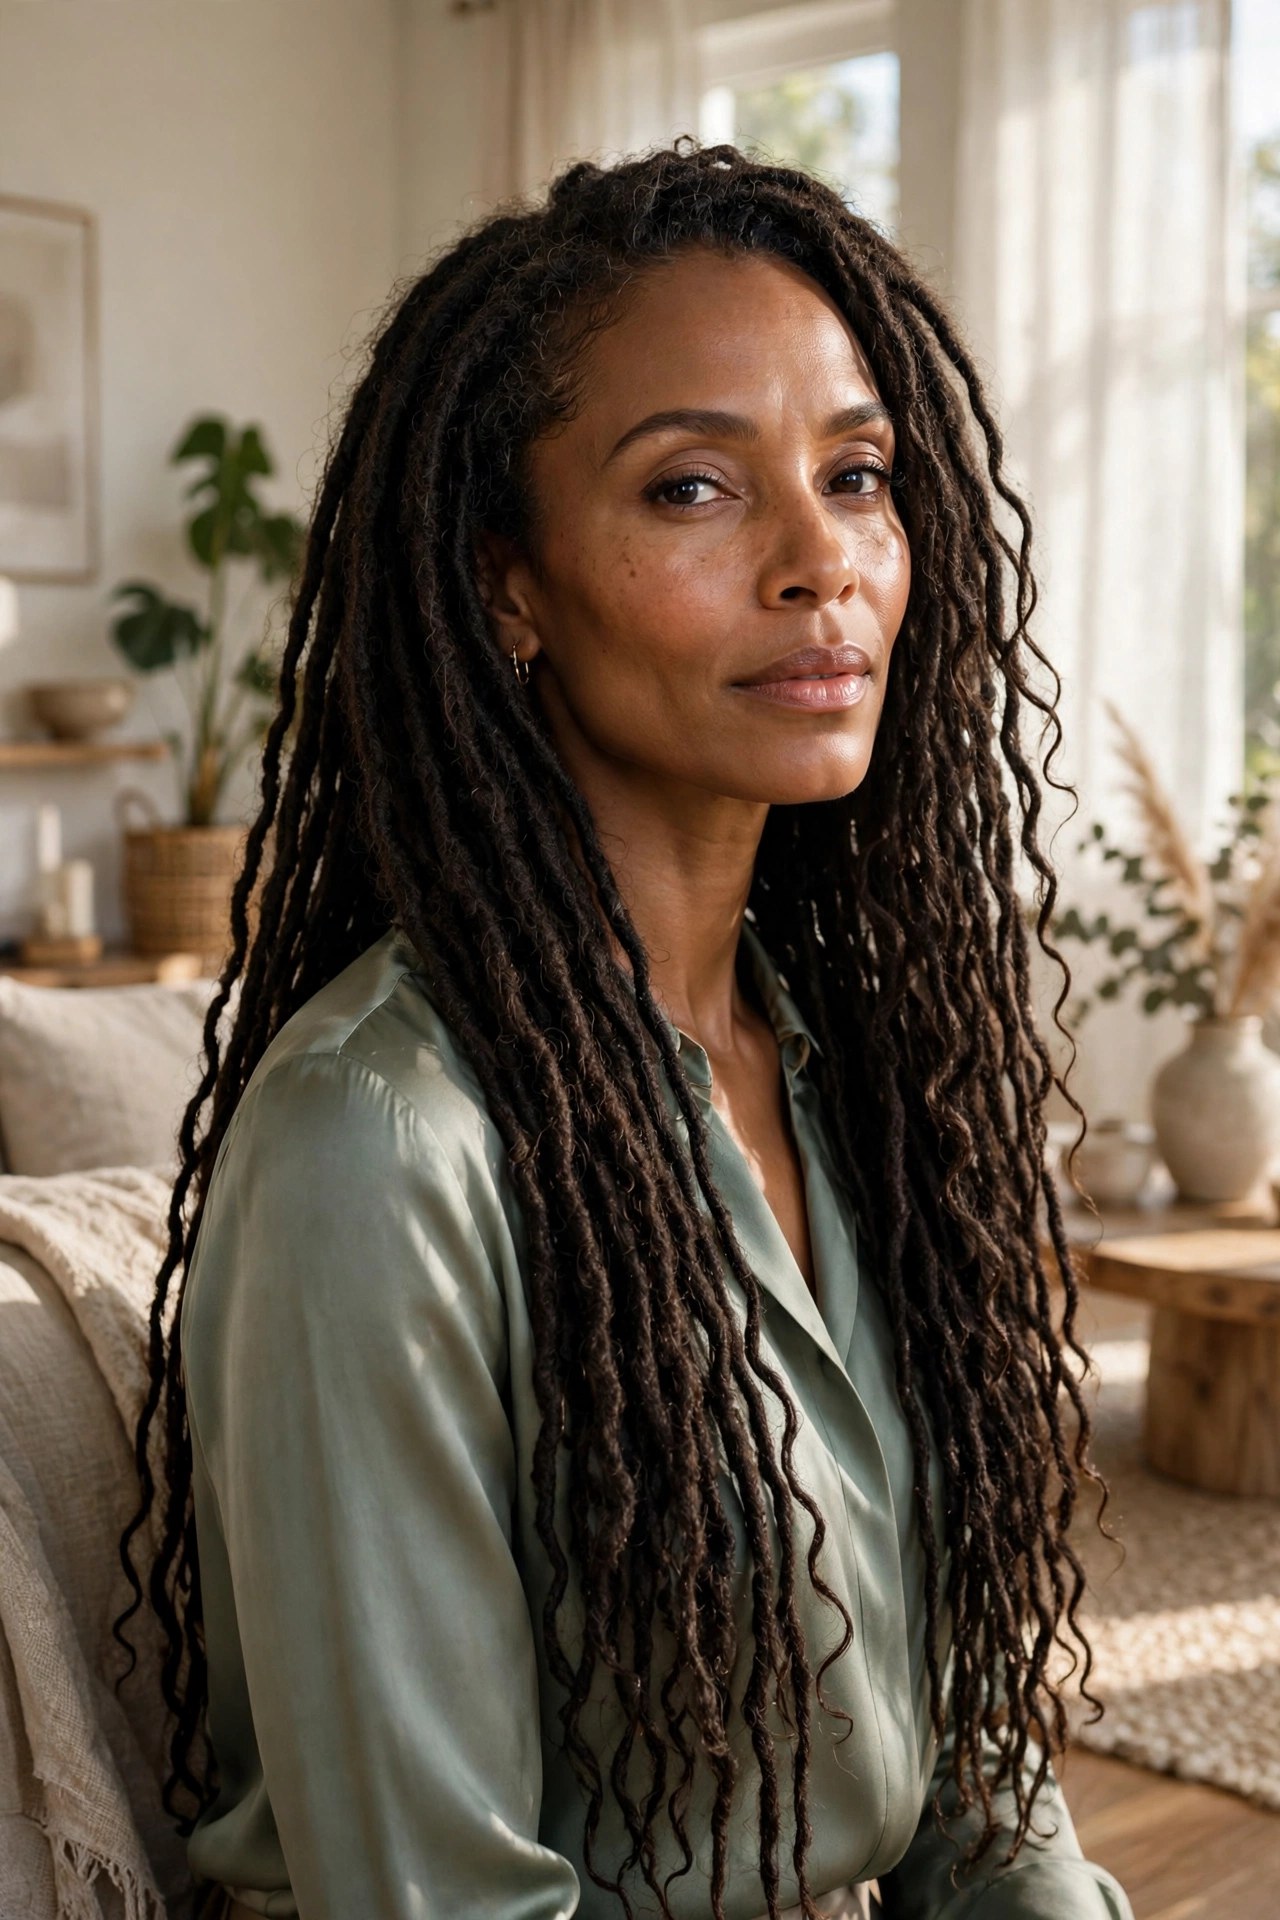
Faux locs give the look of mature locs without the permanent commitment. At waist length they have real drama and presence, and the textured finish keeps them looking natural. Wrap them, bun them, or let them fall.
Try this: Faux loc method + waist length + textured finish
**Make it yours:** Wrap the crown locs into a top knot for height.
**Avoid:** Excessive length if your neck is sensitive; mid-back is kinder.
14. 🦋 Shoulder-Length Butterfly Locs
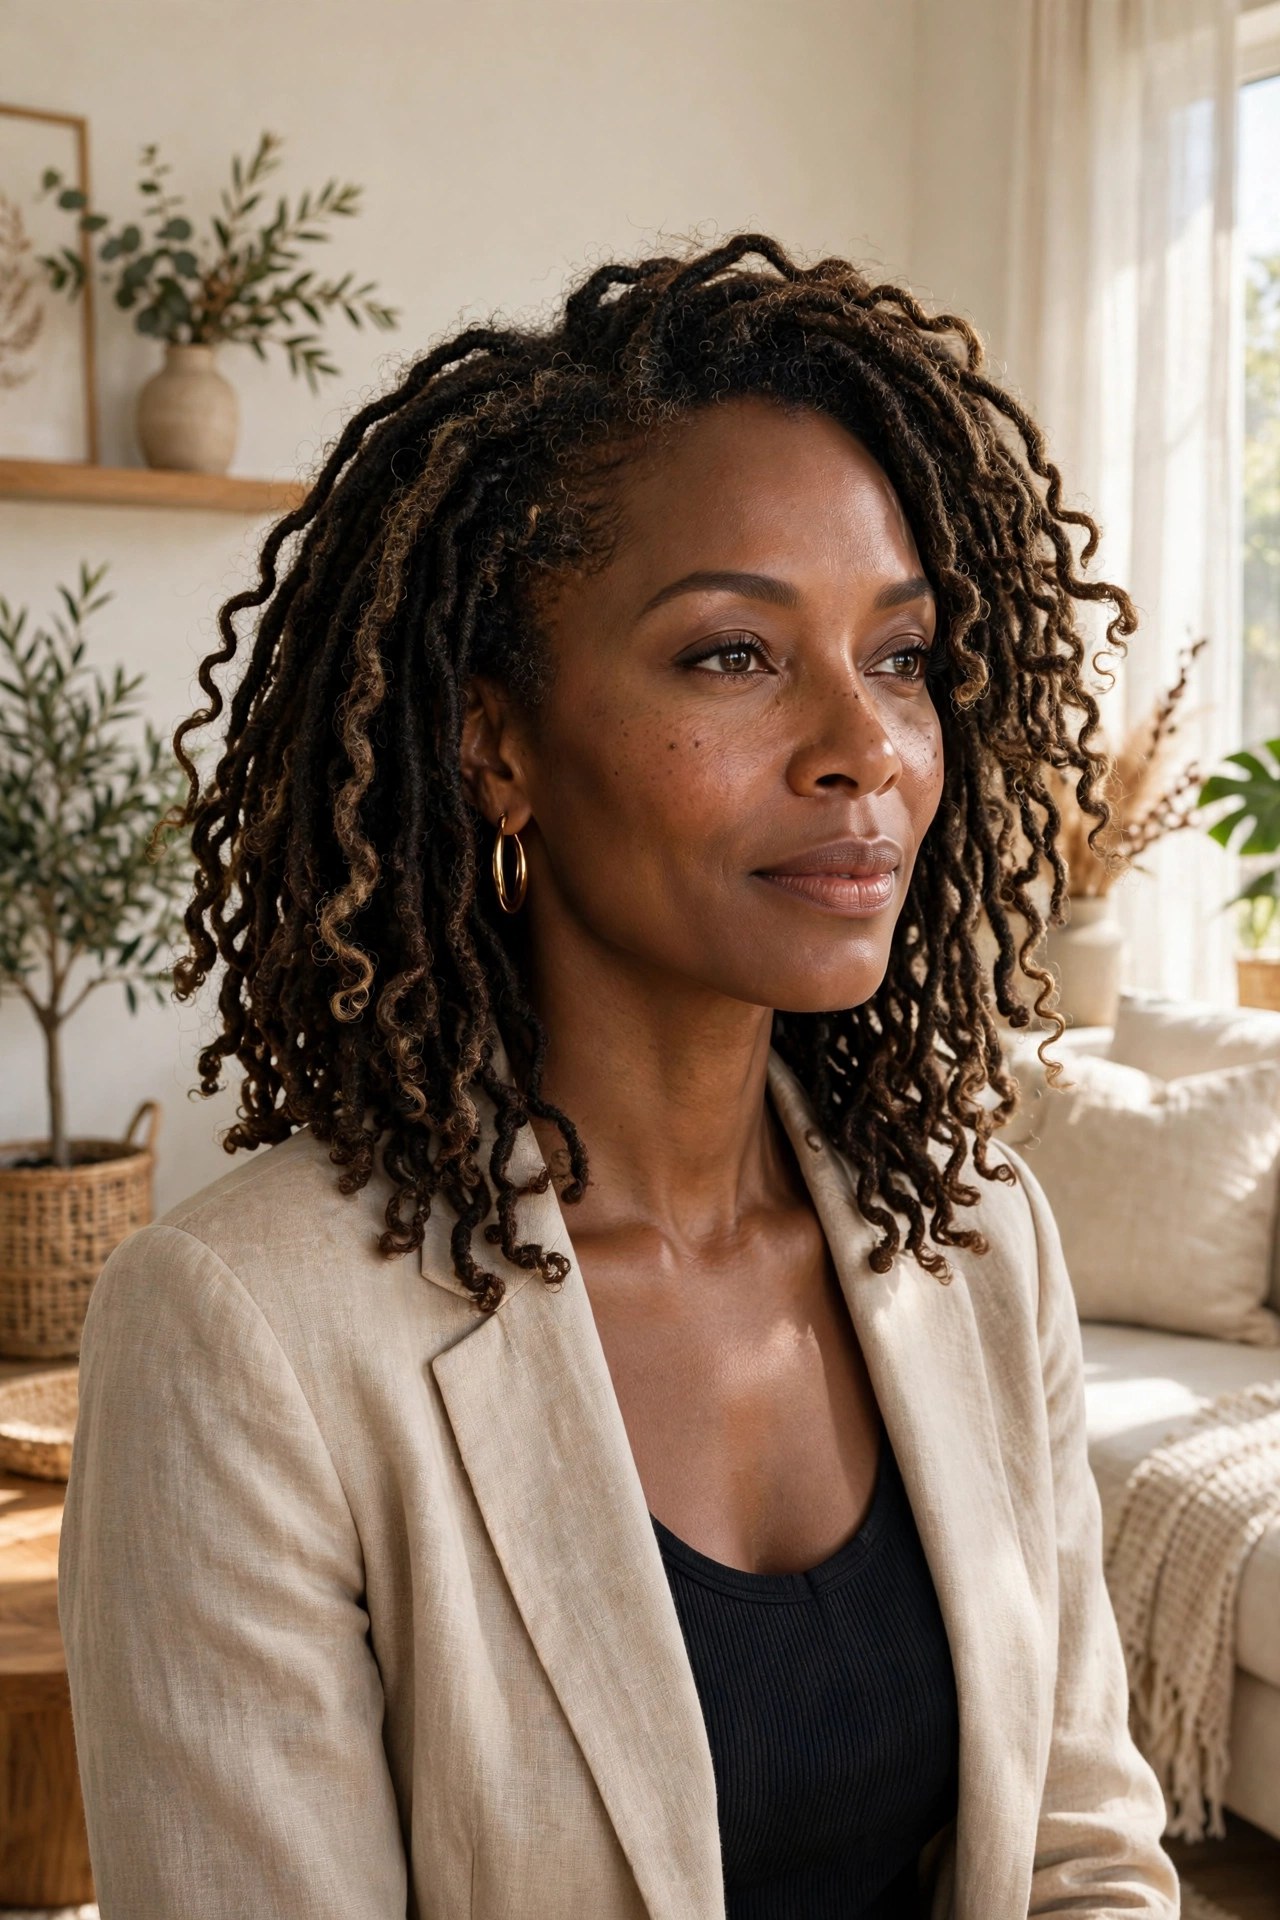
Butterfly locs have a distressed, loopy texture that looks undone in the best way. At shoulder length they are light, bouncy, and easy to manage. The messy finish means you never have to fuss over frizz.
Try this: Distressed loc technique + shoulder length + middle part
**Make it yours:** Add face-framing locs pulled forward.
**Budget tip:** The lived-in texture means fewer touch-ups.
15. 🌊 Goddess Faux Locs with Curls
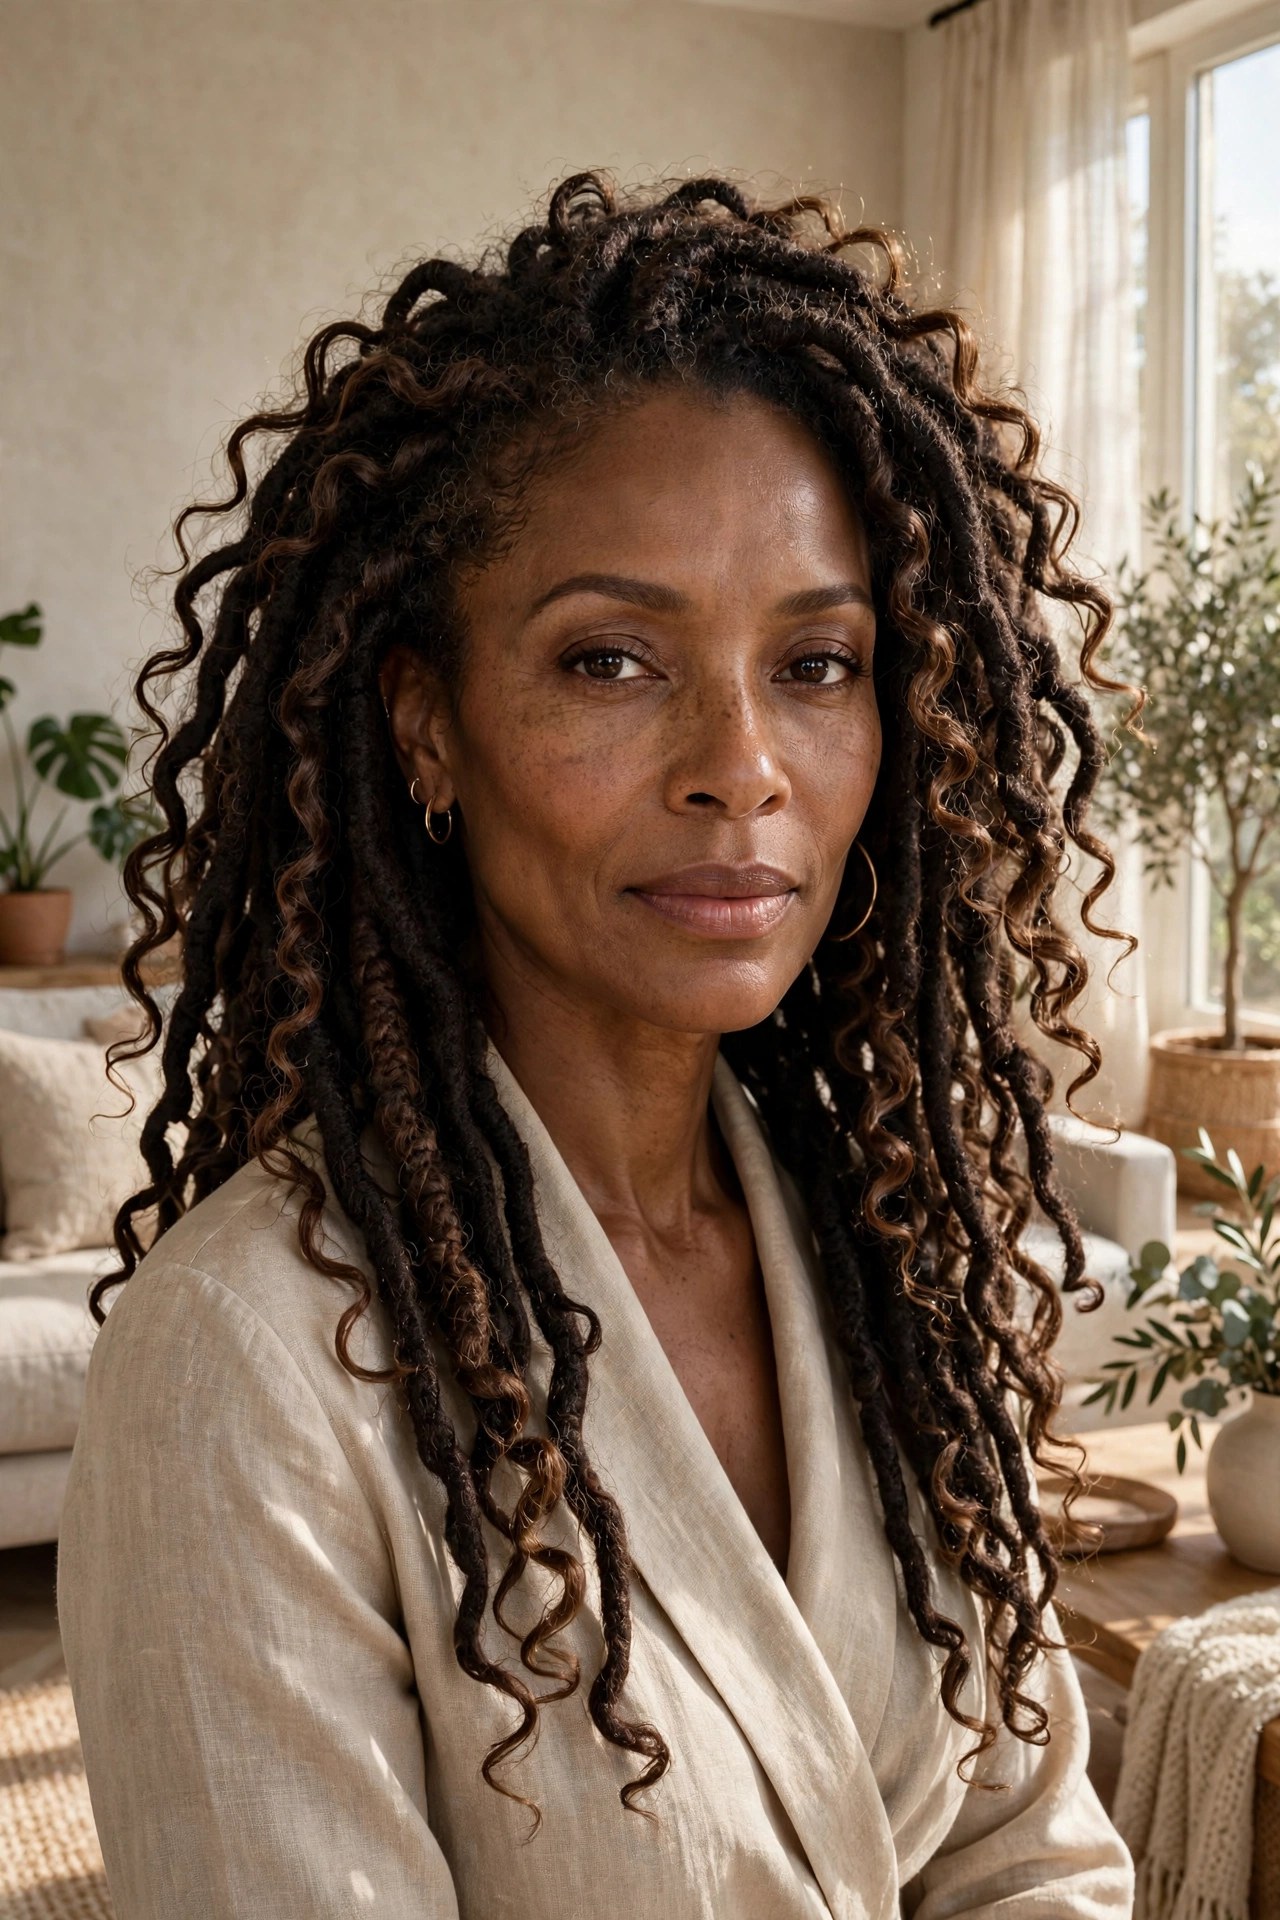
Goddess locs weave loose curls through the locs for a soft, beachy finish. The combination of texture and curl reads romantic and feminine. Beautiful for vacations and special occasions alike.
Try this: Faux locs + woven curly pieces + warm brown tones
**Make it yours:** Pull the front locs back loosely for an open face.
**Avoid:** Heavy oils on the curls; they go limp.
16. 🪝 Crochet Braids
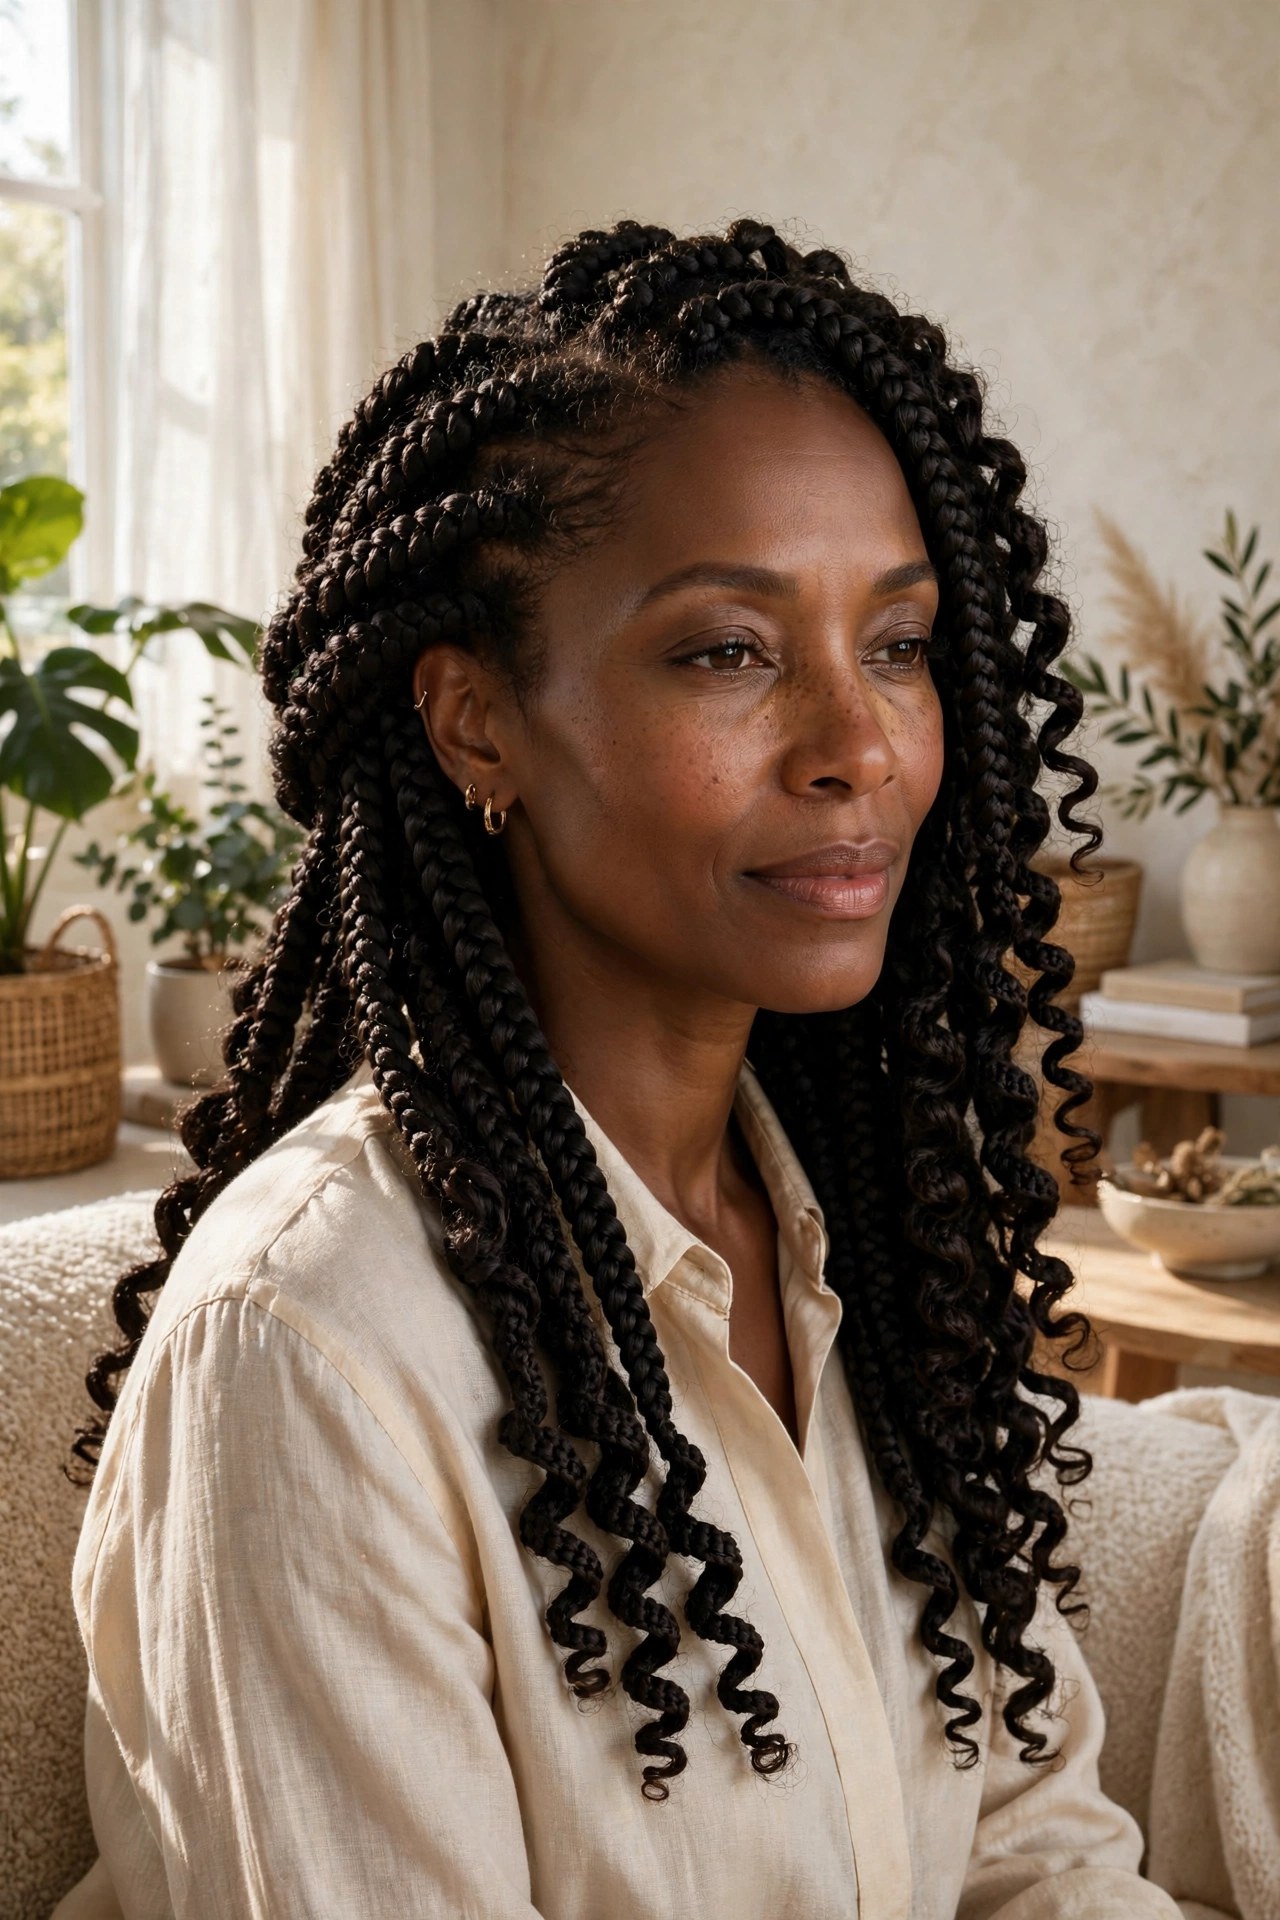
With crochet braids, your natural hair is cornrowed flat and extension hair is looped through with a crochet hook. The install is fast, the tension is low, and the finished look can mimic almost any curl pattern. A weeknight-friendly protective style.
Try this: Cornrow base + crochet hook + curly crochet hair
**Make it yours:** Choose a curl pattern close to your natural texture.
**Budget tip:** Often the most affordable salon protective style.
17. 💫 Crochet Passion Twists

All the softness of passion twists with the speed of a crochet install. The twists are pre-made and looped onto a braided base, cutting chair time dramatically. Great when you want the look but not the long appointment.
Try this: Braided base + pre-twisted crochet hair + mid-length
**Make it yours:** Trim the twists to a bob for a fresh shape.
**Avoid:** Pulling the crochet loops too tight at install.
18. 👑 The Halo Crown Braid

One braid wrapped around the head like a crown, elegant and completely protective. It keeps every strand tucked and looks polished enough for weddings. Works with your own hair or with added hair for fullness.
Try this: Dutch or French braid + wrapped around head + pinned
**Make it yours:** Leave soft tendrils at the temples.
**Budget tip:** A skilled friend can do this one at home.
Moisturize the hair you can reach. A light leave-in sprayed along the parts and on any leave-out keeps the style from drying out your real hair while it rests. Protective does not mean ignore for eight weeks.
19. 🎀 The Low Braided Bun
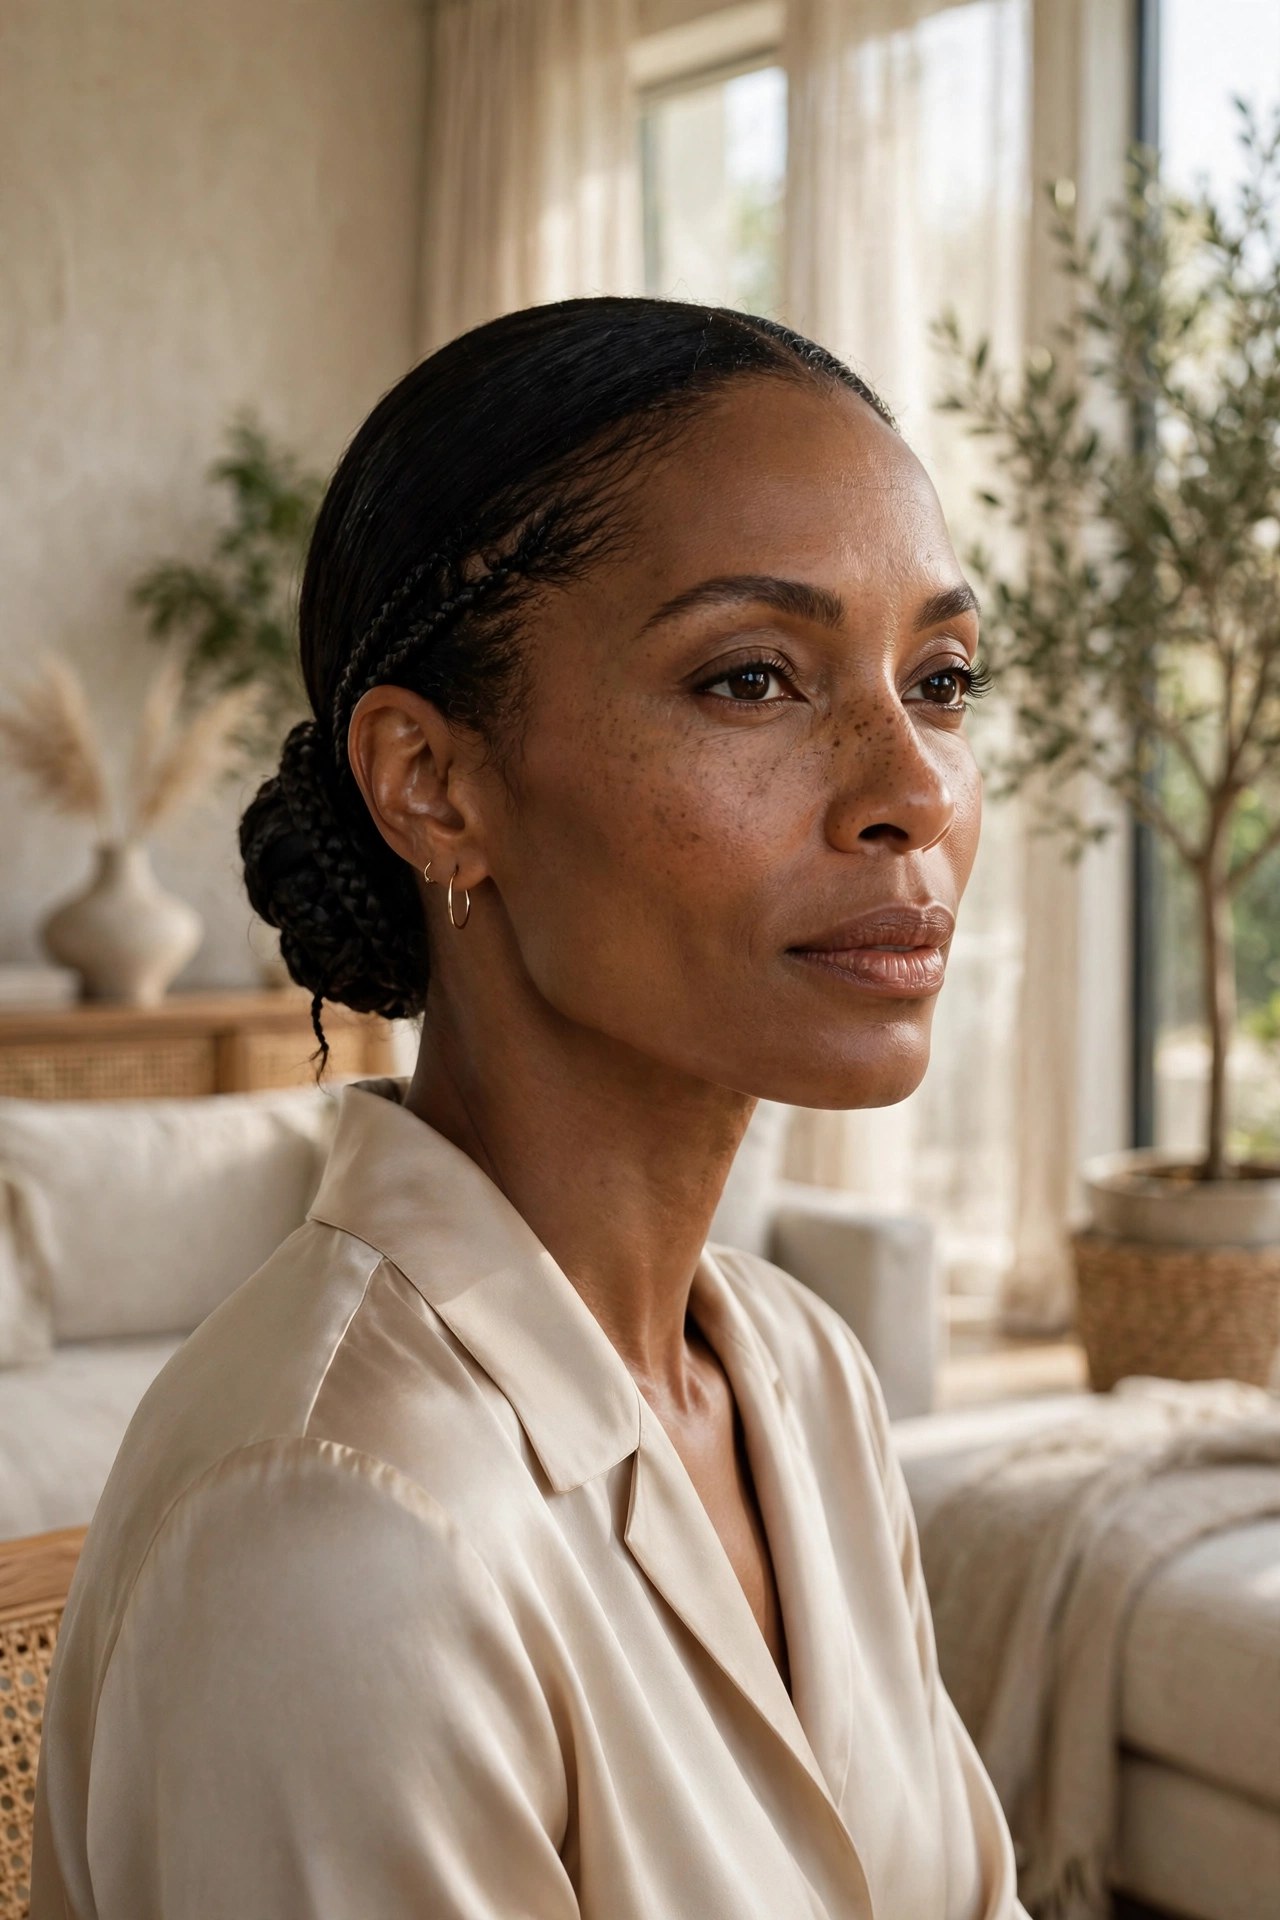
Braids gathered into a low bun at the nape: simple, timeless, and fully protective. The ends disappear completely, which is the whole point. Dress it up with a cuff or keep it plain for work.
Try this: Braids or twists + low gathering + pinned bun
**Make it yours:** Wrap one braid around the base to hide pins.
**Avoid:** Securing with a tight elastic; use pins and a soft scrunchie.
20. ⬆️ Cornrow Updo with a Bun
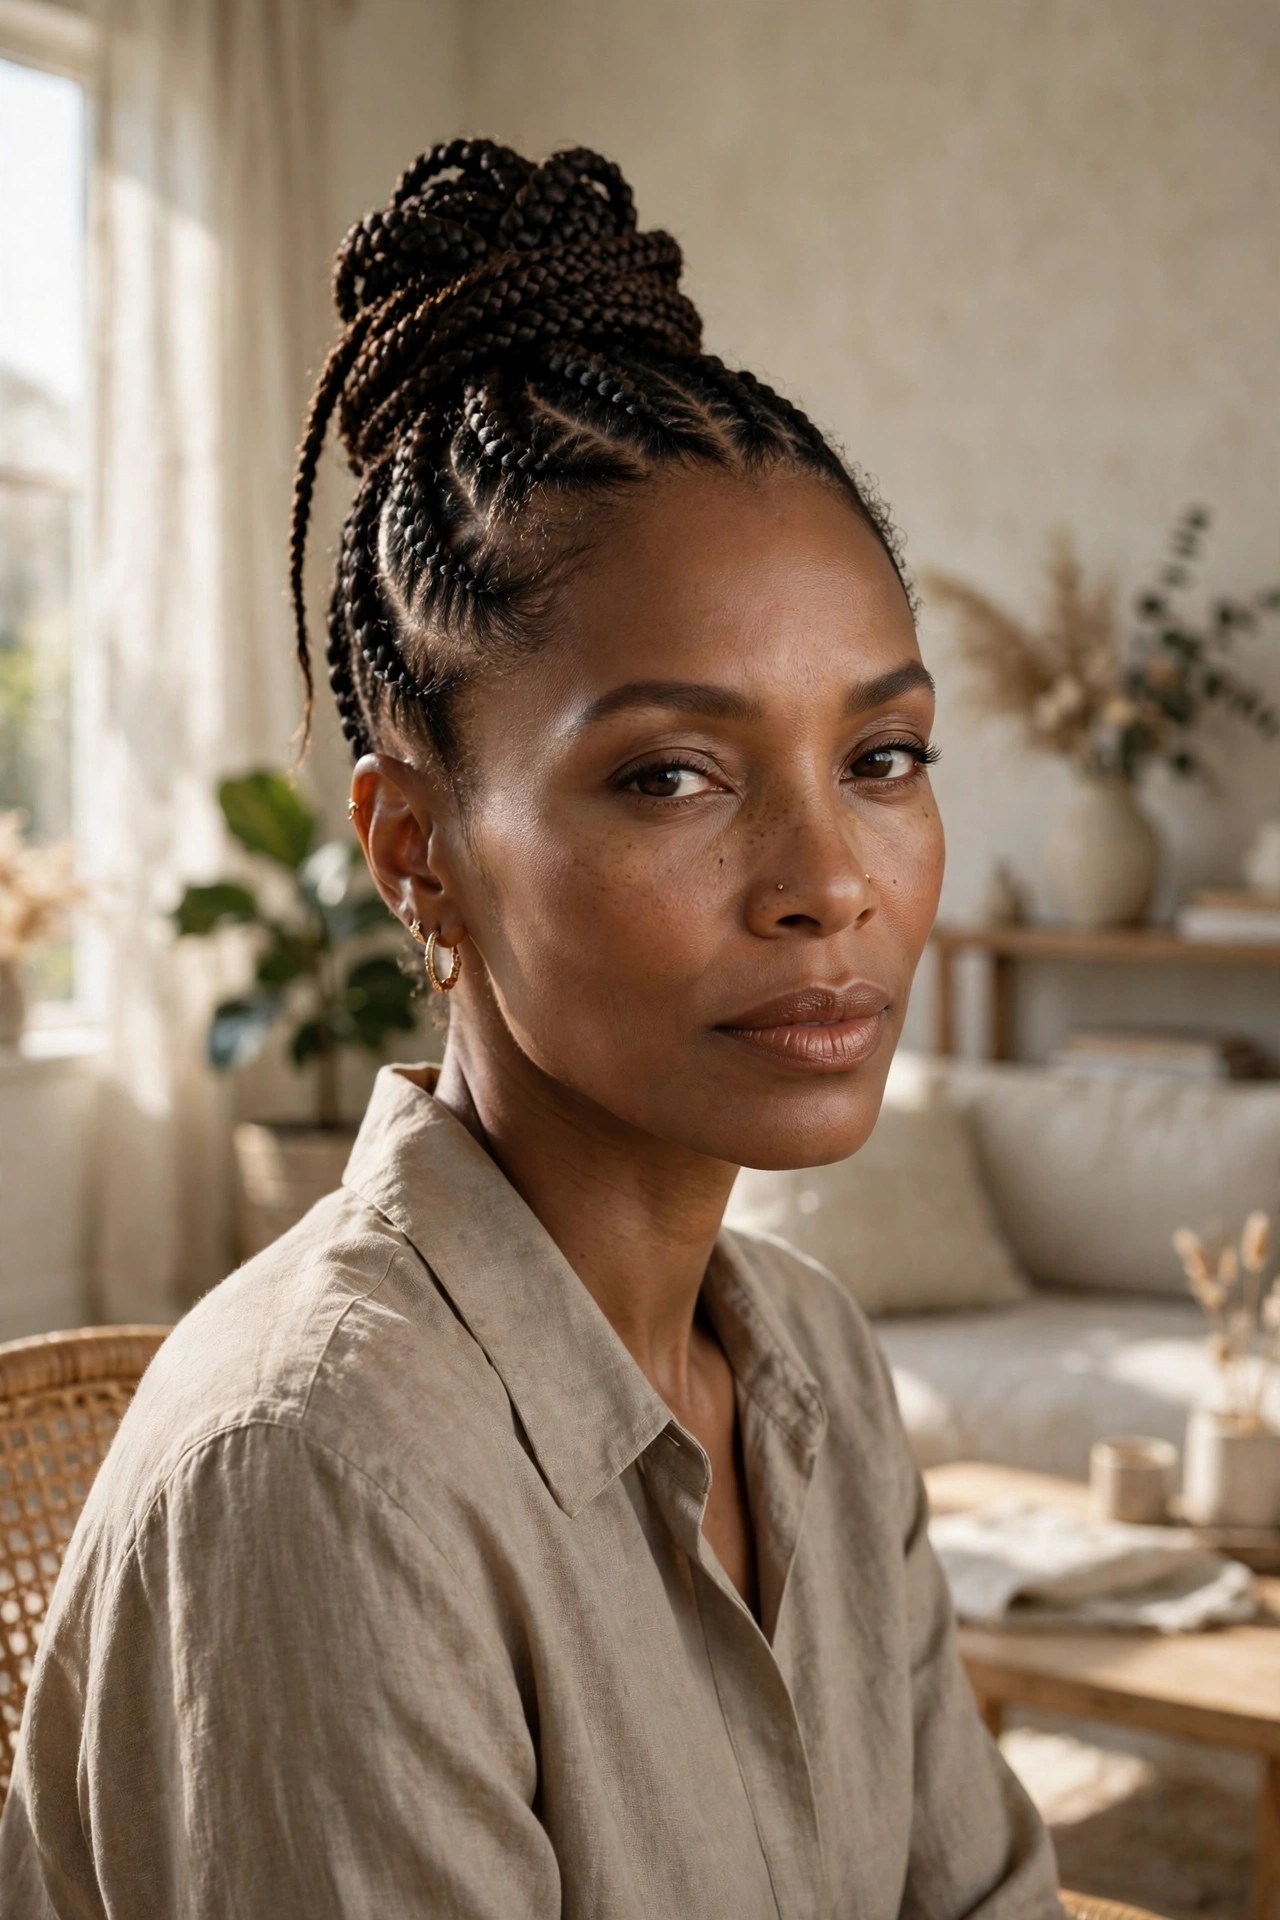
Cornrows braided upward into a full bun on top give you height and complete end protection. The sculpted scalp pattern adds artistry. A confident style for when you want your hair up and out of the way.
Try this: Upward cornrows + high gathered bun + smooth edges
**Make it yours:** Make the bun oversized for drama.
**Budget tip:** This style stretches the life of week-old cornrows.
21. 🎯 The Braided Top Knot
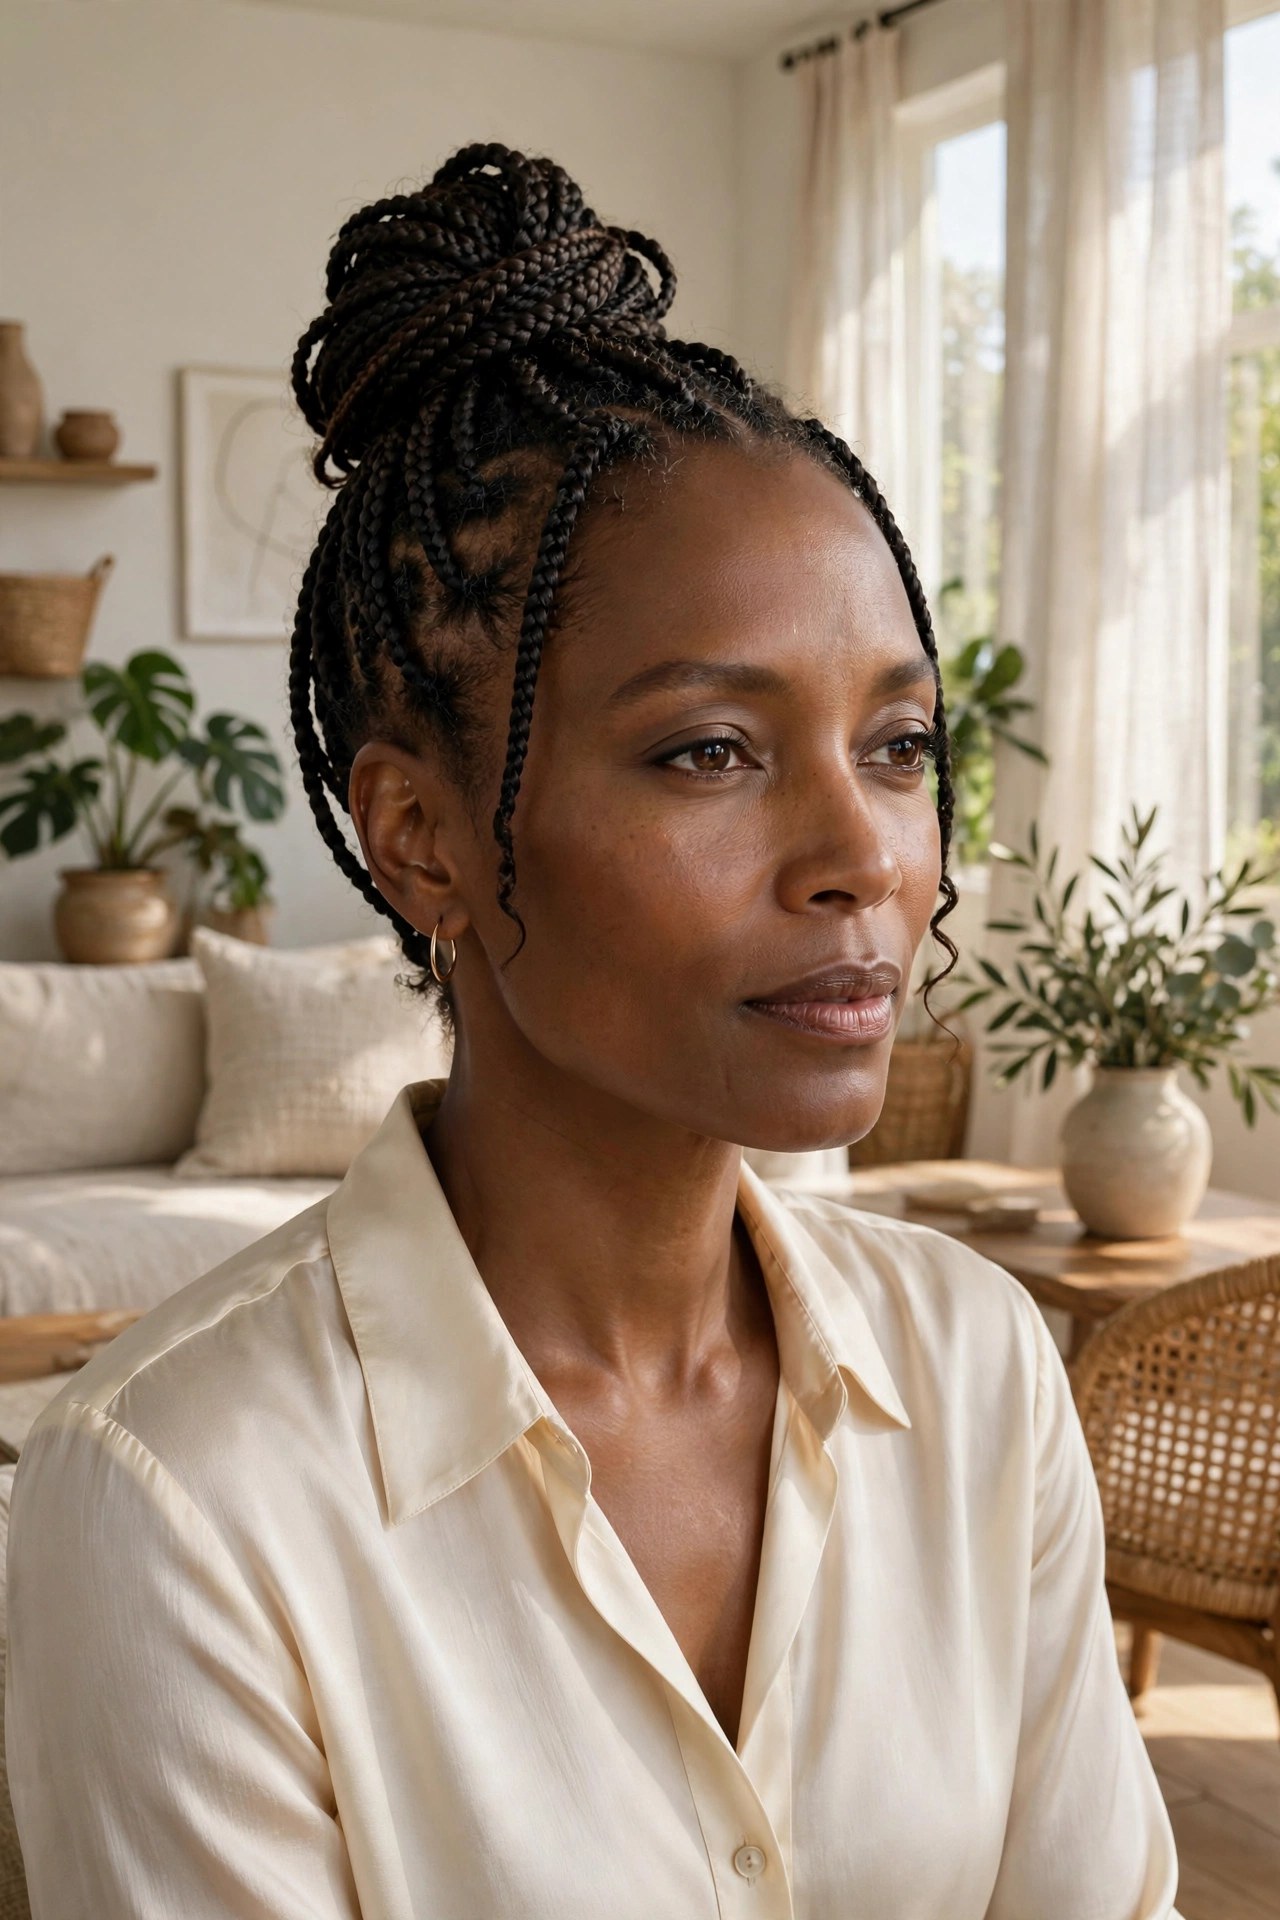
All the braids swept into one knot at the crown: instant polish, zero daily effort. The top knot keeps hair off the neck in warm weather and shows off earrings beautifully. Five minutes in the morning, done.
Try this: Braids + high gathering + wrapped top knot
**Make it yours:** Let two front braids hang loose to frame the face.
**Avoid:** Wearing it tight every day; alternate with looser styles.
22. 💁♀️ A Glueless Wig Over a Cornrow Base
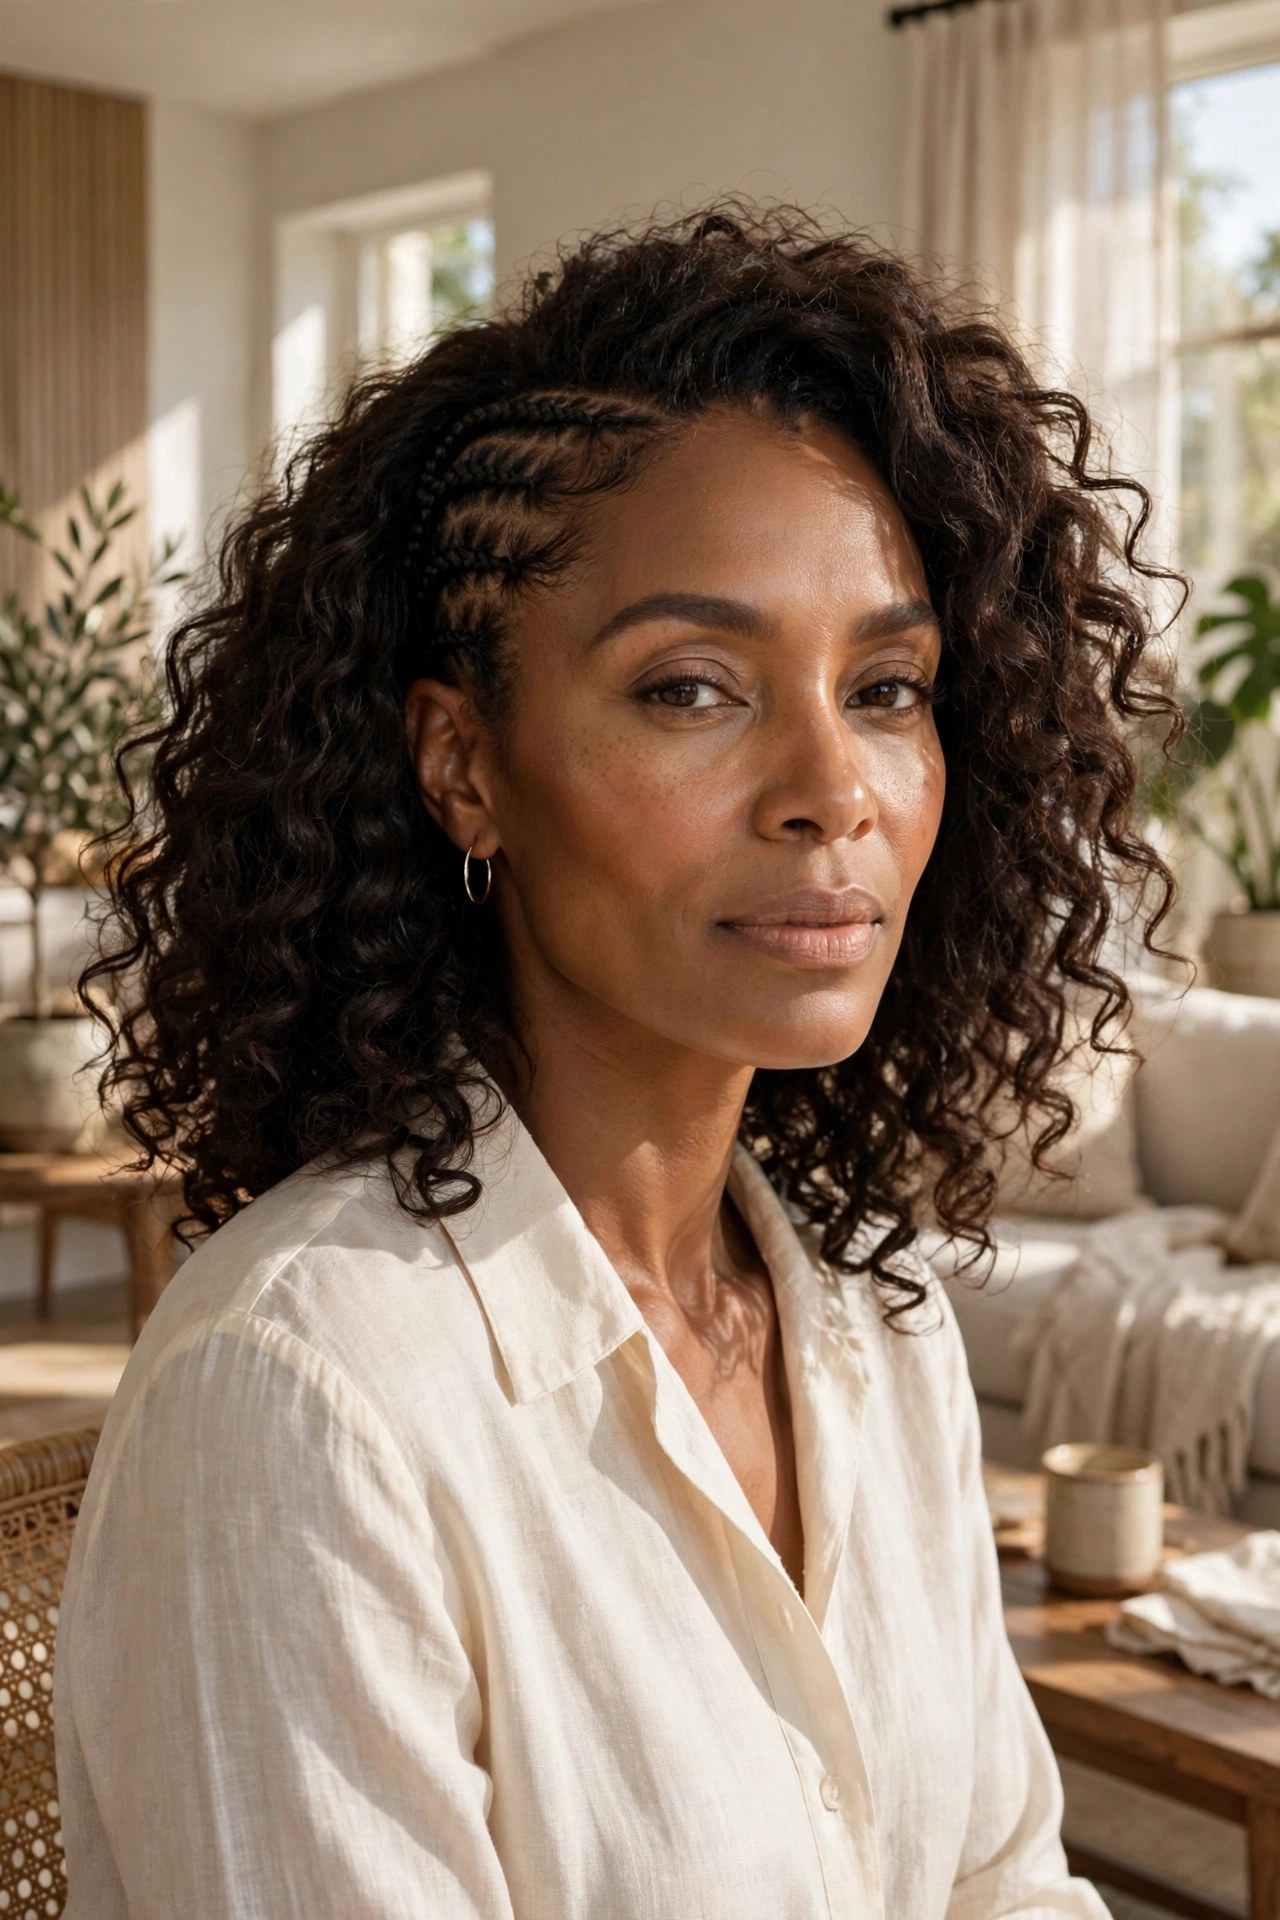
Cornrow your natural hair flat, then wear a glueless wig on top: total protection with unlimited style switching. Your hair rests completely while you change looks at will. Just remember the hair underneath still needs moisture.
Try this: Flat cornrow base + glueless wig + satin lining
**Make it yours:** Oil your scalp through the parts twice a week.
**Budget tip:** One good wig worn over fresh cornrows lasts weeks.
❓ Protective Hairstyles FAQs
How long should I keep a protective style in?
Most styles look and feel best for four to eight weeks depending on the type. Cornrows and stitch braids are happier at two to three weeks, while box braids, twists, and locs can go six to eight. Past eight weeks, buildup and matting can undo the protection.
Will protective styles make my hair grow?
They help you retain length, which is the real mechanism. Your hair grows at the same rate either way, but tucked ends break less, so you keep more of what grows. Consistent protective styling with good moisture is one of the most reliable paths to longer hair.
Are protective styles safe for thinning edges?
They can be, if the install is gentle. Knotless braids, flat twists, and loose buns put less stress on the hairline than tight small braids. Tell your stylist about fragile edges upfront and avoid styles that pull from day one.
Can I exercise with a protective style?
Yes. Rinse or wipe the scalp after heavy sweating, and dry the style fully so moisture does not sit at the roots. High buns and top knots keep hair off your neck during workouts.
Do I still need to moisturize in a protective style?
Absolutely. The style protects the ends from manipulation, but your scalp and the hair near the roots still need water and light oils. A spray bottle with water and leave-in, used along the parts a few times a week, makes a real difference.
📖 Keep Reading
- 18 Proven Ways To Grow Thicker Hair (No Thickening Spray Required) — Keep the growth going between protective installs.
- 19 Home Remedies for Hair Fall for an Effortless, Polished Look — Gentle care that supports the hair underneath your style.
- 16 Dry Hair Remedies That Bring Back Real Shine And Softness — Moisture strategies for before and after takedown day.
✅ Your Protective Style Checklist
- ☐ Pick a style that matches how much time you actually have
- ☐ Tell your stylist about fragile edges before they start
- ☐ Buy a satin bonnet and a light leave-in spray first
- ☐ Plan your takedown: conditioner, patience, and no rushing
- ☐ Give your hair a week of rest between long installs
A good protective style is a gift to your future self: eight weeks from now, your ends will thank you. Choose the one that fits your real life, install it gently, and let your hair do the quiet work of growing.
Discover more from Fashinate Style
Subscribe to get the latest posts sent to your email.