
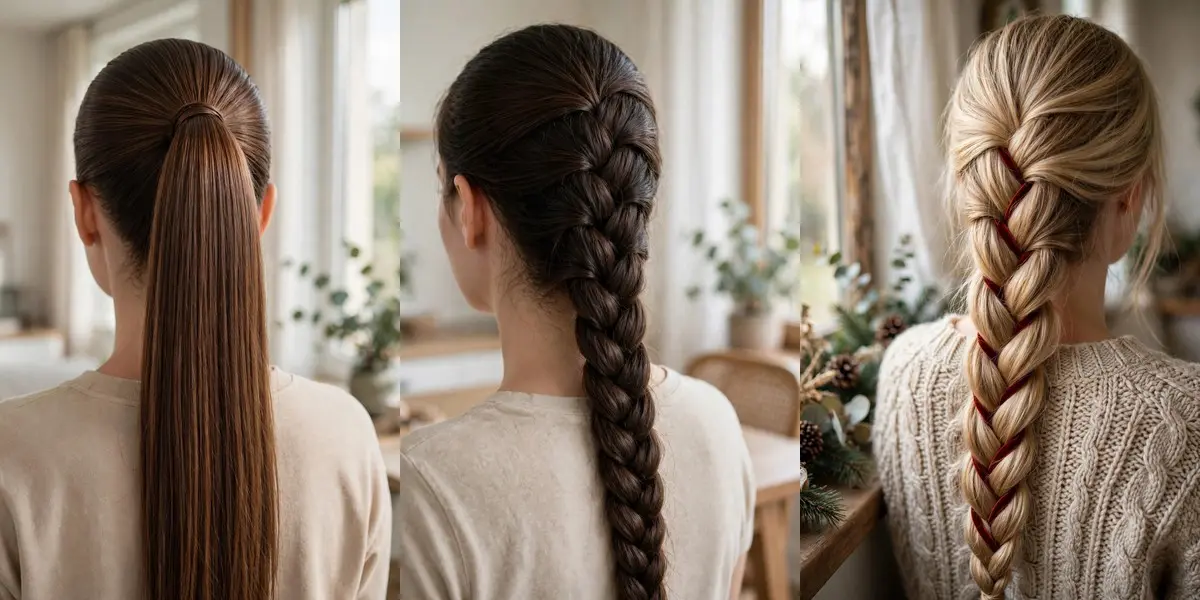
Long hair is beautiful, but wearing it the same way every day gets dull fast. These hairstyles for long hair are all looks you can genuinely recreate at home, and if a color refresh is also on your list, our brown to blonde balayage ideas pair perfectly with them.
Inside you will find 30 styles: sleek ponytails, every kind of braid, buns that take under a minute, and soft waves that need no salon visit. Each one comes with simple steps and a practical tip, so you can follow along in front of your own mirror.
You do not need professional skills or a drawer of tools. A brush, a few elastics, bobby pins and one good clip cover almost everything here, and most styles actually hold better on second-day hair than on freshly washed, slippery strands.
Pick one new style each week and practice it twice. Braiding and twisting are muscle memory — the third attempt almost always looks like the photos. Start with the five-minute styles and work up to the crown braids when you feel ready.
In This Guide
- 1. Sleek High Ponytail
- 2. Classic French Braid
- 3. Messy Bun with a Claw Clip
- 4. Fishtail Braid
- 5. Half-Up Half-Down with Loose Waves
- 6. Elegant Chignon
- 7. Bubble Ponytail
- 8. Double Dutch Braids
- 9. Loose Side Braid
- 10. Crown Braid (Halo Braid)
- 11. Beachy Waves
- 12. Barbie Bow Half-Up
- 13. Waterfall Braid
- 14. Half-Up Top Knot
- 15. Rope Braid
- 16. Double Braids (Pigtail Braids)
- 17. Sleek Crown
- 18. Loose Fishtail Braid
- 19. Double Crown Braid
- 20. Sleek Bun
- 21. Boho Twists
- 22. Side French Braid
- 23. Half-Up with Bow-Tie
- 24. Chunky Half-Up Dutch Braids
- 25. Braids with Woven Ribbon
- 26. Double Braids in a Ponytail
- 27. Milkmaid Braid Crown
- 28. Twisted Space Buns
- 29. Braid-Wrapped Ponytail
- 30. Loose French Braid
- Styling Tips
- Common Mistakes to Avoid
- Best Products to Make Long Hairstyles Last Longer
- Frequently Asked Questions
1. Sleek High Ponytail
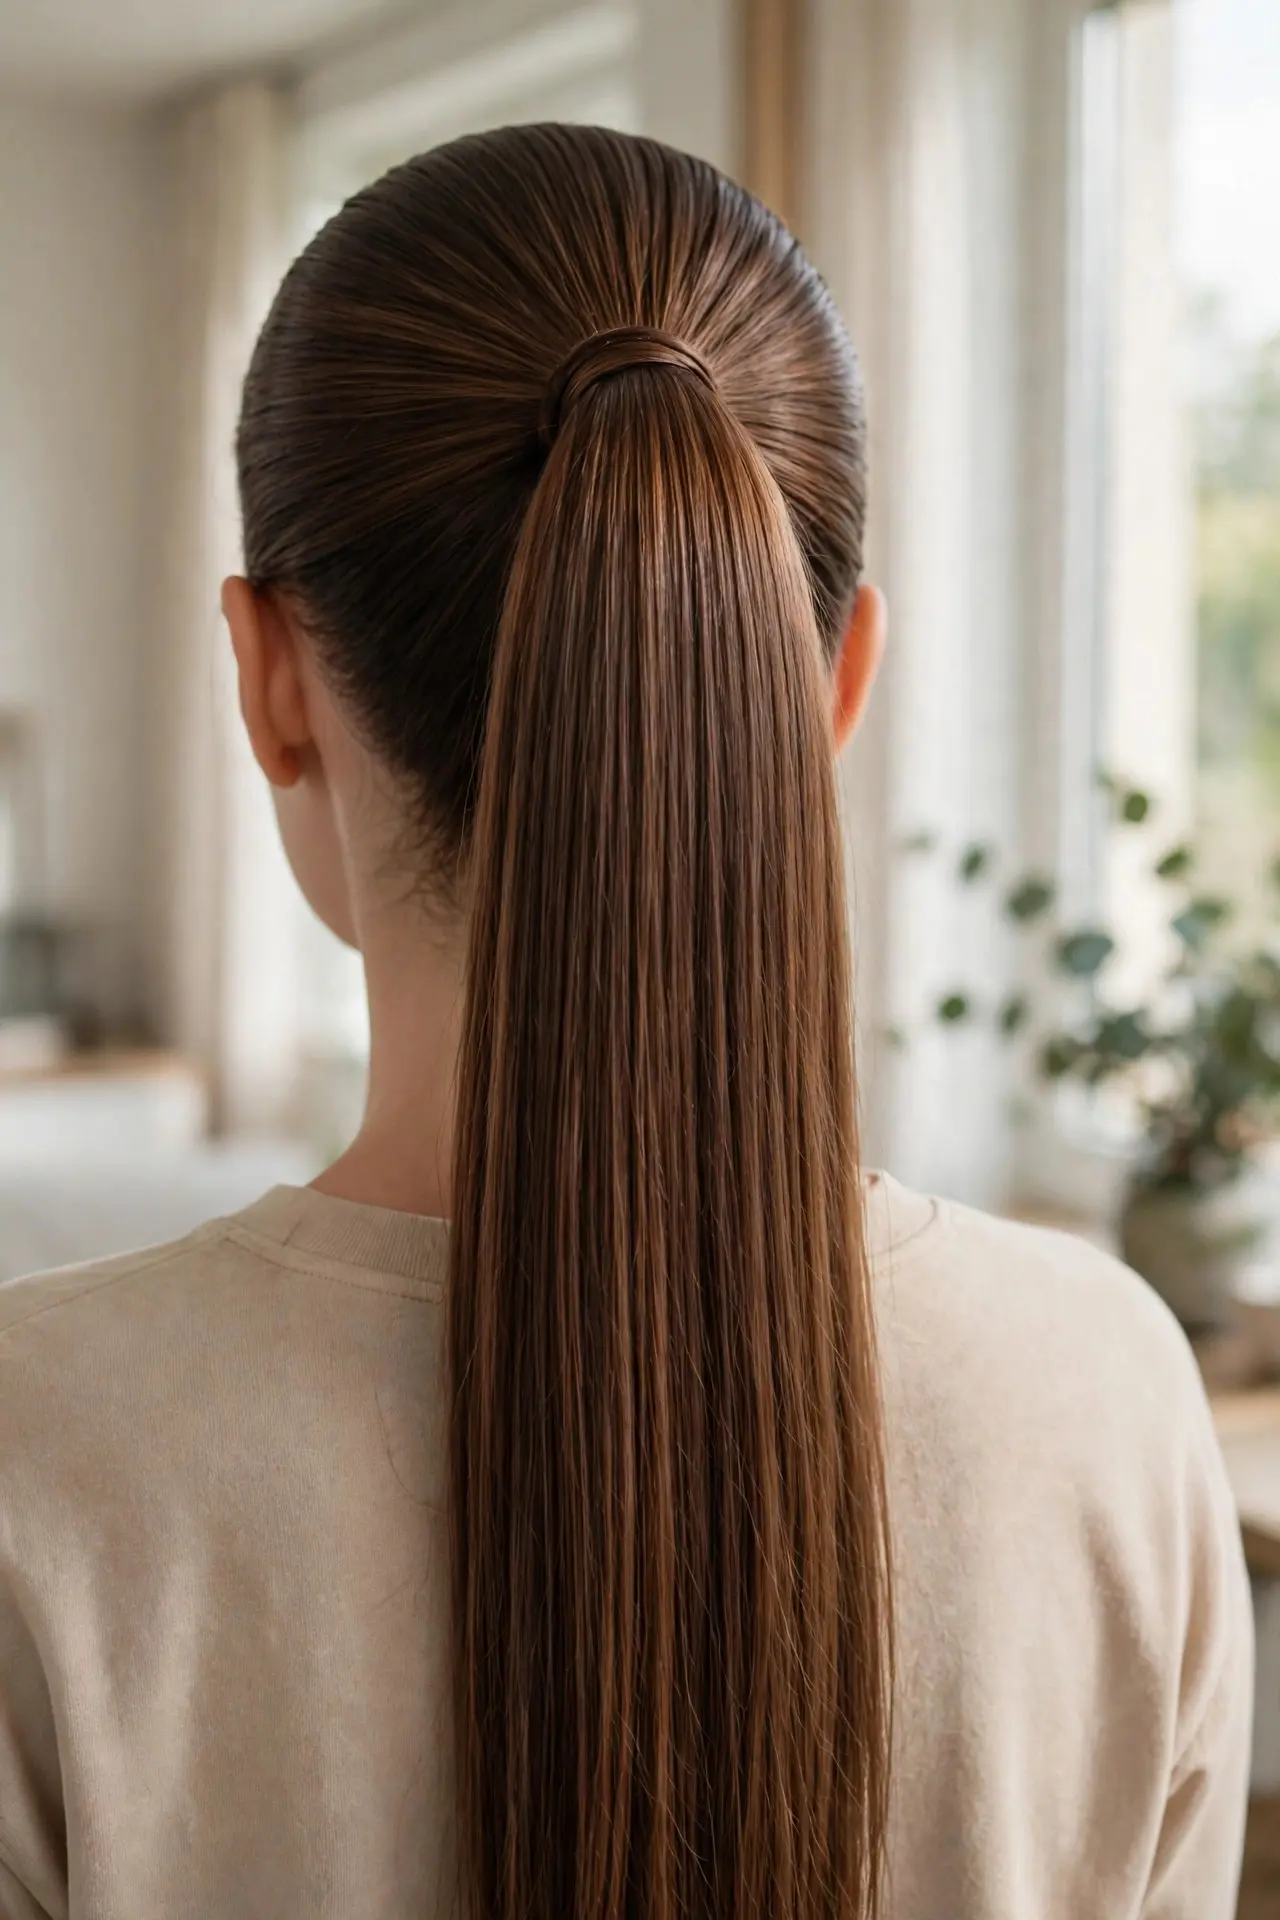
The sleek high ponytail is the quickest route to looking polished: hair smoothed completely flat, gathered high on the crown, and falling in one glossy sheet down your back. It lifts the whole face and works everywhere from the office to a night out.
Brush everything back and slightly upward, then secure it at the crown with a strong elastic. Smooth the hairline with a boar brush and a touch of gel, and wrap a thin strand of hair around the base to hide the tie for a finished look.
Tip: Mist your brush — not your hair — with hairspray before the final smooth-down. It tames flyaways without leaving stiff, crunchy patches along the part.
2. Classic French Braid
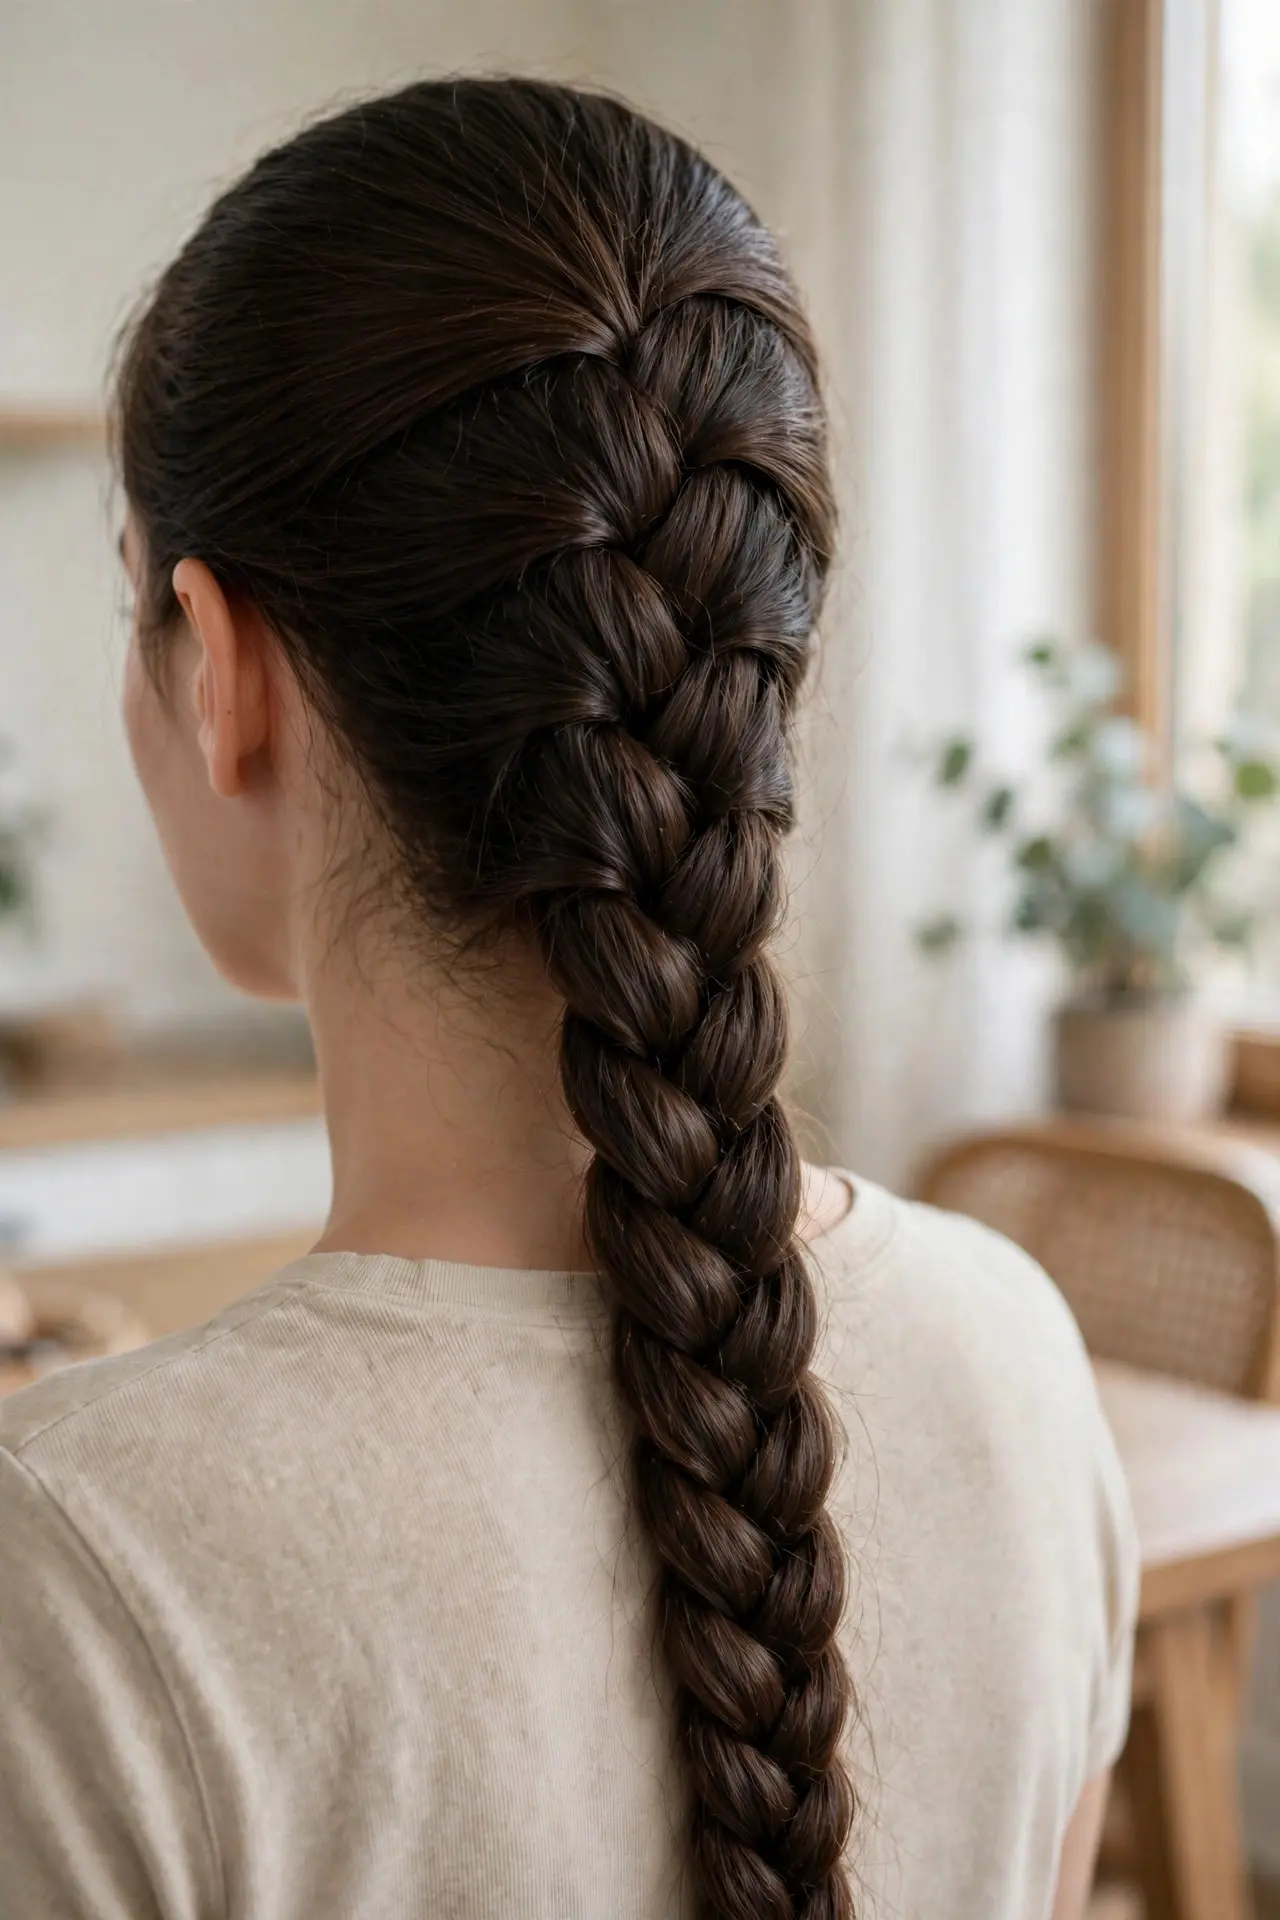
This is the original French braid: one neat weave that starts at the crown, picks up hair as it travels straight down the center of the back, and keeps every strand locked in. It is the tidy, symmetrical benchmark the looser versions later in this list play against.
Start with a small section at the crown split into three. Cross the outer strands over the middle, adding a little more hair to each side every time you cross. Keep the tension even on both sides and finish with a regular three-strand braid below the nape.
Tip: Practice on slightly damp, detangled hair. Freshly washed hair is slippery and hard to grip, while day-two hair holds the weave with far less effort.
3. Messy Bun with a Claw Clip
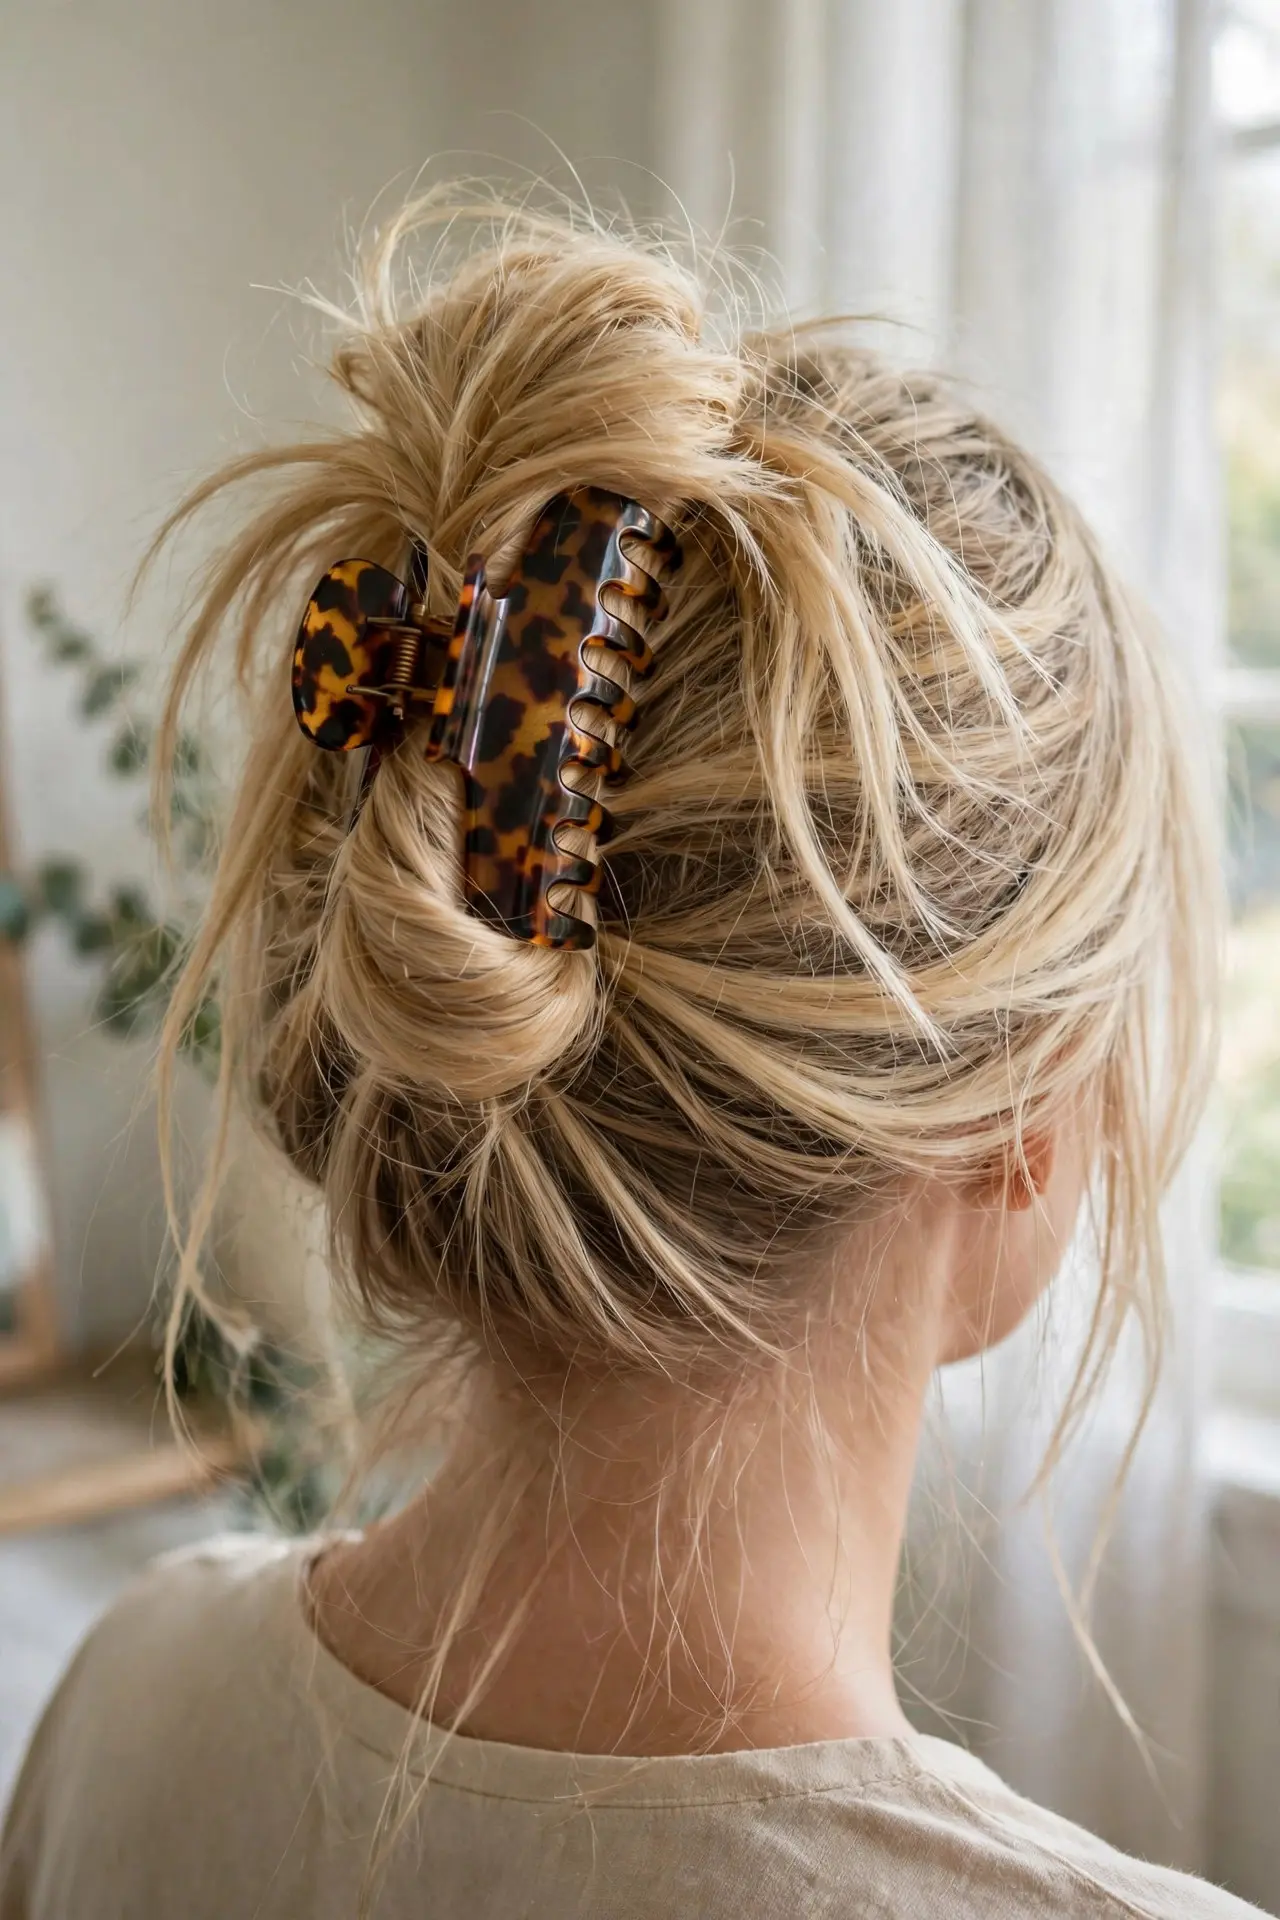
The messy claw-clip bun is the one-minute wonder of this list: all of your hair twisted up and clamped at the back, with soft wisps escaping on purpose. It feels relaxed rather than undone, and it puts far less tension on the scalp than a tight elastic bun.
Gather your hair as if for a low ponytail, twist the length upward against the back of your head, fold the ends down, and clamp the whole twist with a large claw clip. Pull a couple of face-framing pieces free to finish the lived-in effect.
Tip: Size up your clip. Extra-long or thick hair needs a clip of four inches or more, and matte finishes grip noticeably better than glossy plastic.
4. Fishtail Braid
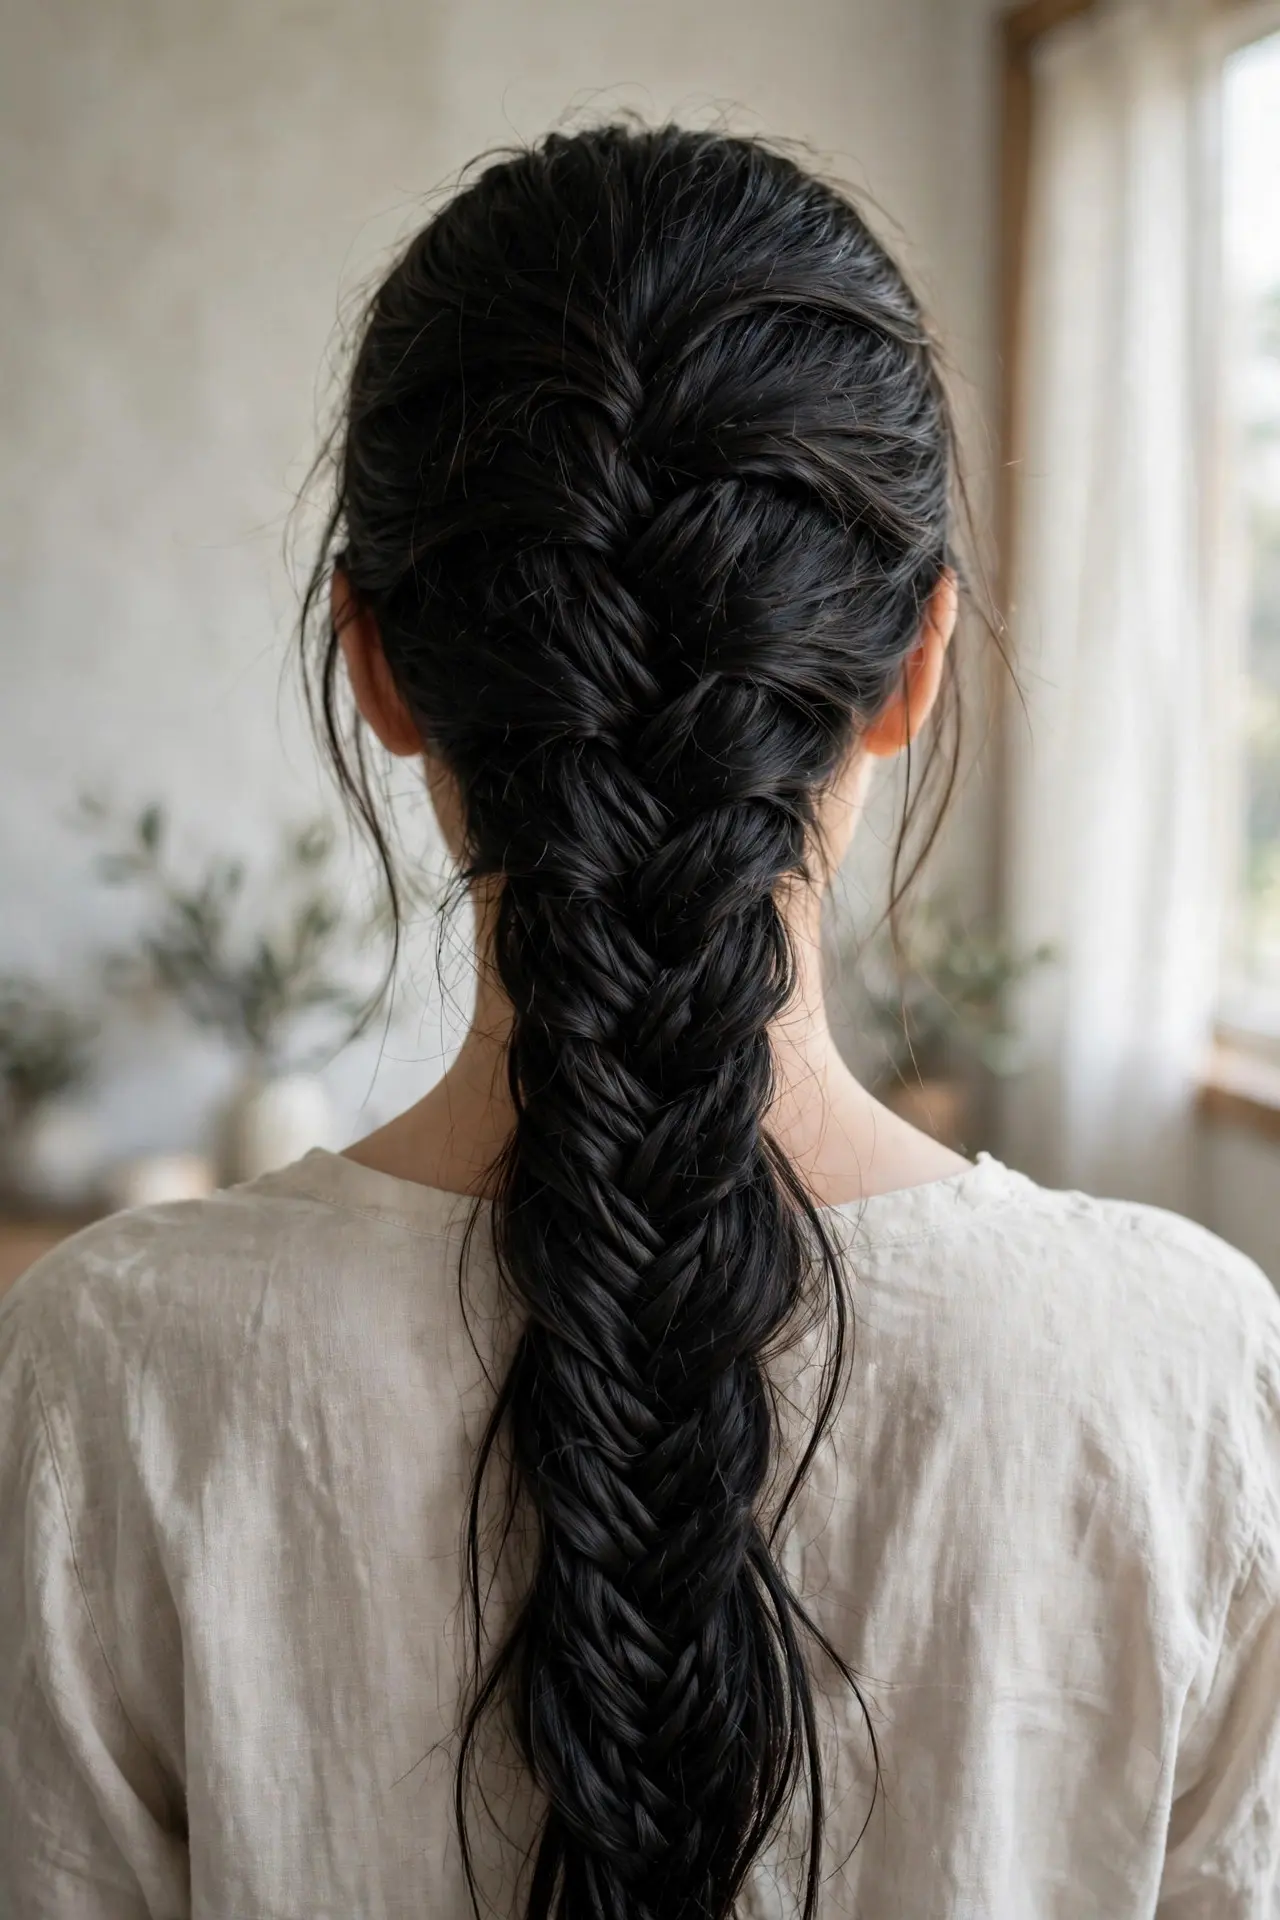
The fishtail looks intricate, but it is built from just two sections instead of three. Thin strands crossed in from the outer edges create that fine herringbone pattern down the back, and the detailed finish reads far more advanced than the effort involved.
Split the hair into two equal halves. Take a thin strand from the outside of the left half and cross it into the right half, then repeat from the right side. Keep working down, keeping the strands thin — thin pieces are what make the pattern look delicate and detailed.
Tip: Once secured, pinch and gently tug the edges of each loop. That pancaking step turns a good fishtail into a full, romantic one.
5. Half-Up Half-Down with Loose Waves
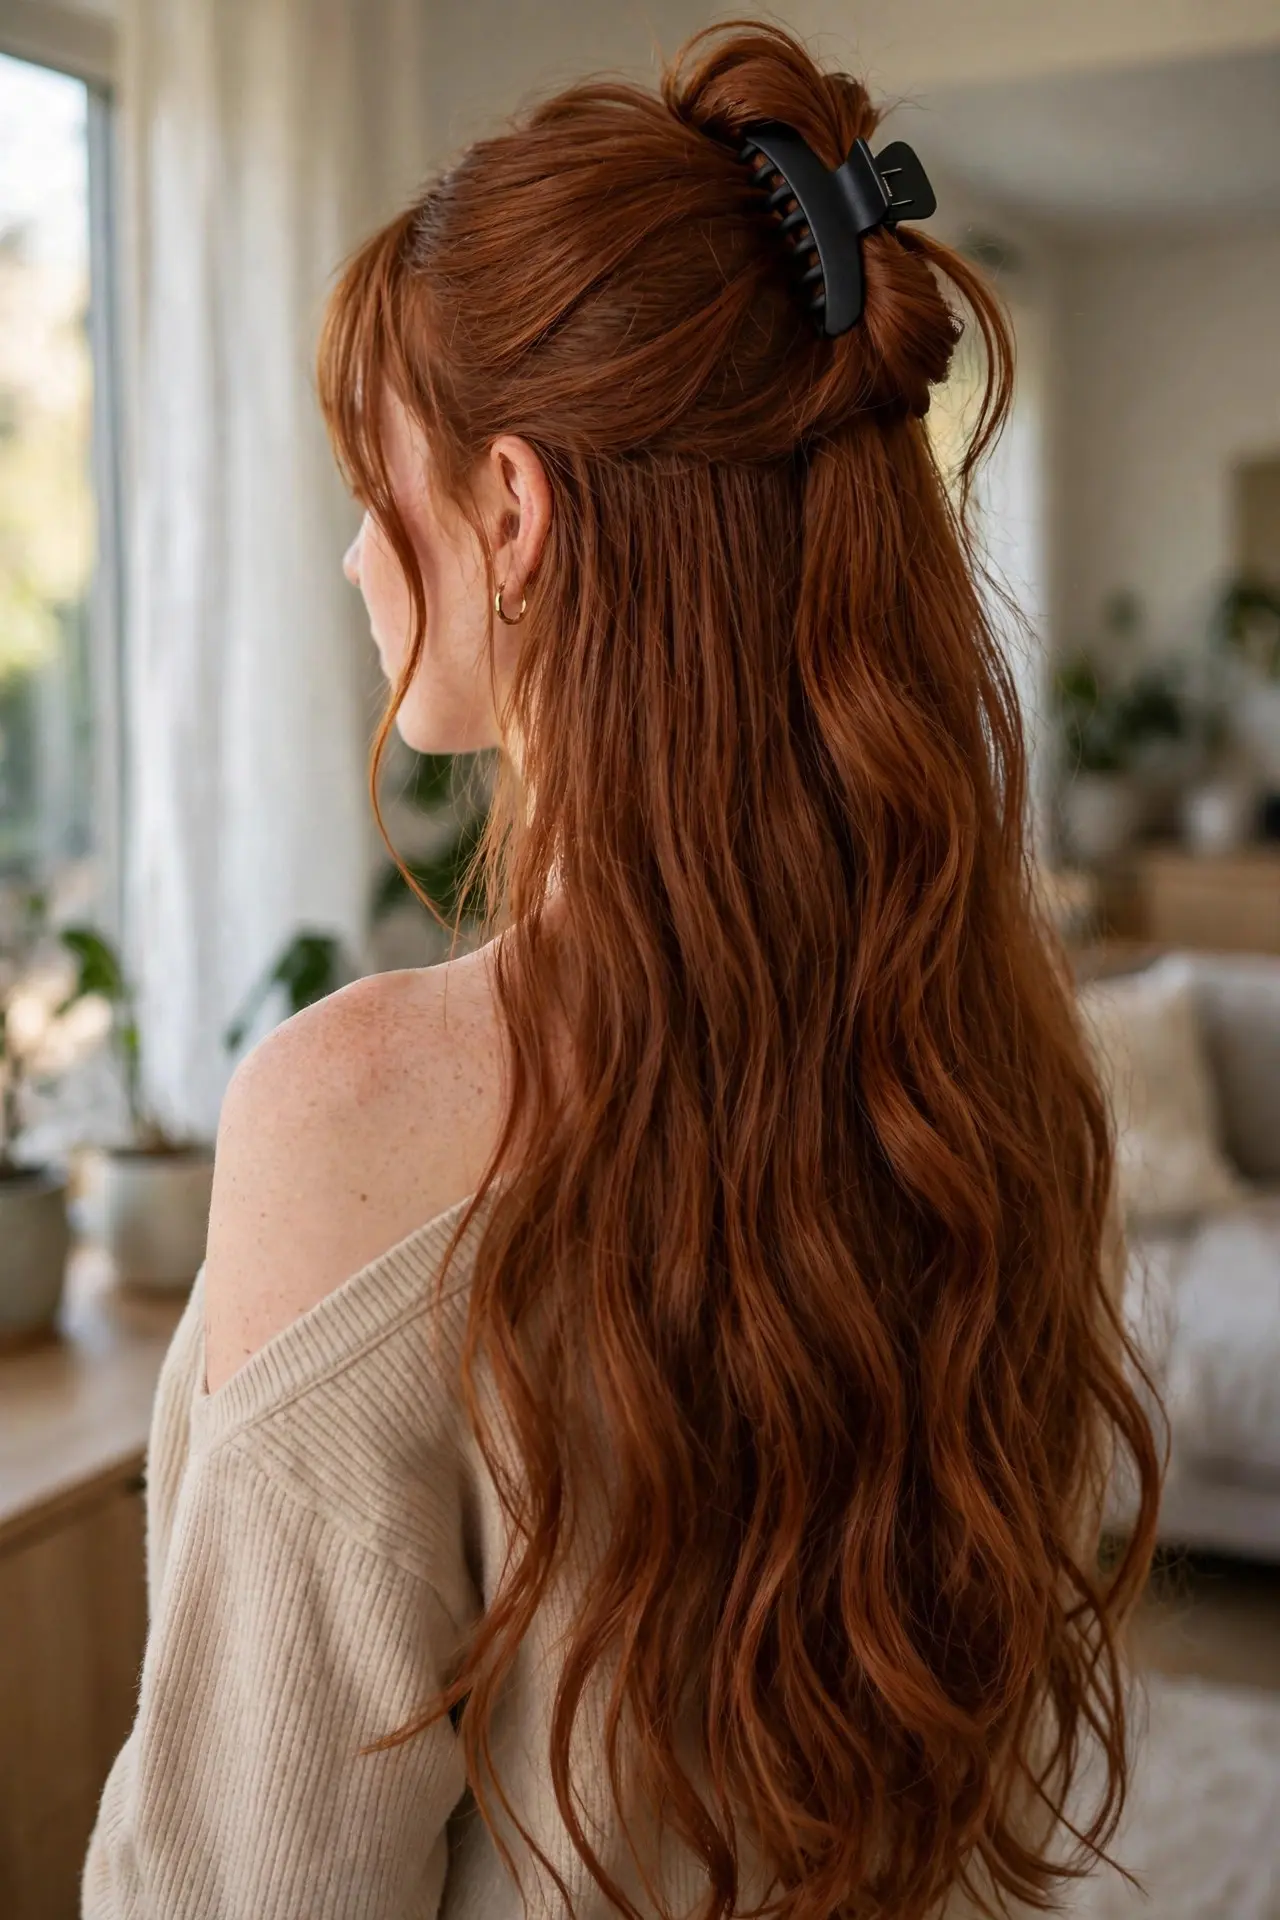
Half-up, half-down is the best of both worlds: the front is tidy and lifted while the length still gets to show off in soft waves. It suits almost every occasion, from garden parties to date night, and never looks like you tried too hard.
Wave the lengths first with a large-barrel wand, letting the curls cool completely before you touch them. Then lift the top section from ear to ear, smooth it back, and secure it with a small clip or clear elastic at the back of the crown.
Tip: Curl in alternating directions, away from the face on both sides. Uniform curls look styled; alternating ones look like natural, expensive waves.
6. Elegant Chignon
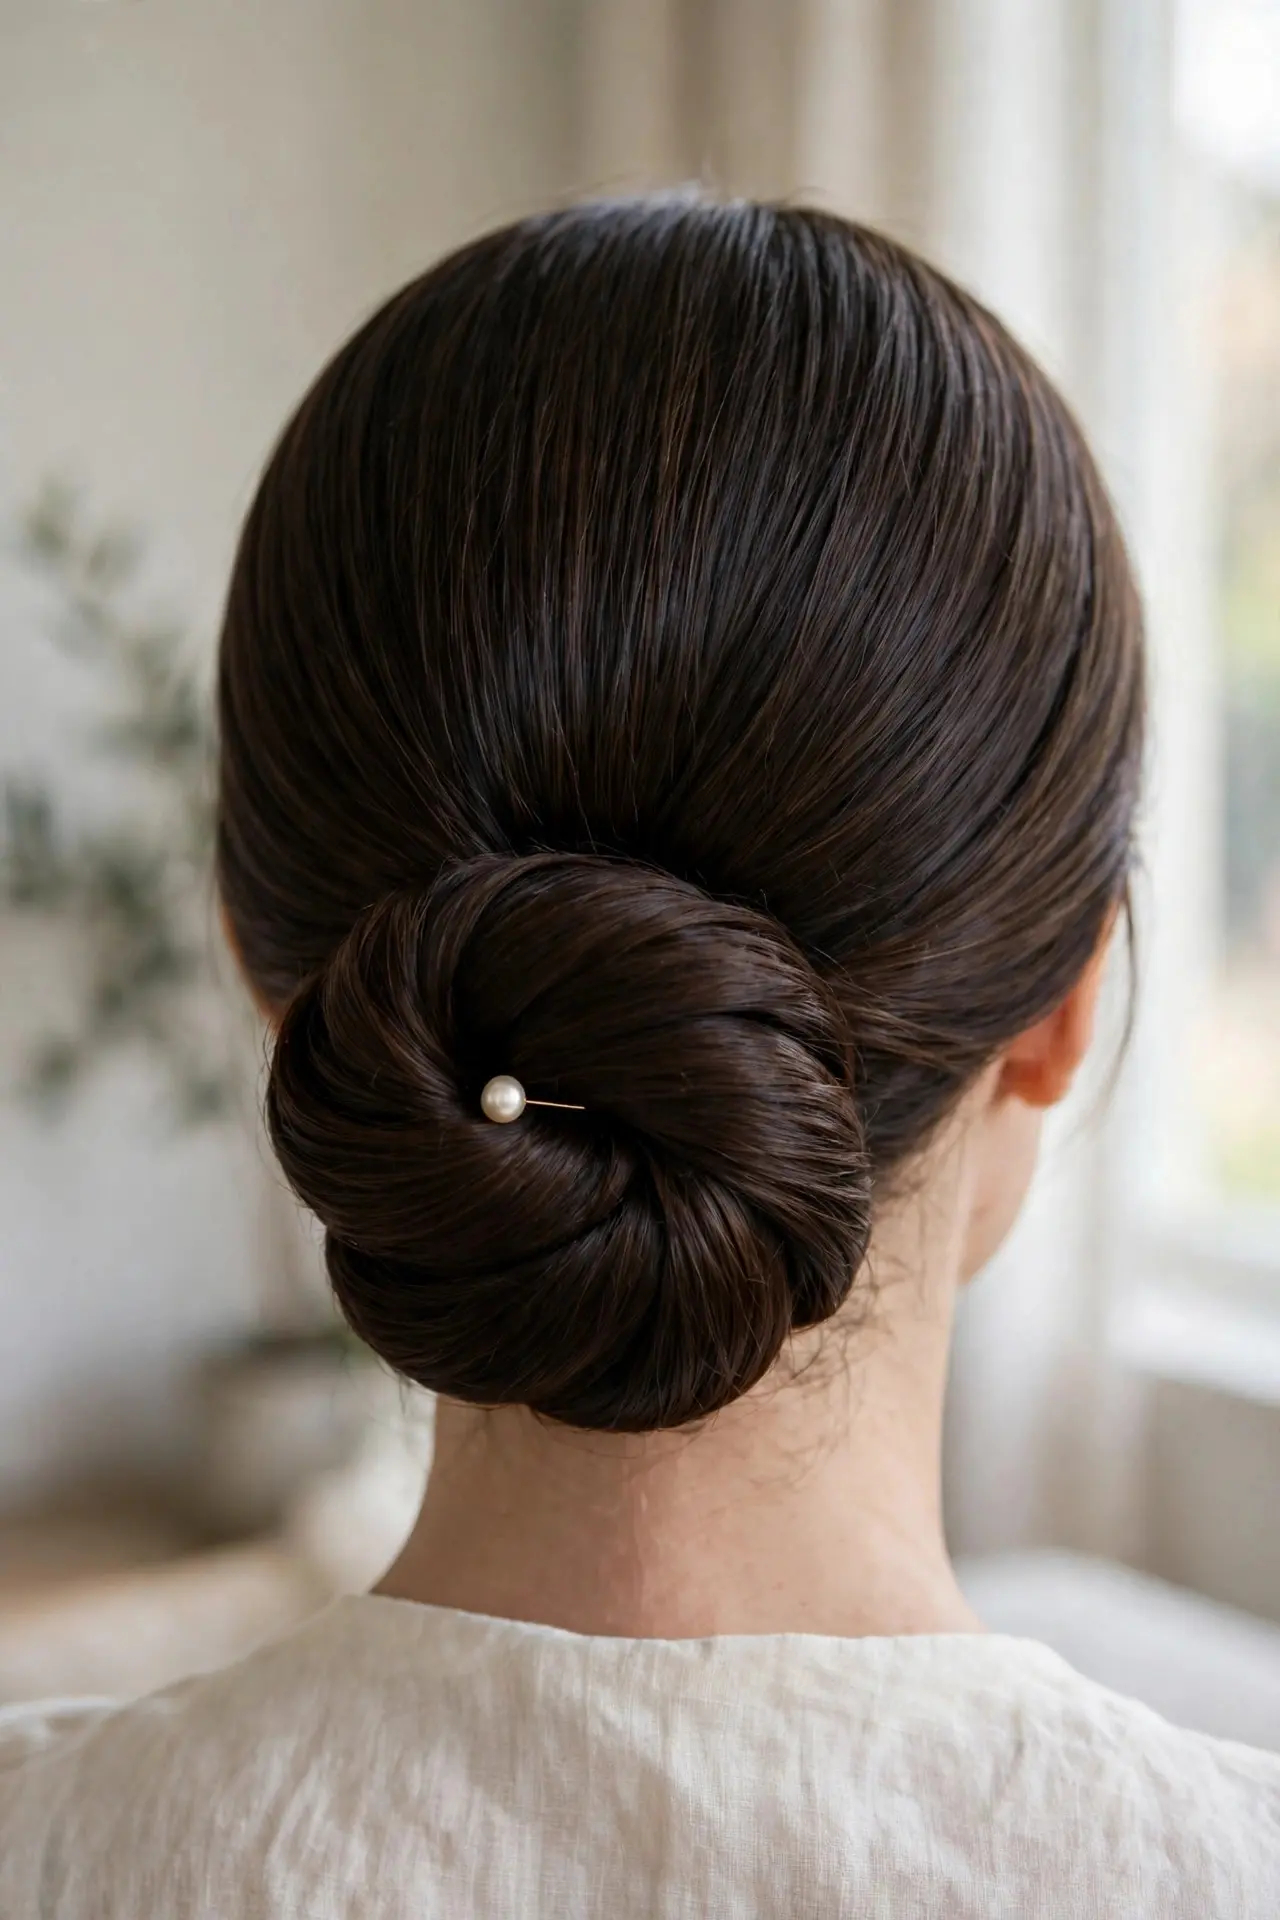
The chignon is a low, coiled bun that sits at the nape and instantly reads as elegant. It is the style to reach for when the dress code matters — dinners, weddings, client meetings — yet it takes about five minutes once you know the motion.
Smooth the hair back into a low ponytail and secure it loosely. Twist the length, coil it flat against the nape into a round bun shape, and pin around the coil with bobby pins, crossing each pair for hold. A pearl or crystal pin adds a quiet finishing detail.
Tip: Keep the coil slightly loose rather than drum-tight. A softer silhouette looks modern and romantic, while a very tight chignon can look severe.
7. Bubble Ponytail
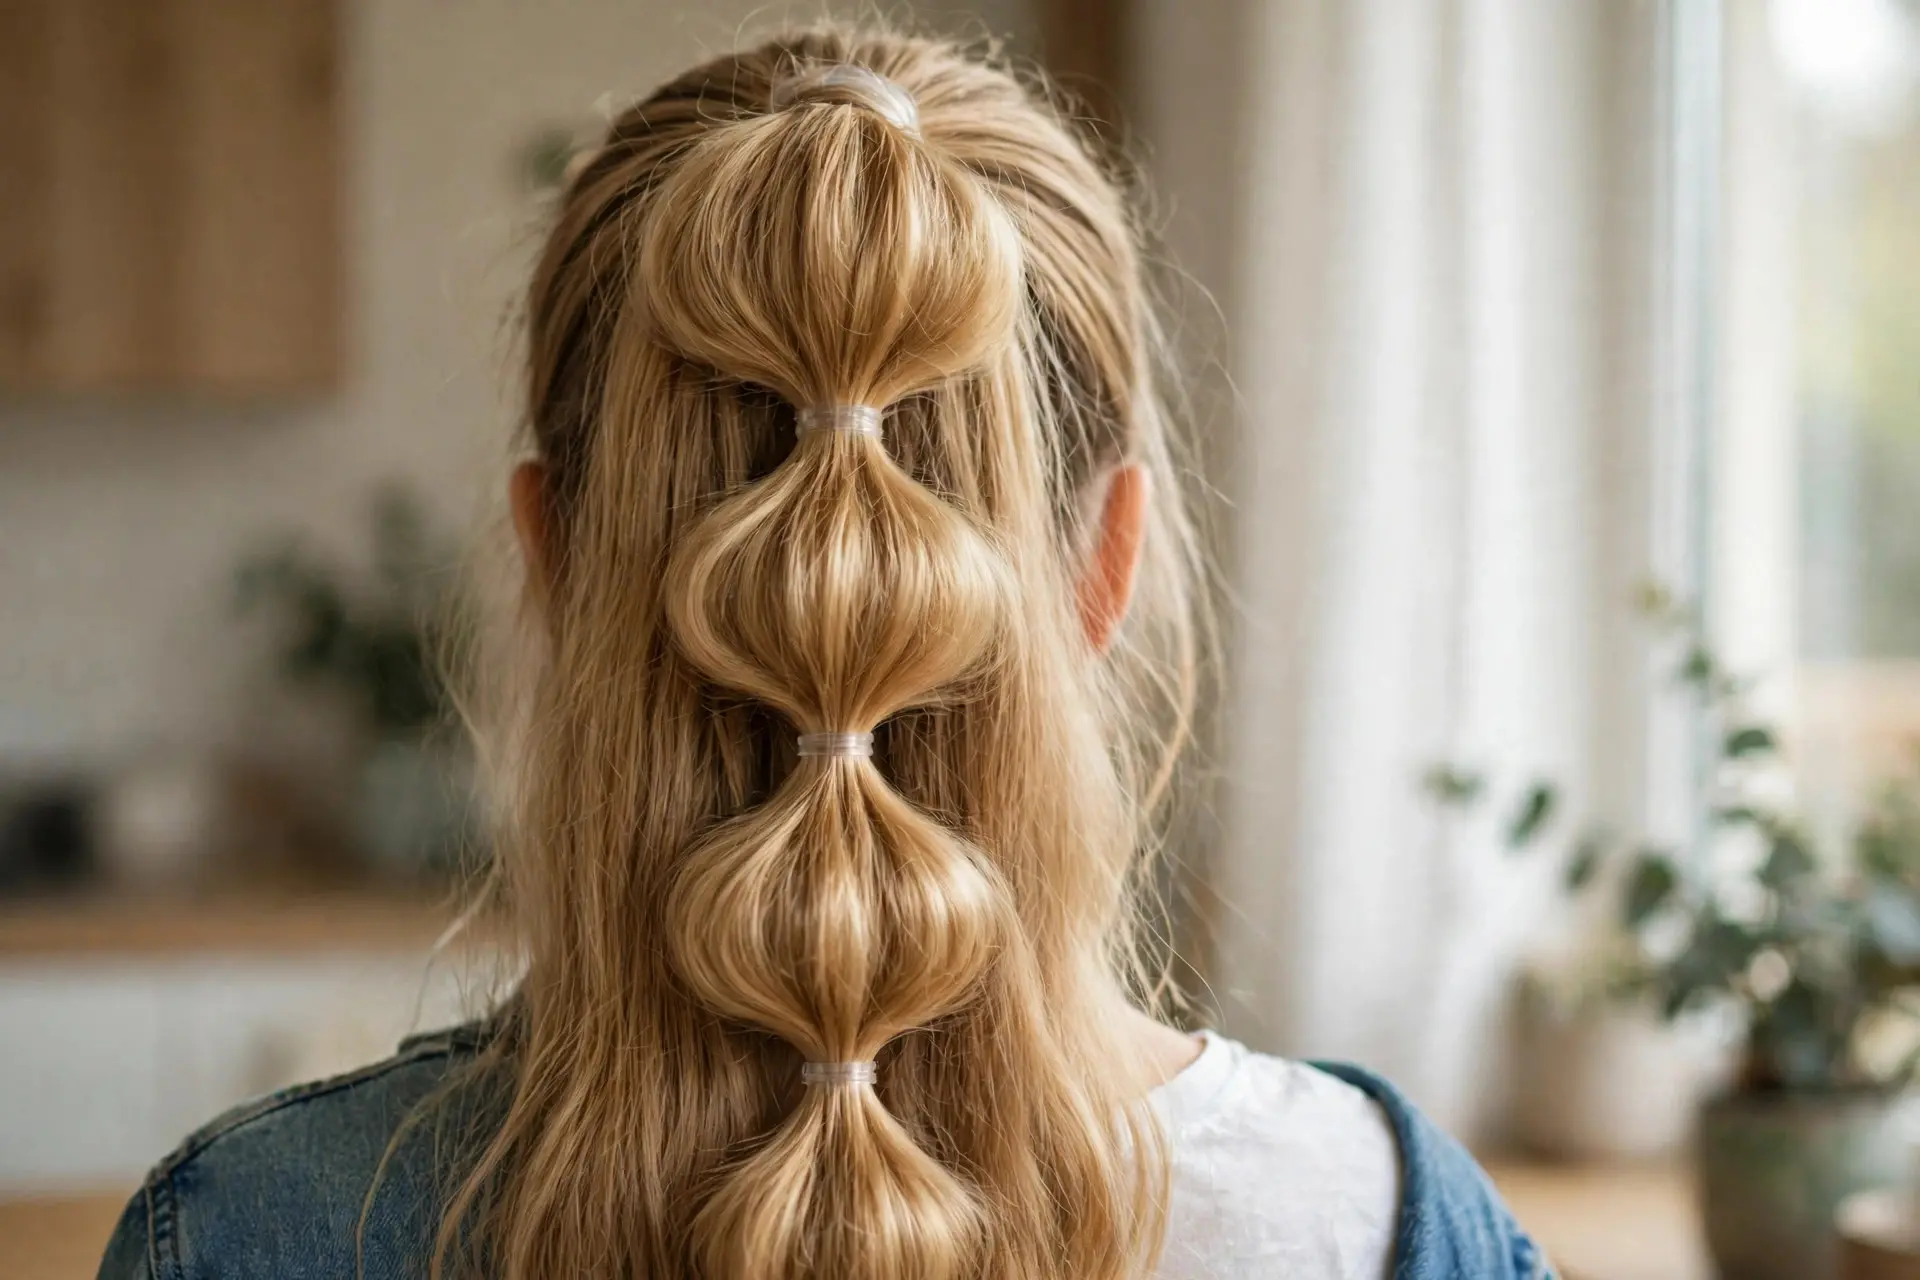
The bubble ponytail needs zero braiding skill and delivers maximum impact: a regular ponytail divided into puffed, rounded sections that look playful and deliberate. It is a favorite for concerts, festivals and photos because the shape reads from a distance.
Start with a smooth, fairly high ponytail. Add a small clear elastic every two to three inches down the length, then gently pull each section outward between the elastics to round it into a bubble. Measure the spacing with your fingers so the bubbles come out even.
Tip: Use clear or hair-matching elastics. The eye should land on the bubble shape, not on a row of bright ties marching down the ponytail.
8. Double Dutch Braids
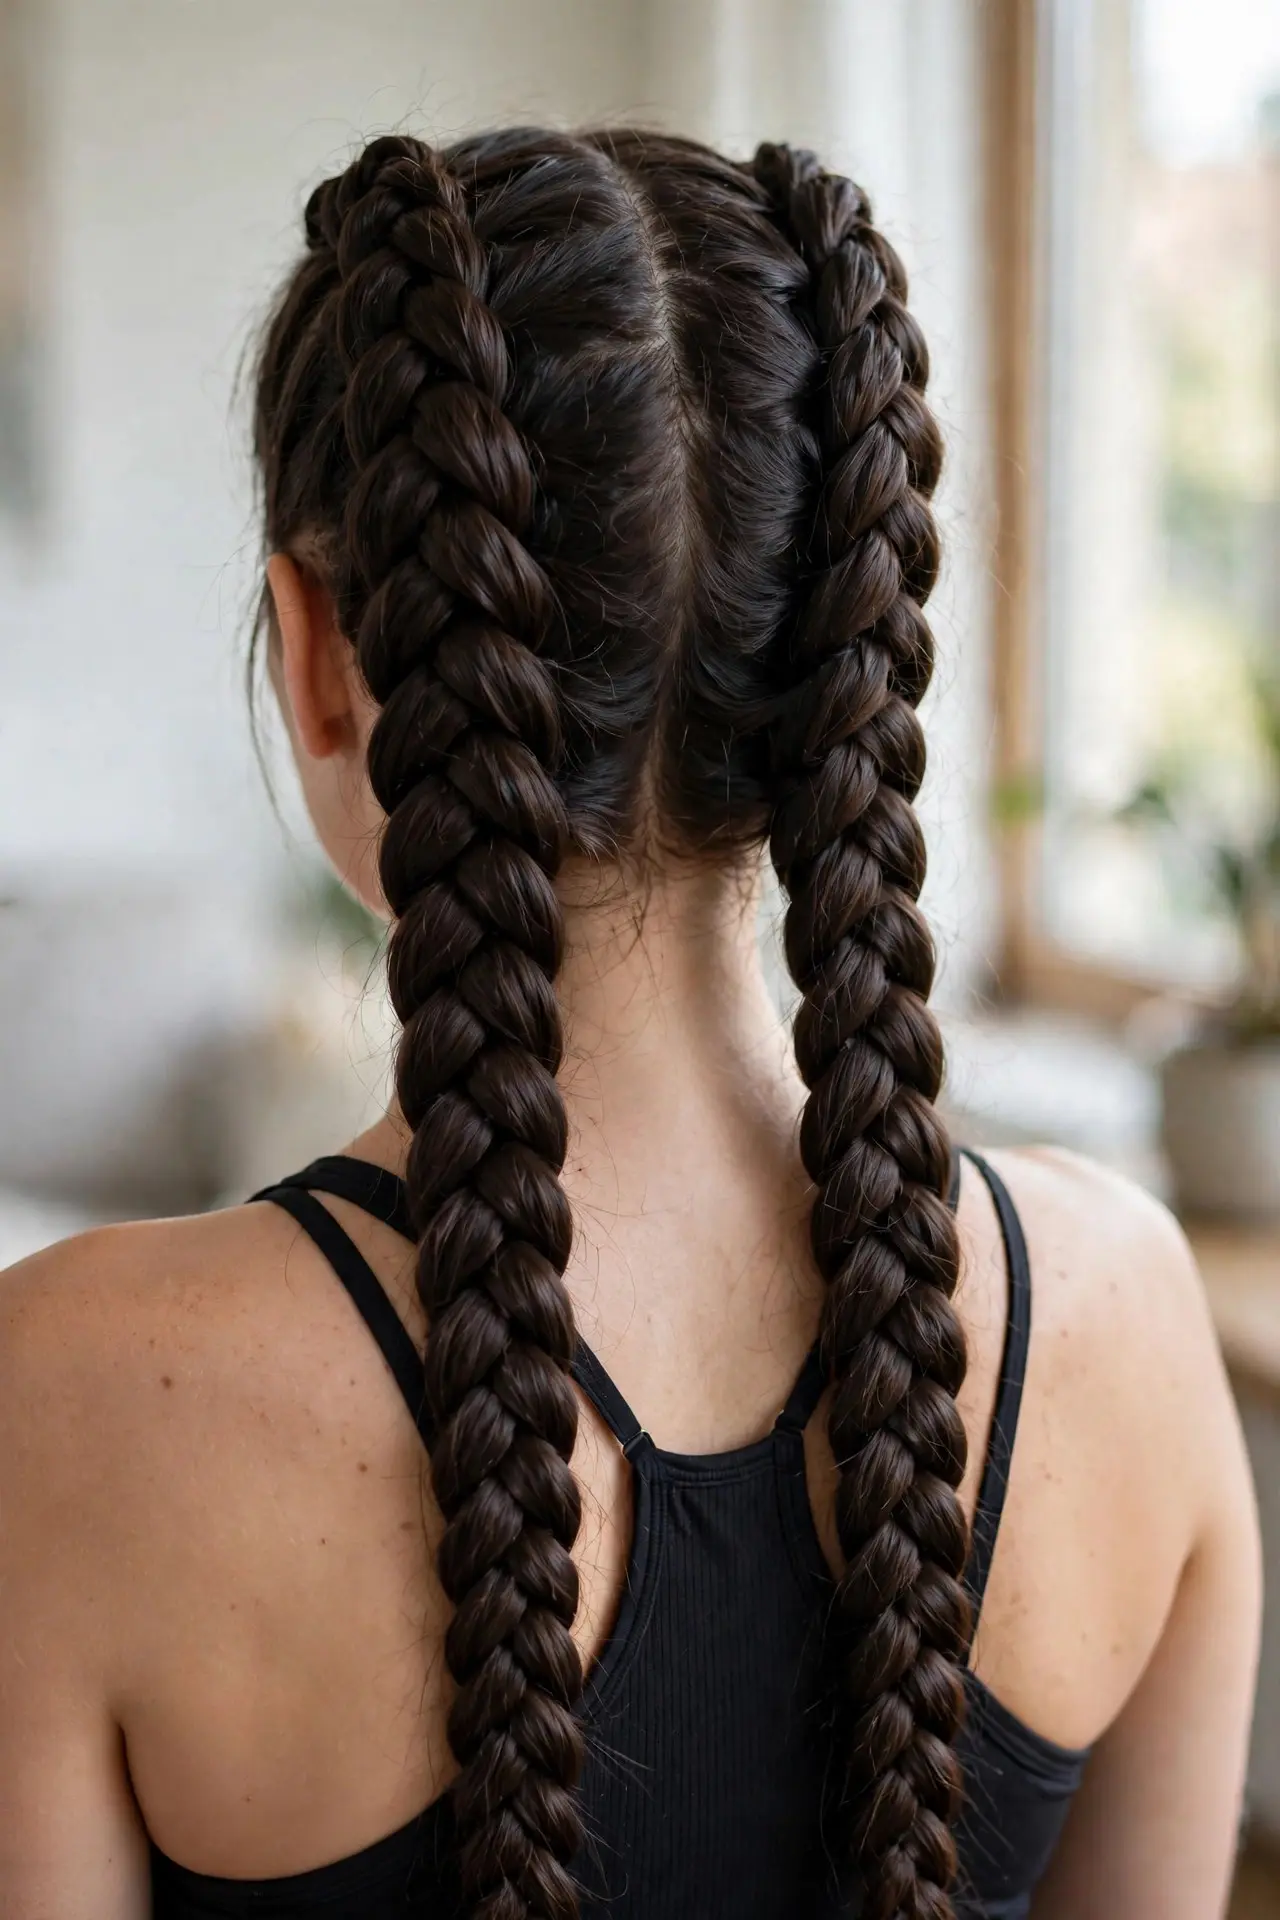
Dutch braids are the inside-out braid: instead of lying flat, the weave sits on top of the hair in a bold, three-dimensional ridge. Two of them, running from the front hairline all the way down, give sporty, festival-ready energy and serious hold.
Part the hair straight down the middle. On each side, braid from the hairline downward, crossing the outer strands under the middle instead of over — that single change is what makes the braid pop up. Continue past the nape as a normal braid and secure the ends.
Tip: Braid on slightly damp hair with a little texturizing product worked through. The grip stops sections slipping and keeps the ridges clean all day.
9. Loose Side Braid
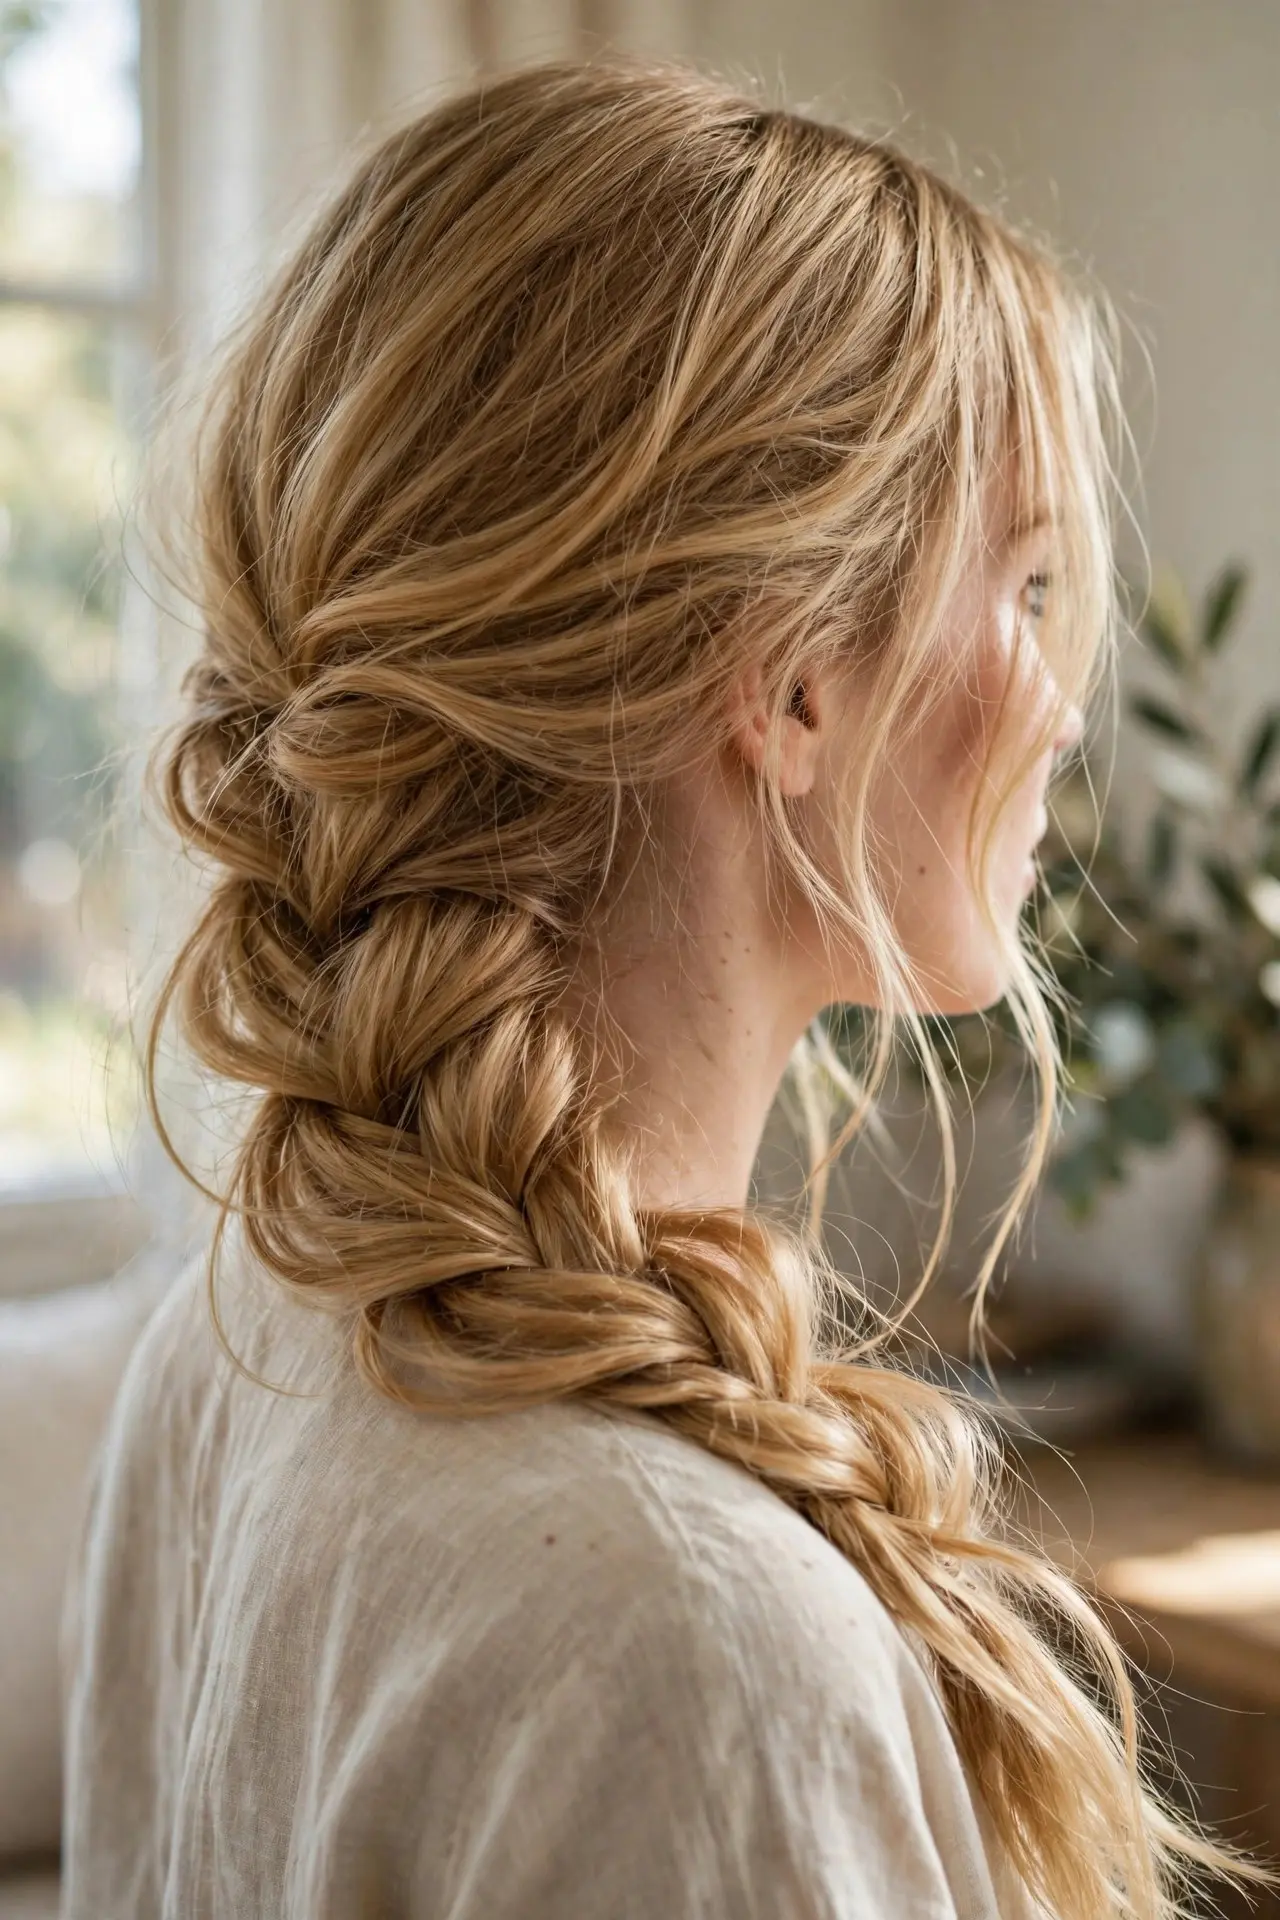
A loose side braid is pure relaxed romance: all the hair swept over one shoulder and braided with deliberate slack, so the weave looks soft and full rather than tight and thin. It is the fastest way to make a plain outfit feel styled.
Bring everything over your preferred shoulder, divide it into three, and braid slowly, leaving a little give between each crossover. Secure a few inches from the ends, then gently pull the loops wider and free a couple of strands around your face.
Tip: Finish with texturizing spray rather than hairspray. It holds the loosened shape while keeping the movement soft instead of shellacked.
10. Crown Braid (Halo Braid)
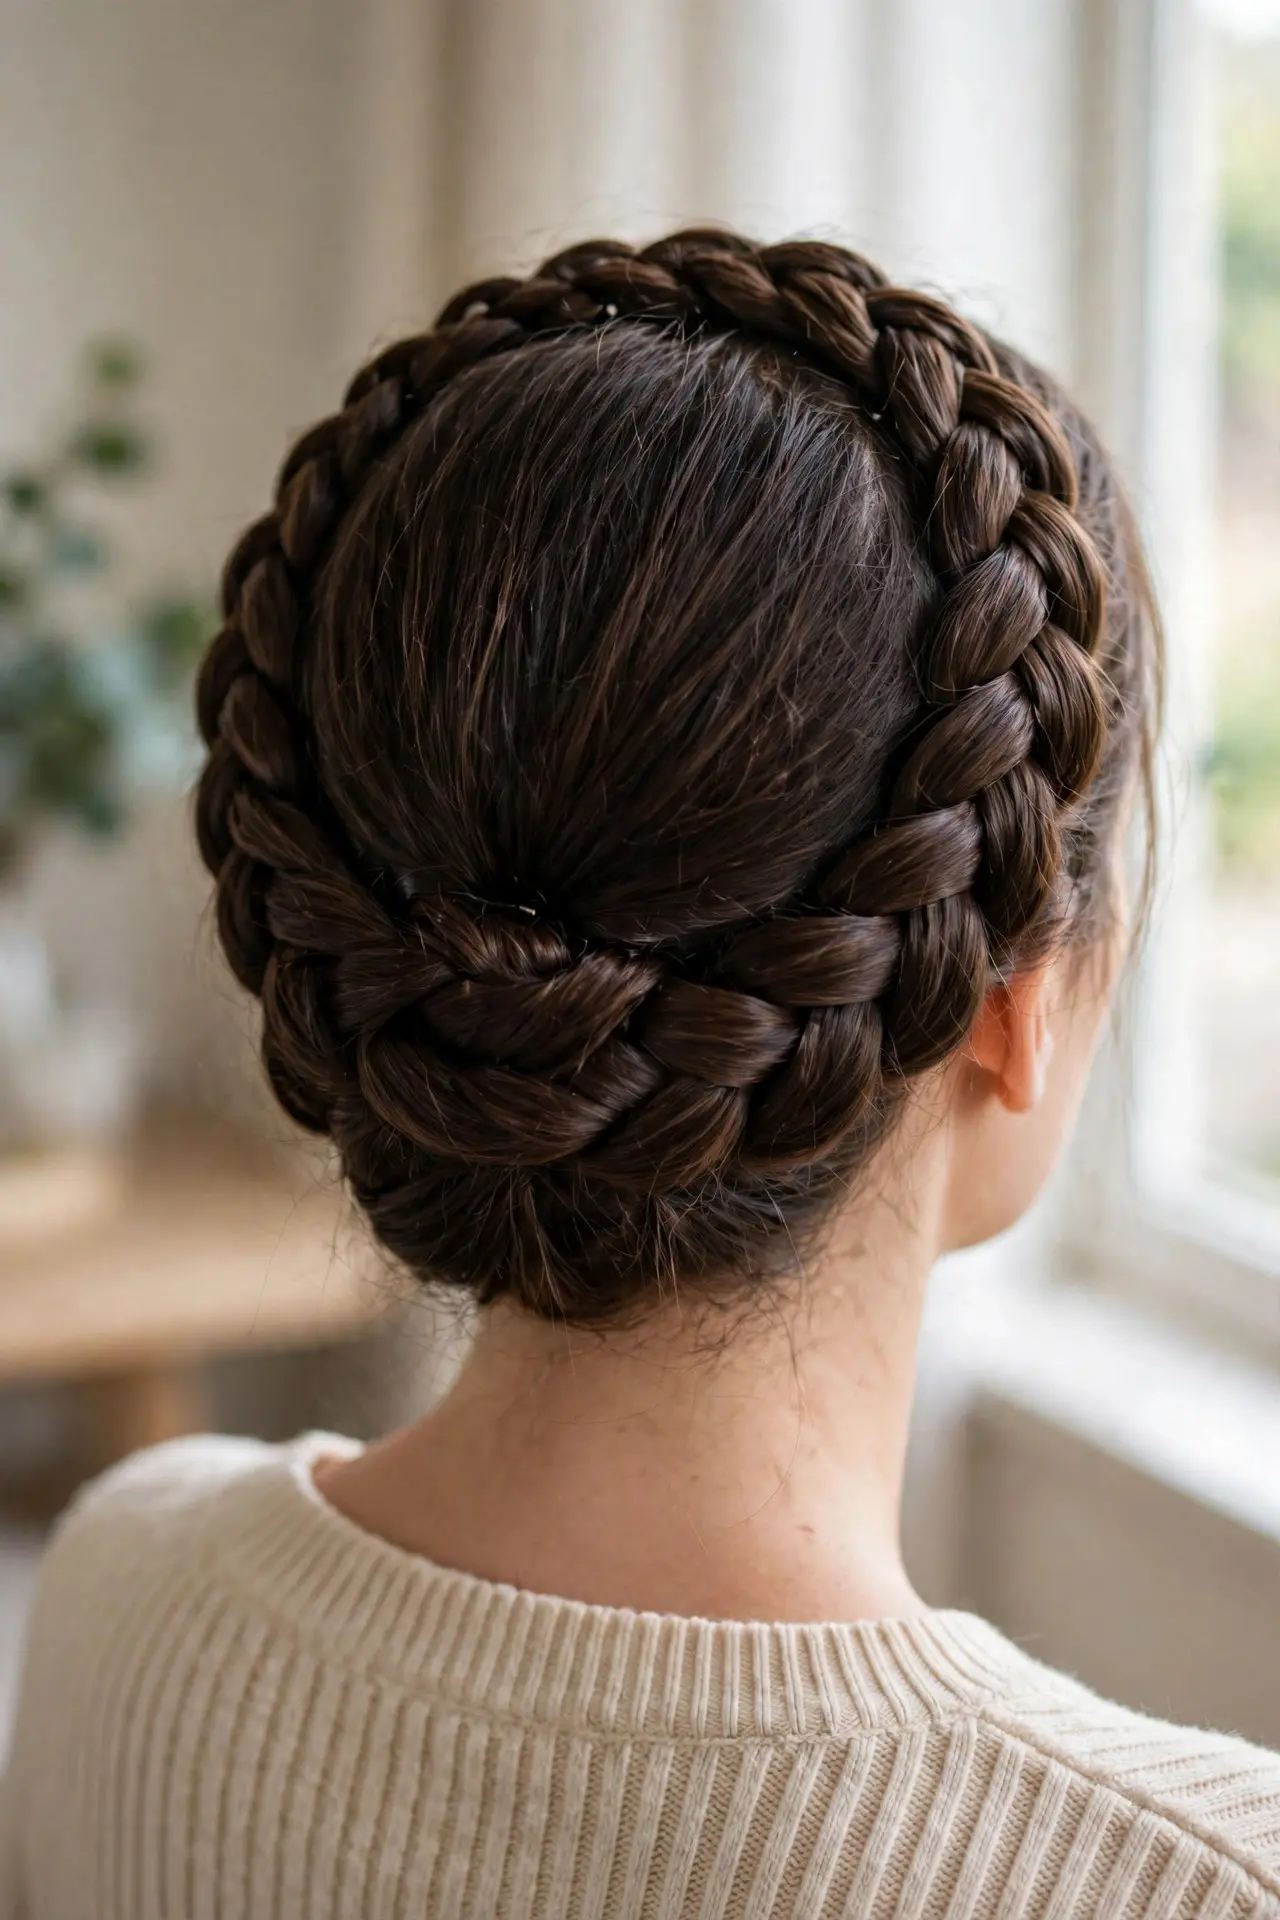
The halo braid wraps one continuous-looking braid all the way around the head like a circlet. It is one of the most elegant styles in this collection — the one that makes a plain dress look like an occasion outfit all on its own.
Braid a Dutch or French braid along one side of the head, following the hairline around, then do the same on the other side so the two braids meet at the back. Tuck the ends into each other and pin them flat so the circle looks unbroken.
Tip: Braid a fraction looser than feels natural. A too-tight crown braid feels fine at 9 a.m. and like a headache by lunch.
11. Beachy Waves
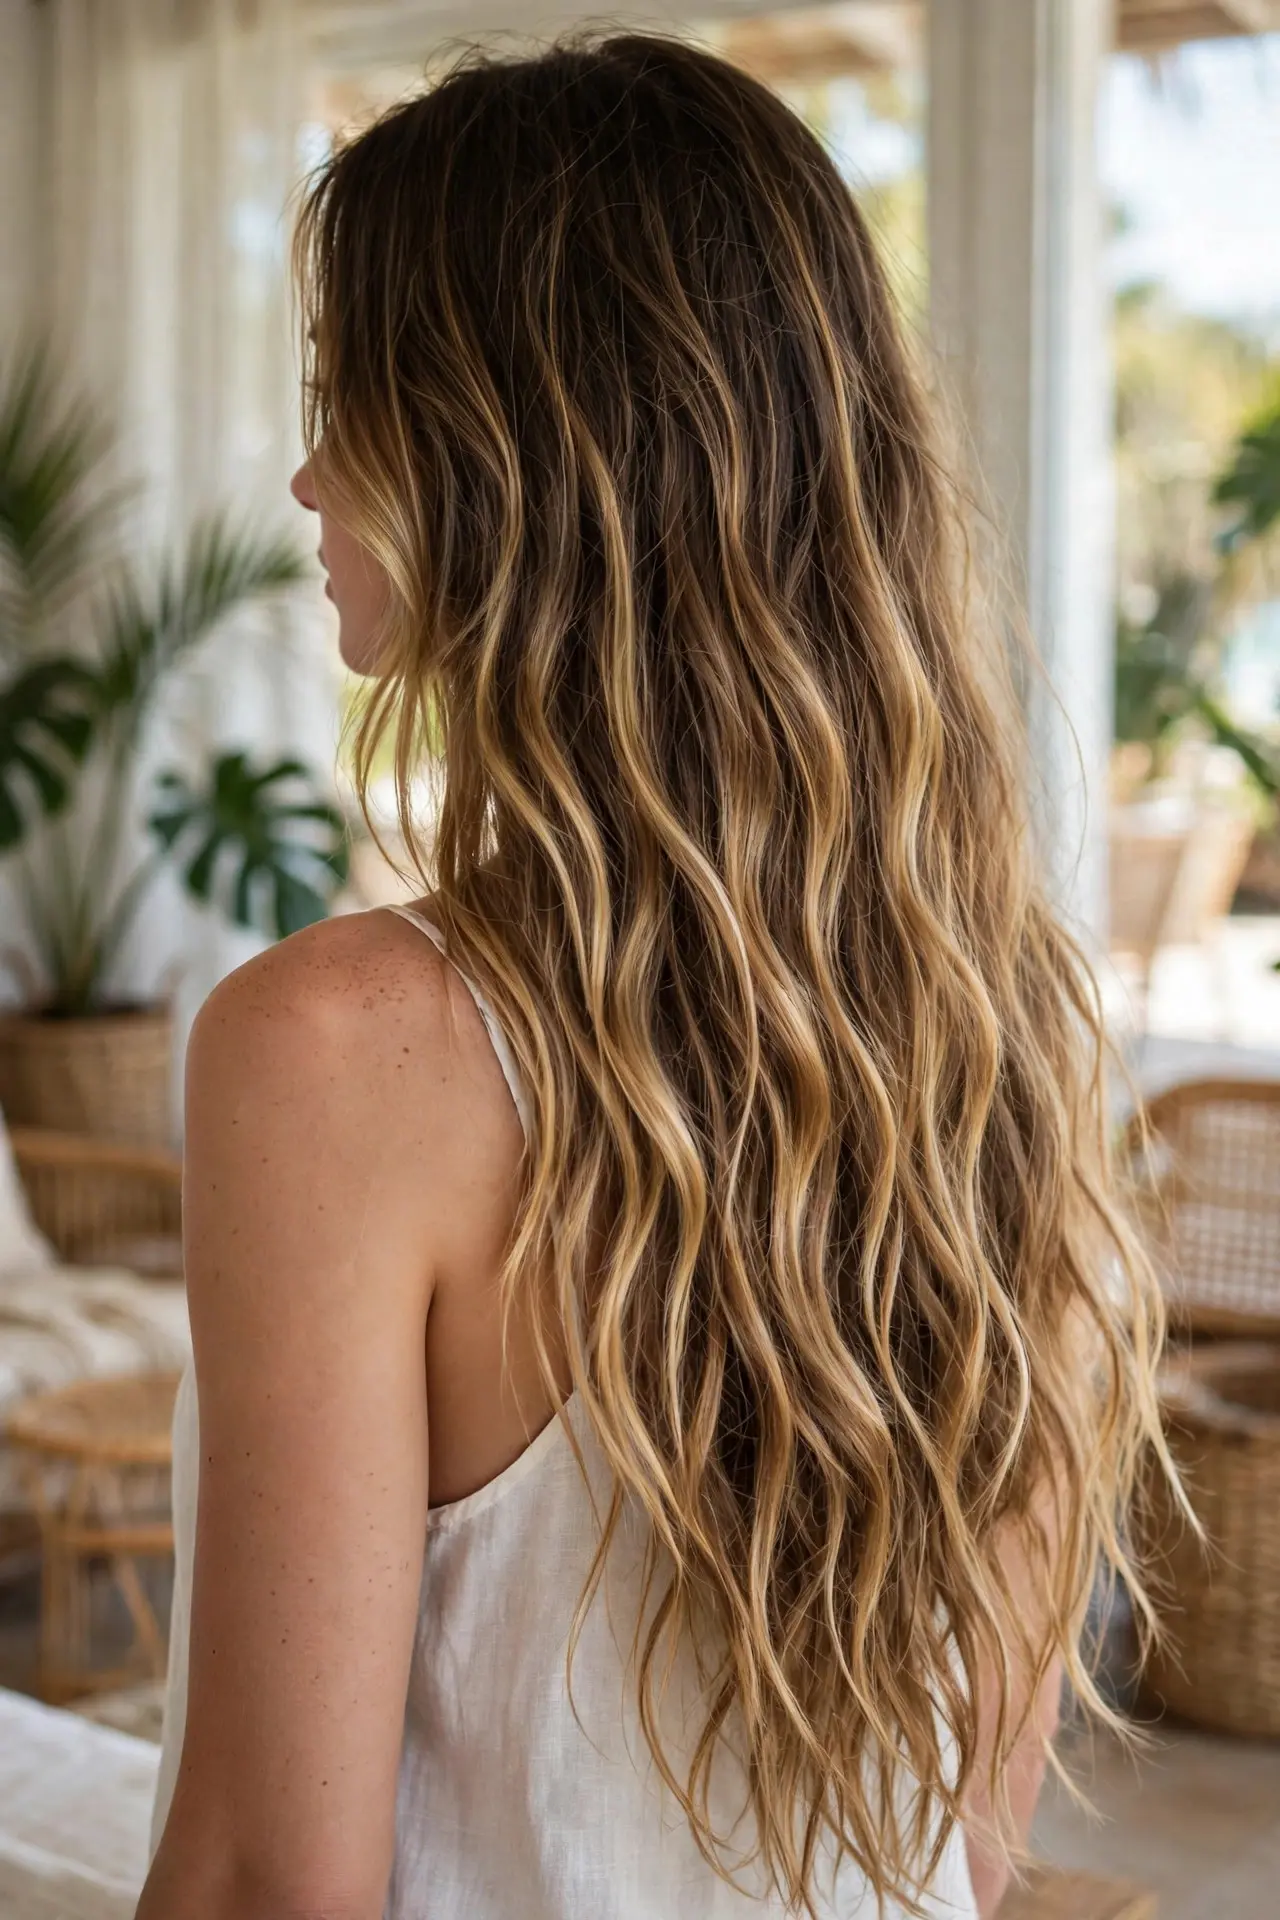
Beachy waves are the sweet spot between doing nothing and doing your hair: loose, tousled bends with a just-back-from-the-coast feel. On very long hair the wave pattern has room to stretch out, which makes the result look especially effortless.
Wrap sections around a curling wand, alternating the direction of each piece, and leave the last inch of the ends out for a modern finish. Let everything cool untouched, then rake through once with your fingers and mist with texturizing spray.
Tip: Never brush set waves — brushing is what turns them into a fuzzy halo. Fingers only, and if a section falls flat, re-wrap just that piece.
12. Barbie Bow Half-Up
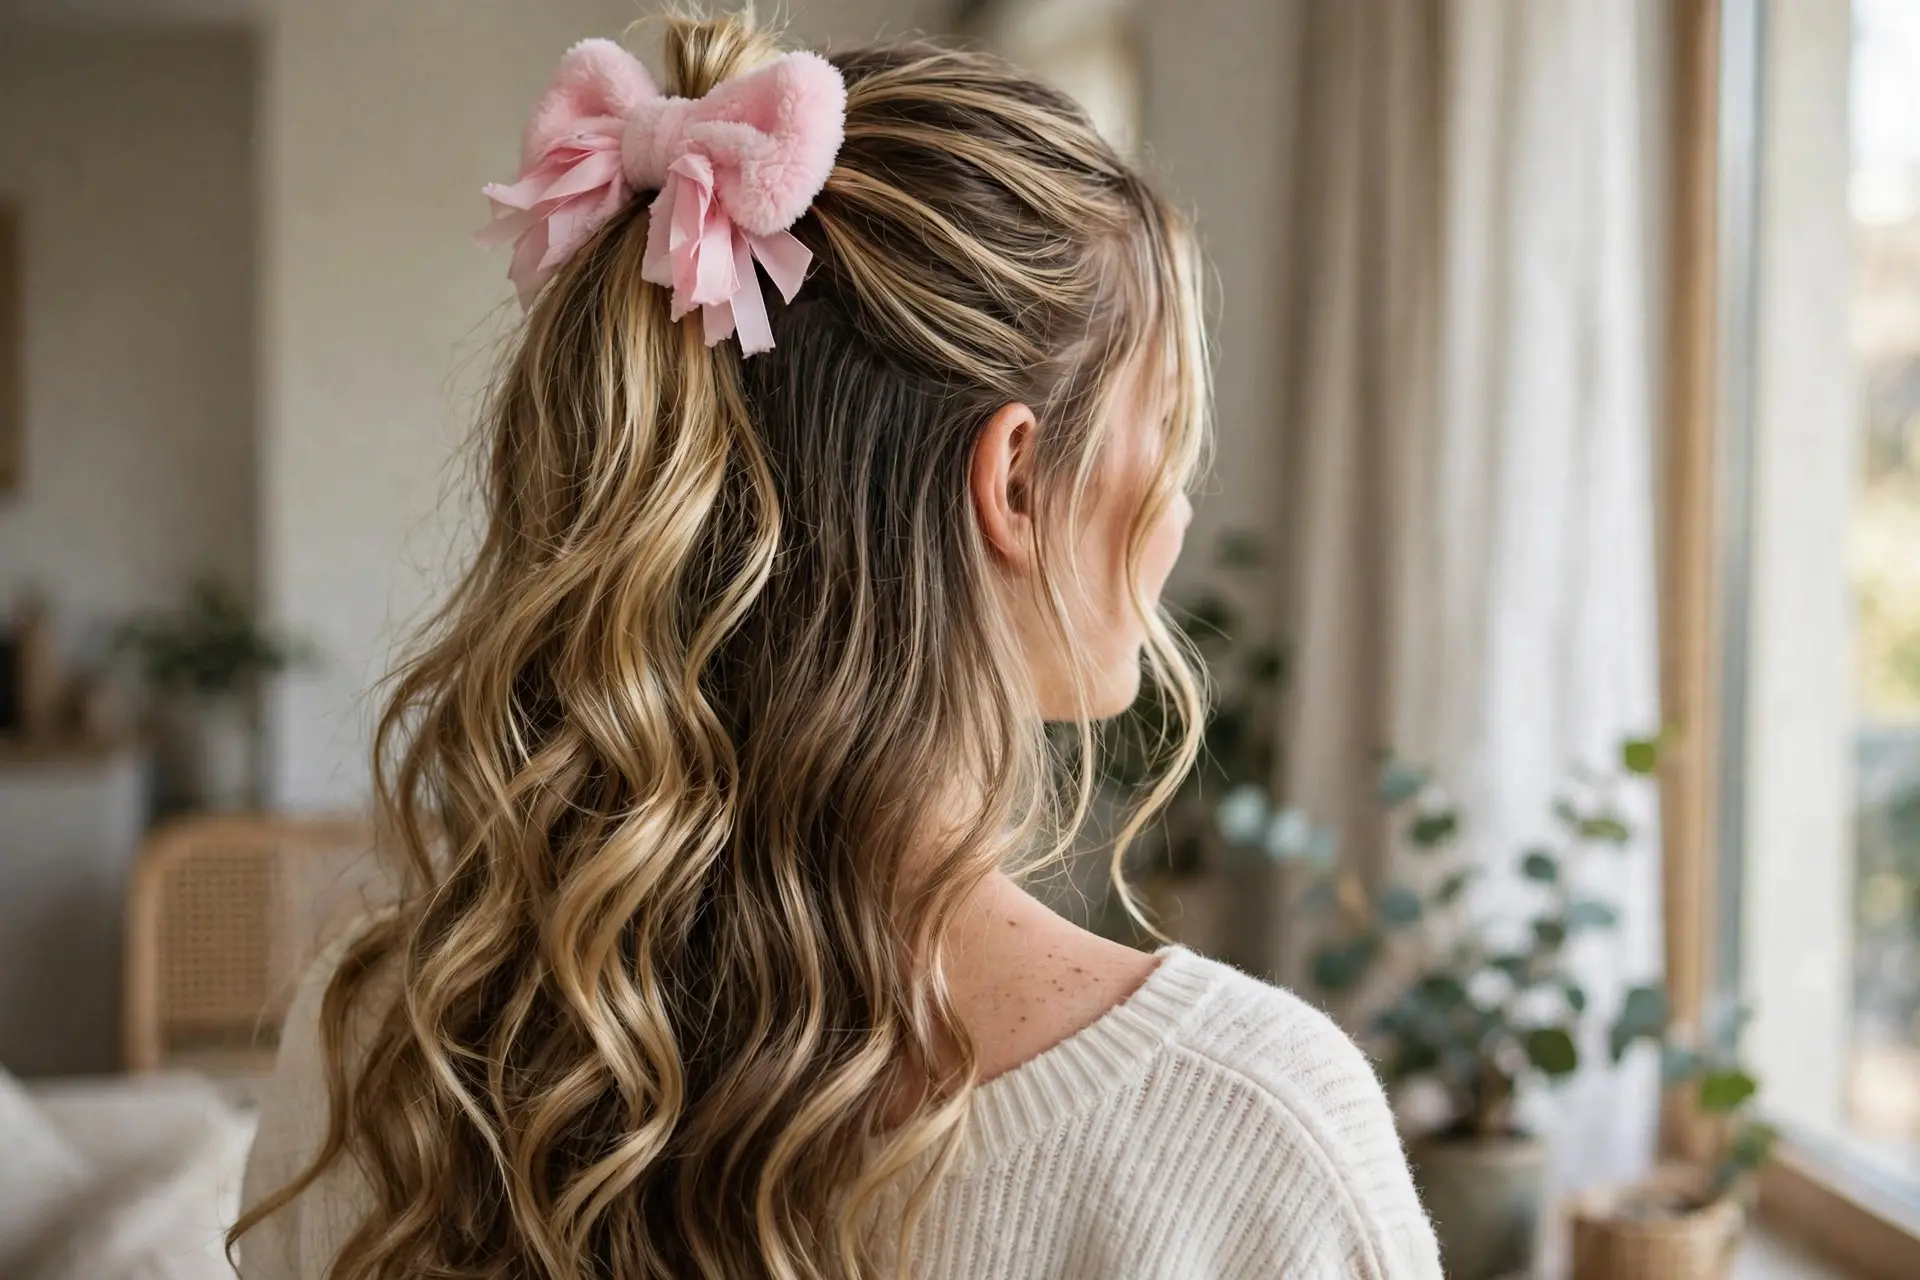
The Barbie bow half-up is unapologetically pretty: the top section pulled into a small ponytail and finished with one big, fluffy bow, while the rest of the hair falls in loose curls. It photographs beautifully and takes about four minutes.
Curl the lengths loosely first. Gather the top section into a small ponytail at the crown, then clip or tie a large bow right over the base so the bow — not the elastic — is the focal point. Match the bow color to your outfit for an intentional, styled feel.
Tip: Choose a bow with wire in the loops. A wired bow keeps its perky shape all day instead of slowly flopping to one side.
13. Waterfall Braid
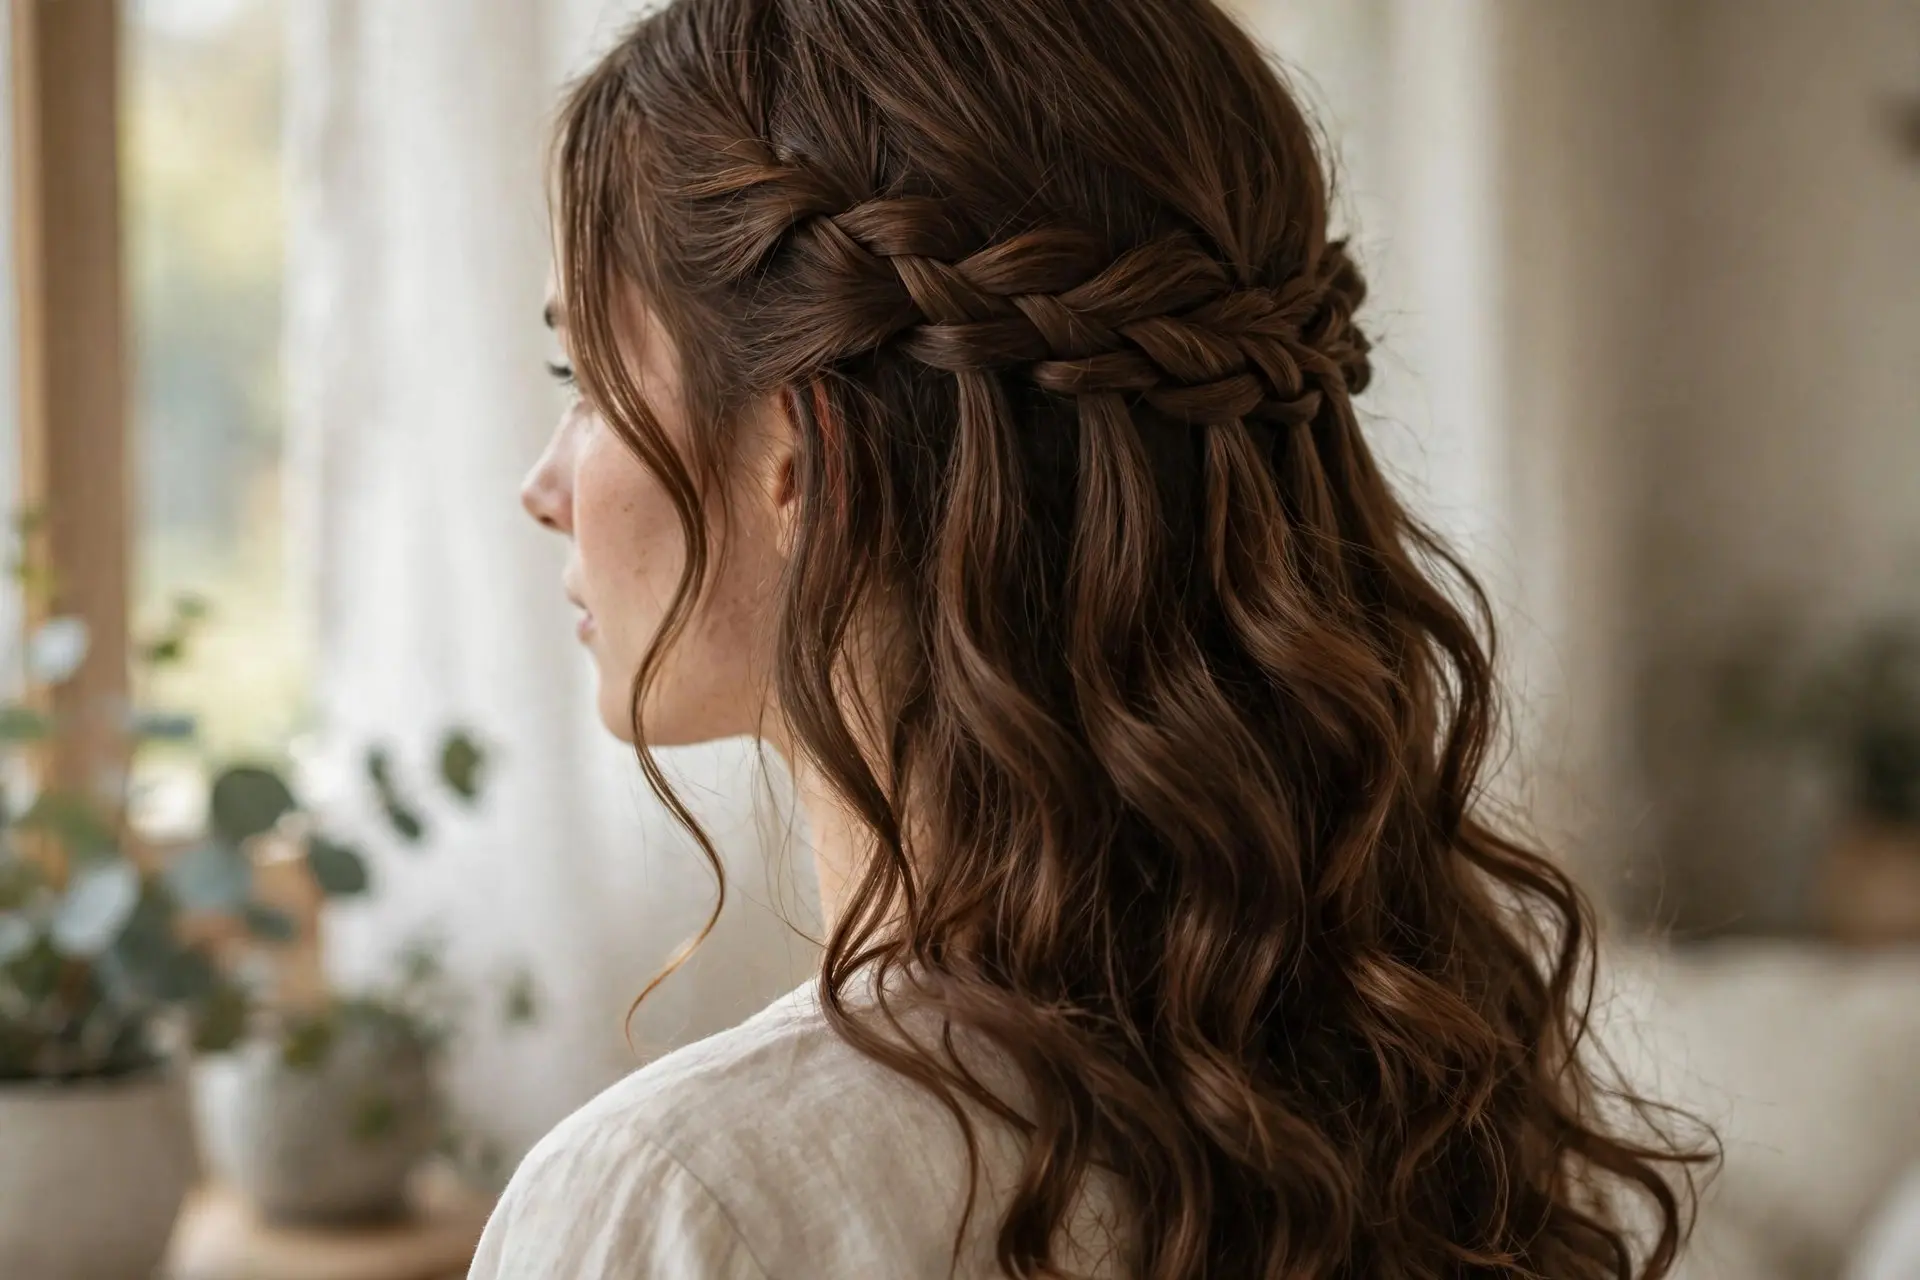
The waterfall braid is a French braid with a twist: at each step you drop one strand and let it fall, so loose hair cascades through the braid like water. It is a wedding-guest favorite because it looks advanced while following a simple rhythm.
Start a French braid near one temple, working across the back of the head. Each time the bottom strand comes up, drop it, pick up a fresh strand from behind, and continue. Keep your pace slow and even — rhythm matters more than speed here.
Tip: Curl the dropped strands afterward so they blend with the loose hair below instead of hanging straight and separate from the waves.
14. Half-Up Top Knot
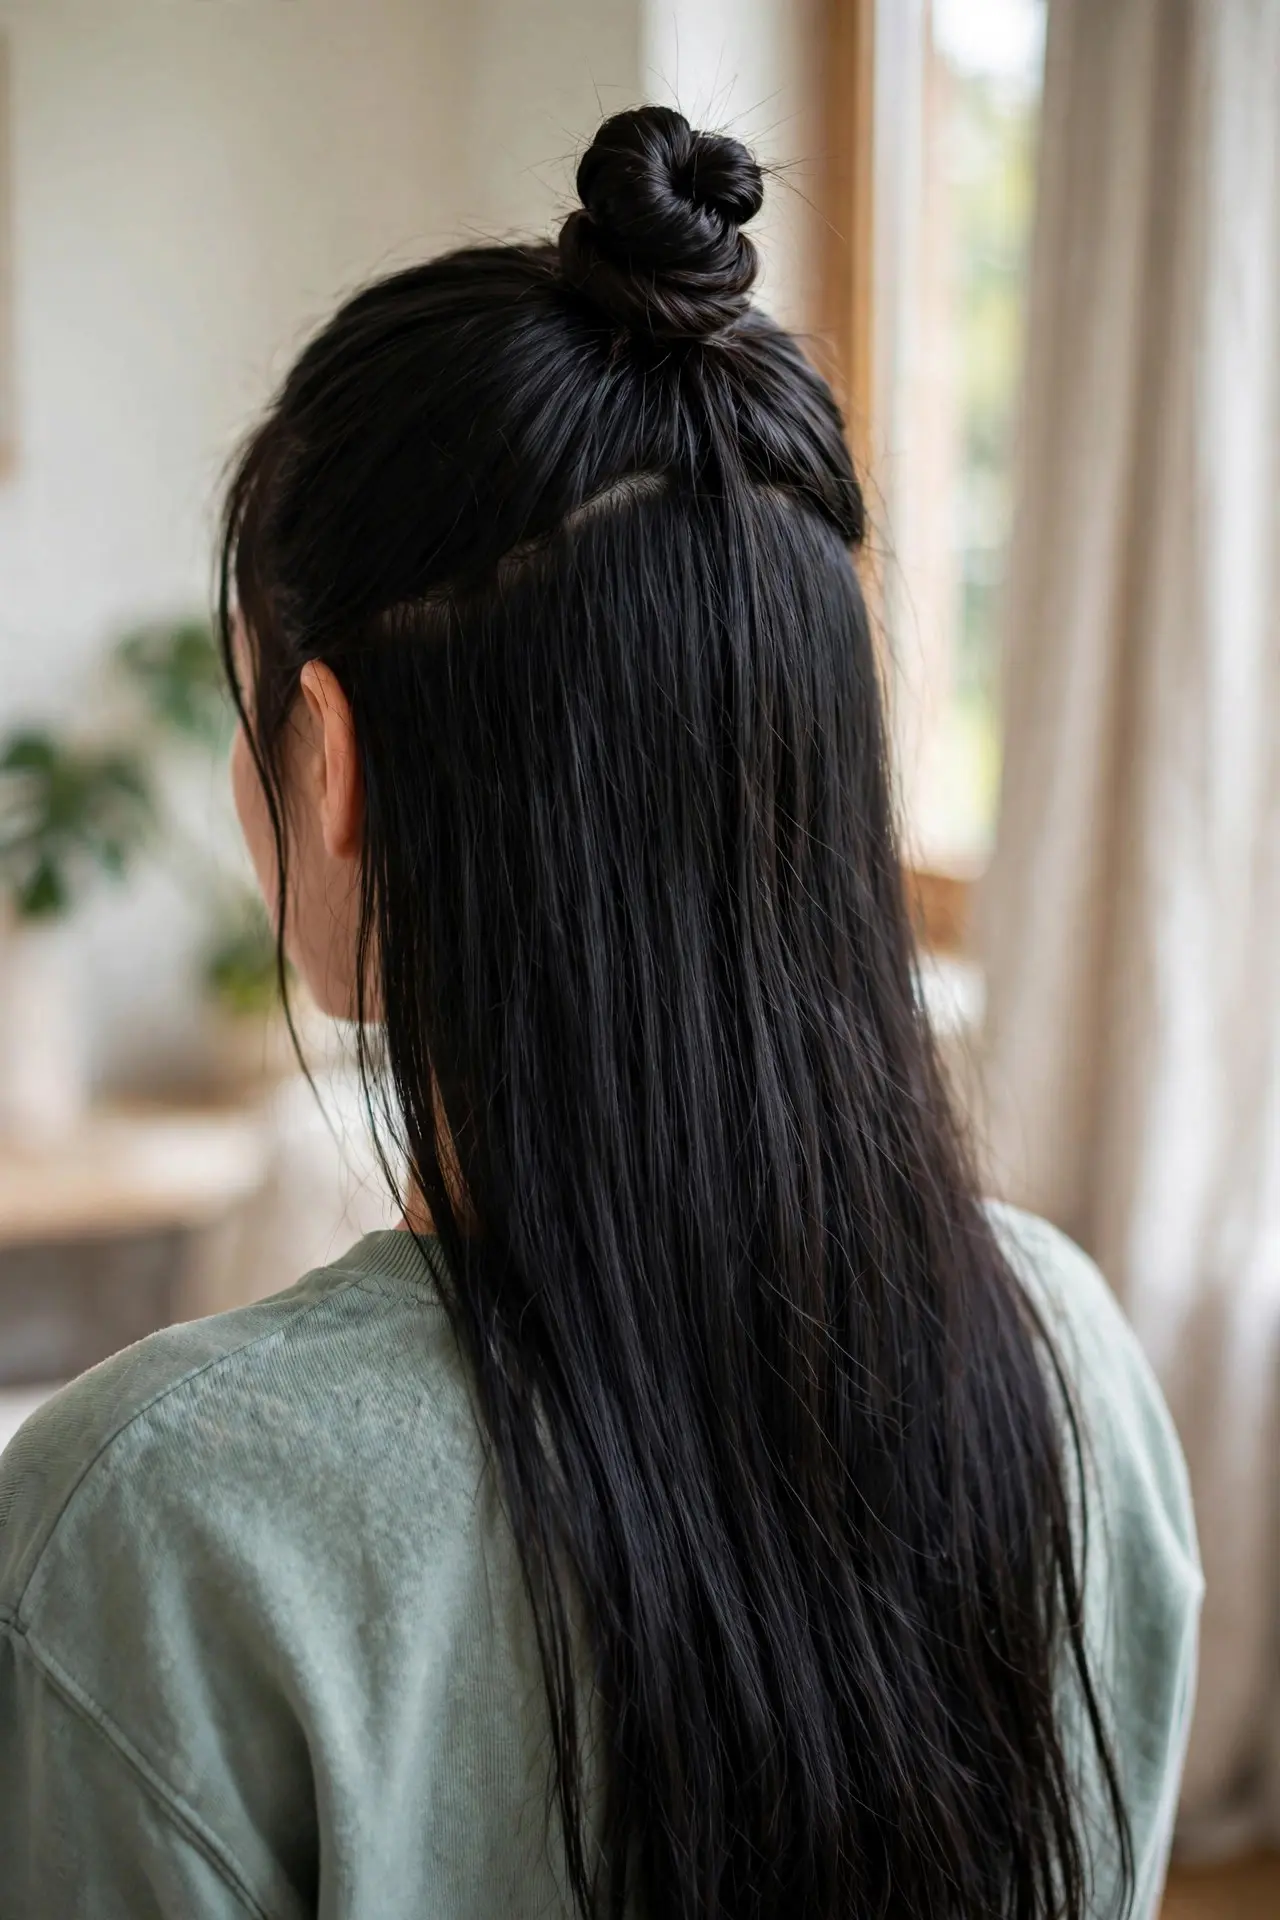
The half-up top knot balances casual and cute perfectly: a small twisted bun perched high on the head while the rest of your length stays down. It keeps hair off your face on busy days without committing to a full updo.
Section off the top of the hair from the temples up. Twist the section as you gather it — twisting first is what keeps the knot compact — then coil it into a small bun and secure it with an elastic or a mini claw clip.
Tip: Position the knot slightly behind the highest point of your head. Too far forward looks top-heavy; just behind the crown reads relaxed and balanced.
15. Rope Braid
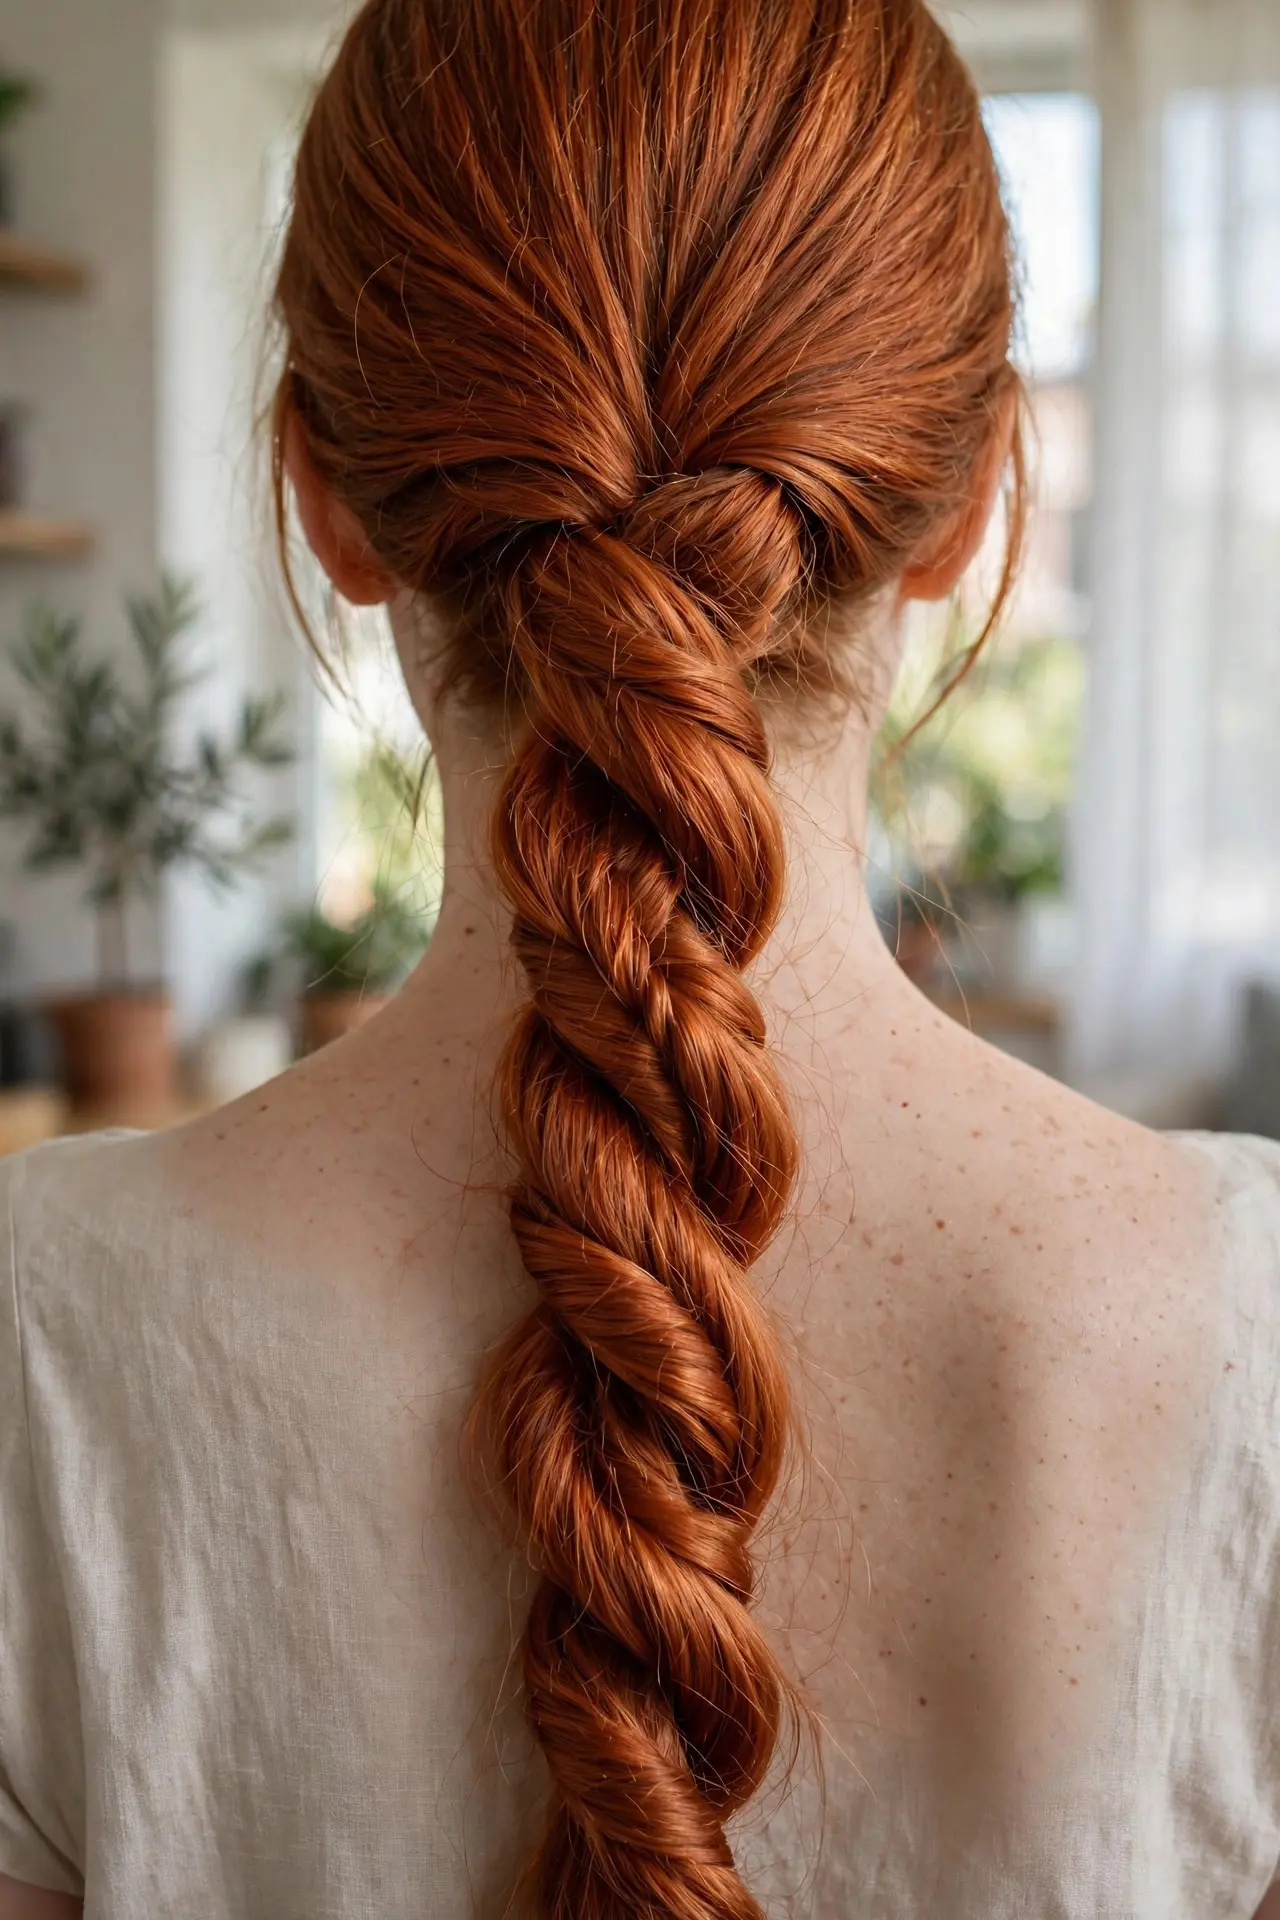
The rope braid is a two-strand twist that spirals down the back like a length of cord. It looks more elaborate than a plain braid, comes together in under five minutes, and asks for none of the coordination a three-strand weave needs.
Divide the hair into two equal sections. Twist each section on its own in the same direction, then wrap the two twisted sections around each other in the opposite direction. Secure the end firmly — the opposing twists are what lock the rope in place.
Tip: Do not skip the individual pre-twist. Wrapping untwisted sections around each other unravels within the hour; properly twisted ropes hold all day.
16. Double Braids (Pigtail Braids)
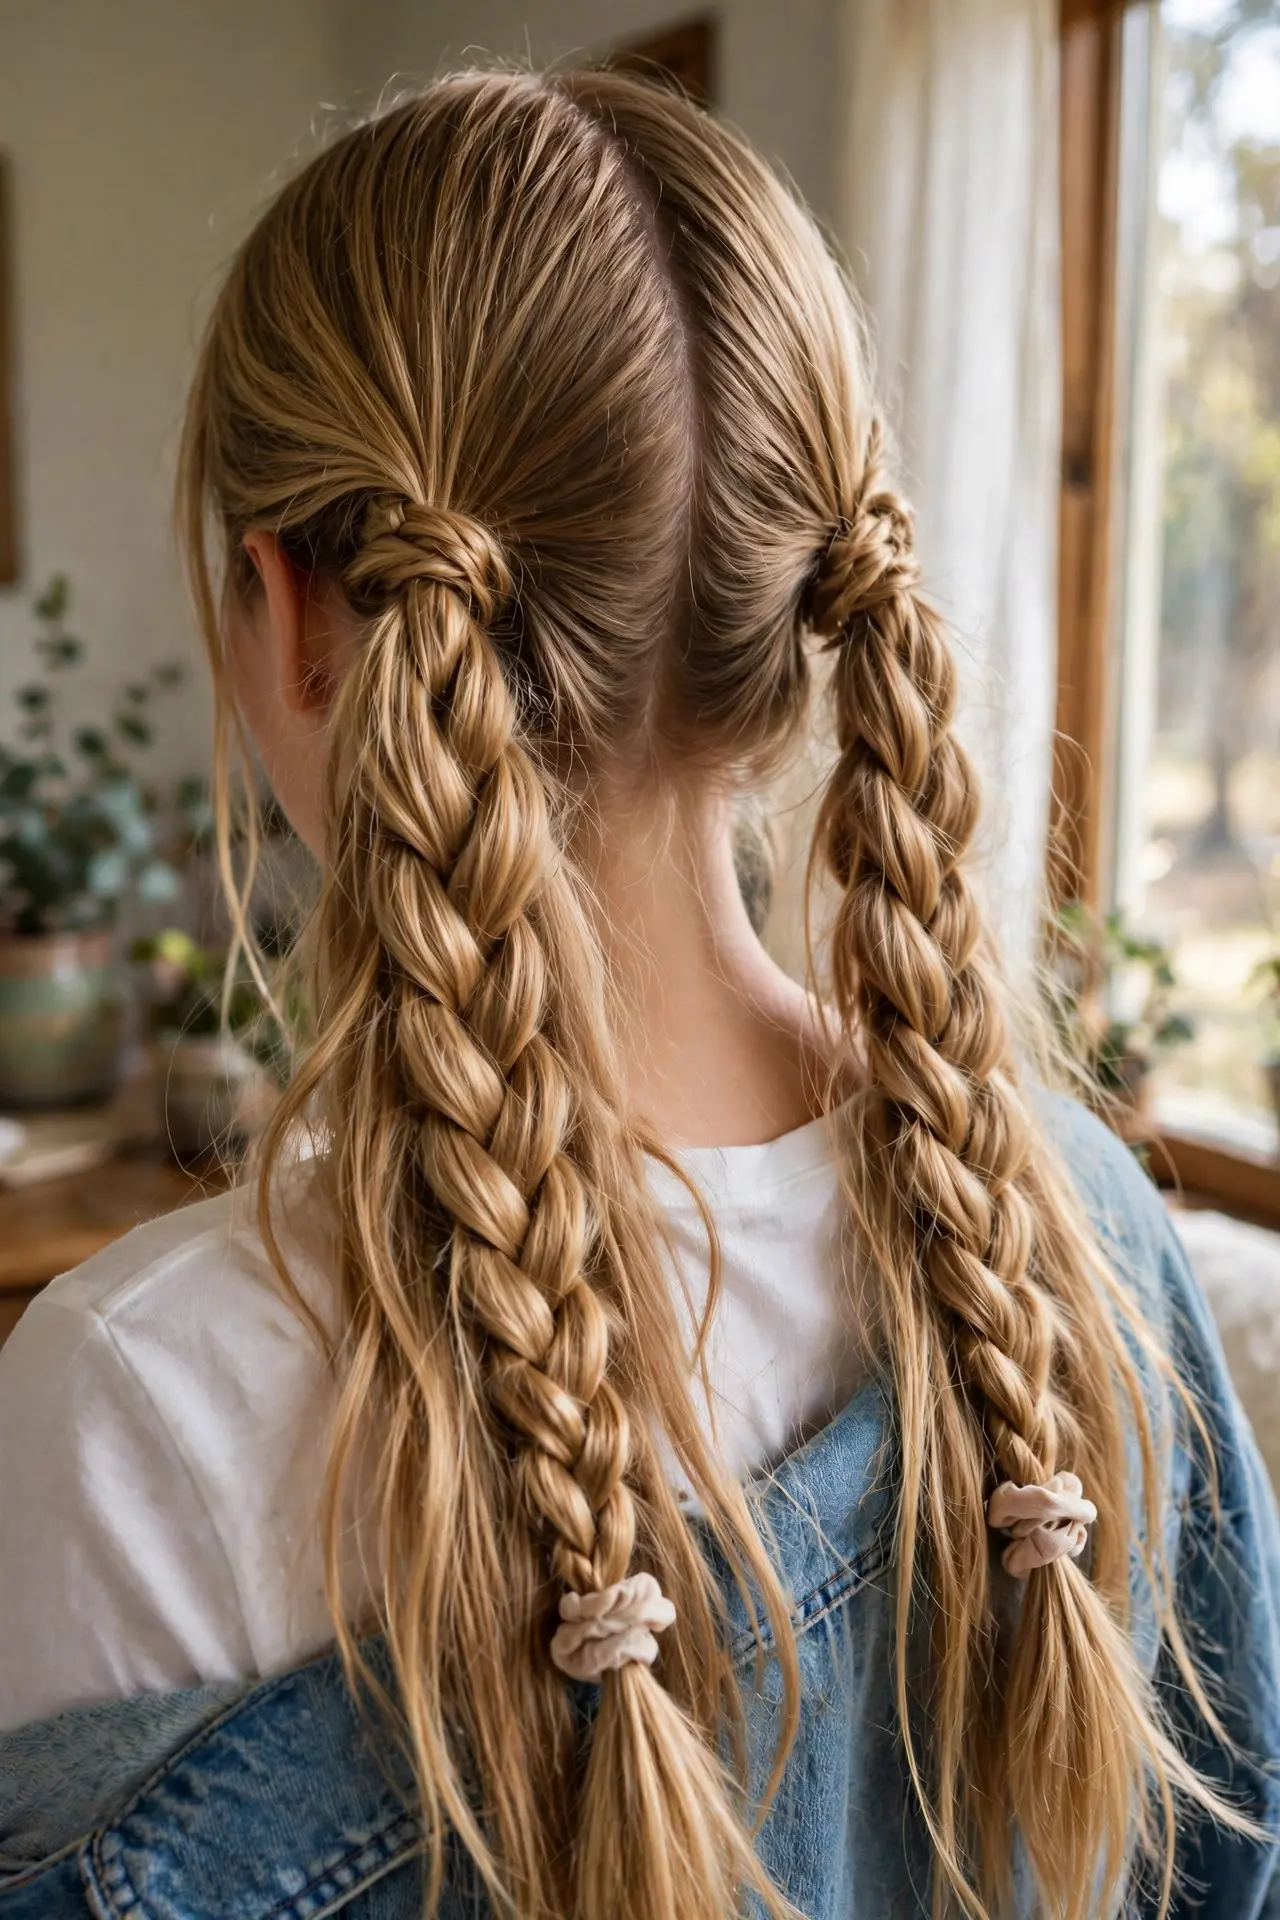
Double pigtail braids are the playful classic: a clean center part and one simple braid on each side. Unlike the raised Dutch braids earlier in this list, these are plain three-strand braids — softer, simpler, and quicker, with a sweet everyday feel.
Use a rat-tail comb to draw a precise center part from hairline to nape. Braid each side at the same tension — count your crossovers if one side tends to come out tighter — and finish with matching ties or small scrunchies.
Tip: Sleep in these braids and undo them in the morning. You get symmetrical, heatless waves that last most of the day for free.

17. Sleek Crown
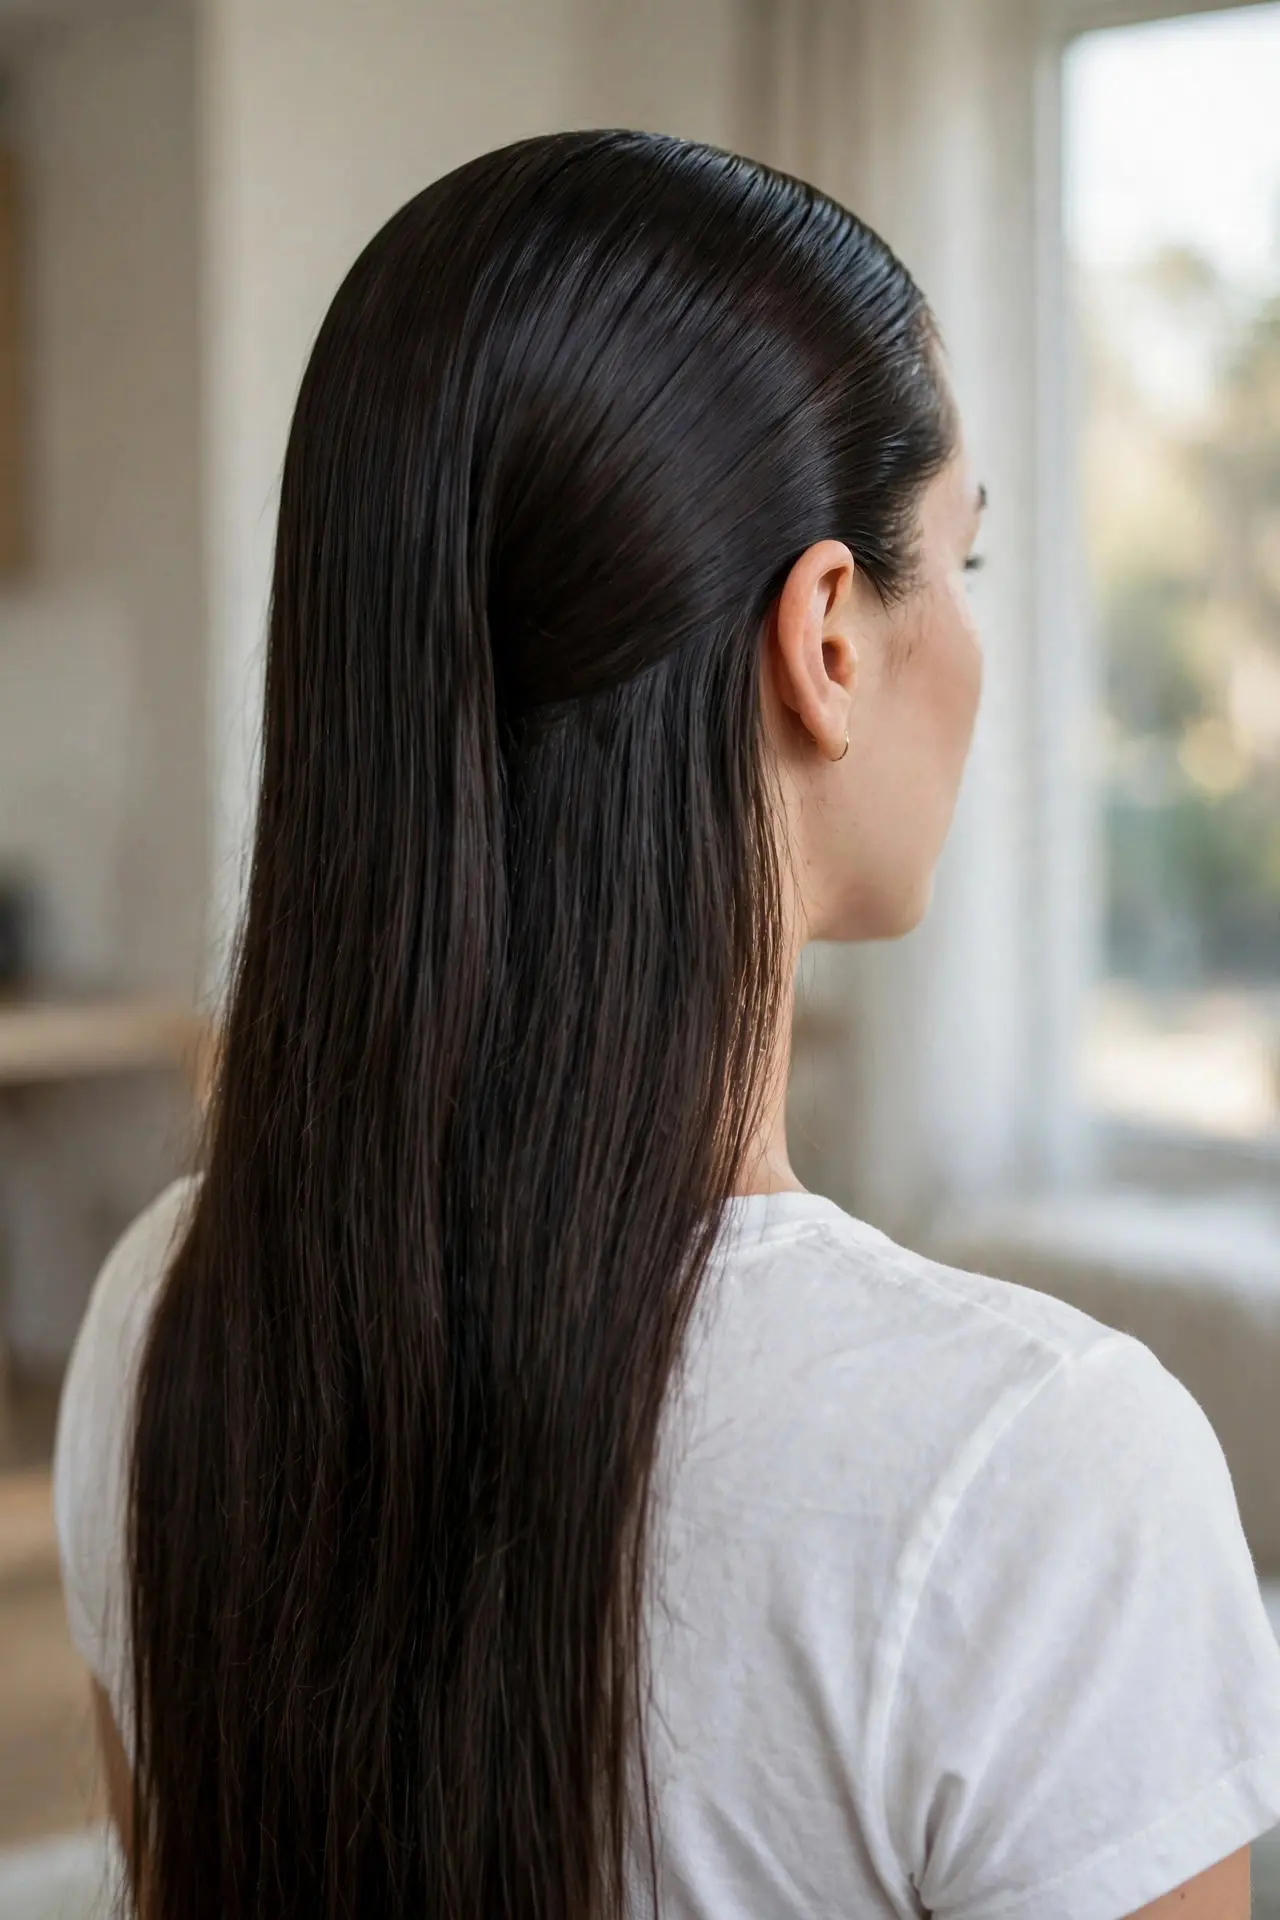
The sleek crown is all contrast: the top of the head combed completely flat and glassy, with the full length flowing loose below it. It borrows the polish of a sleek bun but keeps the drama of very long hair worn down.
Work a small amount of gel or smoothing pomade through the top section, then comb it flat against the head from the hairline to the crown, tucking the sides neatly behind the ears. Set the smoothed area with a light mist of hairspray and leave the lengths clean and fluid.
Tip: Dip a fine-tooth comb lightly in gel to press down baby hairs. It gives you precision without the crunchy overload of gel applied by hand.
18. Loose Fishtail Braid
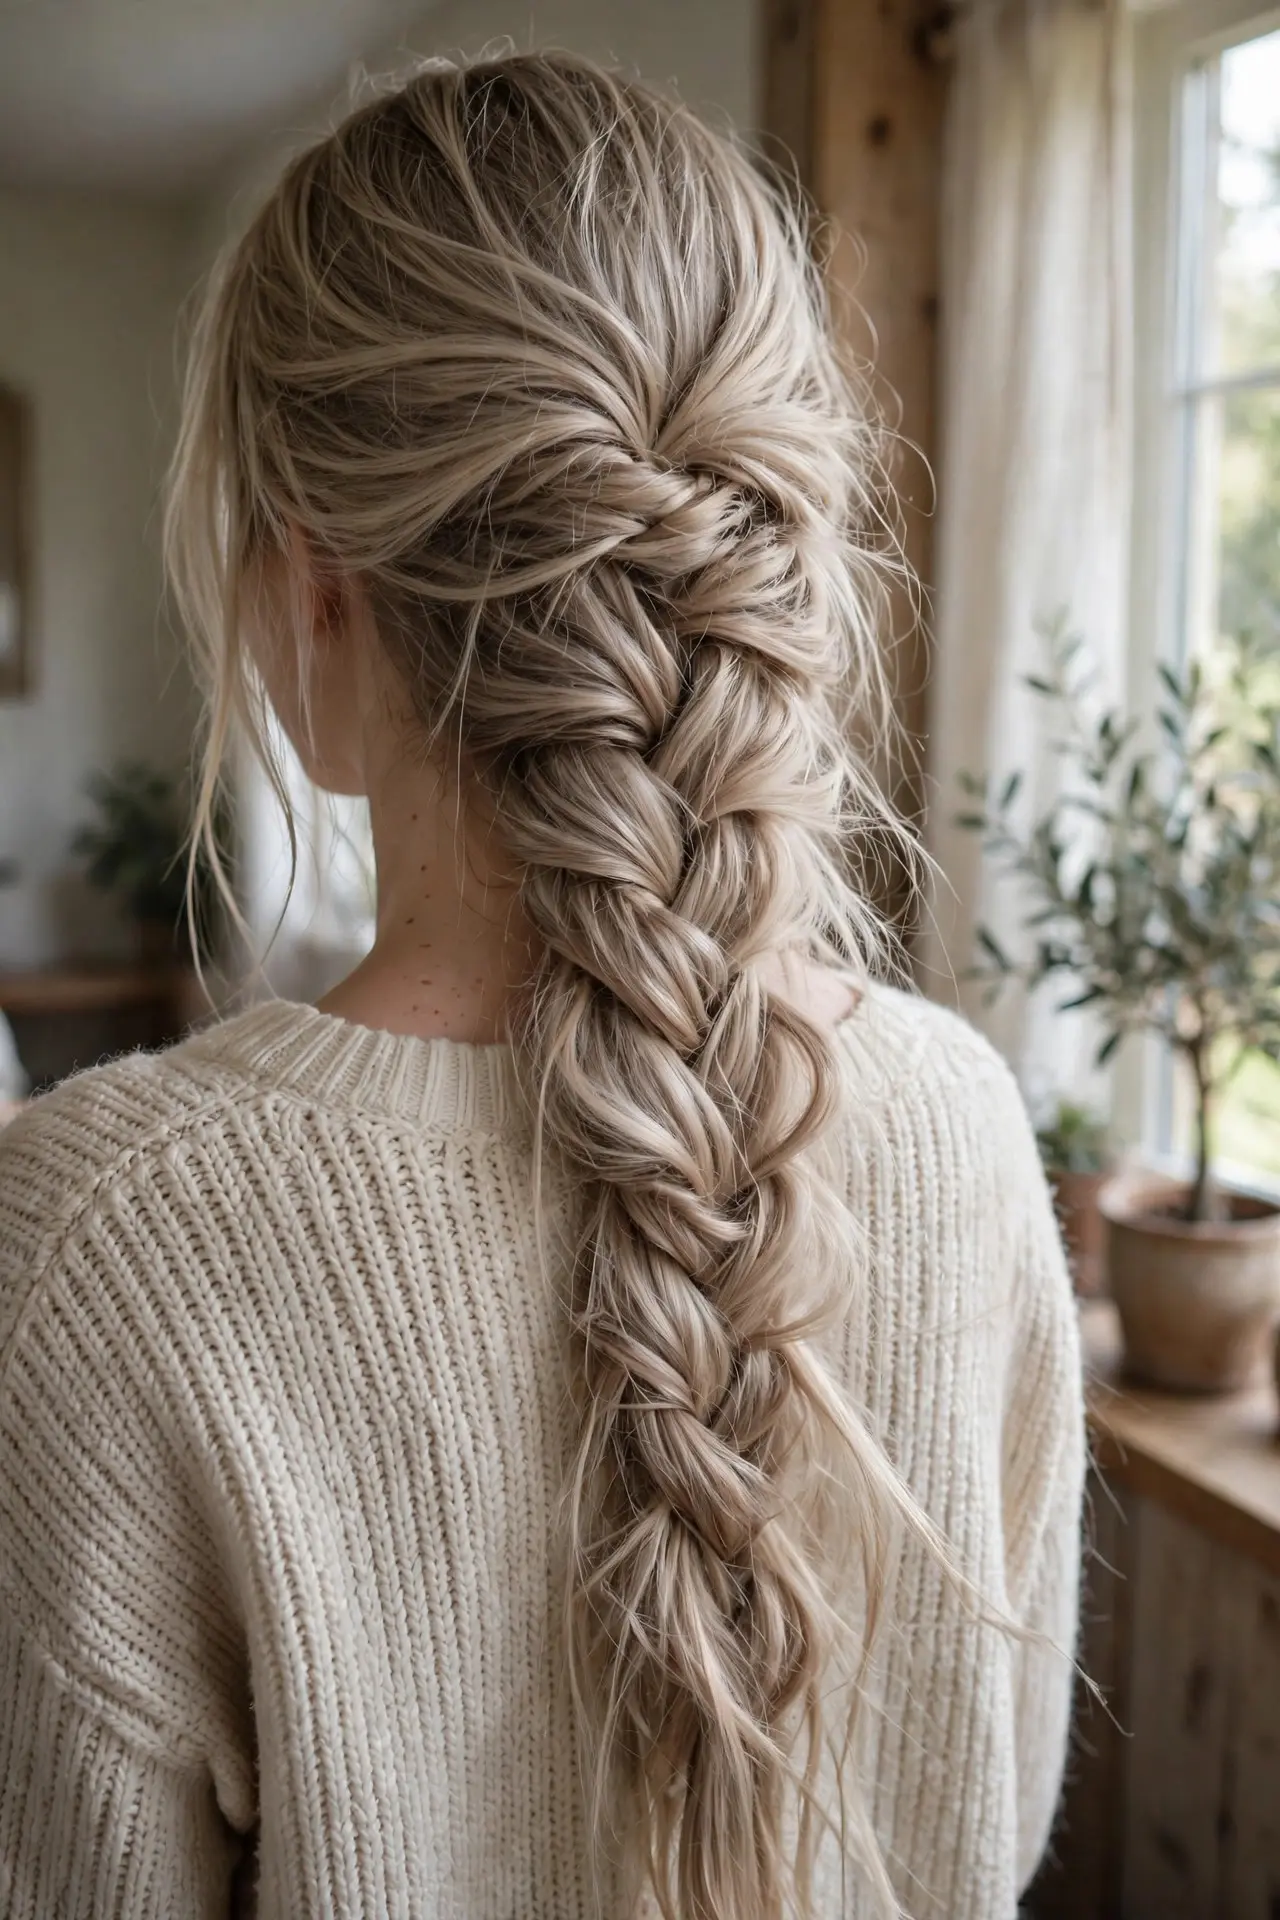
Where the classic fishtail earlier in this list is neat and detailed, this version is deliberately undone: the same two-strand weave, braided and then pulled wide until it turns soft, chunky and romantic. The loosening is not a mistake — it is the whole style.
Braid a standard fishtail down the back, keeping the strands a little thicker than usual. Before the texture settles, work down the braid pinching each outer edge and pulling it gently outward, a little at a time, evenly on both sides.
Tip: Mist the finished braid with light-hold spray, not strong-hold. A flexible finish keeps the pulled texture airy instead of freezing it into spikes.
19. Double Crown Braid
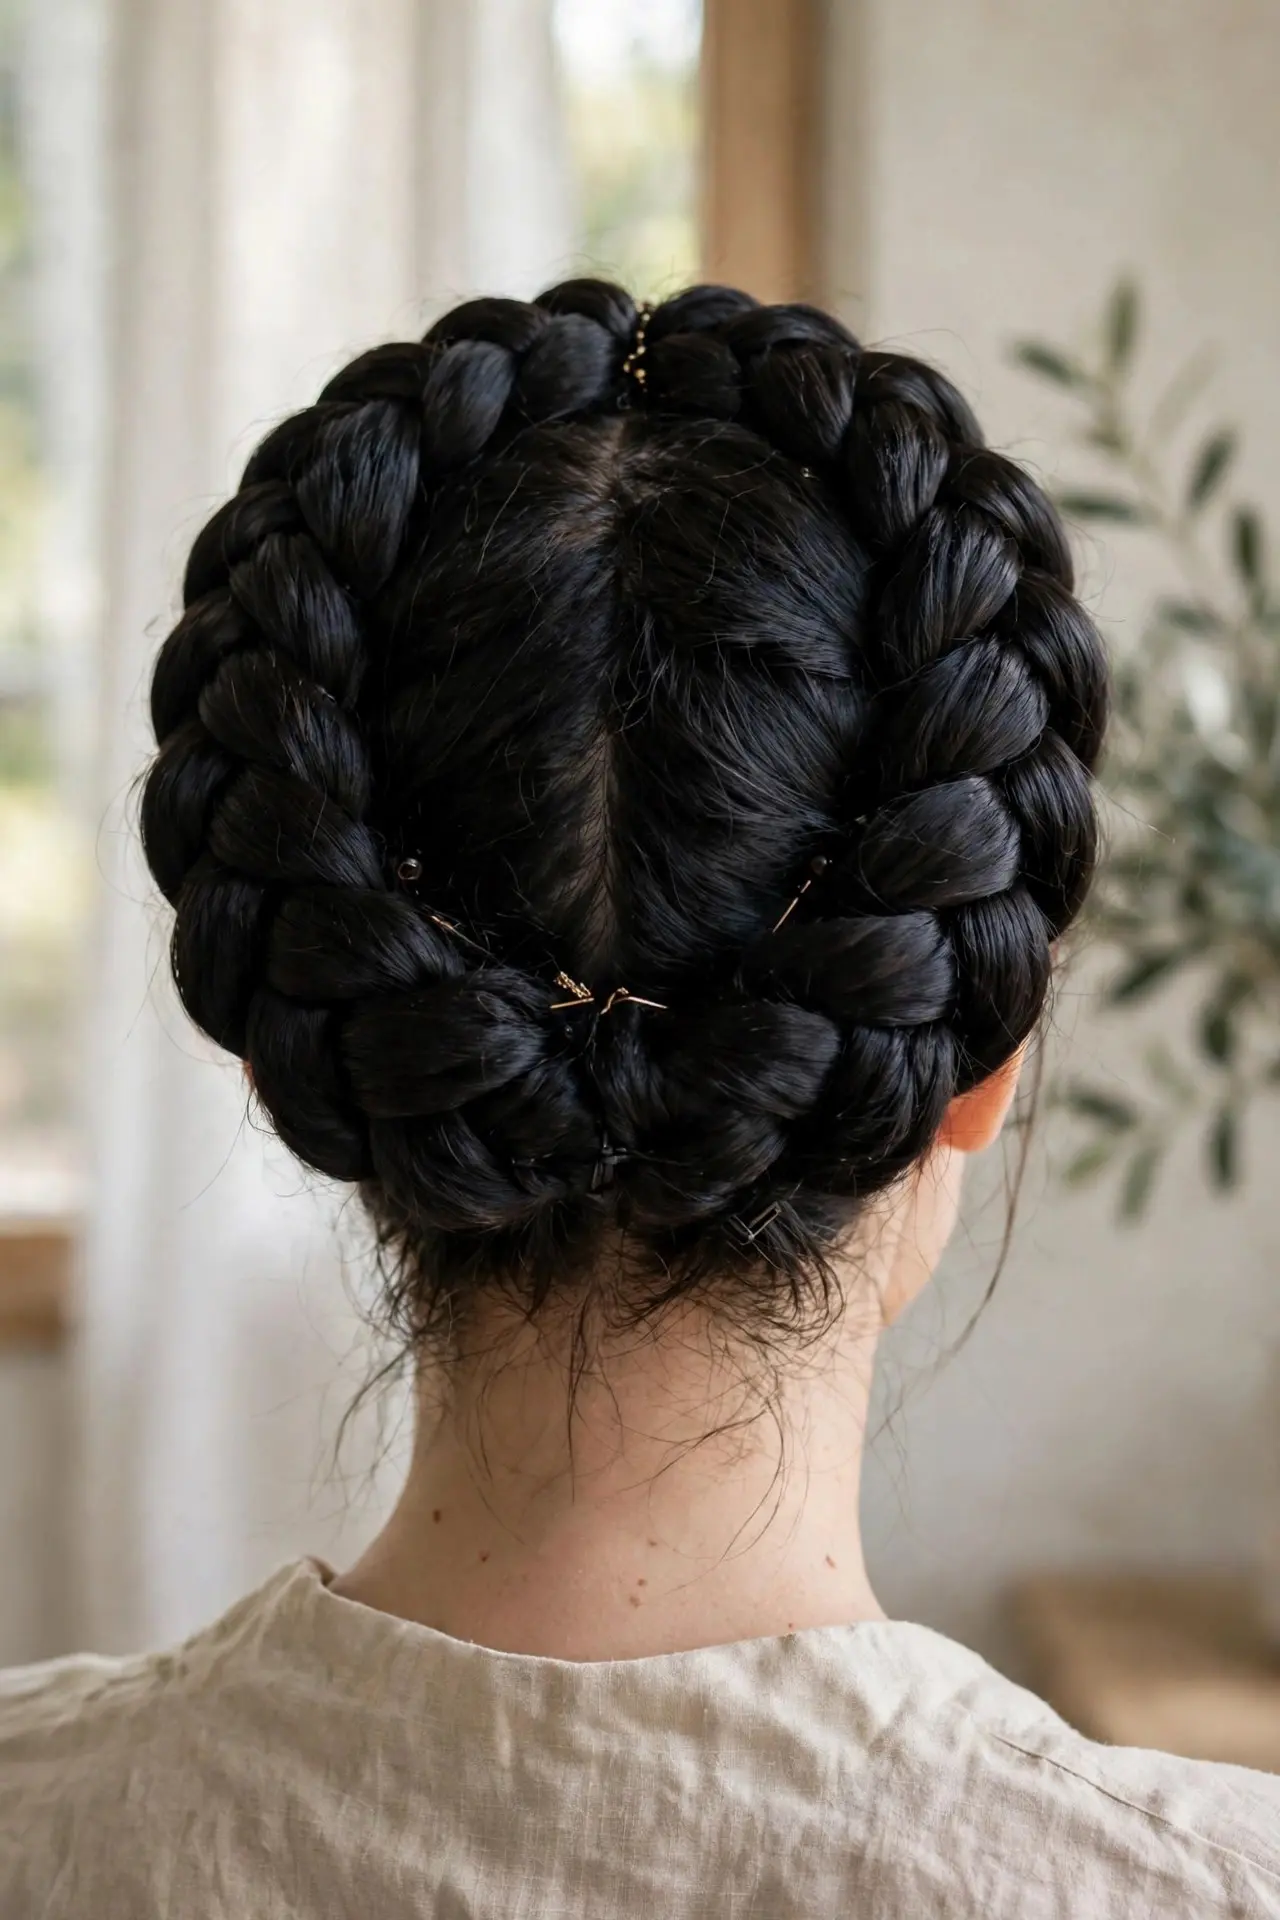
The double crown takes the halo idea and doubles the drama: two thick braids wrap the head in a wide, bold band that looks almost regal. It is the showstopper of the crown family — the one for weddings, festivals and photographs.
Braid one side at a time, following the hairline, but keep the sections generous so each braid comes out thick. Where the two braids meet at the back, overlap the ends and pin them into each other with hair-colored pins so the band looks continuous.
Tip: Backcomb very lightly at the roots before you start. The extra lift stops the wide braids from sitting flat against the head.
20. Sleek Bun
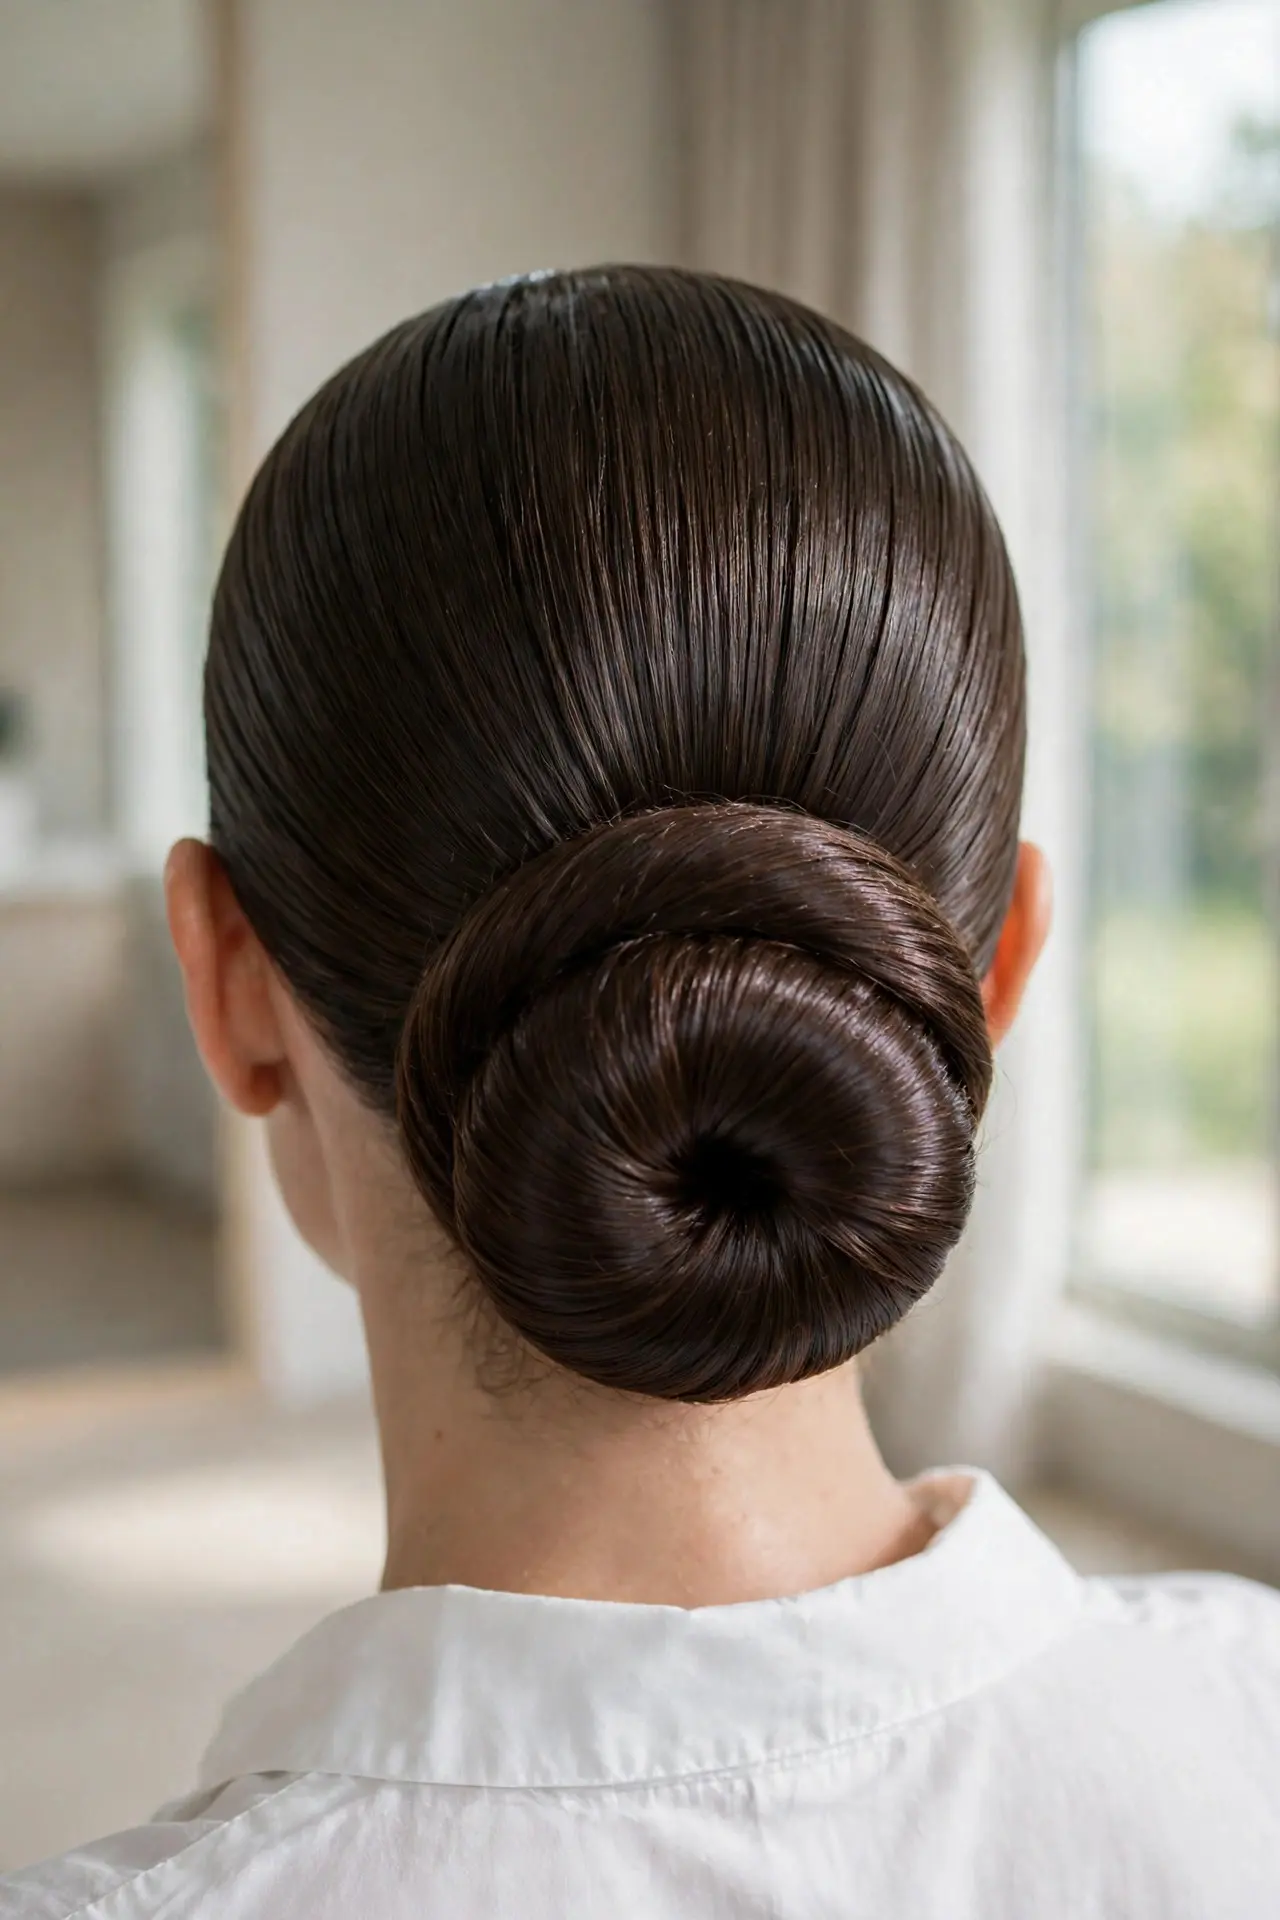
The sleek bun is the chignon’s sharper sister: hair pulled back tight and glassy, coiled into a smooth, flat bun with not a strand out of place. It is the interview, presentation and big-meeting style — instant, unmistakable polish.
Brush gel through the hair with a boar-bristle brush as you gather it, because brushing the product through is what creates the shine without lumps. Twist the length into a coil, wrap it flat, and pin securely, finishing with a fine mist of strong-hold spray.
Tip: Wearing it two days running? Wrap a silk scarf around your head at night. The sleek surface survives sleep instead of fuzzing up.
21. Boho Twists
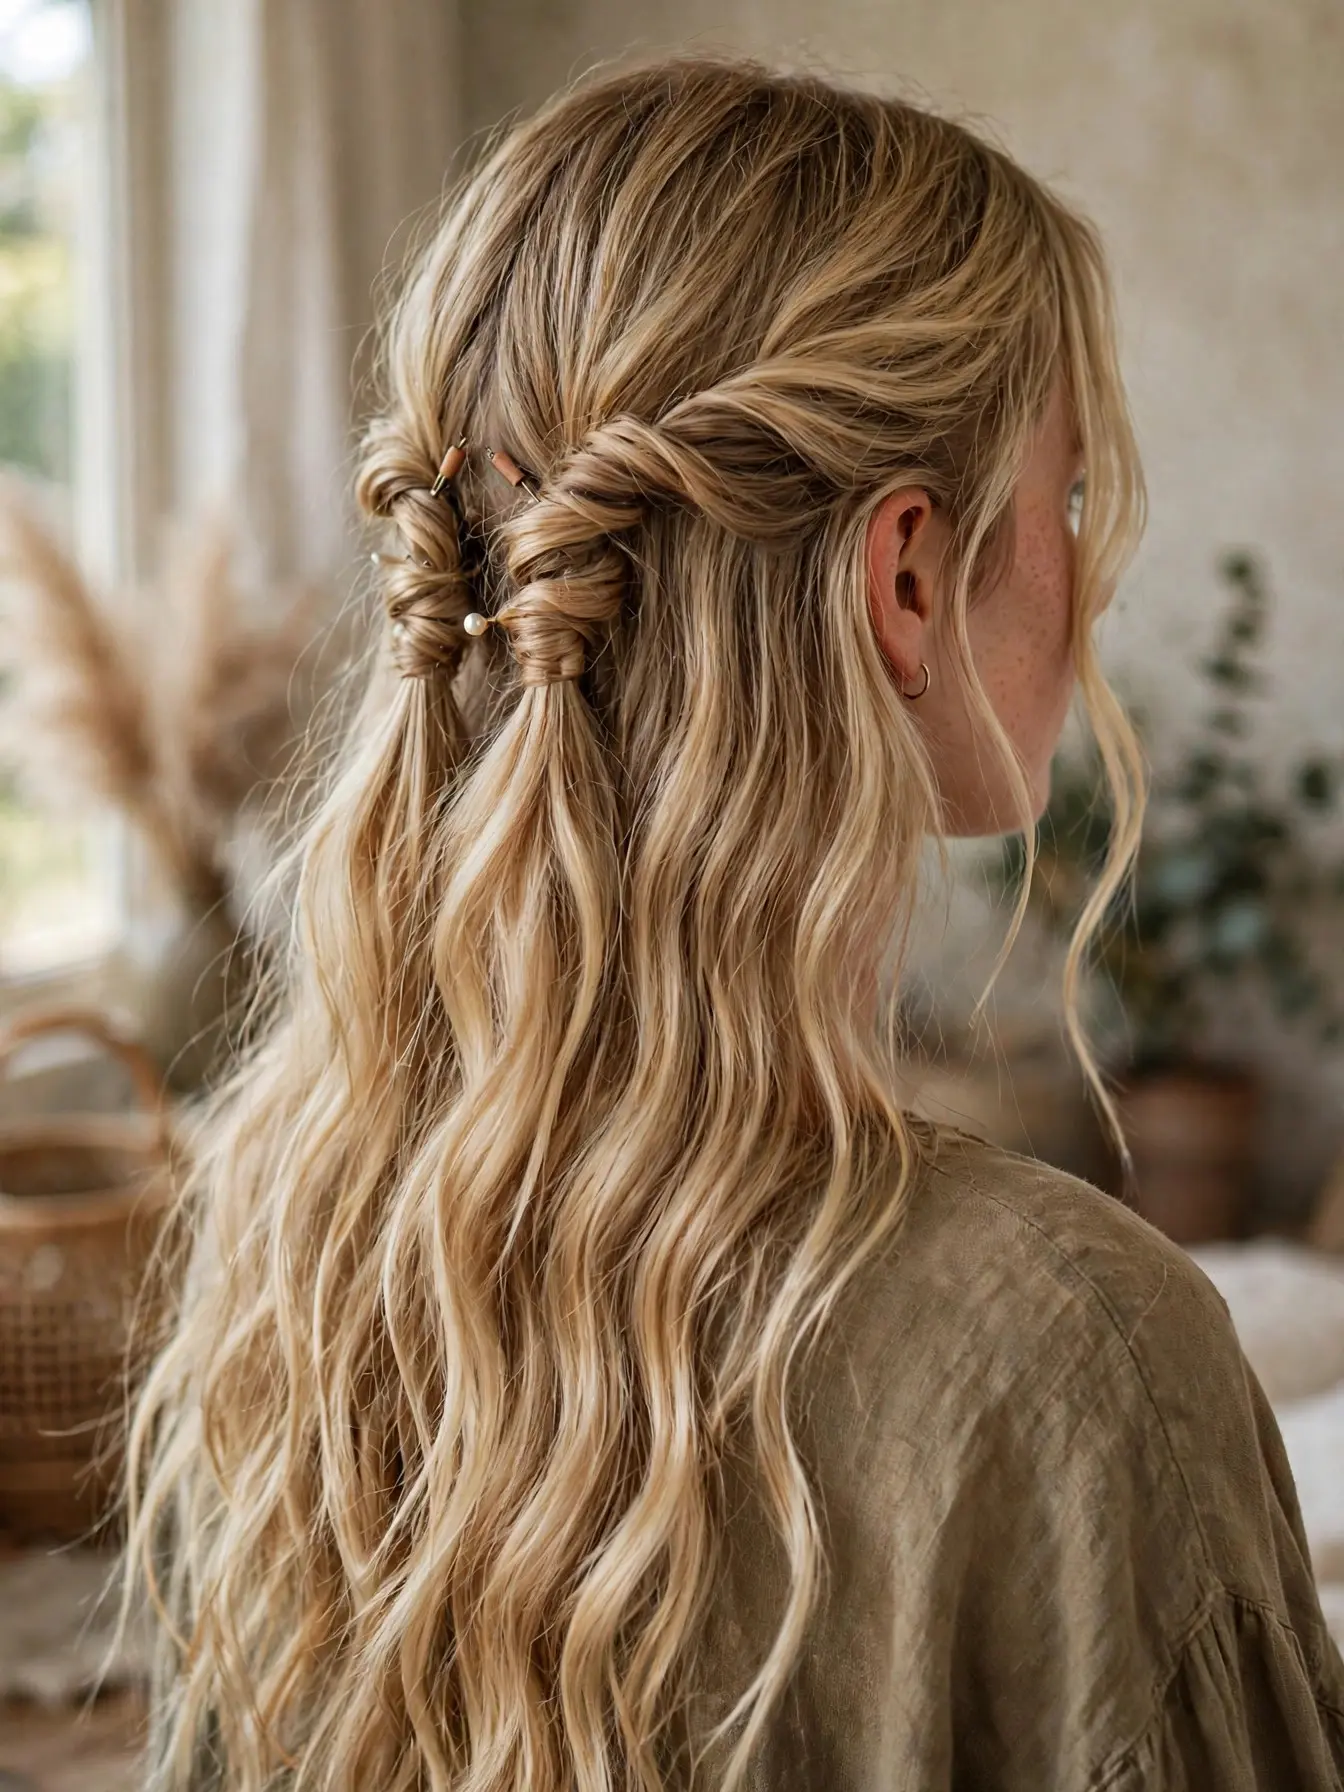
Boho twists add just a little structure to hair worn down: small sections on each side twisted back and pinned, while waves do their own thing below. It is earthy, relaxed, and especially good on second-day hair, when a bit of grit helps everything stay put.
Take a small section above each ear, twist it away from your face, and draw it toward the back of your head. Cross the two twists at the back and pin them flat, hiding the pins underneath the twist so nothing shows from the outside.
Tip: Twist away from the face, not toward it. The away-from-face direction opens up the features and frames them far more flatteringly.
22. Side French Braid
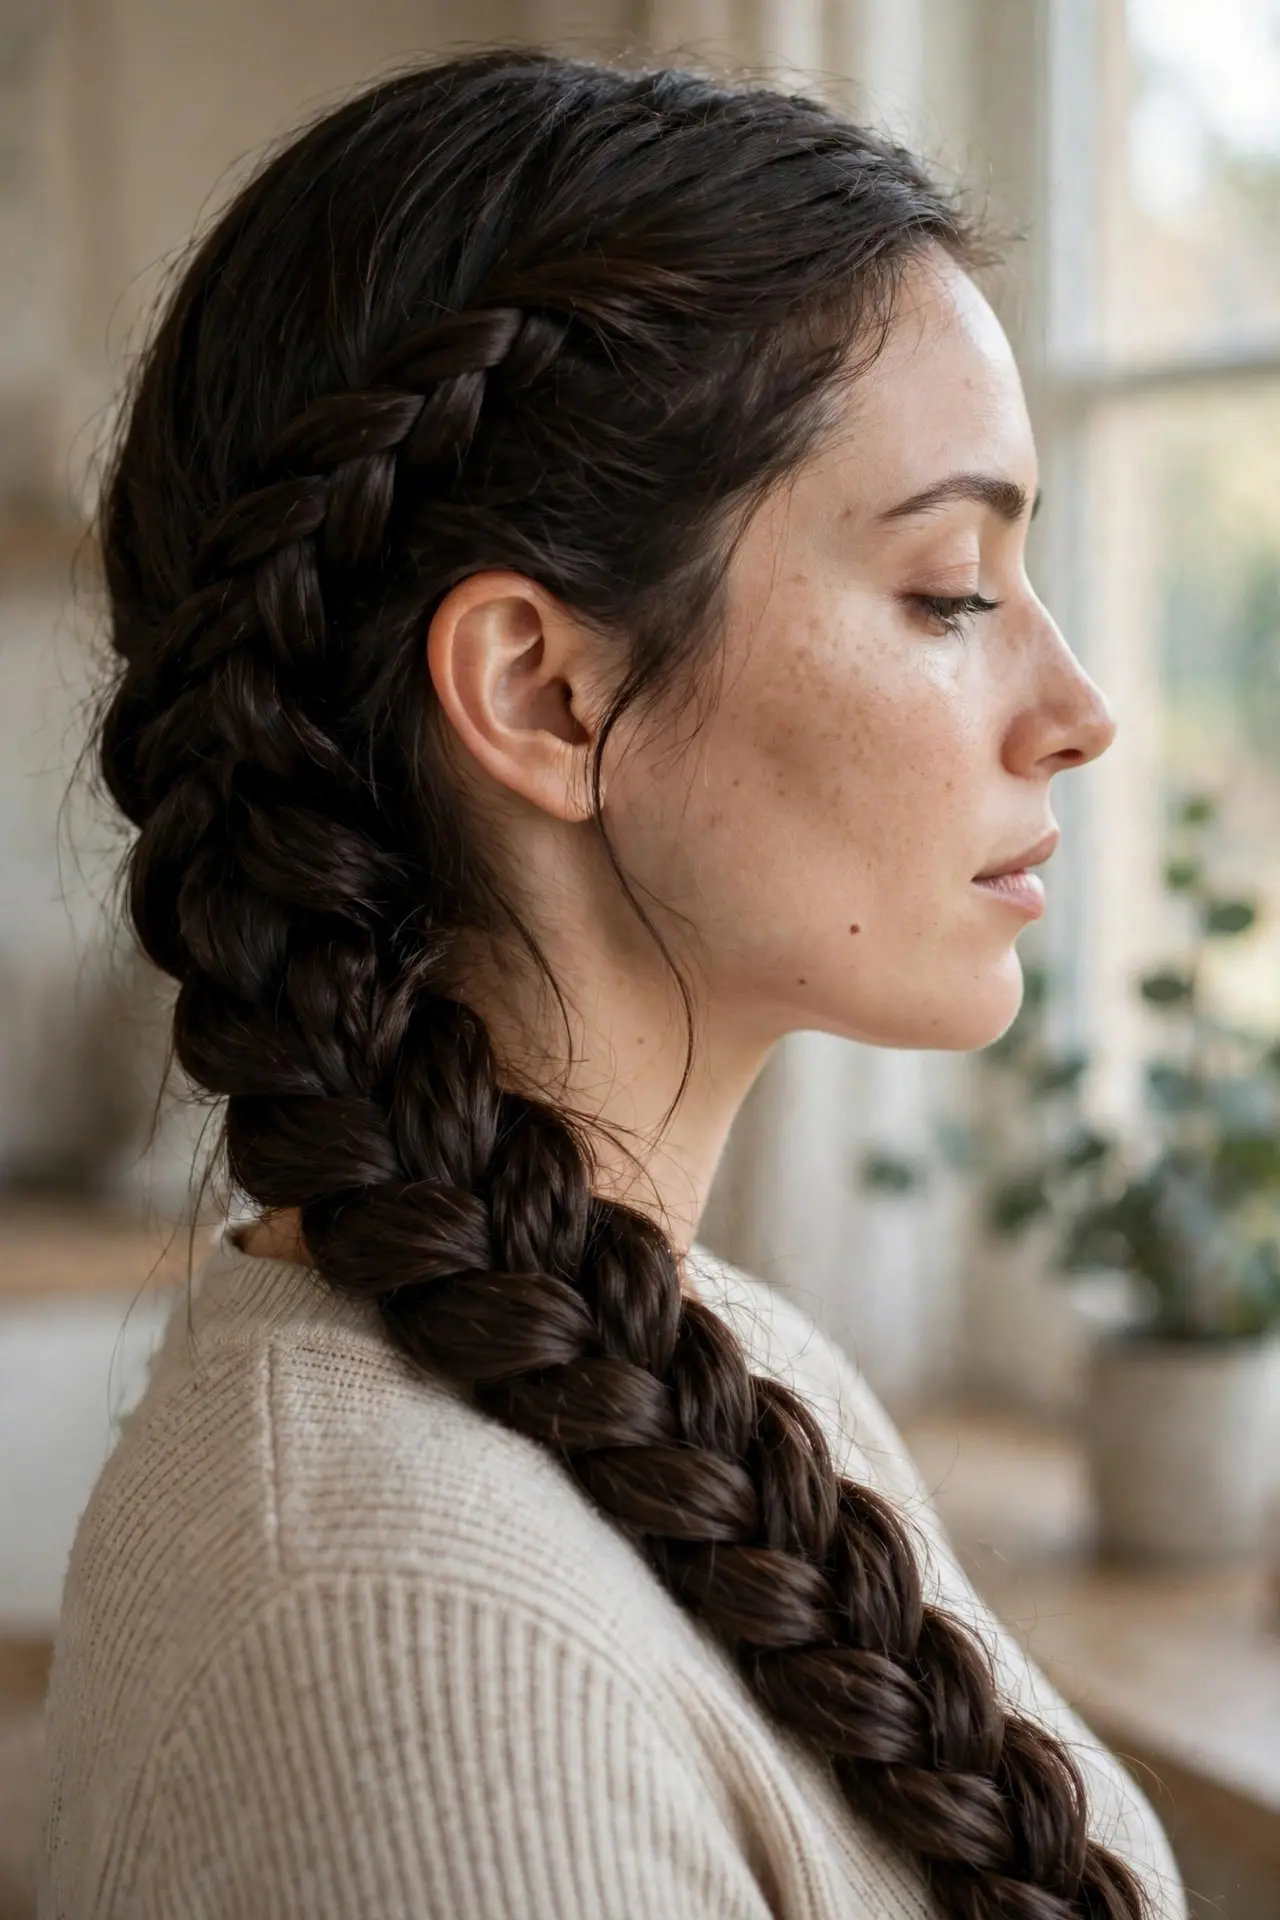
The side French braid takes the classic weave and moves it: instead of running straight down the center back like the braid at number 2, this one starts behind one ear and travels diagonally, landing over the opposite shoulder for instant asymmetry.
Sweep all the hair toward your chosen side. Start the French braid just behind the ear, adding hair as you cross, and angle your hands so the braid follows the side of the head rather than the center. Finish with a regular braid once you pass the nape.
Tip: Decide your finish before you start: keep it neat and tight for the gym, or loosen the loops afterward for the softer, romantic version.
23. Half-Up with Bow-Tie
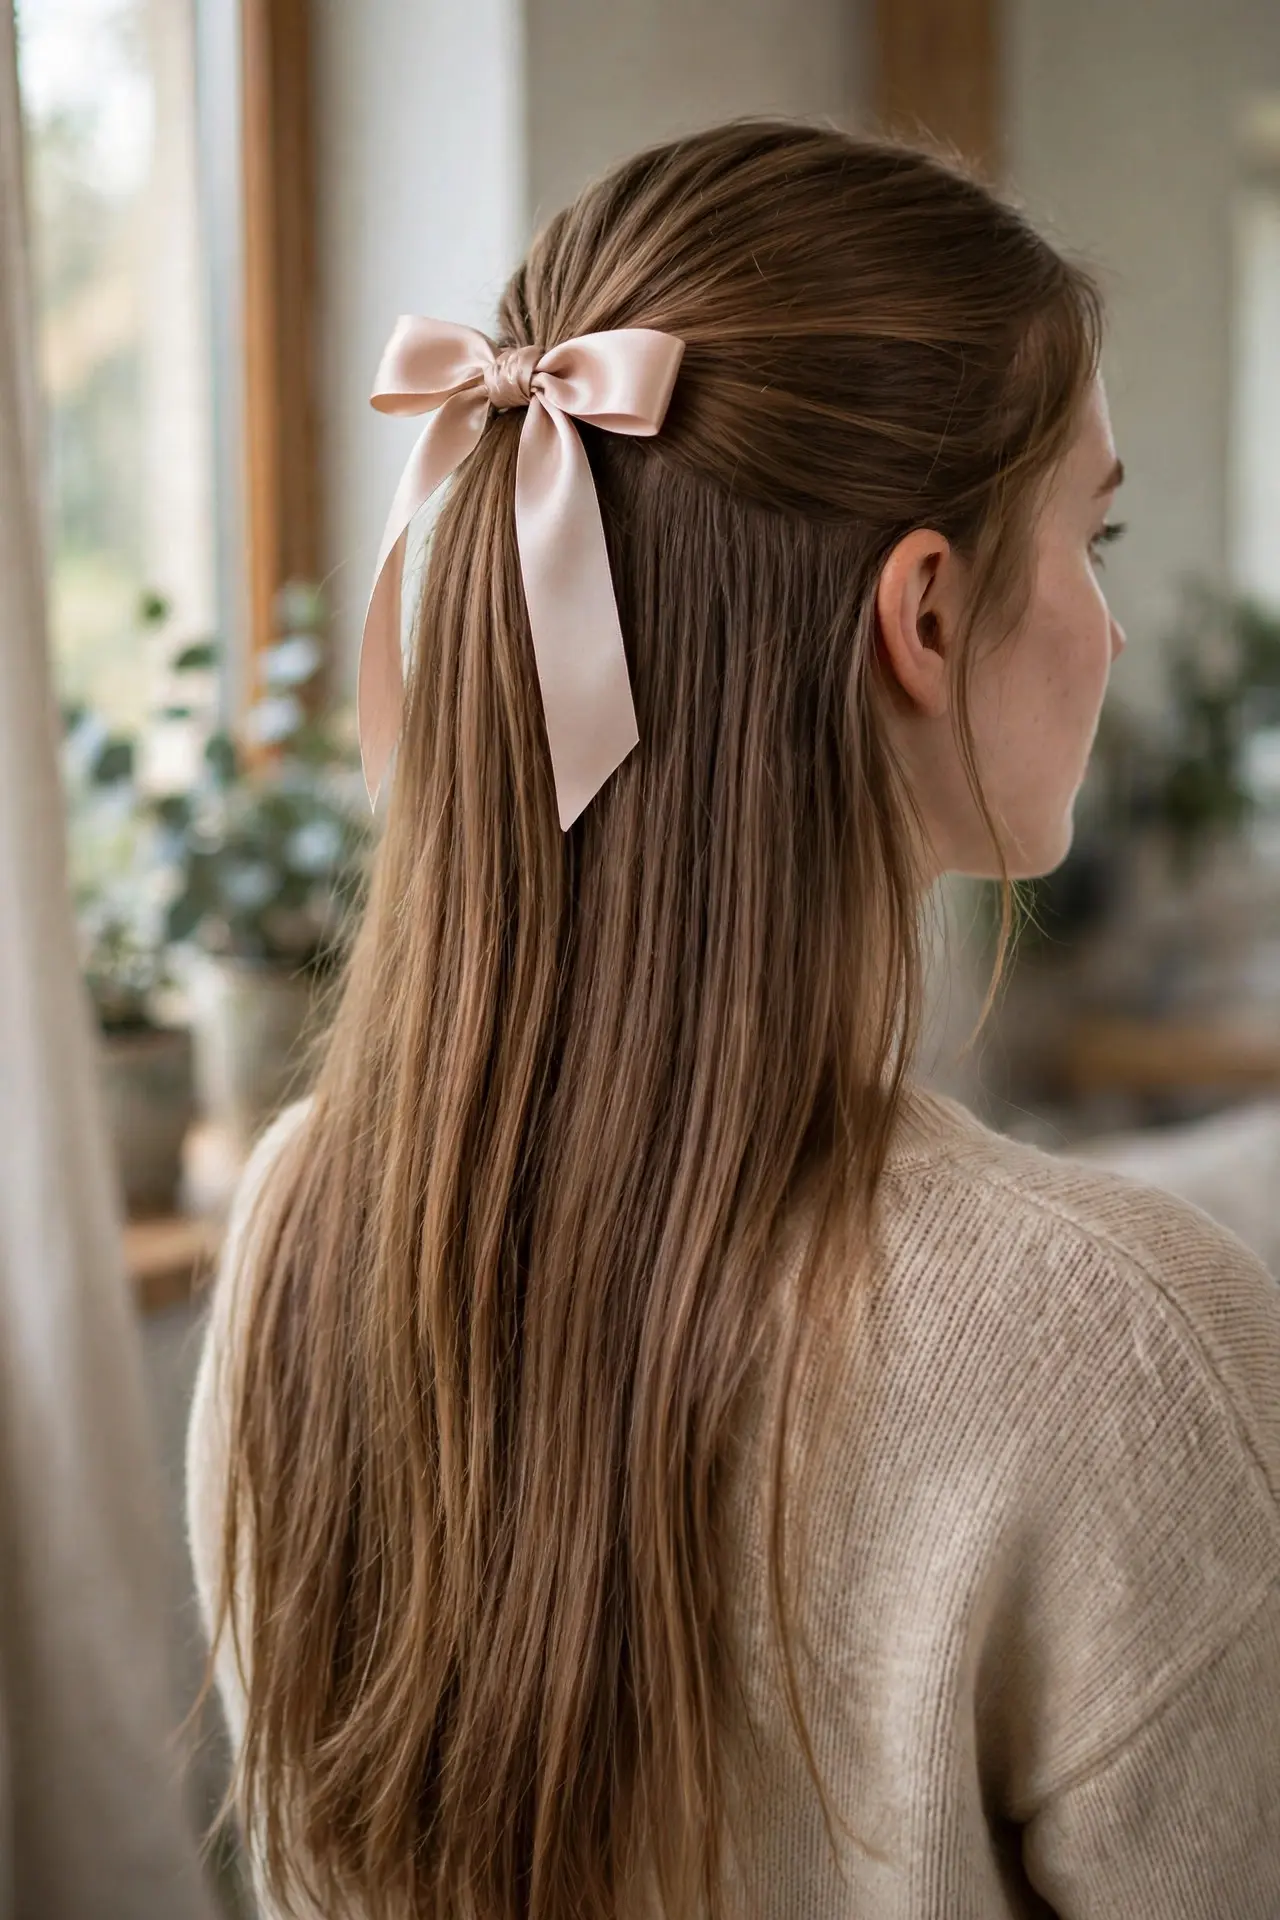
This half-up swaps the big fluffy bow of number 12 for something sleeker: a satin ribbon tied in a neat bow at the base of a small ponytail, with the hair left long and straight. Same idea, completely different mood — polished instead of playful.
Gather the top section into a small ponytail and secure it with a plain elastic first. Then tie your ribbon around the base in a tidy bow, letting the tails hang a few inches so they move with the hair.
Tip: Match ribbon width to hair density: fine hair disappears under a wide ribbon, while thick hair needs a wider ribbon to look in proportion.
24. Chunky Half-Up Dutch Braids
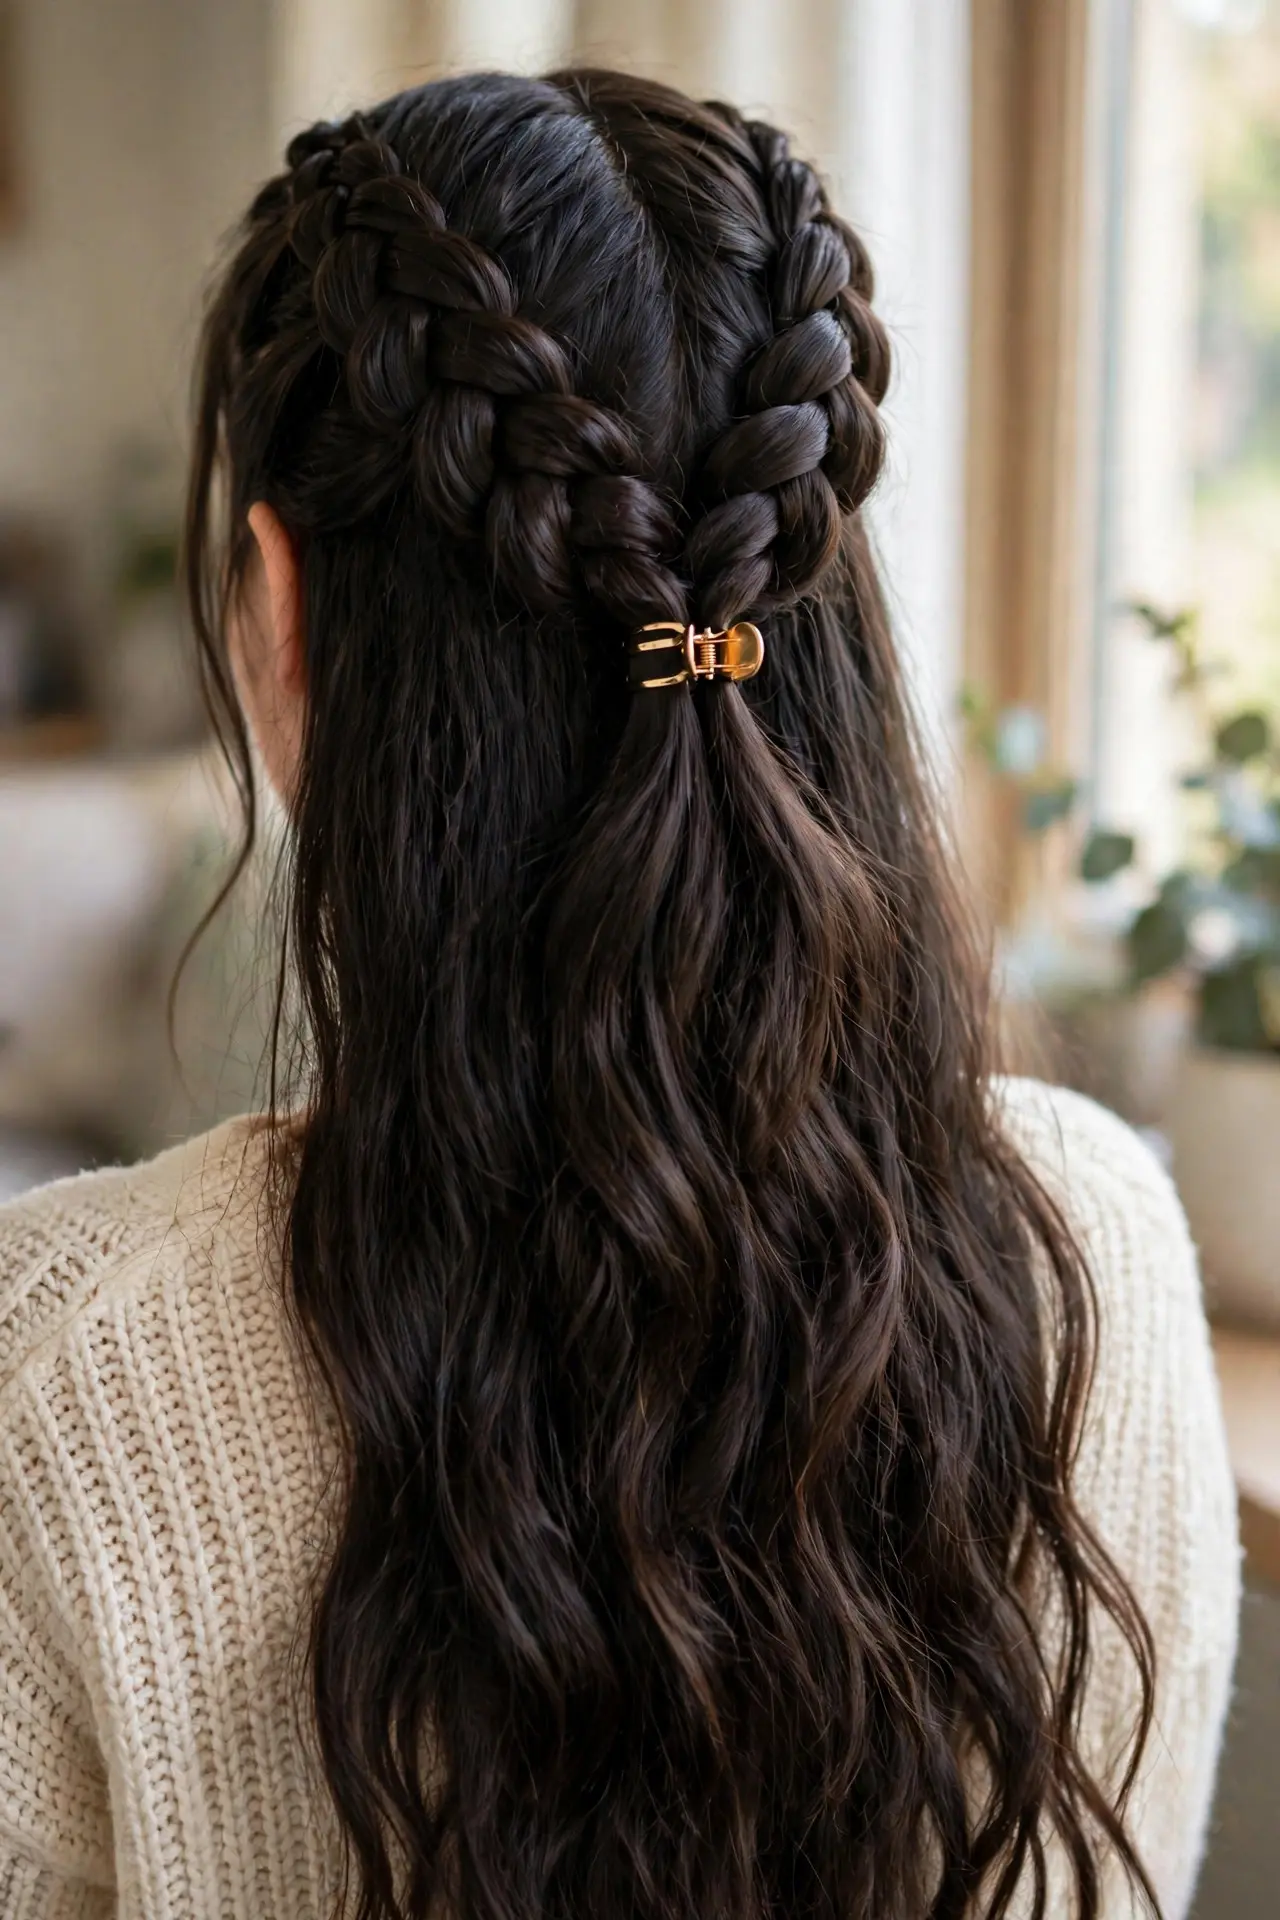
These chunky Dutch braids stay at the crown: two oversized raised braids that start at the front, meet at the back, and stop there, leaving the rest of your length loose and wavy. Bold texture on top, freedom below — a very festival-ready combination.
Take larger sections than you normally would; chunkiness comes from section size, not from pulling later. Braid each side Dutch-style from the hairline to the back of the crown, then join the two braids and secure them together with pins or a small clip.
Tip: This style forgives beginner braiding. The oversized texture hides uneven tension, so it is the perfect practice ground for Dutch technique.
25. Braids with Woven Ribbon
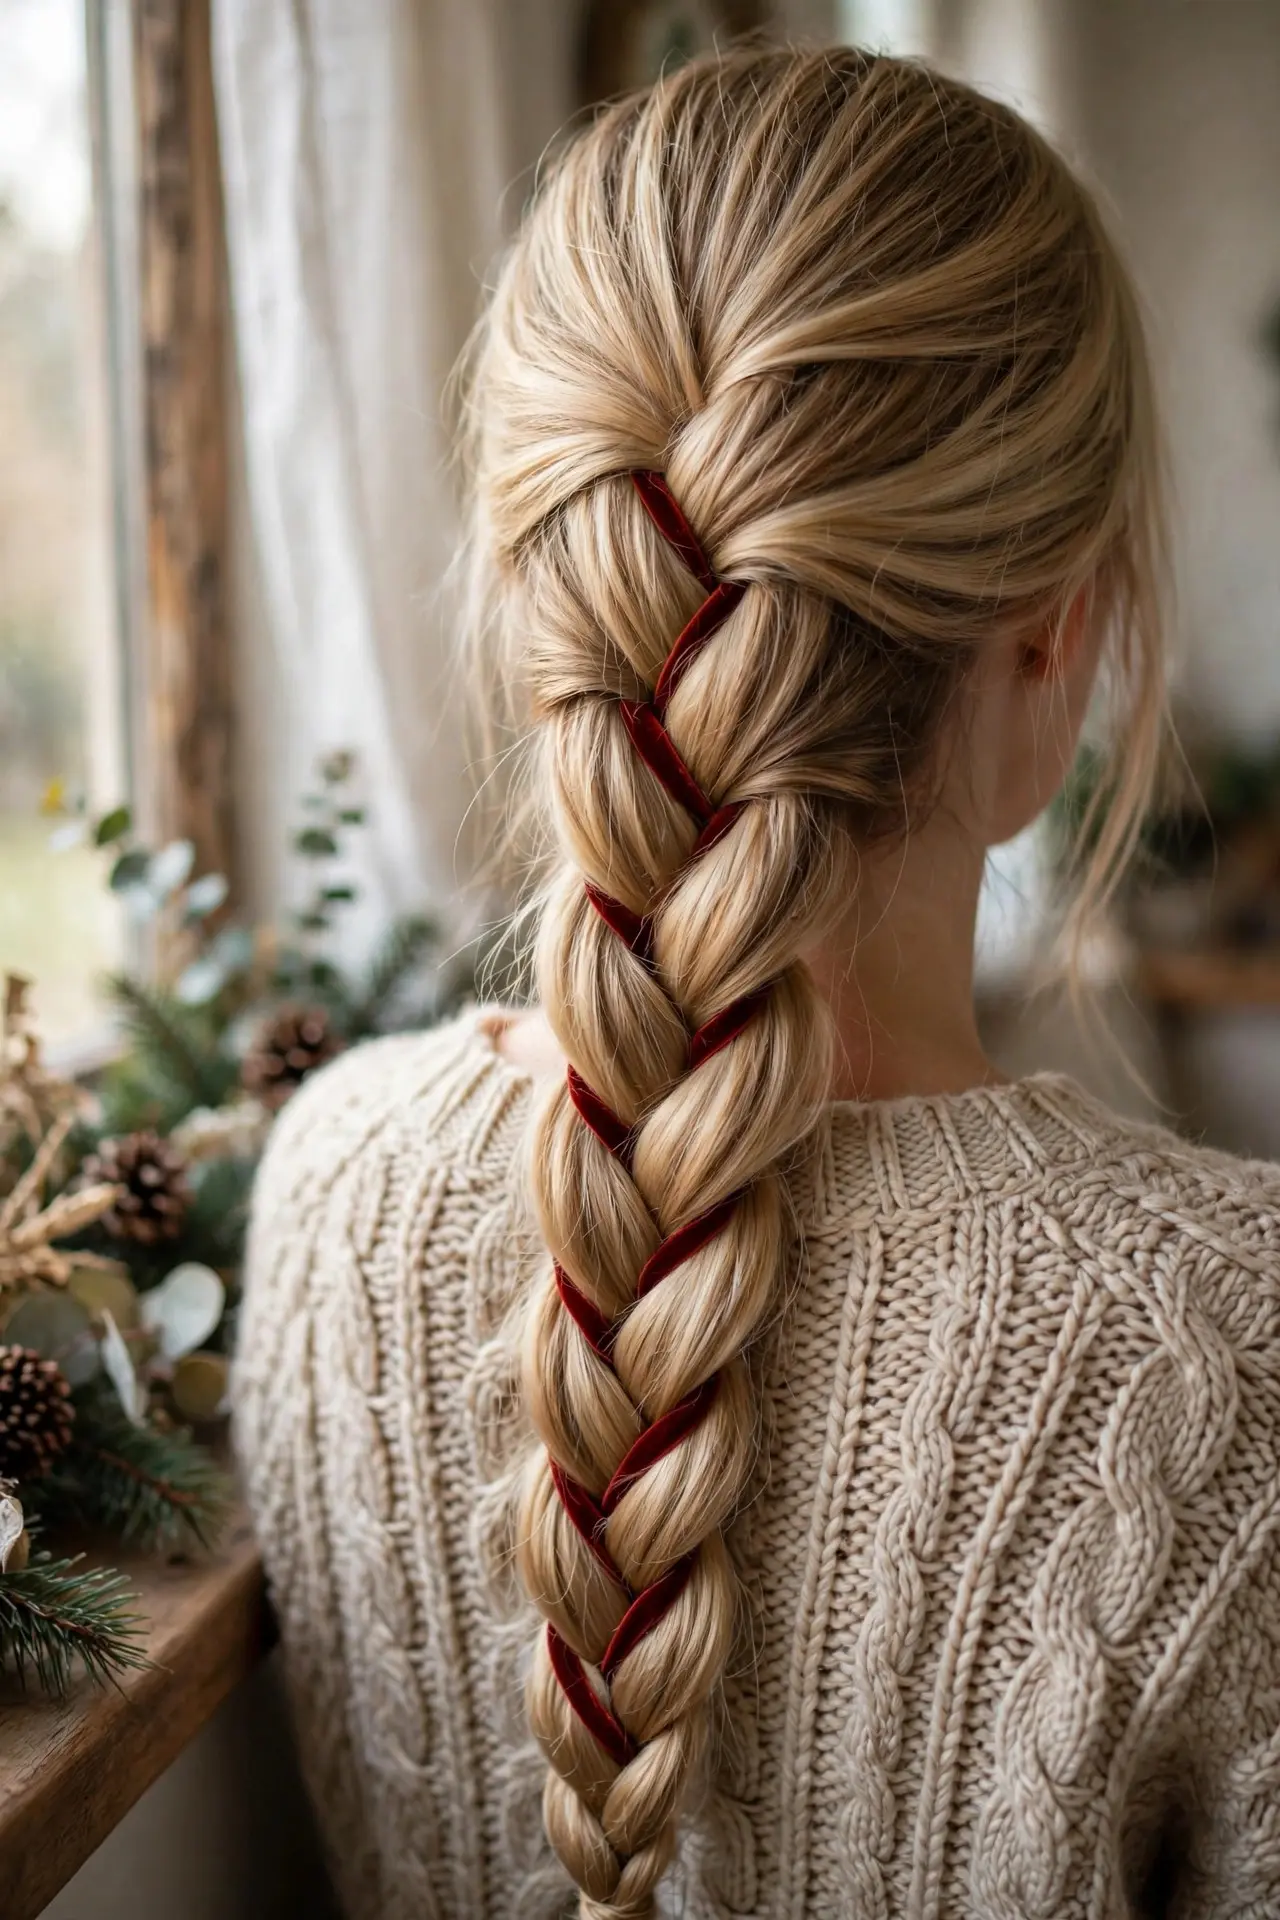
Take any braid you already know and weave a ribbon through it as you go, and a basic style turns special-occasion ready. The ribbon becomes a fourth strand, threading color through the whole length — beautiful for holidays, photos and parties.
Anchor the ribbon at the very top of the braid with a small clip before you begin, so it cannot slide while your hands are busy. Add it to one of your three strands and braid exactly as normal, keeping the ribbon on top of its strand at every cross.
Tip: Choose a slightly textured ribbon — grosgrain or velvet — over slippery satin. Texture grips the hair, so the ribbon stays woven instead of migrating.
26. Double Braids in a Ponytail
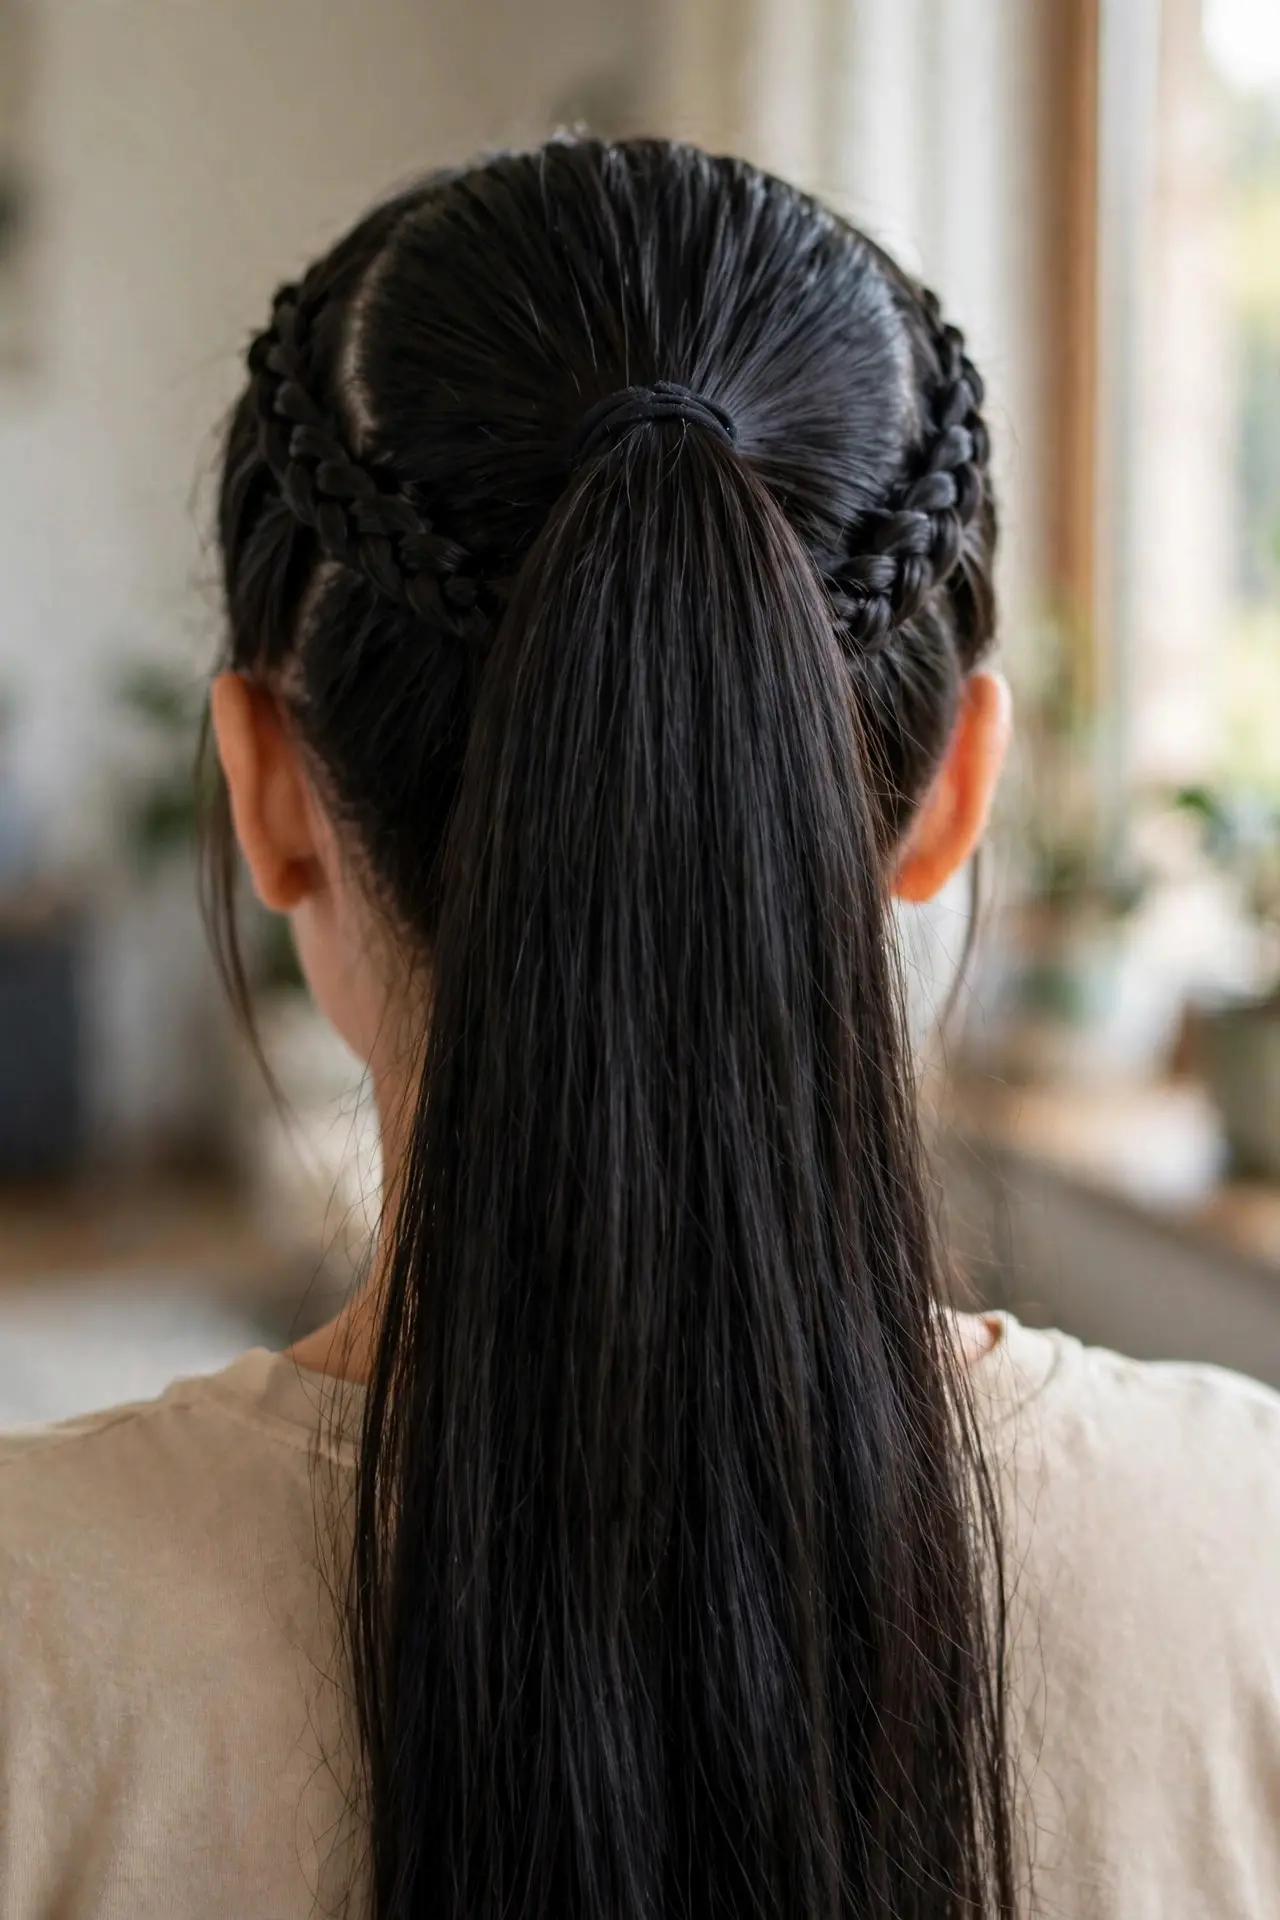
This hybrid braids just the front sections on each side, then sweeps everything — braids included — into one high ponytail. You get two textures in a single style, and it holds up through a full day of movement better than a plain ponytail.
Braid the front section on each side first, while the hair is still down; braiding before tying is far easier to keep even. Then gather all of the hair, braids and all, into the ponytail and smooth any bumps at the base with a small comb.
Tip: Angle the side braids slightly upward toward the ponytail base. Braids that point at the elastic blend in instead of fighting the gather.
27. Milkmaid Braid Crown
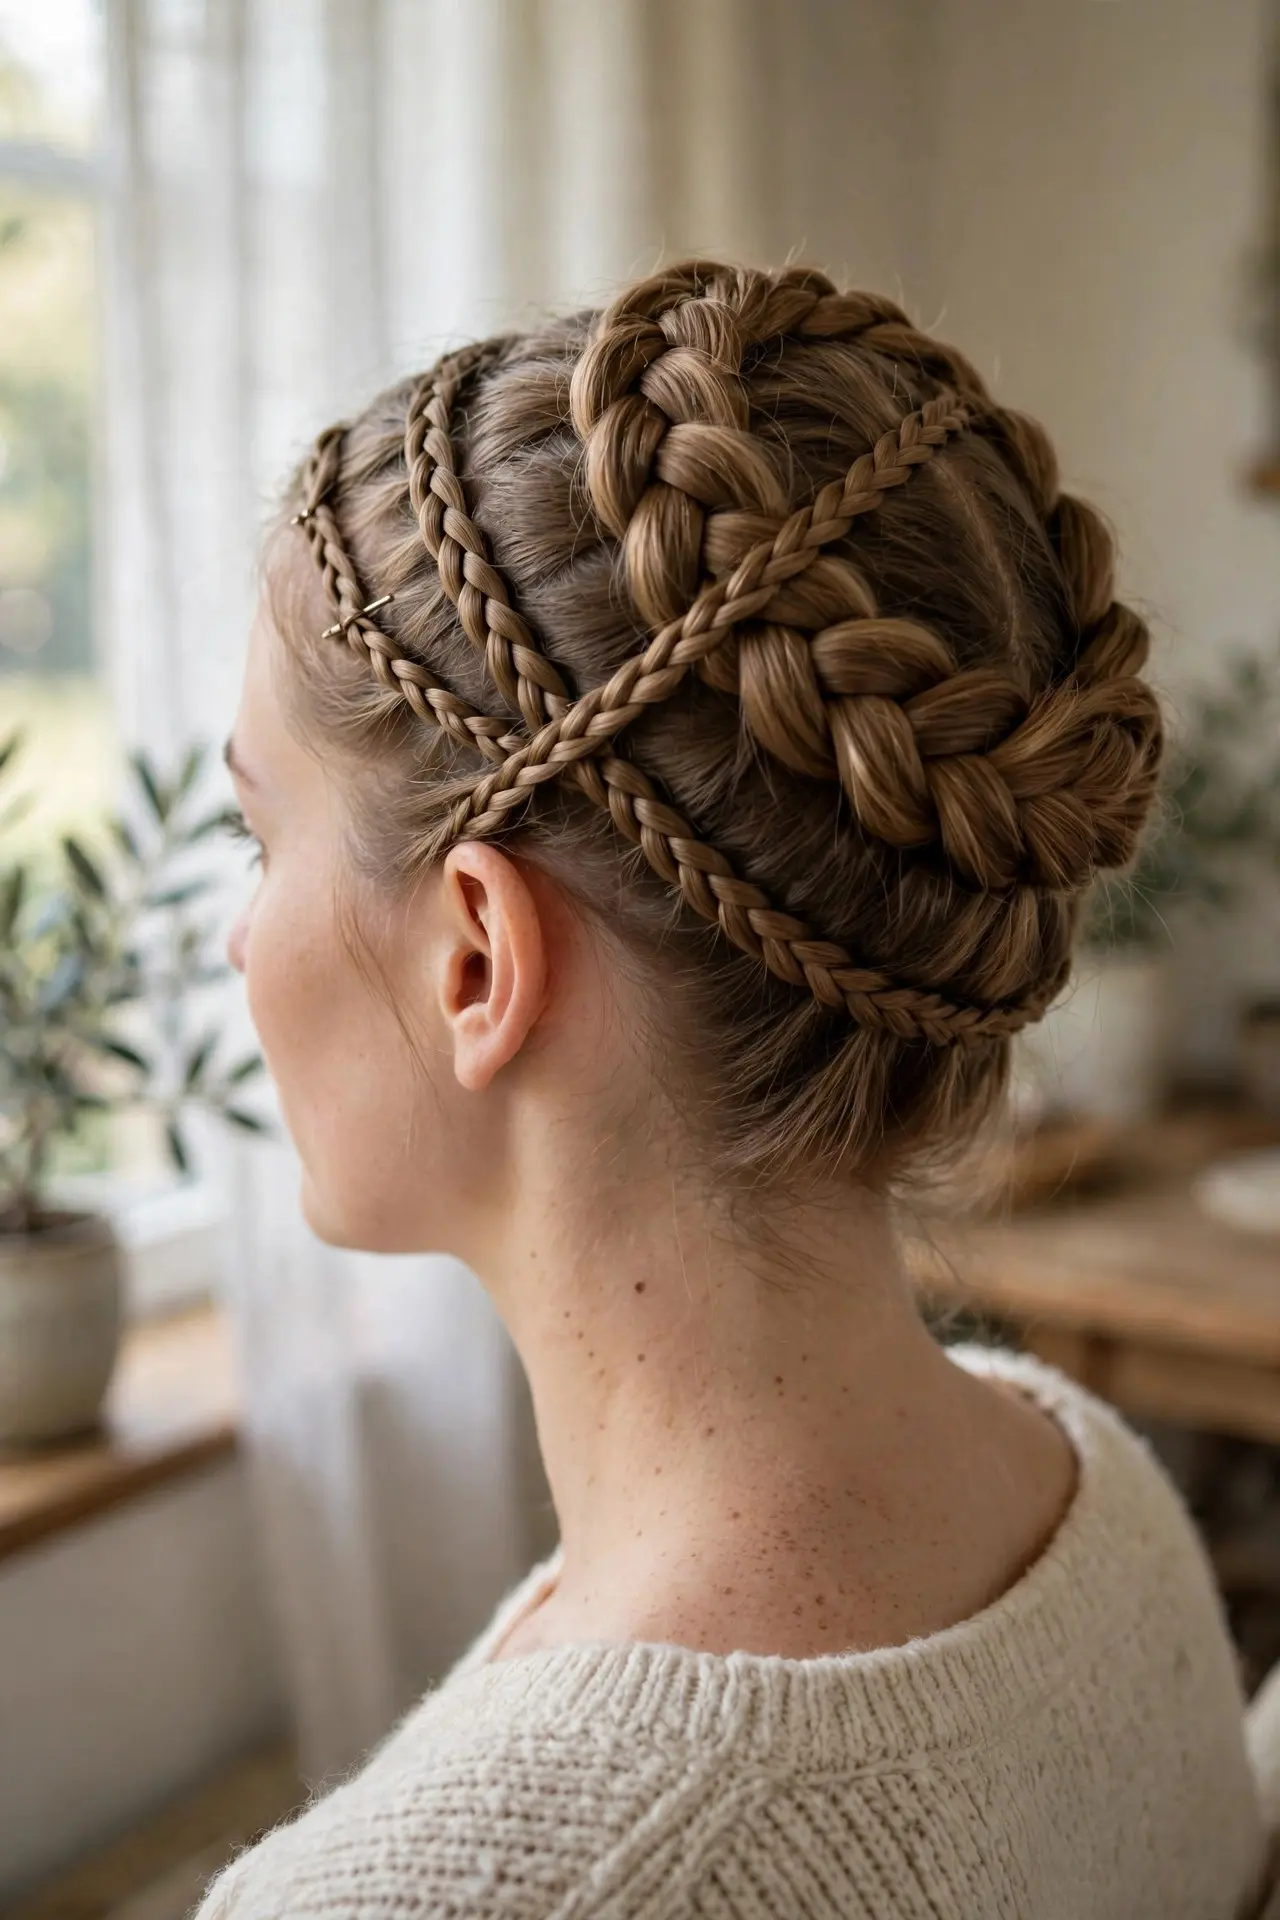
The milkmaid crown is the sweet, structured cousin of the halo braid: instead of braiding around the head, you braid two low pigtails first and then cross the finished braids over the top like a headband. It keeps every strand off the neck — ideal in warm weather.
Braid two low pigtail braids, taking each one up and across the top of your head toward the opposite ear. Pin along the way from underneath, working the pins up into the braid so they stay invisible in the finished style.
Tip: Cross the braids as close to the hairline as you comfortably can. That forward placement is what gives the authentic milkmaid shape rather than a braided bun effect.
28. Twisted Space Buns
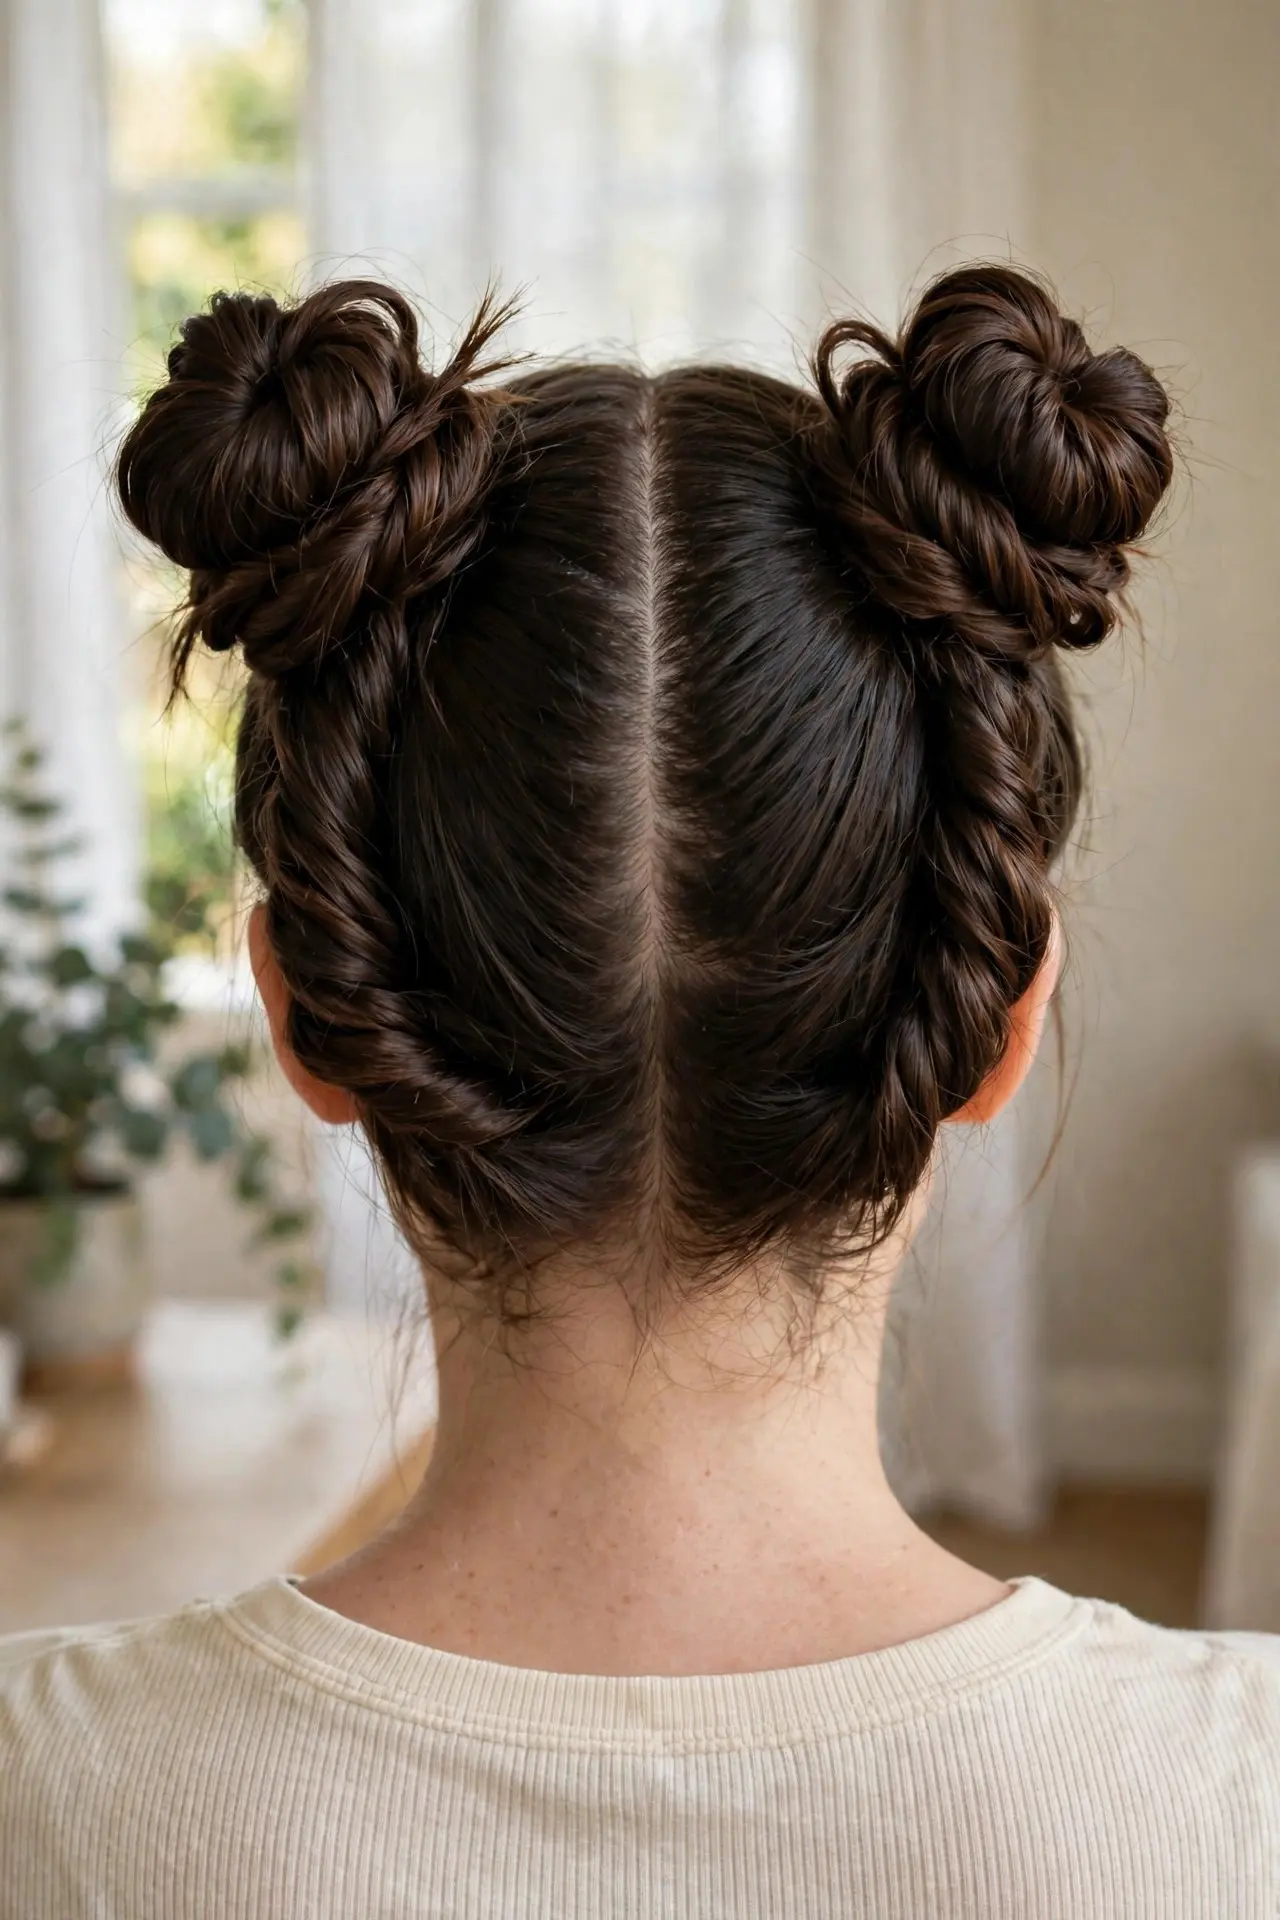
Space buns, but grown up: each side is twisted before it is coiled, which gives the buns a ropey texture that looks deliberate rather than costume-y. They are playful, symmetrical, and keep every bit of hair secured — great for festivals and workouts alike.
Draw a precise center part first, because symmetry is decided before any twisting happens. Twist each side firmly from the nape upward, then coil the twist around its own base into a bun and pin or tie it in place.
Tip: Coil both buns in the same direction — both clockwise or both counterclockwise. Matching coils are the difference between styled and lopsided.
29. Braid-Wrapped Ponytail
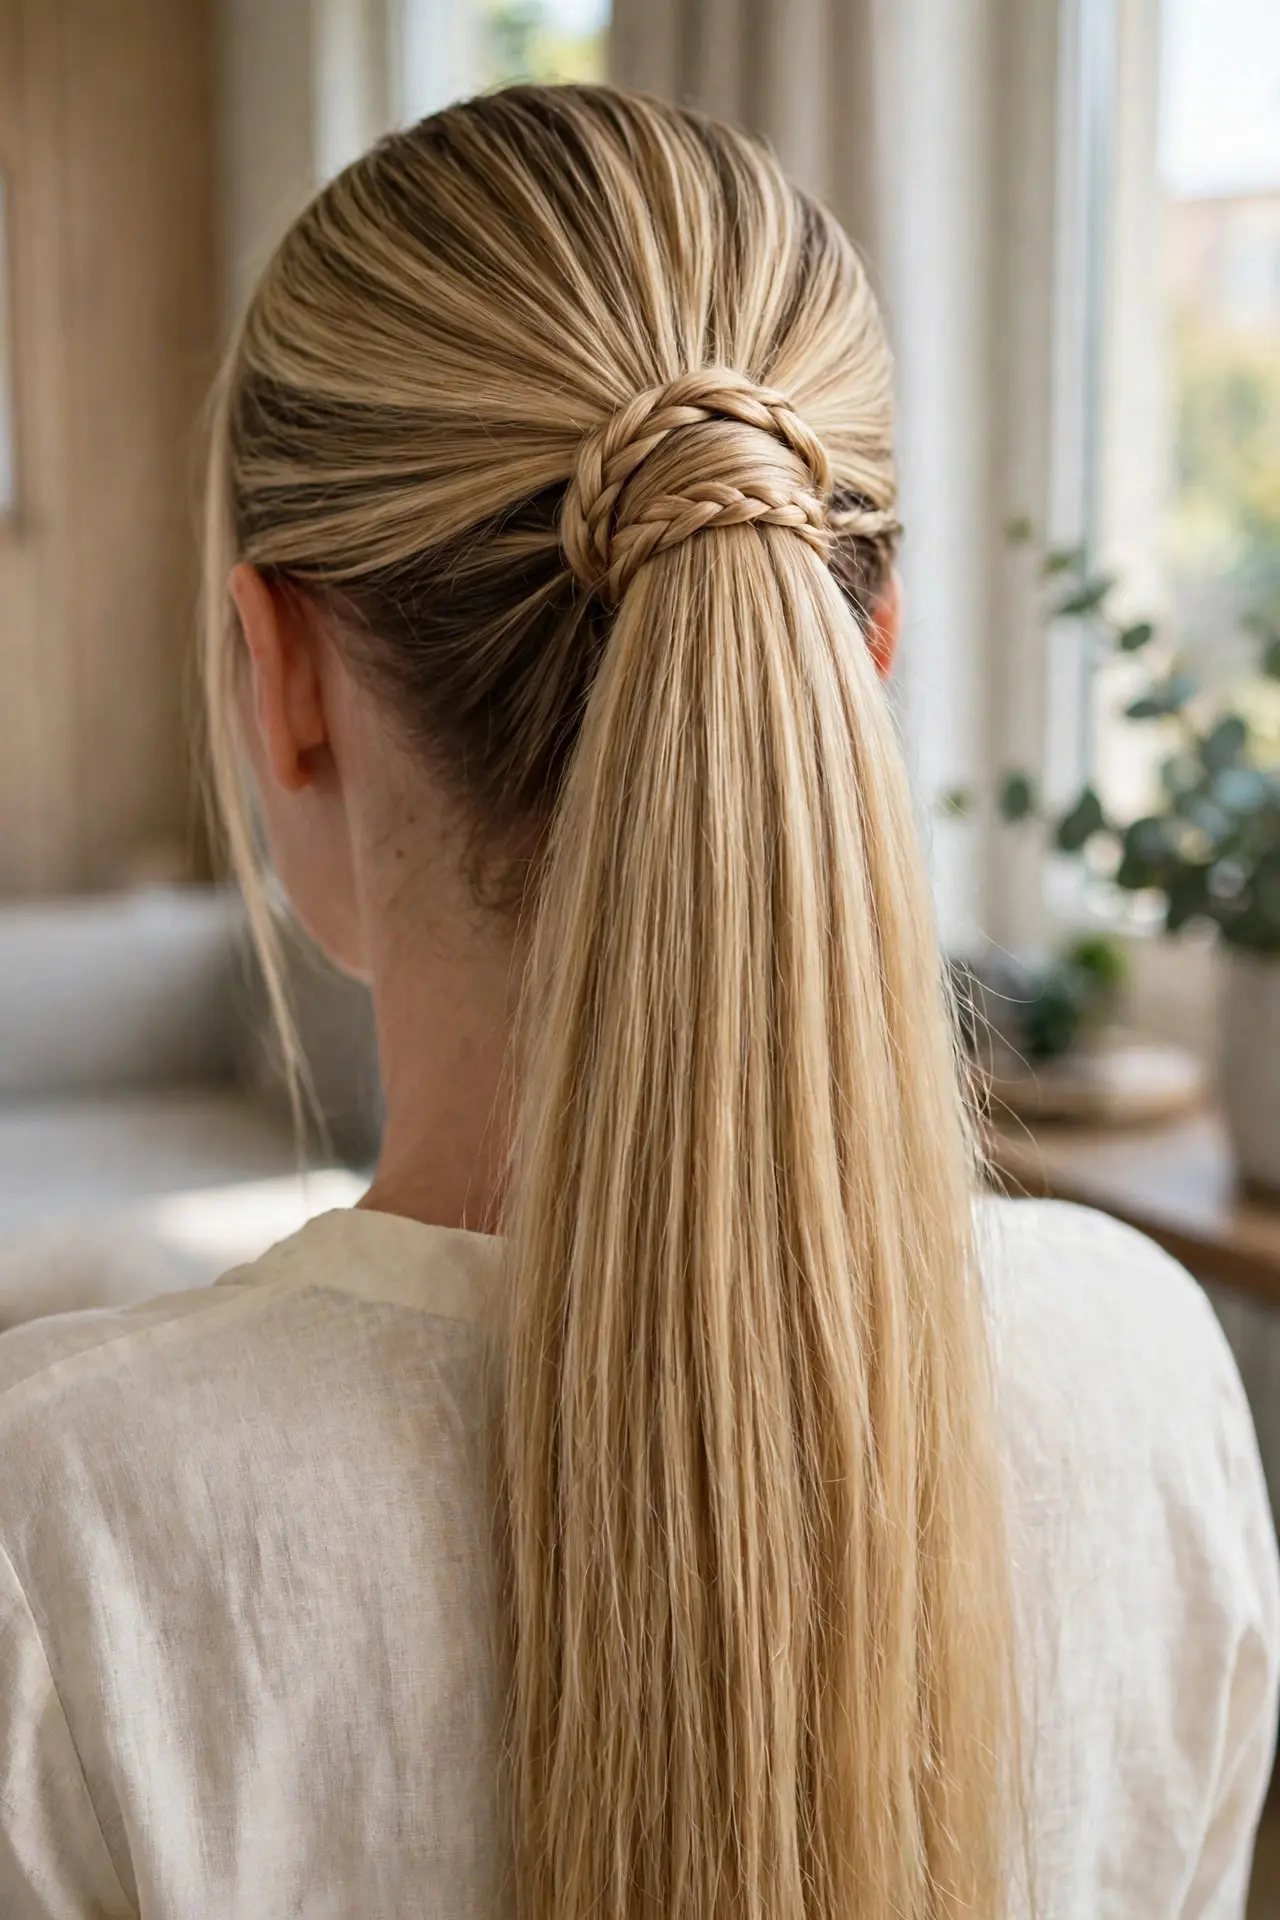
One small upgrade transforms a basic ponytail: a thin braid, made from a strand of the ponytail itself, wrapped around the base to hide the elastic. From behind it looks like the hair is holding itself up — neat, clever, and suitable for literally any occasion.
Tie your ponytail as usual, then take a small section from underneath it and braid that piece on its own. Wrap the little braid around the base until the elastic disappears, and pin the end underneath the ponytail where it cannot slip loose.
Tip: Keep the wrapping braid thin. A bulky wrap looks lumpy against the head, while a slim one reads as a seamless, professional finish.
30. Loose French Braid
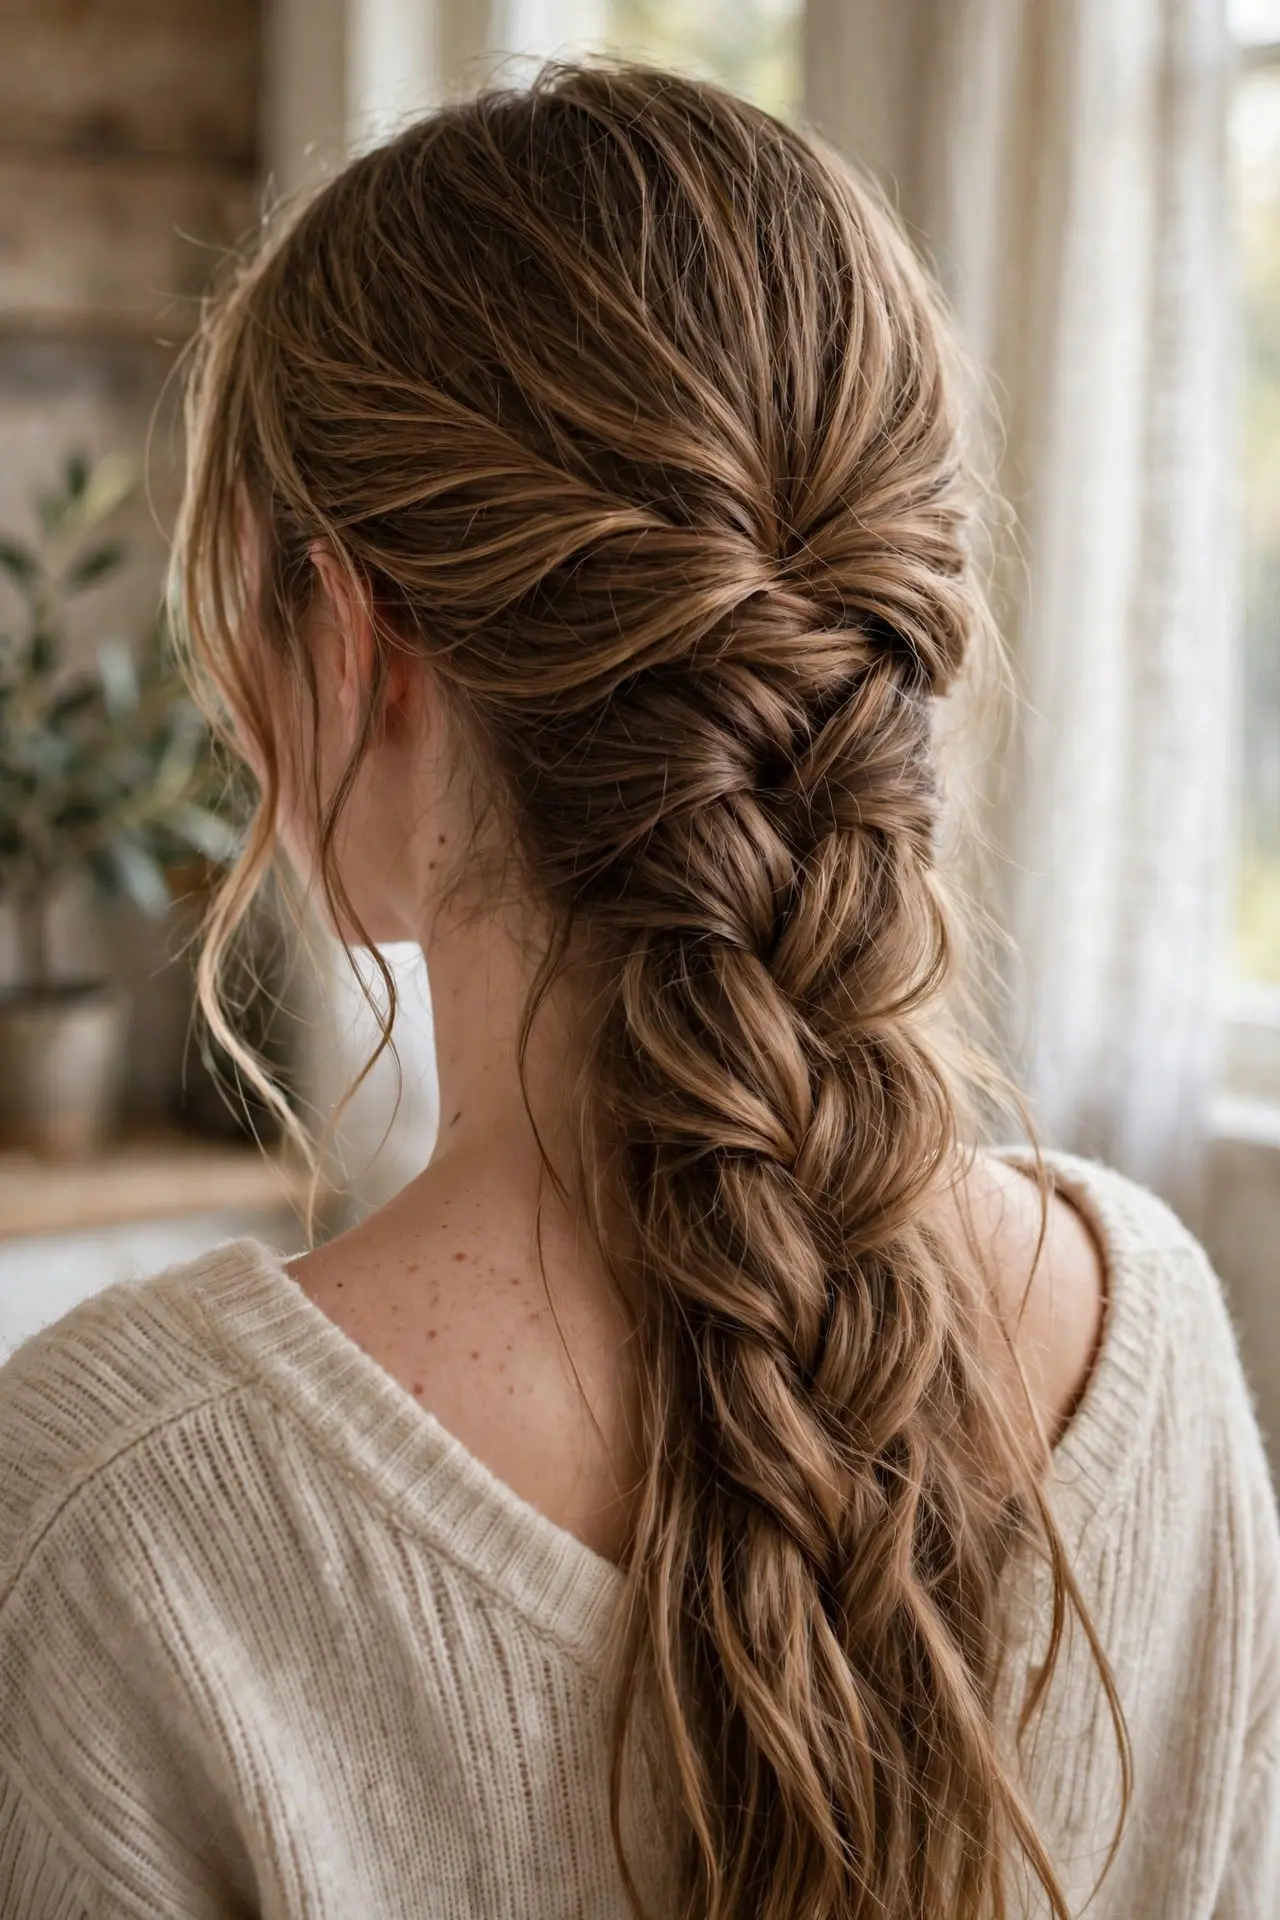
Closing the list is the cozy-sweater version of the classic braid at number 2: the same French technique, woven with the tension dialed right down and then loosened further, so the whole thing looks soft, wide and lived-in rather than neat and tight.
Braid a normal French braid without pulling each cross tight. Once it is secured, loosen it from the top down, tugging each loop gently outward so the softening stays even, and pull a few pieces free around your face to finish.
Tip: Mist the hair with texturizing spray before you loosen, not after. The grit gives the relaxed loops something to hold onto, so the softness lasts.
Styling Tips
- Start with day-two hair: freshly washed hair is slippery and drops styles. A little natural texture — or a mist of dry shampoo — gives braids and buns the grip they need.
- Let heat styles cool completely: waves and curls set as they cool. Touching them early is the number one reason home curls fall flat by midday.
- Brush with intention: a boar-bristle brush for sleek looks, a wide-tooth comb for waves and curls. The wrong brush undoes the style you just built.
- Pin in crosses: two bobby pins crossed in an X hold three times better than two parallel pins, and they stay hidden inside updos.
- Work in a mirror pair: a second hand mirror behind you makes braiding the back of your own head ten times easier — check your part and tension as you go.
- Finish light: a flexible-hold spray keeps movement alive. Heavy lacquer makes long styles look stiff and ages the whole look.
None of these habits costs money — they are about sequence and patience, and they are the real difference between a style that lasts an hour and one that lasts all day.
Common Mistakes to Avoid
- Braiding too tight: drum-tight braids cause tension headaches and can stress the hairline over time. Snug is enough — a braid should hold, not pull.
- Skipping heat protection: long hair is old hair at the ends, and unprotected heat shows there first. Always apply a protectant before wands and straighteners.
- Brushing out set curls: a brush turns defined waves into frizz. Separate cooled curls with your fingers only.
- Using the wrong clip size: a small claw clip in very long, thick hair will slip or snap. Match clip size to hair volume, and keep elastics snag-free.
- Styling soaking-wet hair: wet hair stretches and breaks under tension. Braid damp at most, and never pull an elastic tight on dripping hair.
Best Products to Make Long Hairstyles Last Longer
The right handful of products makes a bigger difference than any single technique. A heat protectant spray is non-negotiable before any hot tool, shielding the oldest, most fragile ends. A texturizing spray adds the grit that braids, buns and twists grip onto, while a light-hold hairspray tames flyaways on sleek styles without leaving the hair stiff or crunchy.
Tools matter just as much. A boar-bristle brush is what gives ponytails and buns their smooth, glassy finish, and strong bobby pins plus snag-free clear elastics mean fewer mid-day repairs. To protect a style overnight, a silk scarf or silk pillowcase cuts the friction that frizzes sleek looks and loosens braids — so yesterday’s style can often be refreshed instead of rebuilt.
Frequently Asked Questions
How do I keep my long hairstyle from falling out during the day?
Start with hair that is not freshly washed, or add grip with texturizing spray before you style. Secure updos with pins crossed in an X, and finish with a light mist of hairspray — hold comes from preparation and pinning far more than from spraying at the end.
What’s the easiest hairstyle for long hair when I’m short on time?
The messy bun with a claw clip and the sleek high ponytail are both under-two-minute styles that still look intentional. Neither needs braiding skill, and both hold up well through a full day of errands or work.
Do these hairstyles work on second- or third-day hair?
Yes — most of them work better. Braids, twists and buns grip far more reliably in hair with a little natural texture than in freshly washed, silky hair. Only the sleekest styles, like the sleek bun, benefit from cleaner hair.
What hair accessories should I keep on hand for long hair styling?
Claw clips in two sizes, clear elastics, snag-free hair ties, bobby pins and one or two ribbons cover nearly every style in this guide. Add a boar-bristle brush and a rat-tail comb for parts, and your kit is complete.
Conclusion
Thirty styles is a lot of choice, but you only need two or three favorites to transform your routine — the best hairstyles for long hair are simply the ones you will actually wear. Start with the claw-clip bun and one braid, master them, then add a new style every week or two, and when you are ready for a bigger change, look through the haircut trends for a fresh seasonal change. Which of these 30 will you try first?
Discover more from Fashinate Style
Subscribe to get the latest posts sent to your email.